How to Handle Root Rot in Clivia? Teach You the Correct Remedies
How to handle root rot in clivia. Clivia is a fleshy-rooted plant; if environmental conditions are poor or care is improper, root rot is often caused. Generally, during the seedling stage, rot often starts below the leaf base, while mature plants rot from the middle of the root downward. There are many causes of clivia root rot, mainly:
① Improper fertilization. Applying unfermented organic fertilizer;
② Overwatering. Especially during high summer temperatures and in winter when indoor ventilation is poor and temperatures are relatively low, root rot is extremely easy to cause;
③ Poor potting soil. An improper mixing ratio of the growing medium causes the potting soil to compact, leading to long-term waterlogging in the pot that damages the roots;
④ Pathogen infection. When clivia is divided, the wound is not disinfected, allowing bacteria to infect and cause root rot.
Root rot can occur at any growth stage of clivia. In mild cases, the plant becomes weak and the leaves turn yellow; in severe cases, the entire plant dies. If a plant with root rot is found, immediately knock the diseased plant out of the pot, gently remove the soil, rinse it clean with water, then cut off the rotted roots, and afterward disinfect with 0.1% potassium permanganate. After taking it out, dip it in a little plant ash, or apply carbendazim to the wound, and place it in a cool place to let the wound dry. The above is an introduction to how to handle root rot in clivia.
What to Do About Clivia Root Rot: How to Handle Clivia Root Rot
Clivia is one of the most common indoor flowers. Part of the reason is that its appearance is rather elegant; placed indoors, it not only has a decorative effect but also brings some green visual enjoyment, making it most suitable for decorating the home. Another part of the reason is the symbolic meaning of clivia: the gentleman is noble and not to be trifled with. Even in modern society, many people use clivia to symbolize their own character. Compared with some ordinary flowers and plants, clivia appears elegant and grand. However, during everyday cultivation, clivia often develops some root rot, which looks very unpleasant. So what should be done about clivia root rot? The answers are all below.
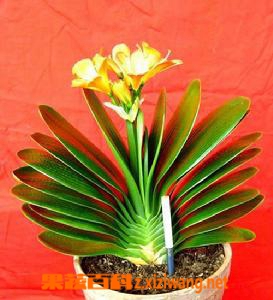
1. Generally speaking, because the overall growing conditions clivia requires are fairly ordinary, and it is also a plant with very strong vitality, unless some relatively major mistakes occur during cultivation, such as excessive water, which may cause clivia to develop root rot and affect its growth, generally as long as you master the corresponding cultivation methods, you can reasonably avoid clivia developing this condition.
2. But if clivia root rot really does occur, is there no way to remedy it? Of course not. We have already said that clivia is a plant with very strong vitality. So even if root rot occurs, there are still ways to remedy it. Only in this way will a life not be wasted, and you can continue to grow it and enjoy the beauty clivia brings us.
3. The remedy for clivia root rot is roughly to tip the whole clivia out, then wash away the soil from the roots, and then remove the rotted roots. Dry the moisture in the sunlight until the orchid roots are slightly soft, then take new soil and repot, water thoroughly, and place in a cool place. Here we must pay special attention that the soil must be dry soil; wet soil will not only fail to save the clivia, but may also worsen the root rot.
How to Handle Clivia Root Rot: Methods for Handling Clivia Root Rot
In home life, many families grow some flowers and plants at home, such as orchids, poinsettias, and so on. Among them, clivia is the most popular. However, many families encounter root rot. So how should clivia root rot be handled? What methods are there for handling clivia root rot? Follow the editor of Shengduoduo Decoration Network to take a look. We hope it can help everyone.1. Most of the clivia root system is still good, with only part of the roots rotted
The rescue method for this situation is: after discovering root rot, immediately knock it out of the pot, remove the attached soil, rinse the root system clean with water, and then use a clean razor blade to cut off the rotted roots;
Then apply 0.1% potassium permanganate solution to the rotted root areas (or coat with charcoal powder, cigarette ash, etc.), dry in the shade for 3 to 5 hours, and then directly plant it in a disinfected pot of humus soil fermented from pine needles, or fully rotted sawdust, or mountain soil.
After planting, put a transparent plastic bag over the rim of the pot, place it in a semi-shaded place, water sparingly, and keep the potting soil slightly moist. At the same time, every 5 to 7 days, spray the leaf surface once with 0.2% potassium dihydrogen phosphate aqueous solution to increase nutrients and promote rooting. In this way, after more than two weeks, new roots can grow. At this point, remove the bag and gradually transition to normal care.
2. Most or all of the clivia root system has rottedThe rescue method for this situation is: first rinse the base of the stem clean with water, then use a sharp knife to cut off the rotted part horizontally (the cut surface is required to be flat and smooth), immediately apply sulfur powder or charcoal powder to the cut to prevent wound infection, and place it in a cool, ventilated place;
After the cut surface is slightly dry, plant it in a pot of plain sand, water once after two days, and afterward keep the potting soil moderately moist. Absolutely do not fertilize. Under temperature conditions of 20 to 25°C, after about 10 days new roots will grow around the cut, and after 50 days it can be transplanted into a new pot of growing medium and gradually brought into normal care.
Related Articles