How to grow Phalaenopsis orchids? Detailed guide to cultivation methods and precautions
How to grow Phalaenopsis orchids. Phalaenopsis is a perennial epiphytic herbaceous flower of the genus Phalaenopsis in the orchid family, native to tropical Asia. It has neither stolons nor pseudobulbs, and its adaptability to climate is relatively poor. Its stem is short, about 5-8 cm long, and each plant has only a few thick, fleshy leaves arranged alternately and overlapping at the base of the stem, while thick white aerial roots coil or hang below the base of the stem. The flowering period runs from October to January of the following year. The flower stalk emerges from the leaf axil, is arch-shaped, and bears a dozen or so flowers, looking like colorful butterflies dancing gracefully. Each flower can stay open for 2-3 weeks, and the whole plant can bloom continuously for 60-70 days. Because of its rich colors, charming flower shape and elegant posture, it has long been known as the "Queen of Orchids."
Phalaenopsis has relatively strict temperature requirements. Its optimum growth temperature is 20-30°C. It stops growing above 35°C in summer or below 10°C in winter, so heat preservation must be provided, and cold wind must not blow directly on the orchid plant, to avoid cold damage and leaf drop. During flower bud differentiation, the temperature needs to be below 18°C; after differentiation, raising the temperature can promote flowering.
For cultivating Phalaenopsis, plastic pots or ceramic pots can be used. The growing medium can be a mixed preparation of broken fern roots, sphagnum moss, perlite, vermiculite, peat soil, charcoal, broken tile pieces, etc. The usual ratio is 40% broken fern roots, 20% peat soil, 20% charcoal crumbs, and 10% perlite or vermiculite. Cultivating with this mixture gives fairly good results.
It needs diffused light all year round, and in winter a small amount of artificial supplemental lighting can be given to help it bloom. It needs temperatures above 20-24°C all year round, and at the same time, when temperatures are high, more water should be sprayed daily. It is best to water in the morning so that the moisture can be fully absorbed before night, with no standing water left overnight on the leaves or leaf stalks, otherwise diseases are easily caused. In winter it is also easily damaged by cold and freezing, and may even drop its leaves. This is a key point in cultivation.
Phalaenopsis can be given a small amount of slow-release fertilizer as a base fertilizer. Normally, use a 1,000-2,000 times dilution of water-soluble quick-acting fertilizer, sprayed once every 10-15 days. Before young plants bloom, use a little more nitrogen fertilizer; as they approach maturity, increase the proportion of phosphorus and potassium. After the flowers fade, apply a compound liquid fertilizer with a nitrogen-phosphorus-potassium ratio of 1:1:1, and in autumn further increase the proportion of phosphorus and potassium fertilizer. The above is an introduction to how to grow Phalaenopsis orchids.
How to grow Phalaenopsis orchids
Compared with other plants, Phalaenopsis is one of the hardest plants to grow, so its cultivation method is rather troublesome. Below is an explanation of how to grow Phalaenopsis orchids.
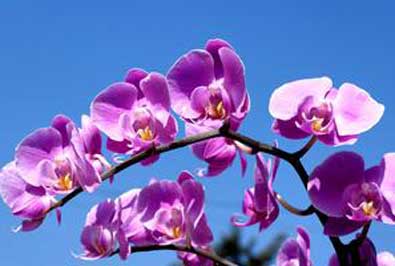
Phalaenopsis orchid illustration
Cultivation methods for Phalaenopsis orchids1. Soil: Phalaenopsis has relatively high soil requirements and needs soil that is breathable, rot-resistant, slightly acidic and water-permeable. Materials such as pine needles, peanut shells, bark strips and clay balls can be chosen as the substrate for growing Phalaenopsis. If you cannot prepare these materials yourself, you can directly buy special orchid soil for Phalaenopsis at a flower market.
2. Temperature: When growing Phalaenopsis at home, temperature must first be ensured. Phalaenopsis is native to tropical regions and likes a high-temperature, high-humidity environment. During the growth period, the minimum temperature should be kept above 15°C. For Phalaenopsis (especially white-flowered Phalaenopsis), when the daytime temperature is 27°C and the nighttime temperature is kept at around 18°C, it grows well. At the turn of autumn and winter and winter and spring, as well as when winter temperatures are low, attention should be paid to raising the temperature. Generally, in rooms with heating equipment in winter, this temperature is not difficult to reach, but be careful never to place the flowers directly on the radiator or too close to it. When summer temperatures are on the high side, cooling is needed, and attention should be paid to ventilation. If the temperature is above 32°C, Phalaenopsis usually enters a semi-dormant state, and continuous high temperatures should be avoided. The peak flowering period is around the Spring Festival. Properly lowering the temperature can prolong the viewing time. When in bloom, the nighttime temperature is best controlled between 13°C and 16°C, but must not be lower than 13°C.
3. Water: Phalaenopsis is an epiphytic orchid. In its place of origin, most grow on tree trunks, with their roots exposed to the air, and they can absorb moisture from the humid air. When cultivated artificially, the roots are buried in the growing medium. If watered too much, the medium's aeration will worsen and the fleshy roots will rot; usually the leaves turn yellow, and in severe cases the plant dies. The principle of watering is to water when dry and let it dry between waterings. Water thoroughly again when the surface of the growing medium becomes dry. Generally, watering should be done on a clear, sunny morning, and the water temperature should be close to room temperature. When the indoor air is dry, a sprayer can be used to spray directly onto the leaf surface; but note that during the flowering period, the water mist must not be sprayed onto the flowers.
4. Light: Phalaenopsis prefers shade, but still needs to receive some light, especially before and after the flowering period. Proper light can prompt Phalaenopsis to bloom and make the flowers more brilliantly colored and longer lasting. Generally, it is best to place it in a spot indoors with diffused light, and do not let direct sunlight hit it. If placed on an indoor windowsill, use a window screen to block part of the sunlight.
Phalaenopsis orchid illustration
5. Ventilation: The normal growth of Phalaenopsis requires circulating fresh air, so when growing Phalaenopsis at home, ventilation must be good, especially during the high-humidity period in summer. Good ventilation must be used to prevent heat stress, and it can also avoid infection by pests and diseases.6. Fertilizing: Phalaenopsis should be fertilized all year round. Unless low temperatures persist for a long time, fertilizing should not be stopped. Winter is the flower bud differentiation period for Phalaenopsis, and stopping fertilizer can easily lead to no flowers or few flowers. Spring and summer are the growth period, and a dilute liquid fertilizer can be applied once every 7 to 10 days. Organic fertilizer is preferable, and special Phalaenopsis nutrient solution can also be used, but do not apply it when there are flower buds, otherwise the buds may easily drop early. In summer, when leaves grow (that is, after the flowering period), nitrogen fertilizer and potassium fertilizer can be applied. In autumn and winter, during the flower stalk growth period, phosphorus fertilizer can be used, but it should be dilute, applied about once every 2 to 3 weeks. Fertilizing should be done in the afternoon after watering. After several fertilizations, flush the orchid pot and orchid plant with a large amount of water, to prevent residual inorganic salts from harming the roots.
7. Pest and disease control: Most Phalaenopsis diseases are caused by factors such as poor ventilation. Common diseases include soft rot, brown spot, anthracnose, viral disease, etc. They can be prevented and controlled by spraying with 500-times dilutions of drugs such as thiophanate-methyl, chlorothalonil, carbendazim and lime sulfur mixture. In addition, improving ventilation conditions, preventing high temperatures in summer and preventing cold in winter are also effective measures to prevent soft rot.
Common pests mainly include scale insects, red spider mites, snails, etc. Red spider mites and scale insects can be controlled with 800--**** times dilution of omethoate or dicofol, and snails can be controlled by scattering lime powder around the pot, catching them at night, or applying snail-killing chemicals.
How to grow Phalaenopsis orchids? Cultivation methods for Phalaenopsis orchids
Phalaenopsis is a plant suitable for indoor cultivation, with flowers shaped like butterflies. Elegant and refined. It has the reputation of being the "Queen of Orchids." The flower is the most ornamental part of Phalaenopsis. Since most Phalaenopsis come from humid Asia, this also determines the growth characteristics of Phalaenopsis. An environment with ventilation and air permeability, moderate temperature and high humidity can be said to be very suitable for growing Phalaenopsis. Beginners should understand before growing Phalaenopsis that standing water is not good for its growth, and Phalaenopsis should be kept from being exposed to the scorching sun. When winter comes, the indoor temperature should be controlled well; when the temperature is below 15 degrees, the growth of Phalaenopsis will be affected. Below, the editor will introduce the cultivation methods of Phalaenopsis in detail.
Growth habits of Phalaenopsis
Phalaenopsis originated in tropical rainforest regions and by nature likes warmth and fears cold. The optimum growth temperature is 15-20°C. In winter, it stops growing below 10°C, and below 5°C it easily dies. Native to the tropical regions of Malaysia, Phalaenopsis, belonging to the genus Phalaenopsis in the orchid family, is a perennial herbaceous plant. Forest trees along rivers and coasts with high temperature and high humidity are where Phalaenopsis grows attached.
Because of its physiological structure, Phalaenopsis can protect itself from stress effects under low-humidity conditions, but in overly wet environments, high temperature and high humidity often come together with diseases. The most suitable relative humidity range is 60%-80% RH.
Propagation methods for Phalaenopsis
1. Seed propagation method. Seed propagation is sowing the seeds released from split seed capsules into the pot of the parent plant. This method is simple and easy, requiring no complicated sterile procedures or operating tools, and is suitable for ordinary home Phalaenopsis growers, but the chance of success with this method is very small and it is rarely used. There is also the sterile sowing method. This method first washes the mature unopened seed capsules, then soaks them in 75%-90% ethanol or chloroform for 2-3 seconds, and then soaks them in a 5%-10% bleaching powder solution or 3% hydrogen peroxide for 5-20 minutes. Take out the seeds and soak them in the same disinfecting water for 5-20 minutes, then remove the solution by filtering, take out the seeds, and use a fine needle to evenly spread the seeds on the surface of the prepared medium in a bottle. The culture conditions are a light intensity of 2000-3000 lux, 10-18 hours per day, and a temperature maintained at 20-26°C. After 9-10 months, when the young seedlings grow 2-3 leaves, they can be taken out of the bottle and planted in pots.
2. Flower stalk bud induction propagation method. The method is to first cut off the part of the flower stalk that has already finished blooming, then use a blade or sharp knife to carefully remove the bracts between the first to third nodes on the upper part of the flower stalk, exposing the bud points in the internodes; use a cotton swab to evenly apply a bud-inducing agent or hormones such as indolebutyric acid onto the exposed internode nodes; after treatment, place the orchid plant in a semi-shaded place with the temperature kept at 25-28°C. After 2-3 weeks, the buds can be seen growing leaves, and after 3 months they grow into small Phalaenopsis seedlings with 3-4 leaves and aerial roots; cut off the small seedlings and pot them, and they can become a new orchid plant.
3. Crown-cut bud induction propagation method. After the growing point of an orchid plant is damaged by some factor, after a period of time, 1-2 new buds will grow from the stem nodes near the base of the orchid plant. This characteristic can be used to propagate Phalaenopsis.
4. Stem-cutting propagation method. The principle of stem-cutting propagation is to destroy the stem apex growing point to induce the growth of dormant buds. Although there are 1-3 dormant buds in the leaf axils of a Phalaenopsis plant, most cannot sprout into a plant. After the plant grows continuously upward and the stem nodes become longer, the upper part of the plant with roots can be cut off with a sterilized sharp knife or scissors, planted in a new pot to continue growing, and the lower part with the rhizome given proper water management, and before long new buds can sprout.
5. Tissue culture method. Using tissue culture to propagate Phalaenopsis can obtain excellent genetic characteristics exactly the same as the mother plant. Phalaenopsis seedlings produced by this method are generally called mericlones or tissue-cultured seedlings. The plant tissue (explant) used for meristem culture can be the terminal bud (stem tip), stem segment (dormant bud), or young leaves or root tips, but currently the most common is the flower stalk of Phalaenopsis.
Cultivation methods for Phalaenopsis orchids
1. Light intensity. For newly purchased bottle seedlings, the light should be slowly raised to 5000 Lx; after being taken out of the bottle, from 3000-5000 Lx; entering normal management, 5000-7000 Lx; medium seedlings of Φ8.4 cm require a light intensity of 10000-3000 Lx; large seedlings of Φ10.6 cm require 15000-18000 Lx; when forcing flowers, the light intensity requirement is 7000-8000 Lx; from flower bud initiation until the flower stalk is 10-15 cm, the light should slowly rise from 10000 Lx to 14000 Lx, with each summer period managed through a slow transition. According to the light requirements at different seedling stages, combined with weather conditions, control the light intensity through the contraction of internal and external shading nets.
2. Temperature. The daytime temperature requirements for large, medium and small Phalaenopsis are basically the same, preferably not exceeding 30°C. At night, medium and small seedlings require 23°C, and large seedlings require 20°C. When forcing flowers, daytime requires 20-24°C, nighttime 17-20°C; after the first flower, daytime 25-28°C, nighttime 20-22°C. When the temperature is low, use a heater; when the temperature is high, a fan-water curtain can be used for cooling.
3. Humidity. During the vegetative growth stage, the best humidity requirement is above 90%; during the flower-forcing treatment stage, the humidity requirement is 70%-80%; after flowering, the humidity requirement is only 50%. Humidity can be regulated by measures such as water curtain ventilation and spraying water on the floor space.
4. Irrigation. The aerial roots of Phalaenopsis have strong absorptive capacity and can absorb oxygen, nutrients, water, etc. Too much water will cause suffocation and root death. Therefore, when watering Phalaenopsis, pour gently with a fine stream when the medium is dry. During operation, try not to let water remain in leaf depressions or on the growing point, to prevent mildew or infection. Water until water overflows from the bottom hole of the soft pot.[1] Phalaenopsis has very important requirements for water quality, especially the two indicators of total hardness and iron content. Total hardness should be below 50 mg/L and iron content below 0.1 mg/L. Tap water can be left to stand for 1-2 days before use. When watering, pay attention to alternating dry and wet; water again after the plant has dried, and never keep it in a constantly moist state. The water temperature should be consistent with the temperature of the seedling growing environment. In summer, the earlier in the morning you water, the better; in winter, watering after 10 a.m. is most suitable. Before and after watering and while watering, check whether the orchid plant is dry or wet. If after normal watering some orchid plants are still dry and lacking water, with soft, drooping leaves, you must find a way to increase air humidity, and never water heavily every day.
The irrigation methods usable for Phalaenopsis include: (1) using drip irrigation lines. (2) using fixed nozzles to irrigate from top to bottom. (3) doing it manually. (5) combining the above methods.
When foliar fertilizing Phalaenopsis leaves, the leaves easily absorb fertilizer components such as urea directly from the leaf surface. Porous media are very important for the roots; despite the negative capillary effect, their advantages are greater. In the early growth stage, irrigating with sprinkler irrigation or irrigation booms is very useful for the crop. During the flowering stage, in order to avoid gray mold on the petals caused by watering, drip irrigation lines are better. When there are already many flowers on the flower stalk, watering from above easily causes the flower stalk to break.
Irrigation water must not contain chemical components or visible microorganisms. The sodium and chloride ions contained in the water must not exceed 100 mg/l, and bicarbonate must not be excessive. If there is no good water source, reverse osmosis treated water must be used. The amount of watering is related to climate, medium and plant age. In the environment of Western Europe, the irrigation amount is roughly as follows: once every 7-10 days in winter, once every 5-7 days in summer. During the growth period, the water temperature needs to be 18-20°C to avoid root damage.
During the growth period and in the first month after being moved to a large pot, water must be applied from above. Besides reliably maintaining sufficient moisture in the medium, this can also avoid salt accumulation on the top layer of the medium. After the roots develop soundly, a drip irrigation system can be used instead. At least once a year, water must be supplied from above to flush the medium.
5. Fertilizing. In the peak growth season, appropriately increase water and fertilizer. Fertilizer water should be dilute rather than concentrated, and applied in small amounts many times. When the temperature is above 32°C or below 15°C, do not fertilize. Apply root fertilizer and foliar topdressing alternately. Before July, in order to promote growth, apply once a month a general compound fertilizer with a nitrogen, phosphorus and potassium ratio of 1:1:1, diluted to 2000 times and poured at the roots; in August, apply liquid fertilizer once every 15 days; after September, use 0.1% potassium dihydrogen phosphate solution as foliar fertilizer; after October, promote flower bud formation by controlling fertilizer and saving water. During this period, mainly apply phosphorus and potassium fertilizer as foliar topdressing, appropriately topdress trace fertilizers such as boron, zinc and iron, and 0.1% Huabao No. 3 can also be used.
For fertilizing Phalaenopsis, compound fertilizers can be used or nitrogen fertilizer can be applied directly. Fertilizer application varies by variety. If a base fertilizer is used, the base fertilizer must contain Dolokal (L3-4kg/) and PG mixture, with a pH range of 5.2-6.2 and an EC range of 0.8-1.2 mS/cm. If nitrogen fertilizer is too high, it will cause excessive leaf growth. If the EC value is too high, the roots will die. If it is too low, the plant lacks trace elements. The best way to measure EC is to collect the water drained from the bottom after irrigation. Above 1.5 mS/cm means the medium in the pot has become salinized. Usually red spots in the shape of barrel rings form on the roots, and at this time they need to be flushed with clean water or water of low EC. During the vegetative growth stage, Phalaenopsis is given 2:1:2 fertilizer. Medium and small seedlings require a fertilizer concentration of 3000-7000 times, and large seedlings require a fertilizer concentration of 3000-5000 times. One month into the flowering period, start applying 1:5:2 flowering fertilizer at a concentration of 3000-7000 times, and stop fertilizing after the first flower.
There are two common fertilizing methods for Phalaenopsis: (1) Apply dilute fertilizer frequently; do not apply in poor climate and do not apply when the root zone is too wet. (2) When applying fertilizer water, maintain air convection to avoid the root zone being soaked too long and causing suffocation; if water droplets are still present on the leaves around 4:00 p.m., forced ventilation should be provided. (3) Both orchid roots and leaves can absorb fertilizer, so when fertilizing it is best to wet the entire orchid plant. (4) A small amount of adhesive can be added to water-soluble fertilizer to increase the fertilizer's adhesion.
6. Flower forcing. Flower forcing can be carried out when the plant has 5 mature leaves. When the plant is sufficiently mature and has gone through a transition period, the flower stalk will naturally emerge. Natural flower forcing in autumn means it can be sold in February or March of the following year. Flowering time can be controlled by regulating temperature and light. When all the flower buds on the flower stalk except the last one have opened, it can be cut for sale. When the flower stalk is cut, it usually already has three flower buds. The second flower stalk emerges from the remaining flower buds and starts from the terminal bud. However, forcing out this new flower stalk takes longer, so whether to adopt this method of first flowering naturally and then producing a second flower stalk depends on the required flower stalk quality and sales plan. Besides the first flower stalk, as long as the plant is healthy, a second time can produce double flower stalks, which can be sold as cut flowers. Therefore, on average, 2.5 flower stalks can be sold each year. After the flower stalk emerges, use hanging strings to keep it straight and avoid bending.
Common flower-forcing methods in the south. (1) Use the cool climate of high mountains for forcing cultivation; the altitude of the high mountains is required to be above 800 m-1000 m. (2) Use air conditioning for cooling and flower forcing cultivation. The former flower-forcing method has higher costs for transportation, packaging and high-mountain management, and the seedlings suffer more serious damage, but the flowers emerge uniformly, grow better and have brilliant colors; the latter has low cost and less damage, but the flowers do not emerge uniformly. When conditions permit, using high-mountain flower forcing in the south gives good commercial traits.
Pest and disease control for Phalaenopsis
The common pests and diseases of Phalaenopsis mainly include: soft rot, brown spot, anthracnose, sooty mold, viral disease, scale insects, red spider mites, etc. The main approach is prevention first, strengthening cultivation management measures, improving ventilation conditions, reasonably controlling placement density, and keeping the environment clean. Spray insecticides and fungicides regularly. If diseased plants are found, promptly remove the source of infection, remove diseased leaves and remnants, and for more severely affected plants, isolate or destroy them to prevent the spread and expansion of pests and diseases. In addition, suitable chemicals can be selected for control. During the disease period, 60% carbendazim or 80% thiophanate-methyl can be used; for scale insects and red spider mites, 40% omethoate or 80% dichlorvos at 1000-1500 times dilution can be used for control.
Tips for growing Phalaenopsis
1. Repotting: Phalaenopsis must be repotted once a year. Late spring and early summer is the most suitable period for repotting Phalaenopsis. Timely repotting can prevent poor growth or even death of Phalaenopsis caused by medium rot. Phalaenopsis likes soil with strong air permeability; when the medium rots, the soil becomes non-breathable.
2. Fertilizing: The principle of fertilizing should be to apply less fertilizer and dilute fertilizer, because it grows relatively fast and its growth period is also relatively long. Phalaenopsis grown for one year or many years is repotted in late spring and early summer (May) each year. Newly repotted Phalaenopsis is in a recovery period, and the orchid plant does not need to be fertilized. After a month of recovery, the orchid plant begins normal growth. That is, from June to September, the orchid plant enters the growth period and needs to be fertilized once a week.
3. Fertilizers suitable for Phalaenopsis: foliar fertilizer, potassium dihydrogen phosphate, farmyard manure fermented with water, special orchid fertilizer, etc. During the growth period, foliar fertilizer and potassium dihydrogen phosphate can be used alternately to fertilize Phalaenopsis. If these two fertilizers are not available, farmyard manure fermented with water can be chosen for watering as fertilizer water. If you have special orchid fertilizer at home, directly apply the special orchid fertilizer.
4. Precautions for fertilizing in spring and summer: Summer temperatures are relatively high, so fertilizing the orchid plant should be stopped. In autumn, the growth rate of Phalaenopsis begins to slow down, and the frequency of fertilizing should also be reduced. If the orchid plant is fertilized frequently at this time, it will affect flower bud formation, making it difficult to bloom.
That is all the editor has to introduce about the cultivation methods of Phalaenopsis. Hope it can be of help to you!