How to Propagate Poinsettia? A Detailed Guide to Common Propagation Methods
It prefers warmth, humidity and ample light.
1. Propagation methods
Compared with other flowering plants that reproduce through cuttings, poinsettia is one of the most difficult to propagate by cuttings. The following introduces the important issues and precautions in the poinsettia cutting propagation process.
(1) Sanitary conditions of the cutting environment The most important condition for the success or failure of poinsettia cuttings is cleanliness and hygiene of the environment. Before cutting, first thoroughly disinfect the greenhouse used for raising cuttings; before use it must be free from pest and disease infection to ensure the sanitary conditions of the cutting environment. Before the medium is added, the benches should first be steam-sterilized. If no steam sterilization equipment is available, chemical fumigation can be used, for example treatment with a 10% diluted sodium hypochlorite (bleach) solution. Remove all weeds below the benches and within the cutting propagation room, as these easily attract whiteflies, red spider mites and various pathogens.
(2) Cutting period Cuttings begin in mid-July and continue until early September, with cuttings collected in batches according to the cutting time. During this period the humidity in the Northern Hemisphere is relatively low, so cuttings are best taken early in the morning, when they contain more water and are plump and full. Therefore some growers choose to take cuttings between three and four o'clock in the morning. The most suitable cutting length is 6.4-7.6 cm. If the mother plants are managed properly, the cuttings should be very easy to snap off with the fingers; if they cannot be taken smoothly by hand, prepare 2-3 blades, immerse them in disinfectant in turn, and change the blade after taking each mother plant. Place the collected cuttings in clean plastic bags or trays and move them from the mother plant area to the cutting propagation area. In principle, do not put more than 100 cuttings in each bag, to avoid unnecessary disease later caused by excessive respiratory heat accumulating in the plastic bag. Use a spray method to lightly apply rooting powder to the base of the cutting to promote rooting, rather than dipping. When using rooting powder, liquid rooting agents are also not suitable, because dipping cuttings directly easily contaminates the rooting agent and leads to disease transmission; when dipping, the rooting powder is distributed unevenly, causing different rooting speeds and making management difficult.
(3) Cutting medium There are many media to choose from, for example: filling seedling trays or individual pots with a peat and perlite medium; filling a seedling pot made of pressed peat, such as a Jiffy No. 9 pot; or using peat compressed by machine into blocks. A small number of growers insert cuttings directly into a medium bed mixed with peat moss and perlite, but this easily causes heavy losses when transplanting and requires more manpower and materials in the early stage of planting out. Used old materials must not be used for cuttings. The medium must also not be disinfected with chemical fungicides. This is because fungicides become an inherent limiting condition for the cuttings; even if disease infection occurs during the cutting process, it is only suitable to prevent and control it by spraying the leaf surface, and it is not advisable to apply chemicals by drenching. The most suitable depth for inserting the cutting into the medium is no more than one inch. This is especially important when using a fixed-shape cutting medium, but it must also be ensured that the cutting makes good contact with the medium so that the cutting can absorb water smoothly. The spacing of cuttings in the medium is determined by whether the growing point of each cutting is covered. If it is covered, rooting will be delayed.
(4) Spraying frequency The number of sprays and the amount of water should be adjusted according to the external climatic conditions at the time of cutting. For example, if the weather is dry and hot during cutting, spraying begins at sunrise and ends at sunset, and sometimes continuous spraying for 24 h is even needed; the amount of spray water should keep the cuttings evenly moist. Too much water causes loss of nutrients inside the cuttings and leads to disease. After 3-4 d of cutting, when the cuttings have regained full moisture, the spraying frequency can be reduced to 12 s of spraying every 4-6 min. Before the cuttings are moved out of the cutting propagation room, stop supplying water by spraying 4-5 d in advance.
(5) Temperature control Poinsettia grows better when the night temperature is not lower than 21°C and the day temperature is not higher than 24-26°C (referring to the temperature near the plant). In midsummer it is difficult to meet these requirements unless air-conditioning equipment is installed and shading is strengthened. Controlling the light intensity can help control the temperature. At noon, adjust the maximum light level to below 2500-3000 lx. The medium temperature is best at 24-26°C; spraying lowers the medium temperature by 2-3°C, and heating equipment can be used to control the medium temperature so that rooting is not too slow. After cutting, depending on the cultivar, rooting is completed in about 18-21 d, and the standard for planting out and potting up is reached after 21-28 d.
(6) Fertilization management About 8 d after cutting, callus tissue gradually forms at the base of the cutting, and routine fertilization begins at this time. Seedling growers and seedling traders mostly prefer not to add phosphorus fertilizer during fertilization, to prevent stem nodes from elongating. But ordinary growers, especially those producing seedlings for their own use, must include phosphorus fertilizer, because phosphorus fertilizer affects the later development and enlargement of the bracts, and phosphorus deficiency leads to poor bract development.
(7) Direct cutting and planting out Some growers use the direct cutting method to reduce the labor hours for planting out, but this requires increasing the area of spraying equipment and bottom-heating equipment. When 5-6 cuttings are planted in one pot at the same time, 1-2 of them often fail to survive, which makes it difficult to control poinsettia quality. Growers in the southern United States often produce by this method, because their autumn climate and light conditions are more suitable for direct cutting and planting out.
(8) Planting out and potting up Before planting out, irrigate the cuttings thoroughly with water containing fertilizer, then pot them up, so that they can smoothly adapt to the conditions of the cultivation environment.
2. Cultivation management
(1) Soil quality It dislikes waterlogging; simply keep the potting soil moist.
(2) Light Both direct strong light and insufficient light are unfavorable to its growth. Poinsettia is a short-day plant, and short-day treatment can make it flower earlier.
(3) Soil quality It is not demanding about soil, but slightly acidic, fertile, moist sandy loam with good drainage is best.
(4) Temperature It is not tolerant of low temperatures; in winter the room temperature must not be lower than 5°C, and 16-18°C is suitable.
Introduction to Potted Poinsettia Cultivation Methods Poinsettia Propagation Methods
Poinsettia, also known as ivory red, laolai jiao, Christmas flower, etc., is an evergreen shrub of the genus Euphorbia in the family Euphorbiaceae. It is native to Central America and widely cultivated in the tropics and subtropics. It is cultivated in most provinces, autonomous regions and municipalities in China, and is commonly seen in parks, botanical gardens and greenhouses for ornamental display. Its stems and leaves are used in medicine and have a detumescence effect. Now let us take a look at the cultivation methods for potted poinsettia!
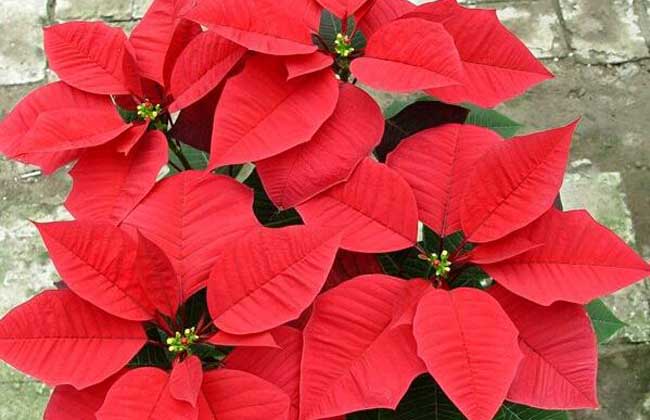
Growth habits of poinsettia
Poinsettia is native to the Taxco region of Mexico in Central America, and was introduced to the United States in 1825 by Joel Poinsett, the first U.S. ambassador to Mexico. It is a short-day plant and prefers warmth. The suitable growth temperature is 18-25°C, 18-24°C from April to September, and 13-16°C from September to the following April; the winter temperature should not be lower than 10°C. It prefers humidity; poinsettia is relatively sensitive to water, and during the growing period it only needs a sufficient water supply. It prefers sunlight, and during the stem and leaf growth period it needs sufficient sunlight to promote rapid and luxuriant stem and leaf growth.
Propagation methods of poinsettia
1. Cuttings: Poinsettia cutting propagation mainly includes semi-hardwood cuttings and softwood cuttings, as well as old-root cuttings. No matter which cutting propagation method is used, poinsettia cuttings should preferably be cut in the early morning. This is because at this time the cuttings have a relatively sufficient water content. When cutting the cuttings, the cut should be smooth, and split epidermis and xylem should be trimmed away to avoid water accumulation and rot, which would affect healing and rooting.
2. Layering: Poinsettia generally uses the air layering propagation method, and the best time for layering is from April to July. Select woody branches, generally healthy and plump branches from the previous year, and make a ring bark cut at a smooth part; the width of the ring cut should be similar to the thickness of the branch at the ring-cut point, generally 3-4 cm is suitable. After layering, roots generally grow in about two months, at which point it can be cut off and planted in a pot, forming a new plant.
Cultivation methods of poinsettia
1. Soil: Poinsettia prefers loose, well-drained soil. Generally use 3 parts vegetable garden soil, 3 parts humus soil, 3 parts leaf mold, and 1 part decomposed cake fertilizer, mixed with a small amount of cinder.
2. Temperature: Poinsettia prefers warmth and fears cold. In mid-to-late September each year, move it indoors and strengthen ventilation so that the plant gradually adapts to the indoor environment. In winter the room temperature should be kept at 15°C to 20°C. This is exactly the period of bract color change and flower bud differentiation; if the room temperature is below 15°C, the flowers and leaves develop poorly. After mid-December it enters the flowering stage, and ventilation should be gradually increased.
3. Light: Poinsettia prefers sufficient light and is strongly phototropic; it is a short-day plant. It should receive sufficient light in all four seasons, and this is even more important during bract color change, flower bud differentiation and flowering. If light is insufficient, branches tend to grow excessively and are prone to disease, and the flower color is dull; if placed in a dark place for a long time, it will not flower and will lose its leaves in winter. To make it flower earlier or later, light can be controlled; generally, giving 8 to 9 hours of light per day allows flowering in 40 days.
4. Fertilization: Poinsettia prefers fertile sandy soil. In addition to adding organic fertilizer and horse-hoof slices as base fertilizer when potting up and repotting, during the growth and flowering season apply a diluted 5-fold fully decomposed sesame paste residue liquid fertilizer once every 10 to 15 days. After autumn begins, a 0.3% compound chemical fertilizer can also be applied once a week for 3 to 4 consecutive times to promote bract color change and flower bud differentiation.
5. Watering: Poinsettia is neither tolerant of drought nor of waterlogging. Watering should be done flexibly according to the weather, the potting soil and the plant growth situation. Generally, watering should keep the potting soil moist without accumulating water, but after flowering, watering should be reduced. Be careful to water evenly and prevent excessive dryness or moisture, otherwise the lower leaves of the plant will turn yellow and fall off, commonly known as "leg shedding," or the branches will grow unevenly.
6. Pinching: About 3 weeks after planting out, when the root system has grown, poinsettia can be pinched. When pinching, leave 4-6 leaf nodes, raise the temperature to a day temperature of 28-30°C and a night temperature of 23°C, and spray frequently to increase humidity. Continue for about two weeks until buds are seen growing, then slowly lower the temperature to 25-28°C during the day and also lower the humidity. During this period, according to the uniformity and fullness of the plant, carry out a second pinching, supplement nutrients, and combine this with treatment using a dwarfing agent.
7. Pruning: Around Qingming Festival, repot the dormant old plant of poinsettia, cut off old roots and diseased or weak branches to promote the sprouting of new shoots. During the growth process, pinching is needed twice, the first in late June and the second in mid-August. During cultivation, heavy fertilization and heavy watering should be controlled, especially before the plant shape is set in autumn. When the branches grow 20 to 30 cm, begin shaping and bending, with the aim of making the plant short and compact, the flower heads neat and evenly distributed, and improving ornamental value.
8. Plant control: During the cultivation of poinsettia, plant growth regulators must be used to dwarf the plant height, so as to meet the requirement that commercial flowers have a consistent height. In addition, maintaining consistent day and night temperatures during cultivation is also crucial and should be tracked and monitored at all times. When the day-night temperature difference exceeds 3°C, after sufficient pinching, spray 750 to 1000 ppm of chlormequat 1 to 4 times to inhibit stem overgrowth.
Pest and disease control of poinsettia
1. Gray mold
[Symptoms] Gray mold mainly occurs in winter, exactly during the poinsettia flowering season. Once there is continuous rainy, humid weather without sunlight, it can harm poinsettia flower stalks, bracts, leaves and branches. Generally, water-soaked lesions first appear on the flower clusters. Afterward, the lesions are covered with a layer of pathogen conidia, and the pathogen continues to spread to the bracts. In the early stage, water-soaked faded spots appear on the bracts, and later they gradually expand into irregular shapes; the pathogen then spreads to the branches, producing yellow-brown to brown lesions on the branches. In the later stage the lesions are clearly sunken and dark brown, and in severe cases the lesion areas become dry and withered.
[Control] Make use of the closed characteristics of the facility to create a high-temperature, low-humidity ecological environment and control the occurrence and development of gray mold. At night the indoor humidity in the facility is often higher than 90%. After the straw mats are pulled up in the morning, immediately open the ventilation openings to ventilate and remove moisture, lower the indoor humidity, and control disease development with a relatively low temperature. After 9 o'clock, when the indoor temperature rises faster, close the ventilation openings and raise the indoor temperature rapidly to about 32°C.
2. Root rot
[Symptoms] It generally occurs more severely in high-temperature seasons, and is also extremely likely to occur when the cultivation soil has a high water content. In the early stage the plant shows wilting. If the stem base is examined at this time, a light brown constriction can be seen, but the infected plant shows no putrefaction or hydrolysis. Later the lesions gradually spread upward, and the wilting gradually becomes more serious. The stem lesions are slightly sunken and yellow-brown. In the later stage the tissue at the lesion disintegrates, causing the plant to wither and die due to severe water shortage. Sometimes the whole plant turns yellow in a water-soaked manner and eventually rots to death. White mycelium can be seen near the ground, and in severe cases it can spread to the cultivation soil. When the roots are affected, root rot often results, initially affecting the normal growth of the plant and in severe cases causing death.
[Control] ① Practice crop rotation: rotate every other year in lightly diseased fields, and every 3-5 years in heavily diseased fields. ② Deep plowing and soil improvement: increase the application of organic fertilizer, irrigate and drain reasonably, and enhance disease resistance. ③ Strict seed selection: eliminate unqualified seeds. Dress seeds with 50% carbendazim wettable powder at 0.5% of seed weight. ④ When disease occurs, spray the stem base of peanuts with a 1000-fold solution of 50% carbendazim wettable powder, using 25-30 kg of liquid per mu each time.
3. Leaf spot
[Symptoms] Leaf spot occurs more severely mainly in spring and summer, and the lesions mostly begin on old leaves. In the early stage, purple-red to brown small spots appear on the leaves. The lesions are nearly round to irregular, and later gradually expand. Most lesions can merge with each other to form one large lesion, and in the later stage the center of the lesion gradually turns gray-brown. In severe cases the lesion tissue becomes gangrenous, causing the leaves to curl and dry up.
[Control] ① Remove diseased tissue promptly and burn it in a centralized manner. ② Crop rotation (soil can be changed in greenhouses). ③ Do not spray or water the plants. ④ Begin spraying from the early stage of disease occurrence to prevent the disease from spreading and expanding.
4. Whitefly
[Symptoms] Adults and larvae of whitefly prefer dense, shaded environments. They gather on the upper leaf backs of poinsettia and suck sap with piercing-sucking mouthparts, causing leaves to fade or develop chlorotic spots, affecting photosynthesis and leading to poor plant growth. The honeydew excreted by the insects often causes sooty mold. Adults are attracted to yellow.
[Control] Whitefly is most vulnerable in the early mobile larval stage, followed by newly emerged adults, which are sensitive to pesticides and suitable for spray control. Whitefly generally occurs in large numbers under high temperature and low humidity, with the peak period from late September to late November. The most suitable control period is late September, and the spraying time is from 6 to 10 a.m.
Cultivation methods of poinsettia
1. Soil: Poinsettia can be mixed with culture soil, leaf mold and sand, or mixed with peat soil, carbonized rice husk and coarse river sand in a 3:1:1 ratio. Slightly acidic soil is preferred, and adding an appropriate amount of calcium and magnesium fertilizer can make the red bracts more vivid.
2. Water: Poinsettia is relatively sensitive to water. During the growing period, as long as the water supply is sufficient, the stems and leaves grow rapidly, sometimes showing excessive growth with elongated internodes and narrow leaves. Conversely, lack of water in the potting soil or alternating dry and wet conditions can cause leaves to turn yellow and fall off. Therefore, water control is directly related to the growth and development of poinsettia.
3. Sunlight: Poinsettia is a short-day plant. During the stem and leaf growth period it needs sufficient sunlight to promote rapid and luxuriant stem and leaf growth. To make the bracts turn red earlier, control the daily light to within 12 hours to promote flower bud differentiation.
4. Temperature: The suitable growth temperature for poinsettia is 18-25°C. In winter the temperature must not be lower than 10°C, otherwise the bracts will turn bluish and the basal leaves will turn yellow and fall off, forming the "leg shedding" phenomenon. When the temperature rises again in spring, branches can continue to sprout from the stems.
5. Fertilization: Fertilize once every half month during the growing period. Usually two weeks before flower bud differentiation, supplement each plant with 1 teaspoon of soluble fertilizer. In winter the fertilizer concentration should be reduced by half.
6. Pests: The main pests of poinsettia include whitefly, thrips, scale insects, aphids, etc., which can be controlled with related insecticides or acaricides, such as a 1000-1500-fold solution of 40% dicofol. In addition, the cultivation environment should be kept clean and weeds removed promptly.