A Detailed Guide to Hyacinth Propagation and Cultivation Methods
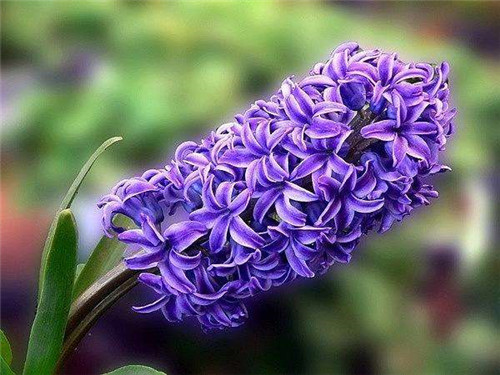
Hyacinth, also known as Dutch narcissus or five-color narcissus, is a bulbous flower of the lily family, with a spherical or flattened-spherical bulb covered by a membranous outer skin. The leaves are basal, 4 in number, strap-shaped and lanceolate. The flower stem is fleshy and hollow, with a terminal raceme bearing 5 to 15 flowers or as many as more than 10. The tips of the small flower segments curl outward and backward, and the flower colors are rich, including white, yellow, blue, purple, pink, deep red and other colors, with a flowering period from March to April.
Hyacinth flowers are delicate and graceful, colorful, dazzling and pleasantly fragrant. They are suitable both for potted cultivation and for water culture, and are bulbous flowers deeply loved by people. Hyacinth originates from the coastal areas of the Mediterranean in southern Europe and the region of Asia Minor. It prefers fertile, moist, well-drained sandy loam and full sunlight, is cold-tolerant, lies dormant in summer, grows in autumn, and blooms in winter and spring. The temperature range for flower bud differentiation is 20 to 28°C, with the optimum temperature being 25°C.
Hyacinth is mainly propagated by dividing bulbs, and seed propagation is used in breeding. The daughter bulbs around the mother bulb can be planted separately, but the natural bulb division rate is extremely low; each mother bulb generally produces only 1 to 2 daughter bulbs per year. To increase the propagation coefficient, the bulbs are often cut manually, that is, after flower bud differentiation, a cross-shaped or radial cut about 1 cm deep is made at the base of the bulb. After the sap secreted from the cut is slightly dry, it is disinfected with 0.1% mercuric chloride solution. After disinfection, the wound is dried in the sun, then the wound is placed facing upward and spread flat in an indoor tray. After about 2 to 3 months, many small bulbs grow from the wound, and they can be planted separately in autumn.
For open-field cultivation, planting is suitable from October to November. The soil is required to be well drained. Before planting, apply decomposed cow manure or bone meal as a base fertilizer. The plant spacing is 15 to 20 cm, and the soil cover is about 5 to 8 cm, keeping the soil moist. After one planting, divide the bulbs again after several years. If bulb division is needed, dig them out in June, dry them in the sun and store them in a dry, cool place. For potting soil, a culture soil mixed evenly from 5 parts leaf mold, 3 parts garden soil and 2 parts sand can be used. In northern regions, planting is mostly done in October, and the planting depth should preferably be such that the shoulder of the bulb is level with the soil surface. After planting, water thoroughly and place in a cold room, keeping the room temperature at 4 to 6°C to promote root development. After sprouting, move the pot to a warm, sunny place and gradually raise the temperature to 18 to 22°C; it will bloom in March to April. After flowering, cut off the withered flower stalks to promote bulb growth.
In June, as the temperature rises, the leaves turn yellow and wither, and the plant enters the dormant stage. At this time, the bulb should be taken out of the pot, slightly dried, and stored in a ventilated, cool place indoors (about 25°C). The bulb can also be placed in a refrigerator at about 5°C for low-temperature treatment for 1 to 1.5 months before planting again. After sprouting, place it in a sunny place for cultivation, keep the potting soil moist, and after the flower stalk emerges, spray water on the leaves 1 to 2 times a day to increase air humidity. Apply 1-2 times of dilute cake fertilizer water before and after flowering, and it will grow well with lush leaves and abundant flowers. Hyacinth can also be grown in water like Chinese narcissus. For water culture, choose a specially made glass bottle, fill the bottle with water, place the bulb at the mouth of the bottle so that there is no gap, with the base not immersed in water, and first place it in a cool, dark place (preferably covering the container with black cloth) to promote root development.
After roots have developed, move it to a semi-shaded place for care. At a room temperature of 18 to 20°C, it will bloom in about 2 months. During water culture, change the clean water once every 2 to 3 days (water temperature about 20°C), and always maintain a shallow water layer. To prevent the water from spoiling, put 1 to 2 small pieces of charcoal in the water. When changing the water, pour it in from the edge of the container to prevent the bulb from moving and breaking the roots, which would affect growth and flowering. After flowering, plant the bulb in soil, and after the leaves wither and die, take it out and store it in a cool place.
Two Major Propagation Methods for Hyacinth Bulbs and Techniques for Cultivating Hyacinths
Hyacinth is a highly ornamental flower, grown in many places around the world and also widely grown in our country. The editor often sees experiences about hyacinth bulb propagation on many forums. Today let us take a look at what the correct techniques for cultivating hyacinths are.
Two Major Propagation Methods for Hyacinth Bulbs
Method One: Bulb Division Propagation
1. Wait until June (the dormant period), dig up the bulbs, and you will be able to see the large bulbs; at this point the daughter bulbs should be separated from the large bulb. Generally, after one year of planting, the mother plant will produce 1 to 2 daughter bulbs. In order to increase the survival rate of hyacinth bulbs, during the summer dormant period the large bulb can be cut to stimulate it to produce daughter bulbs.
2. This is a rather complicated process. First, in August, be sure that the flower buds have already formed, then scoop out part of the base of the bulb, evenly hollowing out the basal plate, and then use a knife to cut a cross from bottom to top, deep enough to reach the bud center inside the bulb. The flowing mucus should be disinfected by smearing with mercuric chloride water, then exposed to the blazing sun for 1 to 2 hours, and then spread flat indoors. Use temperature to induce the bulb to sprout.
Method Two: Seed Propagation
Compared with the method above, this method is relatively simple and is generally used when breeding new varieties. As can be seen from the name, it uses seeds to sprout. Sow in autumn, cover with 1 cm of soil, and wait for germination at the end of January to early February of the following year.
Correct Techniques for Cultivating Hyacinths
1. First is the treatment of hyacinth bulbs. Before planting, they must be disinfected first, otherwise they will mold before sprouting. When disinfecting, first peel off the brown outer skin, then wash the mold spots on the surface clean, and remove the lateral daughter bulbs that have grown. After washing clean, soak in disinfectant solution for about half an hour, then dry and they can be planted.
2. To grow hyacinths in water, everyone should pay attention to changes in the water level. At the beginning, the water level should be relatively high. After the roots grow out, the water level can be lowered. Do not leave all the roots in the water. After the roots grow to the bottom of the bottle, keeping the water surface at about 2/3 of the height from the bottom of the bottle to the bottom of the bulb is sufficient.
3. Adding a little nutrient solution to the water will make it grow better. At the same time, if tap water is chosen, it should be left standing overnight before being added. In the early stage of rooting, add a little fertilizer appropriately. After the hyacinth flower buds appear, some nitrogen fertilizer needs to be added, and afterward the proportion of phosphorus and potassium fertilizer will become higher and higher.
Hyacinth is a very beautiful flower. Many people now also grow hyacinths, and it has a very good decorative effect. Many brides choose hyacinths as bouquets. That is all for the methods of placing hyacinth bulbs. I hope it can help everyone.
Two Major Propagation Methods for Hyacinth Bulbs and Correct Techniques for Cultivating Hyacinths
Hyacinth is a highly ornamental flower, grown in many places around the world and also widely grown in our country. The editor often sees experiences about hyacinth bulb propagation on many forums. Today let us take a look at what the correct techniques for cultivating hyacinths are.
Two Major Propagation Methods for Hyacinth Bulbs
Method One: Bulb Division Propagation
1. Wait until June (the dormant period), dig up the bulbs, and you will be able to see the large bulbs; at this point the daughter bulbs should be separated from the large bulb. Generally, after one year of planting, the mother plant will produce 1 to 2 daughter bulbs. In order to increase the survival rate of hyacinth bulbs, during the summer dormant period the large bulb can be cut to stimulate it to produce daughter bulbs.
2. This is a rather complicated process. First, in August, be sure that the flower buds have already formed, then scoop out part of the base of the bulb, evenly hollowing out the basal plate, and then use a knife to cut a cross from bottom to top, deep enough to reach the bud center inside the bulb. The flowing mucus should be disinfected by smearing with mercuric chloride water, then exposed to the blazing sun for 1 to 2 hours, and then spread flat indoors. Use temperature to induce the bulb to sprout.
Method Two: Seed Propagation
Compared with the method above, this method is relatively simple and is generally used when breeding new varieties. As can be seen from the name, it uses seeds to sprout. Sow in autumn, cover with 1 cm of soil, and wait for germination at the end of January to early February of the following year.
Correct Techniques for Cultivating Hyacinths
1. First is the treatment of hyacinth bulbs. Before planting, they must be disinfected first, otherwise they will mold before sprouting. When disinfecting, first peel off the brown outer skin, then wash the mold spots on the surface clean, and remove the lateral daughter bulbs that have grown. After washing clean, soak in disinfectant solution for about half an hour, then dry and they can be planted.
2. To grow hyacinths in water, everyone should pay attention to changes in the water level. At the beginning, the water level should be relatively high. After the roots grow out, the water level can be lowered. Do not leave all the roots in the water. After the roots grow to the bottom of the bottle, keeping the water surface at about 2/3 of the height from the bottom of the bottle to the bottom of the bulb is sufficient.
3. Adding a little nutrient solution to the water will make it grow better. At the same time, if tap water is chosen, it should be left standing overnight before being added. In the early stage of rooting, add a little fertilizer appropriately. After the hyacinth flower buds appear, some nitrogen fertilizer needs to be added, and afterward the proportion of phosphorus and potassium fertilizer will become higher and higher.
Hyacinth is a very beautiful flower. Many people now also grow hyacinths, and it has a very good decorative effect. Many brides choose hyacinths as bouquets. That is all for the methods of placing hyacinth bulbs. I hope it can help everyone.