How to choose flower pots and growing soil when cultivating Clivia
When cultivating Clivia, you should choose a deep cylindrical flower pot with an appropriate diameter according to the size of the plant, so as to facilitate the extension of its fleshy roots. The best pot for Clivia is a specially made one, with very thin walls, a large drainage hole at the bottom, and a height twice its diameter, providing extremely good aeration and drainage; with this kind of pot, root rot generally does not occur. Never use porcelain pots, purple clay pots, or plastic pots. As for the color of the flower pot, since Clivia is grown mainly for its foliage all year round, and the leaf clusters of the Changchun Clivia are quite neat with a tender green and rustic tone, if a gray-black clay tile pot is used, the contrast between the plant's tone and the pot's tone will be too small, making it look dull and gloomy. Therefore, it is best to choose a brick-red Clivia pot to enhance the color contrast and make the plant more eye-catching.
The growing soil for cultivating Clivia can be purchased directly from the market or mixed yourself. The Changbai Mountain leaf mold soil sold on the market is an ideal soil material for cultivating Clivia. Its main components are the fallen leaves of oak, quercus, hazel, aspen, etc., and it also contains a small amount of pine needles. It has a neutral to slightly acidic reaction, a loose texture, and good water retention and aeration. When using it, it is best to sift it and then mix 20%-30% river sand into 70%-80% leaf mold soil, mixing evenly to prepare the growing soil. When the above soil materials cannot be purchased, you can adapt to local conditions and prepare your own according to the local raw soil materials. For example, the nutrient soil commonly used in the parks of Changchun is made by mixing fully fermented and decomposed horse manure soil with river sand.
At home, you can mainly use sawdust from hard miscellaneous wood and the leaves of broadleaf trees. First pile them up in a large flower pot, water them, and after 2-3 months of composting, mix in 1/4 of crushed cinder. If fertilizing, it is best to mix in 1/5 of decomposed horse manure. Mix the above materials evenly and it can be used as Clivia growing soil. No matter what kind of soil is used as the raw material, the pH of the prepared growing soil should preferably be 6.5-6.8.
Clivia cultivation: watering, flower shape training, and soil replacement techniques
How to water Clivia? How to train the flower shape? How to replace the soil?
How to water Clivia
The general watering principle for Clivia is “wet and dry alternately, do not water when not dry, water thoroughly when completely dry.” Watering thoroughly means making all of the Clivia's roots be in the same level of moisture. To judge whether the water has been watered thoroughly, you cannot decide only based on whether water flows out from the bottom of the pot. This is because sometimes after the pot soil dries, it hardens and shrinks into a ball; after watering, the water quickly flows from the pot wall to the bottom and runs out through the bottom hole, while the central part of the pot soil has not been touched by even a little water. If watering is stopped at this time, the Clivia leaves will wilt, and if it is in the process of shooting the flower scape, a stuck scape will form.
Clivia is suitable for indoor cultivation, mainly determined by its internal structure and physiological functions. Water is an important component of the Clivia plant. According to measurements, Clivia contains 60%-80% water, and especially its fleshy roots have a strong water-storage function and relatively strong resistance to drought. Clivia prefers neutral water. Clean, pollution-free tap water, well water, river water, etc. can all be used for watering, but because fresh tap water and well water have a water temperature lower than the soil temperature and contain some impurities, they should be left to stand for 1-2 days before use.
For small Clivia seedlings, the best method is to spray-irrigate with a spray bottle. Spray upward toward the leaves with the nozzle. The advantage of doing this is that besides achieving the purpose of watering, it can also wash off dust, and at the same time leave mist droplets on the leaf surface, ensuring a certain humidity on the leaf surface. Under sunlight, water evaporation can lower the leaf surface temperature and prevent sunscald. However, for Clivia that is blooming, spray irrigation cannot be used for watering, to prevent water from entering the leaf sheaths and causing heart rot. For Clivia in the flowering period, water can only be poured into the pot.
How to cultivate Clivia with high ornamental value
Clivia is a moisture-loving plant and has relatively high requirements for the humidity of the growing environment. Its most suitable humidity range is 70%-80%. Clivia grown in such an environment has tender green leaves, clear veins, and short, wide, neat leaves, with high ornamental value. However, limited by the conditions of a home environment, it is generally very difficult for ordinary households to reach this standard. This is also the main reason why many people cannot grow Clivia well. Clivia is a day-neutral plant and does not have strict light requirements. As long as the temperature is suitable, it can bloom normally whether the light duration is a little longer or shorter. Short-day conditions in winter and spring are more conducive to flowering. Good light is an important condition for ensuring large and brightly colored Clivia flowers. But it still prefers relatively weak light and especially dislikes strong light.
The leaves of Clivia have phototropism. If it is placed in one place indoors for a long time, the leaves will definitely turn toward the direction of the sun. As far as its plant shape is concerned, it will then be difficult to achieve the ornamental effect of forming a line when viewed from the side and looking like a fan when viewed from the front.
Clivia must be placed in a north-south direction; if it is not in a north-south direction, the leaves will grow crooked. So what should you do if the leaves have grown crooked? You can align the two leaves and clip them together. You can use a playing card to enclose them so as not to damage the leaves. Under normal conditions, the leaves will be corrected in 15-20 days.
Clivia's soil requirements and soil replacement
While the thick fleshy roots of Clivia store sufficient water, they also place higher demands on the soil on which they depend for survival. Only nutrient soil with good aeration, a loose texture, and rich humus content is suitable for the growth of Clivia's fleshy roots.
Decay-resistant tree leaves or pine needles must be fermented before use. They cannot be used without fermentation; without fermentation, they can easily burn and rot the roots. Clivia must have its soil replaced once a year. At the same time, because Clivia has deep roots and large leaves, attention should also be paid to replenishing nutrients in a timely manner. The nutrient elements needed by Clivia mainly come from organic fertilizers, such as soybean cake, peanut oil cake, animal offal, etc. Under normal circumstances, applying them once in spring and once in autumn within a year is sufficient. In spring, apply once after flowering, around late April to early May; in autumn, after the fruits are harvested, apply once more from about mid-September to late October.
The time and frequency of repotting and soil replacement for Clivia depend on the size of the seedling and the season. Mature Clivia like these need their soil replaced once a year. The best time for soil replacement is spring and autumn, because at this time Clivia grows vigorously and its growth will not be affected by soil replacement. Take the Clivia out of the pot, cut off rotten roots and old roots with no absorption capacity, and remove the spent soil.
Cover the drainage hole of the flower pot with a piece of broken pot, fill in 2-5 cm of nutrient soil, take a handful of soil and fill the interior of the root mass firmly, then place the plant in the pot. When filling the pot with nutrient soil up to half the pot's height, gently press downward along the edge of the pot with your hand, so that the roots all stand upright in the pot and are not easily bent. The key point of soil replacement is to fill the root area firmly with soil. Otherwise, if there is no soil around the roots, water and nutrients cannot reach the roots, which can easily cause root rot and stuck scapes. After replacing the nutrient soil, water thoroughly.
Editor's conclusion: Clivia originates from the mountain forests of South Africa, where the natural environment is like spring all year round, and the various organs of the Clivia plant have already adapted to this neither-cold-nor-hot natural environment. Therefore, during daily care, the temperature should be controlled between 15-25 degrees. When the temperature drops below 10 degrees, Clivia's growth and development slow down, and when it drops below 0 degrees, it will freeze to death. Similarly, when the temperature reaches or exceeds 30 degrees, it will also seriously affect the normal growth and development of Clivia.
Clivia is an evergreen perennial herbaceous plant with strong shade tolerance and thick, large, dark green leaves. The leaf mesophyll contains a large amount of chlorophyll and can absorb carbon dioxide and water under sunlight to synthesize organic matter for its own growth and development needs, while also releasing oxygen. In addition, on Clivia's broad and thick leaves, there are many stomata and hairs that can secrete a large amount of mucus. During gas exchange, it can absorb a large amount of indoor dust, dirt, and harmful gases, making the indoor air clean. Therefore, Clivia is also praised by people as an “absorption machine” and a “dust remover,” and the guardian of human health.
Clivia cultivation methods and precautions
Clivia, also known as large-flowered Clivia, is a perennial evergreen herbaceous flowering plant of the genus Clivia in the Amaryllidaceae family. It is native to South Africa. The large-flowered Clivia has dark green, glossy leaves, large and brilliant flowers, and a dignified and elegant plant form. It is an excellent potted flower for both flower and foliage appreciation, and can also be used as a cut flower.
The large-flowered Clivia has fresh flowers and emerald leaves, abundant fruits, and beauty in leaf, flower, and fruit alike. Its leaf form is graceful, noble, and dignified; when blooming, the green leaves and red flowers set each other off, with a poised and elegant bearing. Especially since it blooms right during the New Year festival, it is deeply loved by people and has become an excellent choice for decorating halls, conference venues, or home interiors.
The above is basic knowledge about Clivia. Below, let's learn about how to grow Clivia specifically:
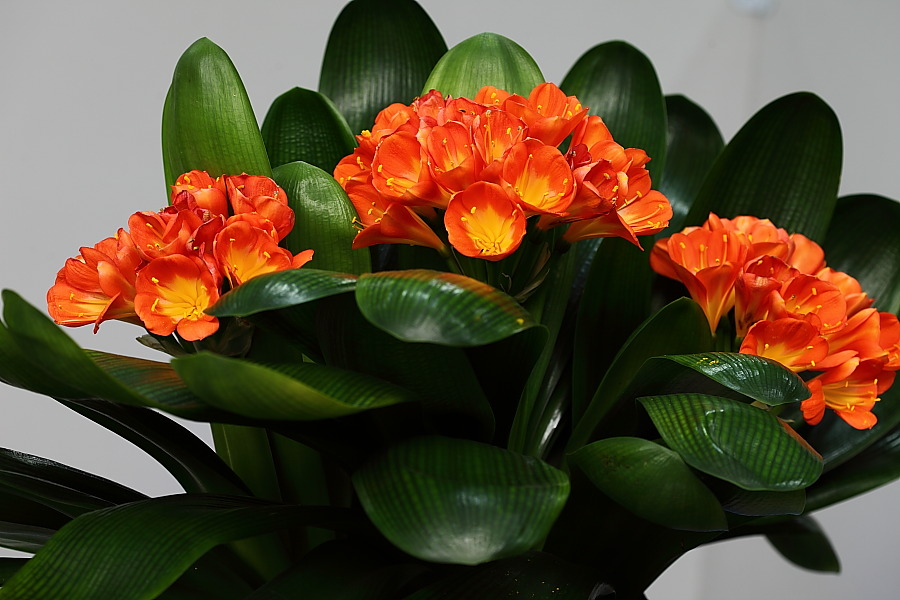
1. Clivia varieties
The cultivated varieties of Clivia include large-flowered Clivia and nodding Clivia, as well as 2 variants, namely yellow-flowered Clivia and variegated-leaf Clivia. In recent years, Clivia varieties have developed rapidly, including "Heshang," "Huang Jishi," "Youjiang," "Hualian," "Jinsilan," "Yuanlan," "Japanese Clivia," "Anshan Clivia," "Henglan," "Quelan," "Gaolan," and others. In addition, when purchasing Clivia, pay attention that the fleshy roots should be fresh, with no symptoms of shriveling, rot, injury, or waterlogging, and the leaves should have no disease spots or yellow spots. After purchase, wipe off the dust on the leaf surface, apply sulfur powder to injured areas of the roots, then disinfect by soaking in 0.1% potassium permanganate for 20-30 minutes, and with the roots facing outward, wrap the leaf surface in newspaper and sun it for 0.5-1 hour.
2. Clivia flower pot selection
For Clivia, choose a clay pot with good water permeability and aeration, or a ceramic or purple sand pot; porcelain pots and plastic pots cannot be used. The pot should not be too large, and the pot walls should not be too thick. The size of the flower pot should be determined according to the number of Clivia leaves. Use a 10 cm pot for 2 leaves; a 12 cm pot for 3-5 leaves; a 20 cm pot for 6-10 leaves; a 26 cm pot for 10-15 leaves; and a 30 cm pot for plants 4 years old or older.
3. Preparation of growing soil for Clivia cultivation
The preparation of growing soil should achieve the characteristics of looseness, fertility, aeration, and good drainage. For potted cultivation, it is advisable to mix 6 parts leaf mold soil, 2 parts compost soil, 1 part cinder (or river sand), and 1 part cake fertilizer evenly; you can also mix 7-8 parts peat soil with 2-3 parts river sand; or mix 7 parts leaf mold soil, 2 parts river sand, and 1 part cake fertilizer.
4. Clivia cultivation method: potting
The best time for potting Clivia is March-April or September-October. The potting substrates include coconut coir, peat, leaf mold soil, river sand, cinder, charcoal, sawdust, etc. Before potting, place several pieces of broken pot at the bottom of the flower pot with the concave side facing down to facilitate drainage. After potting, place it in a shaded place for about 1 week to let it gradually recover. After 1 week, the light can be gradually increased.
5. Clivia cultivation: watering method
Clivia has well-developed fleshy roots that can store a relatively large amount of water, so it has a certain degree of drought tolerance. During the growing period, the environment should be kept moist, and water should be given only when the surface of the pot soil is dry, to prevent root rot. For small pots and small plants, water more when the temperature is high, ventilation is good, and soil aeration is good; otherwise, water less. Generally, seedlings and the flowering period require more water; watering should be less in autumn and winter and more in spring and summer. During high summer temperatures, water should be sprayed on the leaf surface and the ground every day to increase air humidity and strengthen ventilation. In winter, the pot soil should be slightly dry, and watering should be controlled, but during January when the flower scape is emerging, the water requirement should be met to ensure the flower scape emerges smoothly.
6. Clivia cultivation: fertilizing method
Clivia likes fertilizer, but excessive fertilizing will cause root rot. During the growing period, apply dilute liquid fertilizer once every about 15 days, preferably fermented and decomposed cake fertilizer. January is the period when the flower scape emerges; during this period, apply 2-3 times a phosphorus-based liquid fertilizer to promote abundant and brightly colored flowers. In the high-temperature summer season, Clivia growth stops, and fertilization should be stopped.
In spring, autumn, and winter, liquid fertilizer can often be applied along with watering, preferably well-fermented oil residue water or compound chemical fertilizer water, about once every 10-15 days. The application concentration of chemical fertilizer is about 0.1%-0.3%, and the concentration of oil residue water is 15%-20%. The concentration should not be too high, otherwise fertilizer damage is likely. Generally, in autumn, nitrogen-based fertilizer should be applied, such as cake fertilizer water or chemical fertilizer, to facilitate leaf growth; in winter and spring, more phosphorus- and potassium-based fertilizers should be applied, such as diammonium phosphate, bone meal, etc., to facilitate vein formation and improve glossiness. In addition, 0.1% potassium dihydrogen phosphate or 0.5% superphosphate, etc. can also be sprayed on the leaf surface, about once every 10 days. Seedlings will not only grow quickly, with good flower bud differentiation, but also bloom abundantly, with large and brilliant flowers.
7. Clivia cultivation: temperature requirements
Clivia likes warmth and fears heat. In winter and spring, the daytime room temperature should be kept at 15-20°C, and at night at 10-15°C. Different growth stages require different temperatures. During the sowing and seedling stage, when the temperature reaches 25°C, seedlings emerge quickly and the emergence rate is high; during the seedling stage, a temperature of 15-18°C is beneficial for hardening the seedlings; during the scape-shooting stage, the temperature should be somewhat higher and can be maintained at 18-20°C; during the flowering stage, lowering the temperature to about 15°C can prolong the flowering period. The suitable day-night temperature difference is 7-10°C. When the weather is dry and hot, water should be sprinkled on the ground around the pot to increase humidity and lower temperature.
8. Clivia cultivation: light requirements
Clivia is a semi-shade-loving flower and prefers a semi-shaded environment. Light in early spring, late autumn, and winter is extremely important for promoting Clivia to bloom and bear fruit. The growth of Clivia has a certain relationship with light and temperature. In the high-temperature season, it should be maintained under shade; in autumn, winter, and spring, when the temperature is below 20°C, sufficient light is needed; above 20°C, slight shading is appropriate, that is, shading only at noon; when it exceeds 25°C, full shading is appropriate, and it should be maintained in a shaded, ventilated environment.
For home potted cultivation, in winter it should be placed in a sunny spot indoors; in spring and autumn, it should receive half-light; in summer, it should be placed in a cool place. If low temperature, insufficient light, or water imbalance occurs before flowering, the "stuck scape" phenomenon will appear, that is, the scape wants to emerge but cannot be drawn out, so careful care is needed before flowering.
In order to make the leaves neat and beautiful, the direction of the leaves should be parallel to the direction of light, and the pot should be turned once every 7-10 days, rotating the flower pot 180 degrees, so as to train the plant into a shape of "a line when viewed from the side and a fan surface when viewed from the front."
9. Clivia cultivation method: flowering
For Clivia plants that have already bloomed, the flower stalk should be cut off in time to prevent the flowers from setting fruit and consuming excessive nutrients, which would affect continued flowering the following year. After Clivia blooms, the soil should also be replaced once, keeping the pot soil as loose and fertile as possible, so as to facilitate the extension of the Clivia roots and the growth of the plant. Clivia is a plant that fears heat and likes coolness. In summer, watering should be minimized, and it should be placed in a ventilated place, maintaining the temperature below 30°C. In late summer and early autumn during the bud differentiation period, resume normal watering and fertilizing, and apply more phosphorus and potassium fertilizer to facilitate flower bud growth and encourage Clivia to bloom more and produce large flowers.
10. Clivia propagation methods and precautions
Clivia commonly uses the division propagation method. Offsets, commonly known as "foot buds," are easily produced around the rhizome of Clivia, and people can use these offsets for propagation. The best time for division is in spring from March to April, combined with repotting. Division should be carried out when the foot buds have grown to about 20 cm tall, because at this time they have already formed a complete root system, and after division they grow relatively quickly and generally can bloom after 2 years.
In addition, Clivia can also be propagated by sowing, but this is not commonly used in home cultivation. Sowing is best done in early spring. The pot soil should be sandy loam rich in humus, and a layer of tile debris should be spread at the bottom of the sowing pot to facilitate drainage. Use the dibbling method, cover with 1-1.5 cm of soil after sowing, water thoroughly, and place at a room temperature of about 25°C, keeping the pot soil moist. Germination occurs after 35-45 days. After germination, appropriately control moisture and provide sufficient light. When the seedlings grow 2 true leaves, they can be potted separately for cultivation. After 3-4 years of careful maintenance, they can shoot scapes and bloom.
11. Precautions for Clivia cultivation
Clivia enters the reproductive growth period in late autumn. The maximum daytime temperature should be controlled below 25°C, and the minimum nighttime temperature should be kept above 15°C. A day-night temperature difference of 5-10°C is conducive to Clivia shooting its scape. If the temperature is too low, the flower stem grows too slowly and cannot shoot up high, forming a stuck scape. After flower bud differentiation, light should be appropriately increased, and water and fertilizer must be kept up. In addition to applying prepared liquid fertilizer, phosphorus and potassium fertilizer should also be added regularly to meet the phosphorus and potassium fertilizer requirements for flowering. If fertilizer is insufficient, the flowers will be few and small, and the flower color will not be brilliant. In addition, lack of fertilizer is also one cause of stuck scapes. When watering fertilizer or water, water must not be poured between the leaves, to prevent the flower scape from rotting. After Clivia blooms, appropriately lowering the temperature and reducing light can prolong the flowering period.
Common problems in Clivia cultivation:
1. What to do if Clivia leaves turn yellow http://junzilan.yangzhiriji.com/yezifahuang/
2. What to do if Clivia has a stuck scape http://junzilan.yangzhiriji.com/jiajian/
3. What to do if Clivia has root rot and stem rot http://junzilan.yangzhiriji.com/langeng/