New tricks for growing Chinese chives, don't miss these practical tips
Chinese chives, a perennial herbaceous plant of the Liliaceae family, are used medicinally as seeds and leaves. They have the effects of strengthening the stomach, refreshing the mind, stopping sweating and astringing, tonifying the kidney and supporting yang, and securing essence. In traditional Chinese medicine, Chinese chives have a very resounding name, "yang-strengthening herb," and some people also call Chinese chives "intestine-washing herb." Not only that, Chinese chives have many other names. Chinese chives are also called Caozhongru, Qiyangcao, Changshengcao, and also Biancai.
Land preparation and fertilization
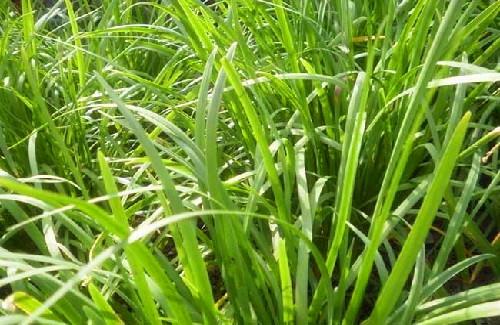
1. Land preparation. Before sowing, plow the soil deeper than 20 cm; in combination with fertilization, harrow finely after plowing, level the land and make beds. Where conditions permit, high ridges can be raised for cultivation to facilitate drainage, or flat beds can be used for cultivation.
2. Fertilization. In combination with land preparation, broadcast 5000-6000 kg of high-quality decomposed organic fertilizer, 6 kg of urea, and 10 kg of superphosphate per mu, or use a compound fertilizer converted according to this ratio.
Sowing
1. Sowing time. After the soil thaws and until the Autumn Equinox, sowing can be done at any time. Generally, late March to early May is suitable, with spring sowing preferred; summer sowing should be done early rather than late.
2. Sowing rate. 4-5 kg of seed is needed per mu. For open-field seedling raising and transplanting, 1.5-2 kg.
3. Sowing method. Before sowing, first take out part of the surface soil from the bed (sieve it for use in covering the seed after sowing), then shallowly hoe and rake it level, first water once with bottom water about 3.3 cm deep, and after the water seeps down, water again to a depth of about 3.3 cm. After the water seeps down, scatter the seeds evenly, then cover with soil about 1.5 cm, and the next day rake level with a tooth rake, keeping the surface soil both loose and moist, which helps the seeds germinate and emerge. After sowing, cover with plastic film to preserve moisture. After more than 30% of the seeds have emerged, remove the plastic film promptly to prevent seedling burn. If white sprouts are found lying down, add some more moist soil.
There is also the "dry sowing method." The dry sowing method uses dry seeds that have not been pregerminated and sows them directly in the seedling bed. On the prepared seedling bed, open small shallow furrows 10 cm wide and about 1.6 cm deep at a row spacing of 10 cm, scatter the seeds into the furrows, then gently sweep the furrows level with a broom and press them firm, then water once, and water again after 2-3 days. Before and after the seeds emerge, the soil must always be kept in a moist state.
Planting out
1. Planting time. Spring-sown seedlings should be planted out after the Summer Solstice, and summer-sown seedlings should be planted out around the Major Heat. When planting out, avoid the high-humidity season, because at that time it is not conducive to the recovery and growth of Chinese chives after planting.
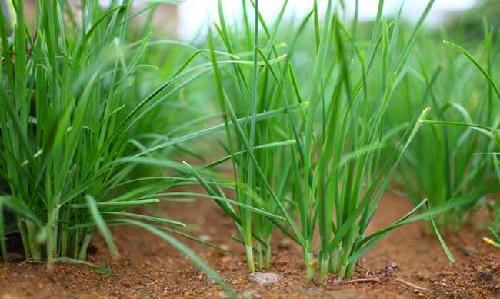
2. Planting method. Lift the Chinese chive seedlings, trim the fibrous roots short (leave only 2-3 cm), and trim the leaf tips short (leave leaves 10 cm long). In the bed, at a row spacing of 18-20 cm and a hole spacing of 10 cm, plant 7-10 seedlings per hole; this is suitable for green Chinese chives. Open furrows at a row spacing of 30-36 cm, with a furrow depth of 16-20 cm, and a hole spacing of 16 cm, planting 20-30 seedlings per hole; this is suitable for producing blanched Chinese chives. The planting depth should be such that the tillering nodes are buried.
Field management
1. Temperature management. After the greenhouse is sealed, maintain 20-24°C during the day and 12-14°C at night. When the plant height reaches more than 10 cm, maintain 16-20°C during the day. When the temperature inside the greenhouse exceeds 24°C, ventilate to reduce humidity. For cultivation in small arched tunnels in winter, strengthen heat preservation and keep the nighttime temperature above 6°C.
2. Fertilizer and water management. After planting out, when new roots and new leaves appear, topdress and water, applying 10-15 kg of urea per mu with the water. At the 4-leaf stage of the seedlings, control water to prevent excessive growth, and strengthen intertillage and weeding. When they grow to the 6-leaf stage and begin tillering, the phenomenon of root jumping appears (the rhizome of the tiller is above the original rhizome). At this time, sand can be spread, soil can be pressed, or ridges can be built up to prevent the root system from being exposed above the soil surface. When the seedlings are 20 cm tall, stop topdressing and watering in preparation for harvest. After harvesting begins, topdress once after each harvest. When the plants grow to 10 cm after harvest, in combination with earthing up, apply quick-acting nitrogen fertilizer, topdressing 8 kg of urea per mu. When the weather turns cool, watering should be stopped, and water once with winter-protection water before freezing.
Pest and disease control
1. Control principles. Follow the policy of "prevention first, integrated control," and adhere to the harmless control principle of "giving priority to agricultural control, physical control, and biological control, with chemical control as a supplement." Pesticides must not include the highly toxic, high-residue, and triple-high (teratogenic, carcinogenic, mutagenic) pesticides explicitly prohibited by the state or their mixed pesticides.
2. Agricultural control. Strengthen intertillage and weeding, clean the field, strengthen fertilizer and water management, and improve stress resistance.
3. Physical control. Use a sugar-wine-vinegar liquid to trap and kill adult insects. Prepare the solution with sugar, wine, vinegar, water, and 90% trichlorfon crystals in a ratio of 3:3:1:10:0.5. Use 1-3 boxes per mu, replenish at any time, and keep it from drying out, to trap and kill various fly pests.