How to grow potted grapes? Master these technical points
Key technical points for growing potted grapes
1 Varieties for potted grape growing
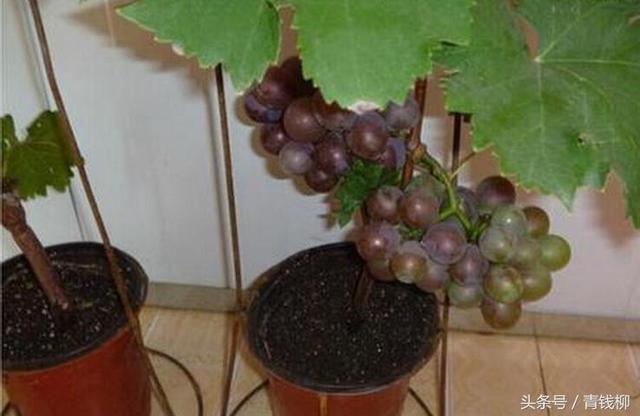
There are many grape varieties, such as Kyoho, Red Fuji, etc. They ripen early and have strong adaptability. According to the local weather, choose varieties with attractive clusters and berries, and red or yellow-green colors; choose varieties with moderate growth vigor, shorter internodes, a relatively high fruit-setting rate, and resistance to pests and diseases; choose female-flowering varieties, and because they cannot self-pollinate, when growing them in pots, consider arranging pollinator varieties or grafting other varieties onto the plant.
2 Containers for potted grapes
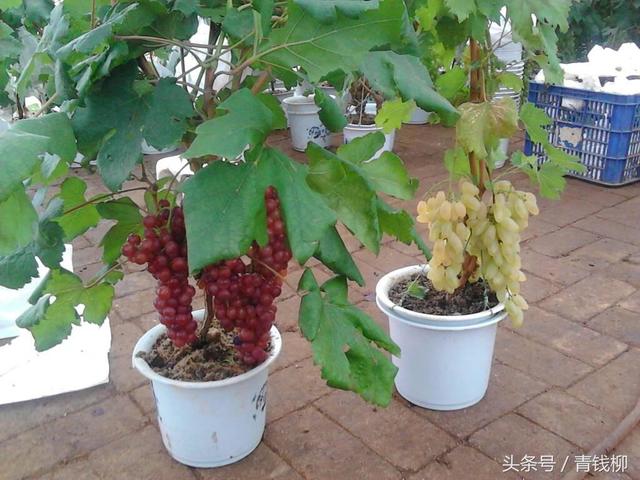
The containers for potted grapes are usually clay pots, which have good drainage and air permeability and are relatively cheap. Ceramic pots, porcelain pots, plastic pots (buckets), wooden boxes, wooden barrels, cement troughs and other containers can also be used. Container shapes include round, polygonal, rectangular, etc. Depths also vary. For household potting, generally a diameter of 25-30 cm and a depth of 15-30 cm is sufficient.
3 Potting soil for potted grapes
It should have good air permeability and drainage performance, good physical and chemical properties, be rich in organic matter and nutrients, have suitable pH, and be free of pests and diseases. The mixing ratio is 30%-50% garden soil, 20%-30% humus or organic fertilizer, and 20%-30% river sand. The prepared growing soil should be based on the principle of being loose, fertile, and having excellent physical and chemical characteristics. The prepared potting soil can be disinfected by spraying with 0.1% formalin solution, using 500 ml of the agent per cubic meter of potting soil. If conditions permit, high-temperature steam disinfection can be used.
4 Planting and management of potted grapes
The seedlings used for potted grapes can be raised by cuttings, grafting, layering, and other methods. If cutting propagation is used, after the flower pot is selected, fill it with disinfected growing soil and insert the cuttings directly into the flower pot to grow into seedlings. When taking cuttings, it is best to insert 2 cuttings per pot so that the better one can be kept, and keep the potting soil moist at all times. It is also possible to use 1-3 year old grape plants and transplant them into the pot with a soil ball before bud break. When transplanting, the plant's stems and vines should be heavily pruned, generally retaining 1-3 strong stems and vines. In the year of transplanting, the focus should be on restoring tree vigor, developing the tree shape, and laying a good foundation; do not let it bear fruit yet.
5 Shaping of potted grapes
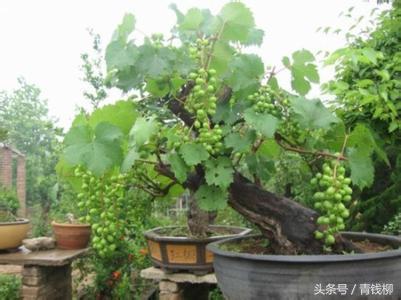
Spherical shape: Keep 2-3 relatively long fruiting mother branches on a short trunk, and with the help of a wire frame, bend and tie them into a sphere. After new shoots grow, keep 6-8 of them and tie them outward in all directions, so the plant forms a spherical shape.
Funnel shape: Keep 3-4 main vines on the plant, distributed diagonally outward along a funnel frame, or bend the fruiting mother branches into upper and lower circular rings, and tie the new shoots around the funnel frame. Fan shape: Keep 1 main vine and 1-2 side vines on the plant, with the branches and tips distributed on a fan-shaped frame surface, and the leaf canopy relatively flat and wide.
Spiral shape: Tie the long fruiting mother branches spirally onto a bamboo pole. After the new shoots grow, tie them upright or let some hang down, forming a cylindrical shape.
6 Cleaning up secondary shoots and shoot thinning of potted grapes
Pay attention to controlling apical dominance, and promptly retract or renew bare stems and vines. Pinch promptly and remove secondary shoots. For plants with too many new shoots, thin out some to facilitate ventilation and light penetration. Remove overly dense and poorly developed branches as early as possible, and keep strong branches; only in this way can large grapes be produced. Pinching should be done when 4-8 leaves have grown above the inflorescence. After pinching, except that the top secondary shoot is allowed to keep 3-4 leaves and is repeatedly pinched, the remaining secondary shoots are pinched with 1 leaf retained.
7 Flower thinning and fruit thinning of potted grapes
Keep 1 cluster (large-fruited varieties) or 1-2 clusters (small-fruited varieties) on one fruiting branch. Before flowering, carefully trim the rachis while thinning flowers. After flowering, carefully thin the fruit, aiming for plump and uniform berry development, with no need to pursue large clusters. For fruiting new shoots, generally pinch 3-5 days before full bloom, and at the latest at the beginning of flowering. For varieties that drop flowers and fruit severely, such as Kyoho and Purple Rose, pinching can be done 8-10 days before flowering.
8 Fertilization of potted grapes
Apply base fertilizer in combination with soil replacement. During the growing season, topdress with liquid fertilizer to prevent excessively high concentration from burning roots. For potted seedlings that have not yet borne fruit, start when the seedling height is 20 cm (6-7 leaves), apply cake fertilizer water once every 7-10 days until the end of September; for those that have already borne fruit, it is best to apply once every 5 days. Foliar spraying is effective and economical. The method is to spray 0.1%-0.3% urea 2-3 times in the early growth stage, and starting from the fruit enlargement stage, spray a 0.3% potassium dihydrogen phosphate solution once every 7-10 days for 3-4 consecutive sprays.
9 Watering of potted grapes
When watering, the water temperature is best close to the potting soil temperature. Watering before 10:00 in the morning and after 4:00 in the afternoon is preferable. Generally, in early spring, water once every 2-3 days. As the temperature rises and evaporation increases, water once every 1-2 days. The watering frequency should be such that the potting soil remains moist.
10 Soil replacement for potted grapes
After the plant has grown in the pot for 1-2 years, the original container space can no longer meet the requirements of root growth and development, and the nutrients in the potting soil gradually decrease. Therefore, the container needs to be changed from small to large, or the potting soil needs to be replaced. The soil replacement period can be in late autumn or before bud break in spring. When changing pots or soil, part of the dead roots should be trimmed off, and water immediately after replacement to help the plant recover growth.
11 Pest and disease control for potted grapes
Potted grapes have relatively few insect pests. Common diseases include downy mildew, white rot, anthracnose, black pox, etc. During the dormant period of grapes, spray 3-5 degrees Baume lime sulfur mixture. After germination, spray a 1:0.5:200 Bordeaux mixture once every 15 days, or a 500-fold compound carbendazim solution.
12 Winter protection against freezing for potted grapes
Overwintering management mainly involves preventing potted grapes from freezing damage and drying out. The following protective measures can be selected according to local conditions: after winter pruning of potted grapes, remove the pot frame, water thoroughly, dig a trench or pit and bury them, with a burial depth of 30-50 cm from the ground surface, or place them in a corridor or on a balcony and cover them for the winter. No matter where they are placed, check the potting soil and keep it moist. The temperature is best at 0-5°C.
13 Cutting propagation of potted grapes
For grape cuttings, in spring when the temperature is between 15-25°C, select healthy branches (vigorous growth, plump and full buds) with a thickness of more than 0.7 cm (the thicker, the higher the survival rate) for cutting; every 3-4 buds form one cutting, with about 3 cm of branch segment retained above the top bud (if left too short, it easily causes bud dehydration), and the lower end should be cut evenly at about 1 cm below the lowest bud. Each cutting should retain three buds and more than one leaf; the planting row spacing for cuttings is 20×25 cm, with a sand thickness of 25-30 cm. Insert the cuttings diagonally into the sand bed, with the insertion depth just enough to expose one bud and leaf; at first, keep them under semi-shade conditions, and after 3-4 weeks gradually expose them to full sunlight; control the temperature between 20-25°C and keep the humidity at about 80%, and in about 30-40 days they will root and can be transplanted; the cutting substrate should preferably be loose, breathable, and free of fertilizer, generally using river sand, vermiculite, perlite, and peat as the main materials.