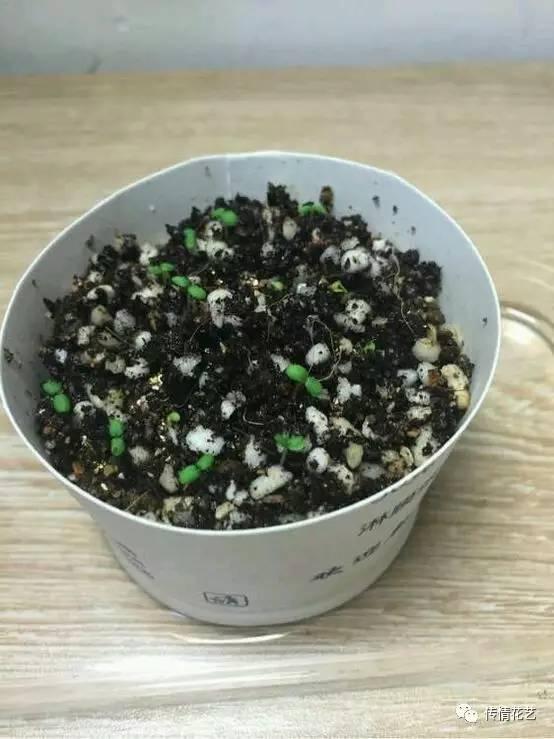
How to Grow Strawberries from Seed? A Detailed Guide to the Key Growing Techniques
The main body of this article has quite a few steps, and beginners may feel discouraged just looking at them, but after carefully working through them once, you will find it is actually quite simple - it is just that written descriptions make it look complicated. Simply put, it comes down to just these few steps:
=============================
1. Germinate the seeds in clean water at 22°C (remember to change the water; germination generally takes 7-30 days)
2. Move them onto seedling soil and cover with a lid to retain moisture
3. Once 4 leaves appear, remove the lid and give them appropriate sunlight
================Main Text Contents================
I. Preparatory work before sowing
II. Sowing method: pre-germination then sowing
III. Sowing method: direct sowing
IV. Seedling soil and seedling environment
I. Preparatory work before germination
(i) Breaking dormancy [not essential, but worth a try]
Overseas growers and some seed companies recommend giving strawberry seeds a period of cold to break dormancy before sowing. There are two methods:
A. Dry cold storage method. Place the dry seeds in an airtight container (such as a Lock & Lock box / ziplock bag) and refrigerate at 0-5°C for 3 weeks. When the time is up, do not open the ziplock bag immediately (a rapid temperature rise would injure the seeds). First let the bag slowly warm from the low temperature to room temperature, then take out the seeds.
B. Water immersion cold storage method. Place the seeds in a clean disposable cup, pour in half a cup of fresh mineral water, and refrigerate at 0-5°C for 7 days. When the time is up, proceed to the next step (such as washing the seeds, germinating them, or sowing directly).
●If you do not want to sow for the time being, use the first method to store the seeds; at room temperature, nutrients are consumed quickly.
●This step is not very necessary, but for certain varieties that are difficult to germinate, pre-germination can improve the germination rate.
(ii) Washing the seeds [not essential, but recommended]
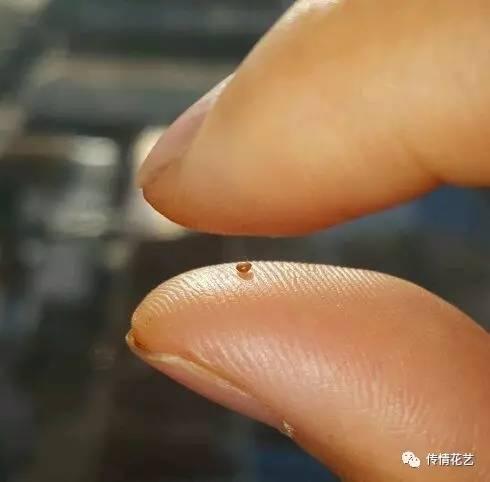
Reason for washing: Although strawberry seeds grow on the outer surface of the fruit, during the seed extraction process some flesh inevitably remains attached to the seed coat. These nutrients during the long germination process can cause the seeds to mold and lose their viability.
Washing method: Put the seeds into a clean container (such as a disposable cup), pour in an appropriate amount of clean water, and soak for 8-24 hours at a temperature between 10°C and 30°C (if you have already used the water immersion cold storage method, no further soaking is needed). Then scoop them out and rub each seed one by one with your fingers for about half a minute per seed, as shown in the image below:
●You can also wrap them in a wet wipe or medical gauze and rub, which is more convenient.
II. Sowing method: pre-germination then sowing
2.1 Advantages of pre-germination:
First, there is the issue of germination rate. Strawberries are a species that is relatively difficult to germinate. Even plump, round seeds may not all germinate. For those using Jiffy seedling plugs or seedling cells, some cells may end up empty, wasting valuable resources.
Second, the germination process of strawberries has relatively high temperature requirements. Gathering the seeds together for pre-germination saves space and allows for effective insulation.
Third, germinating in clean water allows you to observe the germination environment and promptly deal with problems such as mold and rot that affect the germination rate.
2.2 Specific method of pre-germination:
Choice of container: A small ziplock bag or a disposable cup will do. I habitually use disposable cups; if you have many varieties, put one variety per cup.
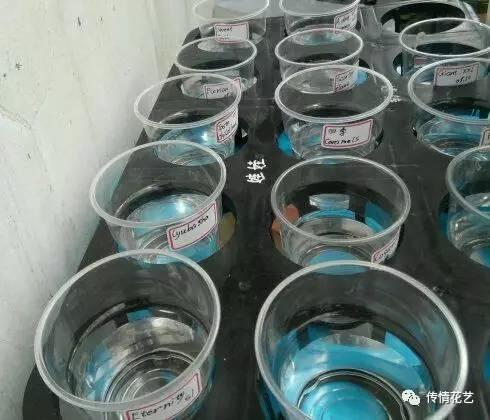
★Some people habitually cover the seeds with paper towels or wet wipes to germinate them. I do not recommend using these, because the main conditions for germination are temperature and humidity, and wet paper towels do not help germination. If you must use paper towels, choose the kind with few fibers that dissolves on contact with water. Do not use wet wipes!
Temperature: Strawberry germination requires a temperature of 22°C, ideally kept between 20-25°C. Too high a temperature easily causes mold and rot; too low a temperature inhibits germination. However, once the cotyledons unfold, the germination process is considered complete, and at this point the young seedlings can tolerate temperatures as low as 10°C.
Humidity: Pour half a cup of mineral water into the disposable cup. Do not let the water dry up; replenish it promptly.
Air circulation: As long as the water does not dry up, do not seal the cup, as this easily causes mold and rot.
Light: It is said that light helps germination, but after long-term experimentation, I have found that light has very little effect on germination. Moreover, a lit environment easily produces green algae, which degrades water quality and consumes oxygen in the water. (See below for methods to remove green algae.)
Water quality: Mineral water is best; tap water also works. Do not use boiled water (it has no oxygen). When green algae appear in the water, deal with them as soon as possible.
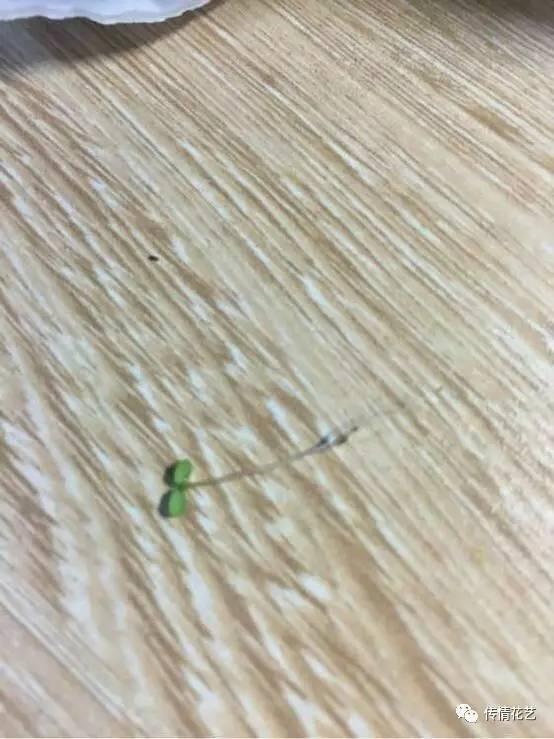
Germination time: This is the most closely watched issue, but given the major premise that the seeds are healthy and active, the accumulated temperature period varies by variety. Some varieties germinate in 5 days, while others need 20 days, or even close to 30 days. Timing of transplanting: Some people move the seeds onto seedling plugs as soon as they see the white root. This is not the best timing - seeing the white root is like a child being only halfway born during labor, with the umbilical cord not yet cut; under poorly controlled temperature and humidity conditions, the whole thing will rot. It is best to wait until both cotyledons have separated from the seed coat, then scoop out the tiny green "bean sprouts" and place them on the seedling plugs.
★How to deal with green algae. If you germinate in a lit environment, green algae are easily produced, especially for those difficult-to-germinate varieties. Green algae consume dissolved oxygen in the water, so once they appear, deal with them as soon as possible. The simplest method is to wash the cup, wash the seeds, and change the water. A more effective method is to pour out the original water, add swimming pool disinfectant diluted 2000 times, wait 30-60 minutes, pour it out, then replace with clean water.
III. Sowing method: direct sowing without pre-germination
1. Soak the seeds in clean water for 8-12 hours to let them absorb enough water. If the water temperature can be kept at 30°C, it is even more helpful for germination.
2. Scoop out the seeds and place them directly on top of the seedling soil; no need to cover with more soil.
3. Put on a transparent lid or cover with plastic wrap and place in a lit area (to prevent leggy growth after germination).
4. Before and after germination, keep the temperature constant between 20-30°C, ideally 22°C. After germination, the seedlings can tolerate temperatures as low as 10°C, but growth will be very slow. They grow quickly at around 25°C.
For detailed requirements, see Part IV!
IV. Seedling environment
(i) Medium formula:
★Ready-made: Jiffy seedling peat
★Ready-made: Zhonghe or Wolong nutrient soil
★DIY mix: nutrient soil 2 : coco peat 1 : garden soil 2
★DIY mix: nutrient soil 1 : coco peat 1
(ii) Medium sterilization [not essential]:
1. Jiffy peat: after adding water and letting it expand, put it in a microwave and heat for 2 minutes to sterilize.
2. DIY medium: keep the medium moist and put it in a microwave to heat (the time depends on how much medium there is).
(iii) Medium moisture
The medium should be moist but not wet. If it drips when squeezed in your palm, it means there is too much water. Too much water hinders respiration, makes it difficult to form aerial roots, and easily causes root rot. It also more easily breeds green algae on the surface of the medium, which competes with the seedlings for resources.
·Seedling plugs: After the peat absorbs enough water and expands, pour off the excess water.
·DIY soil: Add it to the seedling cells and press lightly. Pour half the water into the tray, place the seedling cells in it, and let the water be absorbed automatically from bottom to top. When the soil surface is completely wet, pour off the remaining water in the tray.
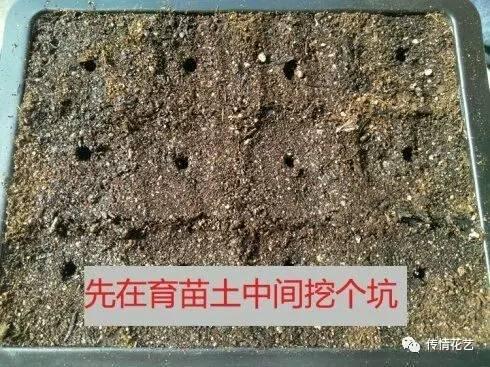
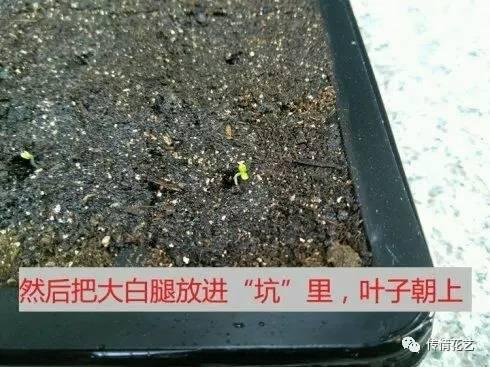
·For pre-germinated tiny "bean sprouts", before putting them into the cells, first make a small hole the size of a mung bean in the middle of the seedling soil, place the white root into the "hole", put the lid back on, and continue to maintain a high-humidity air environment in the seedling cells.
(iv) Light
Before 4 true leaves appear, do not expose them to direct sunlight, whether in winter or summer. After true leaves appear, they can receive appropriate light in the morning and evening.
When growing seedlings indoors in winter, use a supplementary grow light with an illuminance of at least 10000 lux.
(v) Air humidity
During germination and for half a month after germination, the air needs to remain highly humid. Do not let the air dry out the tender stems.
(vi) Temperature
This is a very important condition. Seed germination needs a certain temperature to provide energy. Like most other plants, strawberry germination requires a temperature above 20°C, ideally controlled at 22-25°C. Lower temperatures inhibit germination, while too high temperatures also induce dormancy.
In early spring, late autumn, and winter, use a heating wire with a thermostat to keep the temperature stable.
In summer, as long as they are not exposed to direct sunlight, a somewhat higher temperature is not a problem.