What are the ways to grow mushrooms at home yourself?
Let's start with the familiar ones:Oyster mushrooms and Phoenix oyster mushrooms
Can you tell which one in the picture is the oyster mushroom and which is the Phoenix oyster mushroom? (With friendly support from 12306)
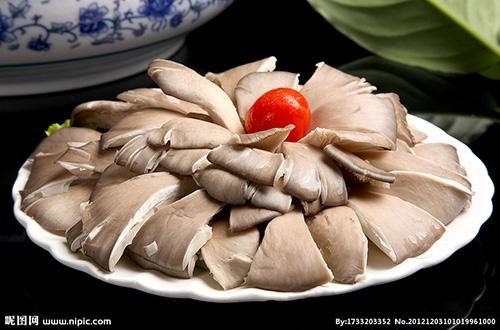
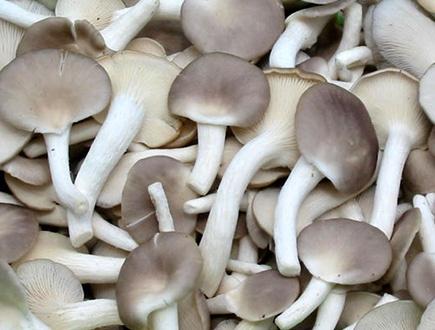
The Phoenix oyster mushroom is a variety of the oyster mushroom, with a more tender, smooth and crisp texture. The Phoenix oyster mushroom has a petite body, while the oyster mushroom has a large cap and a thick stipe. So, do you know which one is the goddess and which one is the tomboy?!
But I won't tell you that the Phoenix oyster mushrooms we grew at home weren't picked in time, and when they were discovered again, they had turned into oyster mushrooms! So, when you grow Phoenix oyster mushrooms, you must eat them while they are still young.
Alright, now that you know the difference between the goddess and the tomboy, let's take a look at how to cultivate the goddess.
For large-scale cultivation, the substrate with the highest yield per unit is cottonseed hulls. If you live in Xinjiang, the Central Plains or the Yangtze River Delta region, try to see if you can find cottonseed hulls. If not, just keep reading.
The role of cottonseed hulls is to provide nutrients, so materials that can provide more nutrients are good substitutes, such as: corncobs, corn kernels (prone to mold if not handled properly, but rich in nutrients), wheat bran, sawdust, wheat straw, rice straw, etc.
Main nutrients of cottonseed hulls: crude protein 4.0%, crude fat 1.4%, crude fiber 44.9%, calcium 0.13%, phosphorus 0.06%. In actual production, the formula is generally 99% cottonseed hulls and 1% lime. So when using other materials, refer to this ratio.
Suppose you now have 9.9 jin of cottonseed hulls and 0.1 jin of lime, it is estimated that you can produce 12-20 jin of Phoenix oyster mushrooms.
But you also need the following tools:
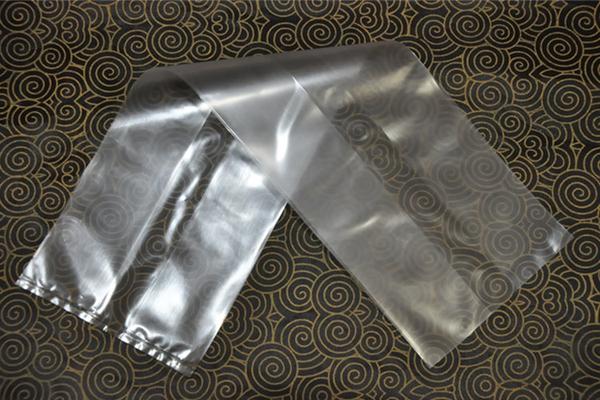
1. 5-15 low-pressure polyethylene bags (taking into account loss and bag specifications, etc.)
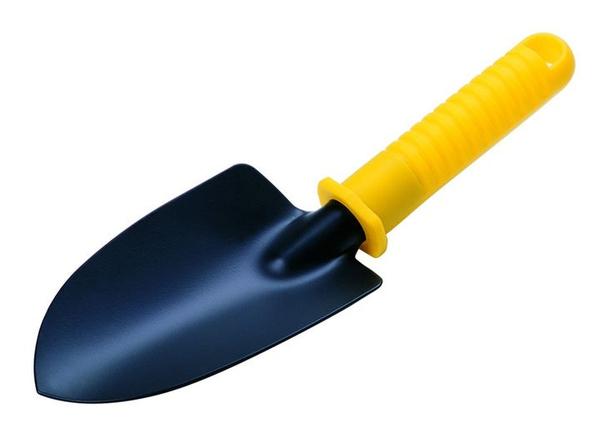
2. 1 small shovel
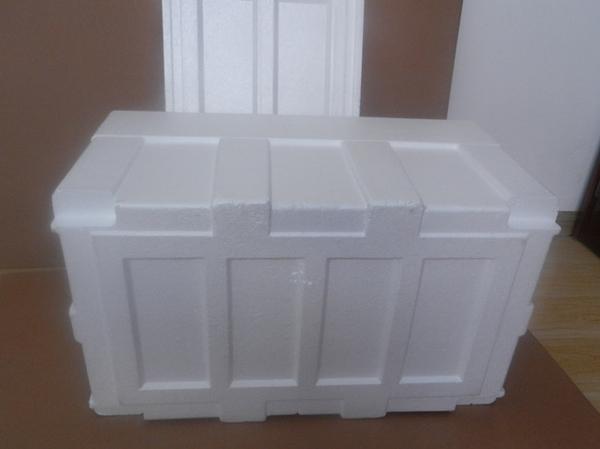
3. Perhaps also 1 foam box
4. In addition, several pieces of plastic rope are also needed
OK, now that you have all these ready, let's officially start the work!
1. Piling the material:
If you have a flat concrete surface where you can work freely, you do not need the foam box. So, below, please substitute or not substitute "concrete surface" for "foam box" according to your own situation.
1. Pile all the cottonseed hulls on the concrete surface, making a very small hill;
2. Add water like kneading dough or mixing cement, and keep "stir-frying" to make sure the water soaks the cottonseed hulls. Add water, "stir-fry", add water, "stir-fry"... When you are tired, the cottonseed hulls have about absorbed 1.5 times their own weight in water. Let it rest, and you rest too.
3. Drain off the water that cannot be absorbed, then pile the cottonseed hulls into a small hill again. Enter the fermentation process.
2. Turning the material:
1. Make sure the internal temperature of that pile of cottonseed hulls can reach 60-80°C. If it cannot, take heating measures (exposure to sunlight, "covering with a blanket", and the like).
2. After 24 hours of fermentation, "stir-fry" several times from the inside to the outside and from the top to the bottom.
3. After 48 hours, "stir-fry" several more times from the inside to the outside and from the top to the bottom.
4. Now you can spread the lime. The operation is risky, so be careful, and absolutely do not face the wind! If you have gloves, a mask, goggles, a helmet or anything like that, put them all on! Note: spread it evenly, and keep "stir-frying" until no lime can be seen.
5. After another 24 hours, if this pile of material turns reddish-brown, gives off a smell, and has no sour or foul odor, you can begin the next step.
3. Bagging:
1. Spread that "small hill" evenly to release heat.
2. Once the hot air has mostly dissipated, you can use the polyethylene bags for bagging.
3. During bagging, be careful to press the material firmly (do your utmost without damaging the bags). Leave about 5 cm of bag opening.
4. Tie up the bag opening with a small rope.
4. Sterilization:
1. Use your ingenuity and use the "steaming over water" method to sterilize the bagged culture material.
2. Sterilize under high temperature (95-110°C) and high pressure (the pressure value of a pressure cooker) for at least 4 hours.
3. If the above conditions cannot be met, the time can be extended as appropriate, but the temperature should be as close to high temperature as possible.
5. Inoculation:
1. After sterilization is finished, let it cool (at least 12 hours later).
2. Open the bag opening and evenly sprinkle a layer of spawn (it is best to use spawn that has been subcultured twice, not the original culture from a test tube).
3. Tie the bag opening, but do not tie it too tightly; a certain amount of air circulation must be maintained.
6. Spawn running:
1. Stack the inoculated spawn bags and wait for the spawn to run.
2. When the white mycelium occupies 1/3 of the spawn bag, the bags can be restacked in the order of top to bottom and bottom to top.
3. Wait until the entire spawn bag is covered by white mycelium, which means spawn running is complete.
Now it is time to wait for mushroom emergence, and the real test of skill has come. From childhood to adulthood, my father always wanted me to inherit his craft, so he always said to me: "What is the most important thing in edible mushroom cultivation? Temperature, humidity, ventilation. It is just that simple. No matter what variety of edible mushroom, in the end, it is all about controlling temperature, humidity and ventilation well.”
So, at this time, it is necessary to control the three key factors: temperature, humidity and ventilation.
In the early stage, control humidity below 60%; in the later stage, control humidity at 60%-70%, and ventilate according to temperature and humidity conditions (ventilate when either temperature is high or humidity is high). Generally maintain ventilation 2-3 times a day.
Room temperature should be controlled at 15-20°C, and the temperature of the spawn bags should be controlled at 20-25°C.
7. Mushroom emergence:
Before mushroom emergence, there is another process called "mushroom induction".
1. First, increase the day-night temperature difference, preferably reaching a day-night temperature difference of 10-20°C. Increase air circulation and increase air humidity. At this time, a certain amount of light can be added. (To control the day-night temperature difference, you can take the spawn bags to a low-temperature environment at night, but do not face the air vent.)
2. When young mushrooms the size of mung beans begin to grow, you can open the bag opening (this step is different from the method for large-scale cultivation, and I am not very sure about it).
3. At this time, control the relative air humidity to reach 85%-95%. And supply sufficient oxygen and low-concentration carbon dioxide, and maintain relatively strong light.
4. Generally, at this stage, maintain the frequency from spraying water once every 2 days to spraying water twice a day in order to maintain the required humidity. To ensure sufficient oxygen, just ventilate more. As for carbon dioxide, just walking around the cultivation room a few more times may be enough.
5、Pay special attention: when spraying water, do not spray it directly at the spawn bags.This can be done by atomizing the water into the air.
8. Harvesting:
1. When you think it has grown about big enough, you can pick it.
2. If you like them tender, pick them earlier; if you like eating the caps, wait a little longer. Growing bigger is easy; after 12 hours without seeing them, they are worlds apart.
3. When picking, note: pull it up from the base, do not leave any part of the base behind, and do not take away a piece of the spawn material. Every piece of spawn material can grow Phoenix oyster mushrooms!
9. Eating
1. Do not eat raw.
2. Tearing by hand is better than cutting with a knife.
3. For stir-frying with sliced meat, use high heat! The meat can be marinated, or coated with sweet potato starch or cornstarch.
4. If making soup, also stir-fry it first.
5. After picking, it needs to be washed and rinsed; I do not need to say that, right?
So, from the above, in terms of convenience: buying fresh oyster mushrooms > buying spawn bags from Taobao > cultivating them yourself from beginning to end;
In terms of understanding oyster mushrooms: cultivating them yourself from beginning to end > buying spawn bags from Taobao > buying fresh oyster mushrooms. At least, in the future when you see a vegetable vendor's oyster mushrooms, you will know whether they have been sprayed with water or have been left overnight.