How to Grow Cat's Claw Buttercup (Ranunculus ternatus) for High Yield? A Detailed Explanation of the Key Technical Points
High-Yield Cultivation Techniques for Cat's Claw Buttercup
Cat's claw buttercup, also known as little buttercup, is a plant of the Ranunculaceae family. It is mainly produced in Anhui, Jiangsu, Zhejiang, Henan, Guangxi, Taiwan, China and other provinces and regions, and is widely distributed in the provinces of the middle and lower reaches of the Yangtze River. It has the functions of detoxicating and dissipating nodules. It is mainly used to treat scrofula, pulmonary tuberculosis, lymph node tuberculosis, pharyngitis, malaria and other diseases. In recent years, the clinical use of cat's claw buttercup in traditional Chinese medicine for the prevention and treatment of cancer has achieved remarkable results, and it has become one of the three categories of medicinal materials that the state focuses on developing; its value and usage have been doubling day by day, and relying solely on digging up wild cat's claw buttercup can no longer meet social demand. Artificial cultivation of cat's claw buttercup has become urgent. In order to promote the artificial cultivation techniques of cat's claw buttercup and meet the growing social demand, the biological characteristics and artificial planting techniques of cat's claw buttercup are introduced as follows.
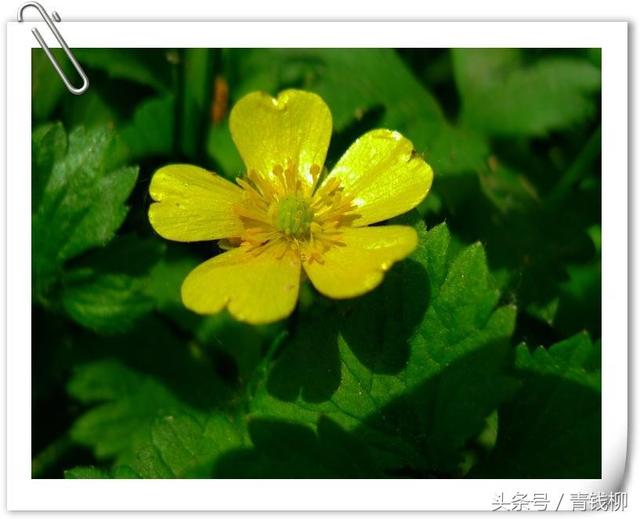
1 Biological Characteristics
Cat's claw buttercup prefers a warm climate and a humid, semi-shaded environment. It has strong adaptability and mostly grows wild along paddy field edges, field ridges and moist grasslands. It is slightly tolerant of cold, and the underground tuberous roots can overwinter in the open field. It is tolerant of poor soil and is not strict about soil requirements. However, for artificial cultivation, deep, loose, fertile, well-drained sandy loam or humus loam is best.
2 Propagation Methods
Tuberous root propagation is the main method, and seed propagation can also be used.
2.1 Tuberous Root Propagation A 1-year-old cat's claw buttercup has more than 10 clustered tuberous roots underground. During harvest in spring or autumn, the tuberous roots can be dug up; the large ones are supplied as commercial goods, and the small ones are retained for seed use. The method of first raising seedlings and then transplanting is adopted to expand the propagation coefficient.
Before raising seedlings, first prepare the seedbed, apply sufficient base fertilizer, and break up the soil finely and rake it level. Then on the bed surface, dig holes at a row spacing of 10-15 cm and a plant spacing of about 5 cm, with a hole depth of 3 cm, for dibbling. Before sowing, soak the selected small tuberous roots in a 5-10 μl/ml gibberellin solution for 24 h, remove them and rinse off the medicinal solution, mix them evenly with 3-5 times their volume of clean, moist fine river sand, and place them in a wooden box for stratified sand storage for about 20 d. At sowing, sieve out the seed roots, divide them into two grades by size, and sow them separately. Sow 1 seed root per hole. After sowing, cover with fine fertile soil about 1 cm thick, and cover the bed surface with grass to keep warm and moist, so as to promote emergence. Spring sowing is carried out in late March; when the temperature rises to 15-20°C, seedlings emerge in about half a month; autumn sowing is carried out in early November, and seedlings emerge in March-April of the following spring. After emergence, remove the covering grass, strengthen management, and transplant when the young seedlings grow 2-3 true leaves. Generally, 1 seed root can sprout 6-8 young seedlings. A 1 hm2 seedling nursery can plant 8-10 hm2 of field.
2.2 Seed Propagation In May-June, collect mature fruits, sun-dry them, thresh them, screen out the seeds, remove impurities completely, put them in a cloth bag and store them in a cool, dry place for later use, for autumn or spring sowing. On a seedbed that has been prepared and supplied with sufficient base fertilizer, sow in shallow furrows at a row spacing of 10-15 cm. Because the seeds are tiny, when sowing, mix the seeds with burnt soil ash and spread them evenly into the furrows, then cover with a thin layer of soil, just enough that the seeds are no longer visible. After sowing, water, and cover the bed surface with grass to keep warm and moist, so as to promote emergence. After emergence, promptly remove the covering grass, carry out intertillage and weeding, thinning and topdressing, and finally establish the plants at a spacing of 5-7 cm. Spring-sown seedlings are transplanted after autumn of the same year, and autumn-sown seedlings are transplanted in the following spring.
3 Cultivation Techniques
3.1 Site Selection and Land Preparation It is advisable to choose semi-shaded, semi-sunny waste slopes or flat land with deep, fertile, loose soil rich in humus for planting. For the seedling-raising land, choose loose, fertile, well-drained humus loam or sandy soil, on flat terrain with irrigation conditions. Apply sufficient base fertilizer, level and till finely, then make high beds 130 cm wide, with bed furrows 33 cm wide, and prepare drainage ditches well around the perimeter.
3.2 Transplanting In spring, March-April, when the young seedlings have grown 2-3 true leaves, carry it out on a cloudy day or on the evening of a sunny day after rain. On the prepared bed surface, dig holes for transplanting at a row spacing of 15-20 cm and a plant spacing of about 10 cm. Before planting, dig up the seedlings, carefully break off the tuberous roots by hand, plant 1 plant per hole, then cover with soil and press firmly, and water thoroughly to settle the roots. Cover the bed surface with grass for shade to prevent direct sunlight from affecting survival. After the young seedlings survive, remove the covering grass and carry out field management. For autumn-winter transplanting, carry it out before the soil freezes.
3.3 Field Management
3.3.1 Intertillage and Weeding After full emergence in early spring, carry out the 1st intertillage and weeding; shallow loosening of the soil is advisable, and weeds should be pulled out by hand to avoid damaging the roots. Before the plants bolt and flower in March, carry out the 2nd intertillage and weeding; carry out the 3rd weeding in early May before summering; the 4th in early September, and the 5th in November. Because cat's claw buttercup plants are short, grow relatively vigorously in early spring, and grow slowly in autumn and winter, weeds should be completely removed to avoid weed infestation.
3.3.2 Topdressing Cat's claw buttercup grows rapidly in early spring. After the 1st intertillage and weeding, apply 22500 kg of dilute human and livestock manure water per hm2 to promote robust growth of the young seedlings; the 2nd time is before flowering in March, applying 1 pre-flowering fertilizer; the 3rd time is after summering in September; and in November-December, apply 1 additional phosphorus-potassium fertilizer to help the tuberous roots enter winter.
3.3.3 Drainage and Irrigation After full emergence in early spring, water frequently to keep the field moist, which is beneficial for robust growth of the young seedlings. In the rainy season, pay attention to drainage to avoid waterlogging causing root rot.
3.3.4 Removing Flower Stalks In late March, before bolting and flowering, except for those retained for seed, remove all flower stalks so that nutrients are concentrated in the growth of the underground tuberous roots, which is beneficial for increasing yield.
3.3.5 Intercropping Cat's claw buttercup plants enter a summering dormant period from early May to late September. During this period, short-growing-season crops such as edamame, vegetables, melons and fruits, or other medicinal materials can be intercropped between the rows. This can both provide shade for cat's claw buttercup and make full use of the land, increasing income.
3.4 Harvesting and Processing For tuberous root propagation, harvest after 1 year of growth; for seed propagation, harvest after 2-3 years of growth. Harvesting can be done in all four seasons, but early May in spring and November in winter are the suitable periods. When digging, carefully dig up the whole plant, cut off the stems and fibrous roots, break off the tuberous roots, wash off the soil, and sun-dry them to obtain the commercial product.
3.5 Yield and Quality Generally, about 2250 kg of dried goods are produced per hm2, and the best quality is that which is yellow-brown in color and firm and plump in texture.