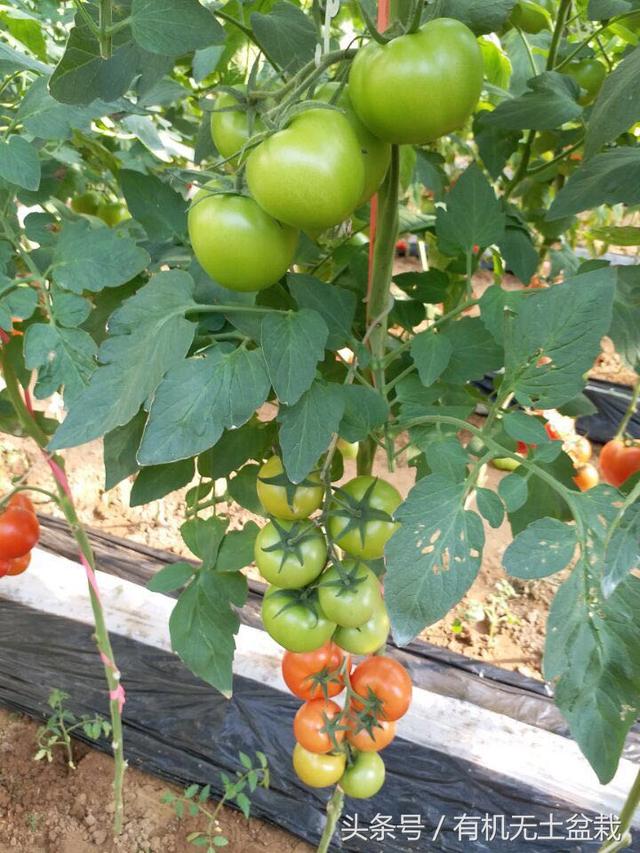
Tomato planting methods and timing, seedling stage management and fertilisation key points
Tomatoes have a well-developed root system; the fine capillary roots that absorb nutrients are mainly distributed within the 30 cm plough layer, with the deepest parts reaching 1.5 m, and the lateral spread of the root mass can reach a diameter of 1.3-1.7 m. The root system has a very strong regenerative capacity; after the taproot is cut during seedling transplanting, more lateral roots are produced, thereby enhancing the absorptive capacity of the entire root system. Therefore, the soil requirements during cultivation are not particularly strict. Generally speaking, they can be planted in any soil except low-lying waterlogged land and saline-alkaline plots. However, in order to obtain high-quality, high-yield tomatoes, it is best to choose loose, fertile sandy soil with good water and nutrient retention and a pH of 6-6.5 (slightly acidic).
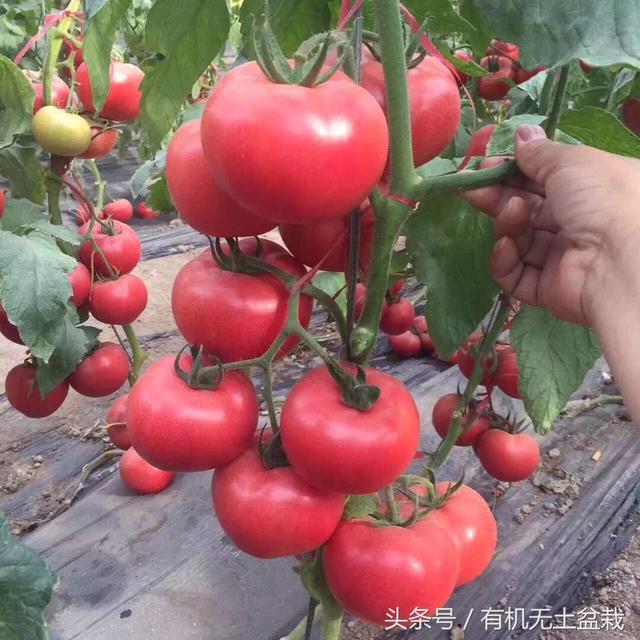
In addition, tomatoes like warmth; the suitable daytime temperature is 25-28°C, and the suitable nighttime temperature is 16-18°C. Too low or too high temperatures will affect tomato quality. When the temperature is below 15°C, tomato seed germination will be hindered, and pollination and colour change will also be affected. When the temperature is below 10°C, tomatoes will grow slowly, and reproductive development will be inhibited. Below 5°C, stems and leaves will stop growing; at 2°C, frost damage will occur; at 0°C, they will be frozen to death. Above 35°C, reproductive development will also be affected; above 40°C, they will be killed by heat. A suitable temperature difference is beneficial for nutrient accumulation and ripening, promotes healthy tomato development, prevents excessive vegetative growth, enhances disease resistance and stress tolerance, and better improves yield.
I. In general, tomatoes can be divided into four categories based on different planting and harvest times: spring tomatoes, autumn-winter crop, winter-spring crop, and overwintering crop.
1. Sowing time for spring tomatoes
Spring tomatoes are sown from late January to early February and transplanted from late February to early March.
2. Sowing time for the autumn-winter crop
The autumn-winter crop is generally sown and raised from mid-to-late July to early August, transplanted from mid-to-late August to early September, and covered with plastic film from mid-to-late September to early October. Harvesting takes place from late November to early February of the following year.
3. Sowing time for the winter-spring crop
The winter-spring crop is sown from early November to early December, transplanted from mid-to-late January to early February of the following year, and harvested from mid-March to June.
4. Sowing time for the overwintering crop
The overwintering crop is a single long-season cultivation; it is generally raised from mid-to-late September to early October, transplanted in November, and harvesting begins in January of the following year.

II. Tomato seedling raising
1. Seed disinfection: you can use seed dressing with mefenoxam + azoxystrobin, or you can directly soak the seeds in warm water. You can soak the seeds in warm water at 55°C for 15-30 minutes to kill pathogens on the seed surface and also remove shrivelled and damaged seeds.
2. Selection of seedling trays: you can choose 50-cell or 72-cell seedling trays for raising seedlings. Substrate seedling raising is usually used; the commonly used substrate is a mixture of perlite, vermiculite and peat, with a ratio of 1:1:10. You can add carbendazim or hymexazol and other agents to the substrate to prevent seedling-stage diseases.
3. Sowing: after filling the seedling tray with seedling substrate, you can press out a 0.5 cm deep indentation, then sow. After sowing is complete, cover with a layer of vermiculite on top to play a role in heat preservation and moisture retention.
4. Watering: after sowing is complete, place the seedling trays on the seedling bed. The height of the seedling bed should be about 1 m above the ground to prevent mice and pests from eating the seeds. In addition, place mousetraps around to catch mice. Once everything is ready, you can water. The first watering must be thorough, as this is beneficial for seed germination and normal growth.
III. Seedling stage management
1. Temperature management: control the daytime temperature in the seedling shed at 25-28°C and the nighttime temperature at 18-20°C. After the seedlings have all emerged and grown to two true leaves, you can appropriately harden the seedlings to cultivate strong seedlings. You can carry out low-temperature hardening by controlling the nighttime temperature at 15-18°C to keep the apical growth in check, and you can also promote root growth by appropriately controlling water.
2. Disease management
The main seedling diseases are damping-off and seedling blight. You can begin chemical prevention after the seedlings emerge. Available chemicals include propamocarb and hymexazol, sprayed once every 5-7 days at a dilution of 1500-2000 times.
3. Fertiliser use
During the seedling stage, foliar fertiliser is mainly used to supplement nutrients. You can fertilise after the tomato has two true leaves. You can choose Baolifeng or Molifeng 18-18-18 balanced fertiliser, dilute it and spray on the leaves at a dilution of 2000-2500 times, spraying once every 10 days.

IV. Soil preparation
The tomato planting site should be chosen from plots where solanaceous crops have not been planted before. Apply sufficient base fertiliser before planting. Per mu, use 1000-1500 kg of fully decomposed organic fertiliser (cow dung, sheep dung, pig dung) and 200 kg of biological bacterial fertiliser. Then mix 50 kg of calcium carbonate and 50 kg of compound fertiliser and broadcast on the ground, then prepare the land and mix into the soil. The bed specification can use 1.3-1.7 m including ditches. The planting density is 2000-2700 plants per mu. The planting specification is double rows per bed, with a plant spacing of 25-40 cm and a row spacing of 40-50 cm. For double-stem pruning, fertile land plots, and vigorously growing varieties, planting can be appropriately sparse, with a plant spacing of 30-40 cm; for single-stem pruning, planting can be appropriately dense, with a plant spacing of 25-30 cm. In addition, winter-spring planting should be sparse, and autumn planting should be dense; fertile land can be sparsely planted, and lean land should be densely planted.
V. Transplanting ⟦28 When the seedlings have grown to four leaves and the growth cycle reaches about 45 days, they can be transplanted to the field. Before transplanting, spray propamocarb plus hymexazol to prevent bacterial infection caused by damage during transplanting. After transplanting, the settling water must be thoroughly watered to ensure rapid recovery.
When the seedlings have grown to four leaves and the growth cycle reaches about 45 days, they can be transplanted to the field. Before transplanting, spray with Previcur plus hymexazol to prevent bacterial infection caused by damage during transplanting. After transplanting, the settling water must be watered thoroughly to ensure rapid recovery of the seedlings.
VI. Management after transplanting
Control the temperature in the shed at 25-28°C and at night at 15-18°C, widening the day-night temperature difference for seedling hardening. Do not water before the second truss sets fruit. During this period, pay attention to preventing mosaic virus and timely supplement boron-calcium foliar fertiliser to promote tomato flower bud differentiation. After the second truss sets fruit, you can apply balanced fertiliser plus chitosan-type rooting agent with irrigation to improve plant vigour.
Pruning and removing side shoots should be carried out on a sunny morning. After pruning and removing side shoots is complete, promptly spray chlorothalonil or carbendazim to prevent bacterial infection of wounds and promote rapid wound healing. During this period, tomato uptake of boron and calcium accelerates. To avoid blossom-end rot and sunscald, apply medium and trace elements with irrigation, especially substances such as calcium, magnesium, boron and zinc. During this period, if there are too many fruits and plant vigour weakens, you can apply balanced fertiliser plus rooting agent with irrigation at the base, while also supplementing calcium and magnesium on the leaves, and additionally spray amino-oligosaccharin, ningnanmycin, and pesticide-fertiliser mixture granular zinc on the leaves for virus prevention. In addition, you must control the humidity in the shed, spraying eugenol, procymidone and iprodione to prevent grey mould and sclerotinia.
When the tomato has set 6-8 trusses of fruit, you can carry out topping.
VII. Main tomato diseases
1. Late blight
Late blight is a devastating disease of tomatoes; it can spread to the entire shed in a short time, leading to early crop termination. Leaves, stems and fruits can all be affected, with leaves and green fruits suffering most severely. When seedlings are affected, dark green water-soaked lesions generally appear on the leaves first, then spread to the stem, with dark brown rot near the leaf petiole. As the disease develops, the base of the young stem becomes water-soaked and constricted, and the plant wilts and collapses; when humid, white mould grows on the diseased parts. At the adult plant stage, dark green water-soaked lesions usually begin at the leaf tip and leaf margin of the lower leaves, gradually turning brown; when humid, white mould grows at the junction of diseased and healthy tissue on the underside of the leaves. Stem lesions are brown or dark brown, water-soaked, slightly sunken, and produce white mould when humid. Fruit lesions are initially oil-soaked dark green, gradually turning dark brown to reddish-brown, with cloud-like patterns, hardened, and producing white mould when humid. Low temperature and high humidity favour occurrence and spread. The most suitable temperature for disease onset is 18°C-25°C, with relative humidity above 90%.
Main chemicals used include dimethomorph, flumorph, cymoxanil + mancozeb, cymoxanil, and metalaxyl + propamocarb.
2. Leaf mould
When leaf mould is severe, it can cause leaves to dry up and even reduce yield. It mainly damages leaves; in severe cases it also damages stems, flowers and fruits, but this is rarely seen in the field. After onset, irregular or oval light yellow chlorotic spots appear on the leaf surface. On the underside of the leaves, the lesions produce a mould layer that is initially greyish-white and gradually turns brown or dark brown and velvety. In severe cases, mould can also grow on the upper surface of the lesions, and the diseased leaves dry up and curl. The suitable conditions for onset are a temperature of 20°C-25°C and relative humidity above 90%.
Main chemicals used include kasugamycin + copper hydroxide, thiophanate-methyl, sulphur suspension concentrate, kasugamycin, and polyoxin.
3. Bacterial wilt
Bacterial wilt is a bacterial disease that causes the whole plant to wilt. When the tomato plant height is about 30 cm, bacterial wilt-infected plants begin to show symptoms; first the top leaves
wilt and droop, then the lower leaves wither, and the middle leaves wither last. There are also cases where leaves on one side wilt first, or all leaves of the whole plant wilt simultaneously. In the early stage of the disease, diseased plants wilt during the day and recover in the evening, and the diseased leaves become lighter in colour. After onset, if the soil is dry and the temperature is on the high side, the whole plant wilts within 2-3 days. If the temperature is relatively low, or there is continuous rain, or the soil moisture content is relatively high, the diseased plant can survive for 1 week before dying, but the leaves still remain green or slightly pale, hence the name bacterial wilt. The stem epidermis of diseased plants is rough, and adventitious roots or adventitious buds grow on the middle and lower parts of the stem. When humidity is high, 1-2 cm patches that are initially water-soaked and later turn brown can be seen on the diseased stem. The vascular bundles of the diseased stem turn brown. When the diseased stem is cut crosswise and squeezed by hand, white bacterial ooze overflows from the vascular bundles on the cut surface. This is an important feature that distinguishes this disease from fusarium wilt and verticillium wilt.
Main chemicals used include streptomycin, azoxystrobin, chlorobromoisocyanuric acid, and mefenoxam + hymexazol.