How to grow bellflowers? Detailed guide to planting methods and care tips
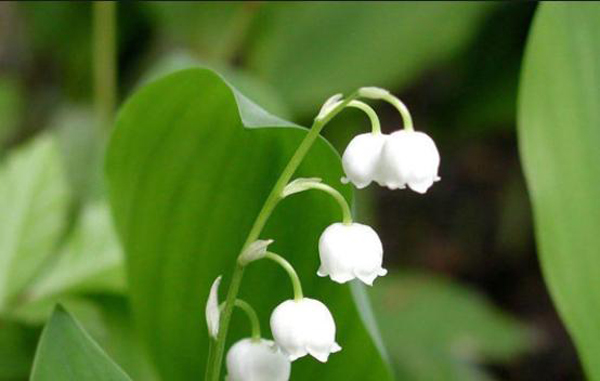
Propagation: Note that this is done by sowing seeds. The small, smooth, oval-shaped seeds should be dried in advance and stored well. Start sowing in late winter and early spring, ideally in a warm plastic tunnel, so as to avoid the high-temperature period. The prepared sowing soil surface should be level; after watering it thoroughly, sow the seeds evenly. The soil should be thin, and the seedlings should be watered appropriately, then given a compound fertilizer once they have developed. Generally, once they reach about 10cm they can be transplanted or planted out. Of course, you can also sow immediately after the seeds mature, and they will bloom the following year; if sown in autumn, the flowers usually bloom in the third year.
Soil: The soil pH should be between 5.5-6.0, loose, nutrient-rich, and well-draining, with a porous substrate, clay making up 20-30%, containing iron chelate, and 1-1.5kg of complete balanced fertilizer applied per 1m3.
Watering: Ensure sufficient water before the radicle emerges, maintaining a high humidity level, and keep the soil moist accordingly. If possible, add a layer of coarse vermiculite over the newly emerged seedlings to ensure moisture does not escape. In addition, under normal conditions, the soil can be slightly drier between waterings.
Temperature: The normal temperature suitable for growth is 13-18°C. In winter climates without frost, the temperature can be 3-5°C; when growing outdoors, insulation is needed. In spring, grow at 15-18°C for 5-9 weeks; at 13-15°C the growing period will be extended.
Sunlight: It likes long hours of light. With 14 hours of daily light it will flower naturally. If you need to bring flowering forward, you can regulate it by interrupting the dark period for 4 hours over 30 days.
Fertilizing: Once a week, alternately apply nitrogen fertilizer and balanced potassium fertilizer at a concentration of 150-200ppm in a 1:1.5 ratio. To speed up seedling growth, you can apply calcium nitrate fertilizer at 30-50ppm, then apply calcium fertilizer. The plants need to be given magnesium sulfide at a concentration of 0.025% and iron chelate 1-2 times to ensure these trace elements. Note that no fertilizer should be applied after mid-September.
Pests and diseases: It is prone to powdery mildew, rust, and leaf spot, which can be eliminated by spraying 50% carbendazim wettable powder diluted 1500 times. During the growing period, plants are attacked by thrips and aphids, which can be eliminated by spraying 40% omethoate emulsifiable concentrate diluted 1500 times.
Pruning: The plants do not need growth regulation or pinching. The shape may not look neat at first, but it will adjust naturally during later growth, so no pruning is needed.
How to grow bellflowers
More and more gardening enthusiasts are now growing bellflowers themselves. In this article we will learn together with fellow gardeners how to grow bellflowers. Generally, there are two ways to plant bellflowers: one is by sowing seeds, and the other is by buying seedlings. The reason for buying small seedlings is that some gardeners find sowing difficult, and buying small seedlings directly avoids the predicament of seeds not germinating.
Let us first introduce bellflowers. Many bellflowers today are horticultural varieties, mostly perennial herbs, with a flowering period in summer. Sowing is generally done in spring and autumn. The plants are about 30cm tall, and some varieties can reach 1m. The growing environment requires full sun (if the growing environment has insufficient light, consider carefully).
Let us start with the care of bellflower seedlings. If you are a gardener who sows seeds, you can read the later section first: learn about sowing first, then about seedling care.
After the seeds germinate for 6-8 weeks (with true leaves), they can be transplanted into pots with a diameter of about 9-11cm. Do not plant the transplants too deep. Newly purchased small seedlings can also be potted on first before planting out, which makes the seedling stage easier to manage; of course, you can also skip this step and pot them directly into their final position.
What needs to be said to fellow gardeners is that bellflowers do not need pinching; they can be left to grow freely.
The planting substrate needs good drainage, with a clay (garden soil) content of 20-30% in the substrate. Do not use all peat, because bellflowers are full-sun plants. During the first three weeks of cultivation, to enable the plants to grow, they can be placed under short-day conditions. When the plants reach the desired height, the day length can be extended (16-18 hours) to make the plants flower.
The optimal growing temperature for bellflowers is 13°C-18°C. Under frost-free winter conditions, the indoor or outdoor temperature can be kept between 3°C-5°C. If grown in the open, they need covering to prevent frost.
Bellflowers have average fertilizer needs. In spring, some potassium fertilizer and nitrogen fertilizer can be given appropriately. Do not fertilize after mid-September.
Now let us talk about sowing bellflowers. Bellflowers are cool-loving plants, so we generally sow in autumn, or sow in January-February. Bellflower seeds are very small; simply broadcast them when sowing, with no need to cover with soil. The optimal germination temperature is 20°C-22°C. After sowing, keep the soil slightly moist, not overly moist. They generally germinate in 14-18 days. Fellow gardeners should be reminded that after sowing, shade is needed to avoid direct sunlight.
After the seeds germinate, appropriately reduce the soil moisture; this can prevent leggy growth, but do not let it get too dry. Appropriate light can also be given.
How to grow bellflowers, bellflower growing methods
How to grow bellflowers 1. Adapting to the environmentBellflowers like a cool summer and a mild winter climate. Note that overwintering requires protection from cold, and a low-temperature greenhouse is needed.
2. Soil requirementsFor the soil requirements of bellflowers, the soil pH should be between 5.5-6.0, and it should be loose, nutrient-rich, and well-draining, with a porous substrate, clay making up 20-30%, containing iron chelate, and 1-1.5kg of complete balanced fertilizer applied per 1m3.
3. Sufficient sunlightBellflowers like long hours of light. With 14 hours of daily light they will flower naturally. If you need to bring flowering forward, you can regulate it by interrupting the dark period for 4 hours over 30 days.
4. Sufficient wateringEnsure sufficient water for bellflowers before the radicle emerges, maintaining a high humidity level, and keep the soil moist accordingly. If possible, add a layer of coarse vermiculite over the newly emerged seedlings to ensure moisture does not escape. In addition, under normal conditions, the soil can be slightly drier between waterings.
5. Temperature adaptationThe normal temperature suitable for bellflower growth is 13-18°C. In winter climates without frost, the temperature can be 3-5°C; when growing outdoors, insulation is needed. In spring, grow at 15-18°C for 5-9 weeks; at 13-15°C the growing period will be extended.
6. Fertilizer controlFor the fertilizing ratio for bellflowers, alternately apply nitrogen fertilizer and balanced potassium fertilizer at a concentration of 150-200ppm in a 1:1.5 ratio once a week. To speed up seedling growth, you can apply calcium nitrate fertilizer at 30-50ppm, then apply calcium fertilizer. The plants need to be given magnesium sulfide at a concentration of 0.025% and iron chelate 1-2 times to ensure these trace elements. Note that no fertilizer should be applied after mid-September.
7. Pest and disease controlBellflowers are very prone to powdery mildew, rust, and leaf spot, which can be eliminated by spraying 50% carbendazim wettable powder diluted 1500 times.