Detailed Steps for Planting Lilies to Make Your Home More Beautiful
In the past era of manual labor, the food people ate basically came from animals they raised with their own hands and crops they grew with their own hands. But now that everyone's living conditions have improved and the wealth gap has widened, those who grow crops and raise animals are mostly farmers who could not leave the countryside, and city people are becoming more and more unfamiliar with growing things. Next, let the editor of Yiqizhuangxiu.com briefly introduce the planting methods for lilies!
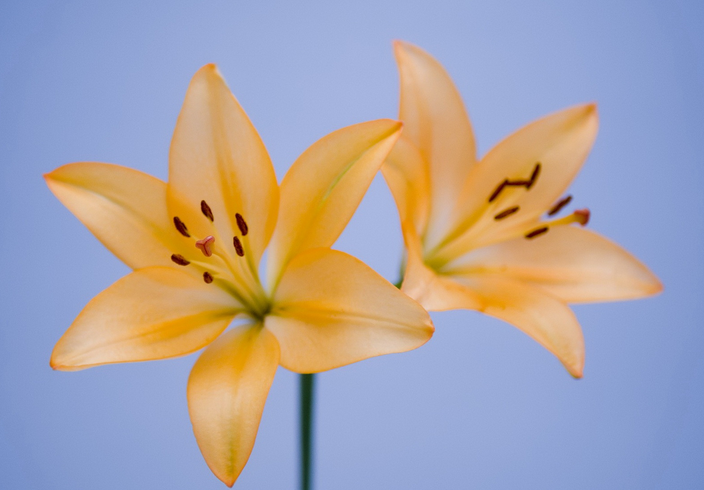
I. Preparation Work Before Planting
1. Soil disinfection: Before planting lilies, the soil must be disinfected. The commonly used disinfection methods are steam disinfection and chemical disinfection. Steam disinfection is rarely used at present because it consumes a lot of energy and is troublesome to operate. Chemical disinfection uses 40% formalin diluted into a 1:50 or 1:100 solution and sprinkled on the soil at a rate of 2.5 kg per sq m. After sprinkling, cover with plastic film for 5-7 days, then uncover and air for 10-15 days before planting, or use 8-10 g per sq m of pure carbendazim powder and scatter it into the soil for disinfection.
2. Thawing and disinfection of bulbs: After the bulbs arrive, immediately open the packaging and place them in a 10-15°C environment to thaw. After they are completely thawed, disinfect them. Disinfection method: place the bulbs into a 0.1% aqueous solution of captan, chlorothalonil, carbendazim, potassium permanganate or the like and soak for 30 minutes. The bulbs can also be placed into an 80-fold 40% formalin solution and soaked for 30 minutes. After taking them out, rinse off the residual solution on the bulbs with clean water, then dry them in a cool place before planting. At some planting bases in China, before planting, the original basal roots are cut off, which helps promote new basal roots.
3. Storage of bulbs: If thawed bulbs cannot all be planted immediately, they must not be frozen again, otherwise there is a risk of freeze damage. They can be stored at 0-2°C, but for no more than two weeks; they can also be stored at 2-5°C for up to one week, and the plastic film packaging must be opened at the same time.
II. Planting Depth and Density
For planting in spring and summer, the planting depth requires the top of the bulb to be 8-10 cm below the soil surface, and in winter 6-8 cm. Planting density varies depending on the variety, bulb size and seasonal factors. In spring and summer, they can be planted more densely; in winter, when sunlight is weaker, they should be planted more sparsely.
The planting densities for lily bulbs of different groups and different specifications (expressed as the number of bulbs per sq m) are listed below for everyone's reference:
III. Harvesting and Storage of Cut Lilies
1. Harvesting: Harvest only after at least 2-3 flower buds have shown color. Harvesting too early affects flower color, making the flowers look pale and unattractive, and some buds will not open. Harvesting too late makes post-harvest handling and packaging difficult, the petals get dirty from pollen, and flowers that have already opened release ethylene, greatly shortening the vase life of the flowers.
2. Handling: After harvesting, remove the leaves from the lower 10 cm, then grade and bundle. A grade interval of 10 cm is appropriate. For lilies bundled in one bunch, the longest stem and the shortest stem should preferably differ by no more than 5 cm, and the flower tops should be aligned.
3. Storage: After bundling, lilies should be placed immediately into clean, pre-cooled water, then put into a cold storage room. The temperature of the water and the cold storage room should preferably be 2-3°C.
Introduction to Garland Chrysanthemum Planting Techniques and Detailed Steps!
Summary: Garland chrysanthemum is an herbaceous plant, recorded under the subfamily Tubuliflorae. In ancient times it was a palace dish, and its health benefits are obvious. It is now widely planted. This article brings you an introduction to garland chrysanthemum planting techniques and detailed steps!
[Garland Chrysanthemum Planting Techniques]
Planting Varieties
The two garland chrysanthemum varieties more widely planted in China are large-leaf garland chrysanthemum and small-leaf garland chrysanthemum, which can be selected according to the two quite different environments of the south and the north.
Large-leaf garland chrysanthemum: This type is more suitable for planting in the south. Its leaves are larger and fleshy, with high edible value. The leaves are green, the root stems are shorter, and the texture is soft. It is suited to relatively mild soil, climate and so on, and is not suitable for the extremely cold regions of the north. However, because it grows slowly, matures relatively late, and has obvious heat tolerance, it can also be suitable for planting in subtropical regions such as Guangdong.
Small-leaf garland chrysanthemum: This type of garland chrysanthemum is also recorded among ornamental plants. As the name suggests, it is small-leafed, with less fleshy leaves, a crisp taste, a thin texture, and relatively slender root stems. It grows faster and is suitable for planting in the north. It has poor heat tolerance, is early-maturing, and has strong cold resistance.
Planting Methods
❦Land can be chosen according to the planting area, with flat terrain and good drainage. Before sowing, deep plow once, then air it for two days. Before sowing, apply about 1500 g of decomposed base fertilizer per mu, then shallow plow.
❦Before sowing, soak the prepared garland chrysanthemum seeds in warm water of about 50°C, sprinkle on about 20 g of diammonium phosphate, and after about 24 hours, take them out and drain the water.
❦The main planting methods for garland chrysanthemum are drilling and broadcasting. Therefore, the prepared garland chrysanthemum seeds can be taken and scattered on the soil surface, then directly covered with about 1 cm of soil.
❦By sprinkling water, lightly scatter a very small amount of water on the garland chrysanthemum land after sowing. For garland chrysanthemum sown in spring, it will sprout after about one week.
❦Once the seedlings break through the soil, watering can begin. The time and frequency need to be controlled flexibly by yourself, as long as the soil is kept moist.
❦Large-leaf garland chrysanthemum planted in the south can adapt to a temperature of about 20-35°C, while garland chrysanthemum planted in the north can adapt to a temperature of 17-20°C. Once the temperature is too low or too high, it will affect the growth rate of garland chrysanthemum. For garland chrysanthemum grown in greenhouses, ventilation should be maintained when the temperature exceeds 25°C.
❦After about one month, the seedlings can grow to about 10 cm. Because the broadcasting method is used, appropriate thinning of the garland chrysanthemum field is needed. The main purpose is to ensure the amount of growth, and weeds can also be removed. When thinning garland chrysanthemum, it is enough to ensure a spacing of about 3-5 cm between each plant and row, and pull out weak and diseased seedlings. For large-leaf garland chrysanthemum planted in the south, a spacing of 20 cm can be maintained.
❦Around autumn, garland chrysanthemum can be harvested. About half a month before harvesting, apply one topdressing of nitrogen fertilizer, used together with urea.
Pests and Diseases
Damping-off: This is a common disease in garland chrysanthemum planting, mostly occurring during the seedling growth stage and the mid-growth stage of garland chrysanthemum. The symptoms are mostly irregular brown lesions on the roots, and during the day they often appear withered and lifeless. In severe cases, black appears on the leaf surface until the plant dies. According to the severity of the disease, appropriately spray oxathiapiprolin, Previcur SL or similar, all of which need to be diluted before use. You can also directly spray Men Shen during the seedling stage and planting stage after dilution for prevention.
Leaf spot disease: Leaf spot disease can be divided in detail into three types: cockscomb leaf spot, fishtail palm leaf spot and clivia leaf spot. They occur on garland chrysanthemum plants according to daily care details, with varying symptoms. Cockscomb leaf spot mostly appears as gray-brown areas in the center of diseased leaves and also on leaf stalks, mostly rectangular; fishtail palm leaf spot appears as brown round spots on the leaf surface, which continuously expand according to the disease, and raised areas can be found at the edges; clivia leaf spot is mostly black small spots, with the color changing from reddish-brown to black and also gradually fading, yet it affects plant health. You can directly spray 4% pyrimidine nucleoside antibiotics, using it after mixing with water.
Conclusion: Garland chrysanthemum is mostly used as an edible vegetable. Eating it can aid digestion and stimulate the appetite, and it can also clear the blood and nourish the heart. It also has the effect of promoting urination. Growing it as a home plant can not only green the environment but also reflect its edible value.
[More Related Information]
The Symbolic Meaning of Lilies Azalea Cultivation Methods Red Rose Flower Language Morning Glory Flower Language Kalanchoe Cultivation Methods Agave Pictures
What Are the Cultivation Methods and Precautions for Geraniums?
Summary: Geraniums are relatively common in the West and are common plants for window decoration, with very strong home decorative effect. This article mainly introduces the cultivation methods for geraniums and related precautions.
[Geranium Cultivation Methods]
Geraniums are mostly planted in southern Africa. Because they are light-loving and do not like too much water, they are mainly soil-cultivated, and hydroponics is relatively rare. The detailed steps for soil cultivation of geraniums are as follows:
①Pot selection: Geraniums are flowering plants, so the choice of flower pot needs to have a certain simplicity, and the material should be selected according to cultivation needs. A neutral plastic flower pot can be chosen, or a beautiful ceramic pot can also be chosen.
②Soil preparation: Geraniums are mostly planted in spring and have strong adaptability, so the soil can be chosen freely. The most suitable soil choice is sandy loam with strong humus content. Fertile garden soil can also be chosen directly, mixed evenly, and then put into the pot.
③Transplanting: Plant the geranium seedlings in the middle of the flower pot, burying about two-thirds of the roots, and water with rooting water at the same time.
④Light: Because geraniums are light-loving plants, they can be placed on a balcony to enjoy sufficient light. For indoor planting, they also need to be placed in a sunny spot.
⑤Temperature: For geranium cultivation, the most suitable temperature is 15-20°C, but in hot summer the adaptable temperature is below 28°C, and in winter the adaptable temperature is around 8°C. When the temperature is difficult to control, they cannot bloom normally.
⑥Fertilizing: About half a month after the geranium seedlings grow, the first fertilizing can be carried out. At this time, about 3 new leaves will have grown. However, geraniums do not like heavy fertilizer, so the fertilizer water can be diluted directly and applied in the manner of watering. Choose decomposed bean cake water, and maintain fertilizing once every half month. But before and after the flowering period, a potassium dihydrogen phosphate solution needs to be chosen to ensure normal blooming.
⑦Pinching: In the cultivation of flowering plants, appropriate pinching is often carried out during the seedling stage. When pinching, the geranium has grown to about 10 cm. Remove the growing tip of the seedling, then directly prune excess branches, diseased branches and so on.
⑧Pruning: The pruning work for geraniums should be during the mature seedling stage, after the first flowering period. To ensure the plant shape of the geranium, pruning should be maintained once every half month. At this time, dead branches can also be pruned. The main purpose is beautification, and it can also prevent diseased branches from consuming too many nutrients.
[Precautions for Geranium Cultivation]
Temperature Control
In geranium cultivation, temperature can determine the flowering time and flowering quality of the plant, and also directly affect the plant's growth rate. If the temperature is too high, leaves may turn yellow and wither, roots may rot, and sunburn may occur. If the temperature is too low, the growth rate will be suppressed, and frost damage, lifeless plants and other phenomena may occur.
The best suitable temperature for geraniums is 10-20°C, mostly the suitable temperature for planting in spring and autumn. Therefore, in summer, the temperature must be controlled, avoiding direct sunlight in summer. They can be placed in a shaded spot, but about five hours or more of diffused light should be ensured. In winter, the temperature should not be lower than 0°C.
Water Control
Geraniums are light-loving plants and overwatering is taboo. If root rot occurs, it is mostly due to overwatering. Even in hot summer, attention should be paid to the watering method, and the frequency of watering can be controlled to once every 2-3 days.
Weather Influence
Geranium roots are fragile, so in windy and rainy weather, avoid outdoor care and move them indoors in time.
Fertilizer Control
Too much fertilizer will cause geraniums to have insufficient nutrients and malnutrition, and even dehydration. At the same time, it will also cause the plant to grow excessively without flowering for a long time, affecting the normal growth rate. For this phenomenon, frequent watering can improve it.
Conclusion: The cultivation methods and precautions for geraniums are introduced above. It is recommended that after buying seedlings, consult professional care personnel to master the most correct cultivation methods and daily care precautions. The flower language of geraniums is “chance encounter”, and giving them directly as a gift is also the best choice.
[More Related Information] How to Grow Cymbidium Flower Language of Various Flowers Hyacinth Flower Language Lily Flower Language Cherry Tree Pruning Apple Tree Pruning Techniques