How to propagate Daphne odora for more beauty? Master these four methods
The Daphne odora has a graceful tree form, abundant and fragrant flowers, and symbolizes good fortune. It is a popular ornamental flower that can be grown in pots and placed in the home, or planted in courtyards and other places. It has a good ornamental effect and is an excellent flower variety for beautifying the home. So what are the propagation methods for Daphne odora? Next, let the editor of Yiqizhuangxiu.com briefly introduce them to everyone!
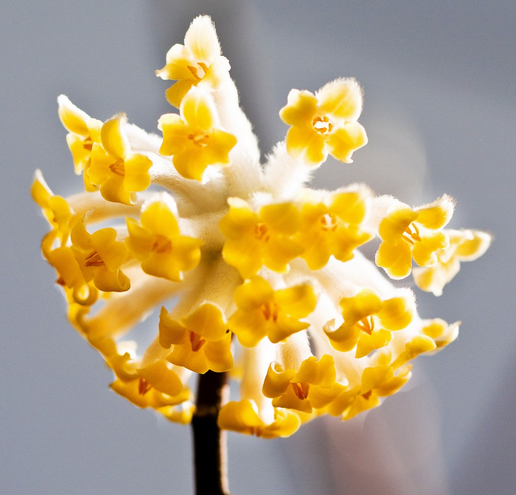
Four methods to make Daphne odora propagation more beautiful
1. Daphne odora cutting propagation
Daphne odora can be propagated by cuttings in spring, summer, and autumn. For spring cuttings, from late February to late March, select robust one-year-old branches about 10 cm long, remove the lower leaves, keep 2-3 leaves, and then insert them into the seedbed; for summer cuttings, from mid-June to mid-July; for autumn cuttings, from late August to late September, all using current-year branches. For summer and autumn cuttings, cut robust current-year branches, and the base of the cutting should preferably have an internode, which is more conducive to rooting. Insert into a pot of river sand to about 2/3 depth, shade after insertion, and keep moist but not overly wet. In 45-60 days, they will root.
2. Daphne odora layering propagation
Layering propagation of Daphne odora is best carried out in March-April when the plant sprouts new buds. First select robust 1-2 year old branches, perform a ring-barking treatment 1-2 cm wide, then wrap the cut with plastic sheeting, fill it with soil inside, tie the lower end tightly, and tie the upper end of the plastic sheeting tightly as well, but leave a small hole for ventilation and watering, keeping the soil in the bag moist. Generally after more than 2 months, it will root. After autumn, cut it away from the mother plant and pot it up or plant it separately.
3. Daphne odora seed propagation
For seed propagation of Daphne odora, choose loose, fertile, well-drained acidic soil (pH 6 to 6.5). Avoid alkaline soil. You can use mountain soil or garden soil mixed with 40% peat soil, leaf mold, pine needle soil, and an appropriate amount of coal ball ash, rice husk ash, urban waste, etc. as the growing medium. At the same time, Daphne odora prefers a warm environment, fears blazing sun, likes shade, and fears cold. In summer, shade it and protect it from rain and strong wind; in winter, place it indoors in a sunny, wind-sheltered spot and maintain a room temperature above 8°C. Keep the leaf surface clean and keep the potting soil from being too dry or too wet; do not let it freeze, and do not let there be coal smoke or cooking fumes indoors. Seedling transplanting can be done in spring and autumn, but it is best to transplant during the spring flowering period or the plum rain period.
4. Daphne odora grafting propagation
Daphne odora grafting propagation is a fairly important propagation method that can maintain the excellent characteristics of the original Daphne odora variety. Generally, this method is used for relatively precious and superior varieties. Precious varieties can be grafted onto common varieties as rootstock by cut grafting.
Four methods to make Daphne odora propagation more beautiful
Unusual flower-growing tricks No. 27 - Introduction to the method of water-propagating Daphne odora
Daphne odora is a common ornamental flower. Its flower colors are beautiful and its fragrance is charming, so it is deeply loved by many flower lovers, and many flower lovers have had experience growing Daphne odora. So, do you know what methods can grow beautiful water-propagated Daphne odora? Today, the editor will introduce the relevant knowledge to everyone in detail.
To propagate Daphne odora 'Aureomarginata' at home, we generally like to use the cutting method. This method is not bad, but the survival rate cannot be guaranteed, and it takes a long time. By comparison, water propagation is much superior to soil propagation.
Water propagation can be carried out from April to September, and now is the best time. Because when the temperature is low, rooting takes a long time, or the cuttings may even rot without rooting; when the temperature is too high, large amounts of bacteria breed in the water, which is also not conducive to the rooting of branches. At present, the temperature for cuttings is just right.
The specific method: cut off current-year branches, remove the lower leaves, keep 3-4 leaves at the top, and cut the insertion end into a horseshoe shape with a sharp knife to help produce more roots. Then find a suitable bottle, fill it with clean water, and insert the lower part of the cutting into it. Note that the water bottle should be placed in a spot with scattered light, not in direct sunlight, and not too shady. Change the clean water once every three or four days.
After water propagation, at the current temperature, rooting will occur in about 25-30 days. If before water propagation the cuttings are soaked for 4 hours in naphthaleneacetic acid rooting solution, rooting can be one week earlier.
Notes:
1. If there are many branches, you can tie them into a bundle and insert them.
2. When the roots grow to 3-4 cm, they can be potted up. Be careful when potting so as not to break the roots.
3. After cuttings are potted up in the same year, they will not send out new shoots that year, so there is no need to fertilize. By around the next Spring Festival, the young plants can bloom, and after flowering they can be fertilized normally.
The above is all the content I have learned about Daphne odora today. I hope flower lovers will find it helpful after reading this article. If you want to learn more about Daphne odora, please continue to follow Succulent Garden, and we will provide you with more related knowledge!
Some unusual flower-growing tricks
These are materials I found, very practical. Keep them for later use, everyone.My unusual flower-growing tricks
My unusual flower-growing tricks: No. 11 [A new method for air permeability in porcelain pots and plastic pots]
Clay pots are breathable and comfortable, but less attractive; porcelain pots are sturdy and beautiful, and plastic pots are light and inexpensive, but they are not very breathable. In short, all have some shortcomings. Actually, with just a little thought, you can turn shortcomings into advantages.
Before repotting in early spring, first prepare some foam plastic (there is a lot in electrical appliance packaging boxes), and cut it into small pieces the size of tangyuan. When repotting, use a thicker piece of paper to form a ring according to the inner diameter of the flower pot, then place it in the flower pot (leave a certain gap between the paper ring and the flower pot). Then fill the gap between the two with the plastic pieces. Inside the paper ring, fill with soil and plant as usual. In this way, the entire repotting task is completed.
With plastic pieces along the inner edge of porcelain pots and plastic pots, their air permeability is greatly increased, which has a very good effect on the growth and development of flowers. (If plastic granules are used at the bottom of the pot, that also works.)
My unusual flower-growing tricks No. 12: Broken bricks and tiles make flowers more brilliant
Broken bricks and tiles make flowers more brilliant. If you do not believe it, try it.
Growing flowers in the city makes soil very precious. Some people continue to use old soil after repotting, but it is actually far inferior to broken bricks and tiles.
Broken bricks and tiles are easy to obtain and can be found everywhere. The specific method:
Break waste bricks and tiles into pieces about 0.2-0.5 cm in diameter. When planting flowers, place the smaller and powdery pieces near the plant roots, and place the larger pieces at the bottom of the pot or in other parts. Other practices are the same as planting with soil.
Growing flowers with broken bricks and tiles has the advantages of air permeability, water retention, and fertilizer retention.
This is because broken bricks and tiles have many tiny gaps and especially strong adsorption capacity, and can quickly absorb applied water and fertilizer, playing a role in retaining water and fertilizer. Second, because bricks and tiles have been fired, their texture is hard but not solid, and they have the characteristic of not dissolving in water. The many tiny gaps inside can remain for a long time, which is conducive to the circulation of air in the soil.
Through experiments, pomegranate, Aglaia odorata, and Pyracantha grown with broken bricks and tiles had well-developed root systems, larger flowers, more fruits, and longer flowering periods.
(Because broken bricks and tiles themselves contain relatively few nutrients, fertilization should be applied several more times than for soil cultivation.)
My unusual flower-growing tricks No. 13: Force-feeding for fattening in growing roses
The method of force-feeding for fattening in growing roses is implemented for large rose plants because the limited potting soil cannot meet the nutrient needs of rose growth. It can make the roses you grow large, brilliant, and especially vigorous. Interested friends might as well give it a try.
1. In early spring, before the roses are about to sprout, pot them up or repot them, and apply sufficient fermented base fertilizer at the bottom of the pot.
2. The second step is to promote budding. During budding, apply 1-2 times of solid nitrogen fertilizer such as urea or ammonium sulfate. Be sure to mix with water strictly according to the ratio in the instructions, and do not make it too concentrated, otherwise it will burn the roots. About one week after application, dozens of tender buds can densely appear. At this time, buds should be appropriately thinned according to plant size and shaping requirements.
3. The third step, which is also the most important step, is force-feeding fertilization:
1. After sprouting, first fully strengthen the supply of nitrogen fertilizer to make the new buds robust.
Water with diluted fully fermented soybean cake liquid, and spray the leaf surfaces and tender branches with a 1/1000 urea solution. Alternate the two once a week.
2. When the new buds grow to about 2 cun, begin switching to fertilizers mainly based on phosphorus and potassium. Apply diluted fish intestine fertilizer or other phosphorus-potassium fertilizer to the potting soil, and spray the leaf surfaces and branch tips with 1/1000 monopotassium phosphate, also alternating once a week. In this way, a flower bud will soon appear at each branch tip. To distribute the flower buds evenly, appropriately thin the buds; 3. Afterward, still alternately use phosphorus-potassium-based fertilizer once every other week to help the next batch of flowers bloom. In between, apply nitrogen fertilizer about once a month.
Notes: Apply organic fertilizer to the potting soil and inorganic fertilizer to the leaves, and do not arbitrarily increase the concentration; when heavy rain occurs, shelter from or cover against the rain to prevent loss of potting soil and nutrients; it is best to add a certain proportion of coal ball ash to the potting soil, which is both breathable and has the function of adsorbing nutrients, and releases them relatively evenly.
——
My unusual flower-growing tricks No. 14: An alternative way to increase humidity - escorting balcony azaleas
Azaleas are delicate and charming. When they bloom, there is a scene of abundant spring color that makes people stop and admire. But to grow azaleas well on a balcony, the humidity problem is a headache. Generally speaking, the climate on a balcony is always drier than outdoors, but azaleas need relatively high humidity, which forms a difficult contradiction: either the buds are hard to open, or the red fades and the fragrance disappears.
Actually, conditions can be created, and azaleas can also be grown well on a balcony---
Find a shallow tray or other container slightly larger than the potted azalea, place two wooden strips 3-4 cm high at intervals in the tray, then set the azalea pot on the wooden strips, and add water to the shallow tray. The water height should be level with the bottom of the azalea pot or just slightly touching it. When the water gradually decreases and exposes the wooden strips, you can wait two or three days before adding water back to the original level.
The reason this method can effectively increase humidity is that the shallow tray has standing water year-round or intermittently, which is equivalent to installing a simple long-lasting humidifier that transpires upward. The higher the temperature, the faster the transpiration, which exactly matches the humidity requirements of azaleas at different periods. Second, water slowly moistens the entire pot wall from the bottom up, keeping it often in a good state of being neither too dry nor too wet, protecting the potting soil and root system from the effects of dry air.
This method can be used with confidence, and the azalea will not rot at the roots. Because water seeps in from the bottom of the pot, its depth cannot exceed the depth of the shallow tray below; at the same time, the moisture is completed by slowly rising, and the amount of water is limited. Moreover, intermittent water supply gives the azalea a chance to adjust the soil air and humidity.
This method can enable azaleas to grow robustly and bloom normally just like on the ground.
Notes: 1. When repotting azaleas, it is best to place some foam plastic pieces and other materials at the bottom of the pot, which is safer.
2. The amount of watering should be appropriately reduced. The water given at one time should be about 2/3 that for ordinary potted flowers.
3. During high-temperature periods, combining with measures such as frequently misting the azaleas will produce a better effect.
My unusual flower-growing tricks No. 15: Single-node rapid propagation of ivy and honeysuckle
There are many propagation methods: sowing, cuttings, grafting, and so on, each with advantages and disadvantages. But there is one method that is simple and easy to do, and the number propagated in one operation is several times that of cuttings, and it sprouts quickly with a 100% survival rate. What method is that? That method is called single-node rapid propagation.
This method is most suitable for our homes. If conditions allow ground planting, the effect is even better. The propagation varieties suitable for this method are honeysuckle, ivy, winter jasmine, pothos, and Monstera deliciosa, etc. In addition, Syngonium, Tradescantia pallida, Tradescantia zebrina, and forsythia also have good results.
Take ivy as an example: when repotting or potting up, plant it at one end of a long pot more than 40 cm long, and guide the branches to develop toward the other side. Then bend iron wire into small n-shaped pieces and insert one between every two nodes of the branches, loosely embedding the branches. After that, carry out routine care.
By early summer, use a sharp knife to cut the branches between every two nodes, so that each node has one leaf. In this way, each node can quickly sprout and flourish. After that, at any time, dig them up and pot them, and you can obtain many independent small plants. If this trick does not cut between the nodes, some varieties can also be made into connected-root style bonsai...
Key points: 1. The potting soil must be soft. 2. The branches must contact the soil. 3. Choose varieties that root at every node as described above.
My unusual flower-growing tricks No. 16: Cutting roots in sections to give old trees new life
It is said that all things in heaven and earth have a certain lifespan, and plants are certainly no exception. Although we cannot change this trend, through certain methods we can still prolong their lives. Below is one method~~~
The so-called root of life means that life lies in the roots, especially for plants. When the roots are strong, the plant is strong; when the roots age, its life is nearing its end. Therefore, if we want to prolong the life of plants, we must use our brains on the roots - during the spring growth period, scrape away the potting soil, cut off 1/3 of the entire root system, and then cover it with potting soil again. Fine new roots will soon grow from the cut old root areas. Treat it the same way next year and the third year. In this way, after three years, it is equivalent to the entire root system having been renewed. Compared with old roots, new roots have significantly stronger ability to absorb water and fertilizer, so it is only natural for the old tree to regain its youth.
In addition, after cutting off old roots, you can replace 1/3 of the soil with new soil. After three years, the potting soil is equivalent to having been completely renewed, and the trouble of repotting is also avoided, achieving two benefits at once.
If the old stump still has some vitality, it can also be shortened in combination with shaping to make it send out new branches.
My unusual flower-growing tricks No. 17 [Aglaia odorata, blooming every day and fragrant every day]
Aglaia odorata has glossy leaves and remains evergreen all year. When it blooms, it is richly fragrant. The small golden-yellow flowers like grains of rice are also very eye-catching against the green leaves. If cared for properly, it is no problem for Aglaia odorata to bloom 5 times a year. So can it be made to bloom every day and be fragrant every day? There is a way---
Generally speaking, after Aglaia odorata blooms once, it needs to "rest" for a period before it can bloom again, because it needs to accumulate nutrients to prepare for the next flowering. So its flowering appears intermittent. If we want it to bloom every day, we must artificially satisfy its nutrient needs, that is, by appropriately thinning buds to reduce the nutrients consumed by each flowering. Specifically, when Aglaia odorata is full of buds for the first (or second) time in early spring, you can first thin the buds on 1-2 branches, then after another 4-5 days thin the buds on another 1-2 branches, and so on repeatedly and continuously. When the cumulative flower and bud thinning reaches more than 6-7 times, and the branches that have been thinned reach more than 60-70% of all branches, then all the branches of Aglaia odorata can bloom in turn, achieving the goal of flowers every day and fragrance every day. According to the procedure, the branches that have not been thinned bloom first, and after about 5-10 days, the branches thinned the first time bloom next, then the flowers open in the order of thinning. In total, one pot of Aglaia odorata can let you smell its fragrance every day for 7-8 months during the entire growing period. (Because its fragrance is rich, thinning some buds does no harm.)
Key points: 1. Water, fertilizer, and light must keep up. 2. The plant must not be too small; it should have at least about 10 branches.
My unusual flower-growing tricks No. 18 - Try it: feeding fat meat makes Epiphyllum bloom
Everyone has their own hobbies, and plants are no exception. For example, Clivia miniata likes alcohol, while Epiphyllum is fond of fat meat. During the growing period, often feeding it some fat meat can not only make its plant dark green and glossy, but also enable it to bloom as many as 5-6 times, with large and numerous flowers.
The specific operation is very simple: soak the fat meat in boiling water to remove the salt; or cook the waste lard from the pig stomach in water, then let it cool.
Then use a suitable tool to poke several holes in the Epiphyllum pot, 2-3 cm in diameter, then cut the fat meat or waste lard into tablet-sized pieces, pour them into the holes, and cover the surface with about 3 cm of soil.
Key points: 1. Adding a small amount of monopotassium phosphate and mixing it in produces a better effect.
2. Generally, a flower pot with a pot diameter of 15 cm only needs two holes, and a 25 cm one needs three holes. And so on.
By extension, the fertilizer effect can supply the needs of Epiphyllum for one year of growth.
3. It must be cooked and chopped, otherwise the decomposition speed is too slow and it easily attracts insects and ants.
4. Using the waste oil from the oil collection cup in a range hood and pouring it in also has a very obvious effect.
My unusual flower-growing tricks No. 19 - Spraying flowers with beer achieves two benefits at once
Flower growers love dealing with all kinds of flowers; this goes without saying. But what you deal with is not only flowers, but also various pests, haha, even though you do not like them at all.
Among pests, aphids and red spiders are relatively easy to deal with. Spray the right pesticide twice and it is basically ok. But scale insects are more troublesome. They have a protective layer - a waxy shell - and spraying pesticide has little effect on them, really somewhat invulnerable. So, besides manual pest removal (brushing with a brush), is there a simpler and more effective method? Yes.
After discovering scale insects, do not panic. Prepare a bottle of beer, pour out some and mix it with water at a ratio of 6 water to 1 beer, and spray the plant once, covering as many parts as possible. The next day, check carefully. If the insects turn reddish-brown and fall off at a touch, then they are certainly dead. If there are still live ones, spray again. Generally after three consecutive sprays (three days), it can basically be solved.
Principle: After beer is sprayed, it forms a sealing film on the insects' bodies, causing them to suffocate to death. However, it is also possible that they died from drunkenness. Of course, this point still needs entomologists to prove,
In addition, beer is also a very good leaf fertilizer. Spraying it often can make plants grow full of vitality and especially vigorous. The ratio should be lighter than when treating pests: 8 water to 1 beer is enough. If you are interested, you might as well try it.
My unusual flower-growing tricks No. 20 - Four watering methods
Watering is the first hurdle that flower growers must pass, and also one they must pass. Although watering looks simple, there are actually many finer points to it. Many beginners' flowers are ruined at this hurdle of watering. Regarding watering, the so-called water when dry and stop when wet; water more during the growing period and less during dormancy; water more for small pots and less for large pots, and so on, everyone understands relatively well, so I will not say more. Below I will only introduce several special watering methods---
1. Sand column method - preventing potting soil from compacting
When potting up or repotting flowers, first stand several hollow tubes in the pot (bamboo tubes, plastic tubes, iron tubes, etc. are all fine), then fill soil around them and press firm. Then pour coarse sand into the tubes, with the upper end level with the soil surface. Finally gently pull out the hollow tubes, and sand columns form in the pot. Thereafter, when watering, water only spreads around through the sand columns, thus preventing soil compaction without adverse side effects.
Note: The tubes cannot stand in the exact center; leave room for planting the flowers.
2. Round-trip method - do not water only halfway
Watering only halfway means the water has not penetrated thoroughly: the top is very wet, while below is still dry. If this is often done, how can the flowers and trees not die? There are several reasons: inexperience; potting soil that is too compacted; not repotting for a long time so the roots are tangled, etc. The solution is as follows: if you have many flowers, you can water them one by one as usual without considering whether they are thoroughly watered. After all are watered, water them again from beginning to end, and a few can even be watered a third time. In this way, watering only halfway can basically be eliminated. Because after the first round of watering, even if not thoroughly watered, the potting soil has already become moist and softened to a certain extent, so after a period of time, the second round of water is relatively easy to absorb.
Note: This is unnecessary for loose potting soil. If there are not many flowers, you can do something else after watering and water again after a while.
3. Sitting pot method - preventing Caragana from root rot
Caragana flowers are very beautiful. When the flowers first open they resemble butterflies, and after opening they look like dancing golden sparrows, and they can also be made into bonsai, so many people love to grow them. But in recent years fewer and fewer people grow them, because they easily rot at the roots and die if you are not careful. There is one method that is very effective at preventing root rot, namely the sitting pot method. Put some water in a container, place the potted Caragana in it, and when the soil surface looks wet, it has been thoroughly watered, and then it can be taken out.
Note: Also follow the principle of watering when dry and stopping when wet.
4. Noon water - making jasmine more fragrant
Watering jasmine at noon can make jasmine more fragrant when it blooms. The ancients already summarized it: "If you want jasmine to be fragrant, give it a ladle of water at noon." But watering under the strong midday sun is a taboo in flower growing; the reason is just like people cannot take a cold shower immediately when they are too hot. To water flowers at noon without mishap, the prerequisite is to first put the water under the sun to warm it, and water when the water temperature is close to the soil temperature. In this way it is ok
, safe.
Reminder: Other plants have not been tested, so please use cautiously.
My unusual flower-growing tricks No. 21 - Old loofah helps your leaves be green and flowers beautiful
When the autumn wind rises, the harvest season arrives again. The loofah vines gradually wither like an old person's arms, and the leaves tremble in the wind, while only the old loofahs still hang heavily.
In the past, villagers used them to wash bowls and scrub pots. Now no one uses them, and they seem to have become waste. Have they really become waste? No!
After picking the old loofahs, wash them clean and dry them. When repotting and changing soil or potting up flowers, cut them into small pieces about 5 cm. Spread a layer of loofah stems at 1/3 of the potting soil at the bottom of the pot, fill soil on top, then spread another layer at 2/3 of the potting soil, add more soil, and afterward carry out normal operations.
Note: Before cutting, first spread it flat on the ground and smash the loofah seeds with a hammer.
(This method can effectively improve the potting soil, making it loose and not compacted. Moreover, the loofah fibers and seeds slowly decompose in the potting soil and are a very good slow-release nitrogen fertilizer, so potted flowers all have green leaves and beautiful flowers.
My unusual flower-growing tricks No. 22 - Wonderful use of sawdust, turning waste into treasure
During ordinary home renovation, afterward sawdust is often simply dumped as garbage. In fact, sawdust is very useful to us flower growers, and we can absolutely turn waste into treasure~~
1. Cuttings: Sawdust used as a cutting medium for roses, gardenia, pomegranate, and other plants has an obvious effect, far superior to soil cuttings or water cuttings, and roots grow quickly, in greater number, and the plants are robust. It also has a big advantage: after the plant takes root and survives, it can be moved into the potting soil together with the block of sawdust, so the roots are not damaged, it establishes easily, and flowers and fruits appear early. Even for varieties that are relatively difficult to root, such as azaleas, I have also tried successfully, and even inch-long tender tips of crabapple can root quickly. The reason is that sawdust has better water retention and air permeability than soil, and oxygen is sufficient.
Specific method: Put sawdust into a flower pot, then pour boiling water over it several times to thoroughly disinfect it. After the temperature drops, squeeze out the excess water (so that the wet sawdust does not drip water when squeezed by hand), and then you can begin cutting. The method is the same as soil cuttings. After insertion, keep the sawdust moist and they will quickly root and survive. This method can be carried out all year round, except in winter it needs to be placed on a sunny windowsill indoors with heating.
2. Used as wrapping medium for air layering: Because sawdust is loose in texture and its dryness and moisture can be controlled, it is likewise superior to other media, roots faster, is relatively safer, and has a high survival rate.
Specific method: After ring-barking the plant, fill the plastic bag wrapped around it with a medium made of half wet sawdust and half loess, then tie both ends tightly.
3. Used as fertilizer: Making fertilizer with wet sawdust is nutritionally comprehensive, economical and convenient, and clean and hygienic.
Specific method: Mix wet sawdust with an appropriate amount of inorganic fertilizer such as superphosphate, potassium phosphate, or urea. It is even better if organic fertilizer is mixed in. Put it into a plastic bag and tie the bag opening tightly. Turn it over once every two weeks to accelerate even decomposition. In spring and autumn, it can be used after about six weeks.
Note: When using it, mix in 50% soil.
The above lists several points, and the rest will not be repeated. In fact, the uses of sawdust are not limited to these. Everyone can use their brains and give it a try.
(Oops, I forgot an important point, so let me add it now~~ Sawdust must be fermented before use.)
When I make fertilizer from sawdust, I mix in an appropriate amount of rapeseed cake (soybean cake works the same way), which I got from someone who raises fish; I also add some chicken and duck manure (last year I used cow manure), then add a little water and let it ferment. After it has rotted, dry it until it is half-dry before use. The sawdust fertilizer made this way has fairly complete nutrients. Spring and summer are the better times to make it, because the higher temperatures speed up fermentation.
My Unusual Flower-Growing Tricks, No. 23 - If you want your plants to do well in winter, leave some grass in the pot
The reason I say "leave" rather than "plant" is that our potted flowers often have wild grass that shows up uninvited and grows lushly and happily on its own. The usual reaction from gardening friends is to be so annoyed that they want to get rid of it immediately, the so-called "pull the grass up by the roots."
This trick of mine is not really so unusual. It comes from the fact that gardening friends often say the watering scale is hard to judge in winter. Roots rot, leaves drop, and the poor flower's life is in danger. Is there any simple method that can help everyone quickly grasp the watering scale? Yes. Please show mercy and leave a little wild grass in the pot. Pulling grass up by the roots is not the way.
Generally speaking, most varieties of plants are in a dormant or semi-dormant state in winter, so they do not need much water, and the soil only needs to be slightly moist. But many gardening friends rush to water as soon as they see the soil surface turn pale, thinking the plant may dry out. Actually, that is not so. When the soil surface turns pale, the middle is still very moist. If you water anyway, it would be strange if the plant did not develop problems!
Leave some grass in the pot, but not just any grass. Leave those green grasses that stand firm against the cold in winter. And not the more the better either; just three to five plants is enough.
When should you water? When should you not water yet? Look at the grass! If the grass is still standing green and lush, do not water; if the wild grass has wilted and lost its spirit, water immediately. The scale is just that simple!
Leaving some grass in the pot has more benefits than just these: it can protect against cold in winter, protect against sun in summer, and also decorate the pot surface - after all, what is there to admire about bare soil? In addition, when loosening the soil, bury the grass in the soil with a trowel and it becomes green manure, enough to make up for the loss caused by the wild grass competing with the potted flowers for nutrients.
I have used this method for watering for more than one year, and it has worked every time. If you believe it, you can try it too.
Note: 1. Plants still flowering and fruiting in winter are not covered by this example.
2. This method also applies in other seasons.
My Unusual Flower-Growing Tricks, No. 24 - Burying Nodes to Propagate Emerald Bamboo into a Grove
"Better to eat without meat than to live without bamboo." The ancients were like this, and people today are the same. In modern homes, emerald bamboo is also one of the indispensable plants for greening around the residence or in the environment. Planting trees often requires "ten years to grow a tree," while planting bamboo often creates a cool, evergreen environment in just one or two years. On a night with bright moonlight, the swaying bamboo shadows outside the window add even more endless elegant charm.
Planting a few tall bamboo stems in a pot and accenting them with one or two Ying stones is also a favorite desk piece in the hearts of many flower growers.
Bamboo generally uses the method of propagation with rhizomes, and a few are also grown from seed. This propagation method of mine is relatively rare (my cousin taught me), but the effect is excellent - simple, easy, and with a high survival rate. Bamboo lovers may want to give it a try...
In the early spring rainy season, choose a mother bamboo with plump buds and saw it off between two nodes (that is, keep one node scar in the middle); then fill both ends of the bamboo tube with moist fine sand, filling it full and pressing it firm, then seal both ends of the bamboo tube with clay. This is the first step.
Next, choose loose, well-drained sandy loam soil. According to the thickness of the bamboo tube, dig a trench about 10 cm deep, place the prepared bamboo tube flat in the trench and cover it with soil, press it slightly firm, then water it thoroughly. That is it done. Remember when burying the node to face the buds upward, and absolutely do not put it in upside down.
The bamboo nodes can grow tender shoots in about 25-30 days. If making a bonsai, just pot it during the rainy season.
Key points~~ 1. To cultivate a bamboo grove, choose thick bamboo; to cultivate potted plants, choose thin varieties.
2. When sawing the bamboo tube, be careful not to let it split, so as not to injure the buds.
3. Water according to the principle of dry-wet alternation.
4. After burying, it is best to cover with some bamboo branches or dry grass to block part of the sunlight.
My Unusual Flower-Growing Tricks, No. 25 - Homemade Rooting Agents for Fast and Abundant Roots
The weather is gradually warming, the ground is heating up, and it is once again a good season for cuttings. There are many cutting methods, and generally people like soil cuttings or water cuttings. But everyone's technique differs; add to that differences among plant varieties, and rooting ranges from easy to difficult, which makes survival rates vary. To properly solve this problem, everyone likes to use rooting agents such as naphthaleneacetic acid before taking cuttings. This is indeed effective, and the rooting survival rate also improves. But if you are in a remote place, supplies are out of stock, and you cannot buy any for the time being, what then? Do not worry. Let me introduce several homemade rooting agents for you. They cost no money, and their effect is not one bit worse than the bought ones -
(1) Phosphate fertilizer solution~~ As said above, rooting agents such as naphthaleneacetic acid are actually a kind of rooting hormone. In fact, phosphate fertilizer solution has the same effect. This is because "phosphorus," this substance, can effectively promote the growth and development of plant cells and tissues, and promote wound healing and rooting in plants.
Specific method: before taking cuttings, first dilute the phosphate fertilizer solution with water at a ratio of 7 parts water to 3 parts fertilizer, then soak the pre-treated cuttings (the root ends) in the fertilizer liquid, with the submerged part accounting for 1/3 of the cutting. After 2-3 hours, take them out, rinse clean with water, and then take cuttings as usual.
For common varieties such as camellia and Chinese rose, using this method for cuttings can produce roots 10-22 days earlier, with well-developed roots and vigorous growth.
(2) White sugar solution~~ This is also a very good rooting agent. Many people have tested it, and the effect is obvious.
Specific method: first melt white sugar with hot water at a ratio of 9 parts water to 1 part sugar. After the sugar water cools, soak the trimmed cuttings in it. Take them out after about 40-60 minutes, rinse the cut ends clean with water, and use a sharp knife to cut off part of the cut end, then take cuttings as usual.
After the above treatment, the survival rate is much higher than that of ordinary cuttings. Even for rhododendrons, camellias, and others that are harder to root, it can reach more than 90%.
(3) Willow soaking liquid~~ Willow liquid is a very good plant growth agent. Its liquid is rich in growth hormones, so it can survive whether planted upright or upside down, and its vitality is especially strong.
Specific method: take some willow branches and leaves, smash the branches with a hammer, then soak them in water. After one day, remove the branches and leaves, and the water is willow soaking liquid.
The next day, soak the cuttings in it for about 1 day. (A longer time does no harm; willow liquid contains components that inhibit bacterial reproduction.) Then take cuttings as usual.
Roots develop quickly and abundantly, and the plants grow robustly.
My Unusual Flower-Growing Tricks, No. 26 ~~ The "Amphibious" Cutting Method
Cuttings are a simple and easy propagation method that everyone gladly uses. Right now is also a good season for cuttings, so these several posts of mine are all related to cuttings. I recommend them to everyone, hoping they will be helpful to you all.
The two most commonly used cutting methods are soil cuttings and water cuttings, each with advantages and disadvantages. But both have a difficult hurdle ~~ after rooting, they must be moved into pots. Because the new roots are rather delicate, and some people are not very skilled in handling them, efforts are often wasted and success slips away at the last moment. This is very discouraging.
The cutting method introduced below does not require moving into a pot after rooting, thus greatly increasing the survival rate of cuttings. I call it: the "amphibious cutting method."
The method is as follows ~~
1. Find a flower pot of suitable size, and first seal the bottom hole with melted wax liquid. (Other materials can also be used, but it must be something that can be poked open when needed.)
2. Put about 3/5 cutting soil at the bottom of the container, then spread about 1/5 river sand on top to fix the cuttings. Then gently pour in clean water until it is about 1 cm above the sand surface.
3. Take cuttings. The cutting length can be about 8-15 cm. Cut the lower end flat with a sharp knife (a horseshoe shape or a flat surface is fine), so it is less likely to rot. Insert the cutting into the yellow sand about 1/3 of the way, and remove the green leaves below the water surface. The cuttings should not be too crowded either; generally 1-3 stems are more suitable.
4. After inserting, it can be placed in a full-sun environment (cuttings taken in midsummer are better placed in diffused light), but the sand surface must not lack water. Change the clean water once every 10 days to half a month to ensure the water quality stays clean.
5. Roots form in about 25 to 45 days. At that point, poke open the sealed bottom hole of the pot from below and drain the water completely. After a few days, when the potting soil is dry, water again and enter the normal management stage.
Notes: a. Choose moisture-tolerant varieties, such as gardenia, Buddhist pine, serissa, and other plants.
b. The potting soil should be plain soil (without fertilizer).
c. If you cannot be sure whether the cuttings have rooted, you can pull them up to observe. If white new roots appear on the callus tissue, you can drain the water and switch to dry cultivation.
My Unusual Flower-Growing Tricks, No. 27 - Water Cuttings of Daphne A, B, C
Daphne is an excellent flower among flowers. It is full of vitality all year round, with verdant branches and leaves that seem about to drip green; when it blooms, its fragrance travels far and fills the room with spring, making it a precious seasonal flower for the Spring Festival period. Among them, the golden-edged daphne has leaves like green bordered with gold, and its flower color changes from white first to purple and then red, very bright and beautiful, with an extremely strong fragrance. It can be called excellent in color, scent, posture, and charm, and has been listed as a treasure since ancient times.
When we want to propagate golden-edged daphne at home, we generally like to use the cutting method. This method is good, but the survival rate cannot be very well guaranteed, and it takes a relatively long time. By comparison, water cuttings are much superior to soil cuttings ~~
Water cuttings can be done from April to September, and right now is the best time. This is because when the temperature is low, rooting takes a long time, or they may even fail to root and rot; when the temperature is too high, a large amount of bacteria breeds in the water, which is also unfavorable for the branches to root. The current temperature for cuttings is just right.
Specific method: cut off branches of the current year, remove the lower leaves, keep 3-4 leaves at the upper part, and cut the insertion end into a horseshoe shape with a sharp knife to help produce more roots. Then find a suitable bottle, fill it with clean water, and insert the lower part of the cutting into it. Note that the water bottle should be placed in a spot with diffused light, not in sunlight, and not too shady. Change the clean water once every three or four days.
After water cuttings, at the current temperature, roots can form in about 25-30 days. If before water cuttings you soak the cuttings in naphthaleneacetic acid rooting solution for 4 hours, roots can form one week earlier.
Notes: 1. If there are many branches, you can tie them into a bundle and insert them.
2. When the roots grow to 3-4 cm, they can be potted. Be careful when potting and do not break the roots.
3. After cuttings taken that year are potted, they will not send out new shoots that year, so there is no need to fertilize. By around the next Spring Festival, the young plants can bloom, and after flowering they can be fertilized normally.
My Unusual Flower-Growing Tricks, No. 28 - Planting Epiphyllum Cuttings Upside Down
Epiphyllum has large and beautiful flowers, with delicate, eye-catching colors, and it is coarse and easy to grow. Many gardening friends want to have a pot of it. The common trick for home propagation of epiphyllum is cuttings, but many gardening friends report that the survival rate of cuttings is not high, and if you are not careful the roots rot, so many years of cuttings end up wasted. Why do epiphyllum cuttings rot easily? Because its fleshy stems are relatively thick, and the cut ends are extremely sensitive to soil moisture - if too wet, the cuttings rot easily; if too dry, the branches shrivel and become thin and weak, barely hanging on. Even the cut ends of branches that have been rooted for a long time may still rot if you are not careful, and all previous efforts are wasted. To solve this problem, there is a clever method, and that is upside-down planting.
The method is very simple: cut a 10-15 cm cutting with a sharp knife (the upper end with the leaf tip), then insert it upside down into the soil, with a burial depth of about 6-8 cm. Because it is inserted upside down, the cut end is exposed outside. At the current temperature, roots can form and it can survive in about 20 days, and new branches can sprout and grow in a month and a half. At that point, you can safely switch to normal management.
Notes: 1. Be careful when watering or spraying, and do not spray onto the upward-facing cut end.
2. There is no need to control water; from the start, use the dry-wet alternation principle.
3. The cutting medium does not need to be sand or plain soil; you can insert the cuttings directly into fertile, loose soil.
4. Cut and insert right away; the cuttings do not need to be dried in the shade.
5. The section of the cutting from the new roots to the old part will naturally shrink and dry out later, and new branches will take its place.