A Detailed Guide to the Propagation Methods and Cultivation Techniques of Asparagus Fern
Asparagus fern likes a warm, humid, semi-shaded and well-ventilated environment. In winter it cannot tolerate severe cold, nor can it tolerate drought. It must not be watered too much, or the roots will rot. In summer, direct sunlight must be avoided. It is best cultivated in loose, fertile, well-drained sandy loam rich in humus. The room temperature should ideally be kept between 12-18°C; when it exceeds 20°C, ventilation is needed to dissipate heat. The optimum growing temperature is 15-25°C, and the overwintering temperature is 5°C. It grows in the wild and is also cultivated in gardens.
What are the propagation methods for asparagus fern?
Asparagus fern plants that are 3-5 years old grow relatively densely and can be propagated by division. Division is carried out in spring when repotting. Use a sharp knife to divide the clustered stems and roots into 2-3 clumps, making sure each clump contains 3-5 buds, then plant them separately into pots. When dividing, damage the root system as little as possible. After dividing and planting, water thoroughly, place in a semi-shaded spot, and pay attention to moisture retention and shading. Afterwards, watering must be properly controlled, otherwise yellow leaves are easily caused.
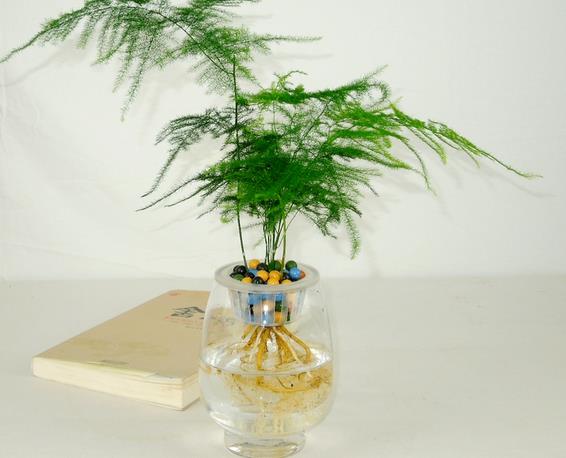
What are the propagation methods for asparagus fern? What are the cultivation techniques for asparagus fern?
What are the cultivation techniques for asparagus fern?
I. Home cultivation
1. Potting soil: For cultivating asparagus fern, the potting soil should preferably be fertile sandy loam, requiring warmth and moisture, richness in humus, and good drainage. Generally, a ratio of 4 parts garden soil, 2 parts leaf mold, 2 parts compost soil and 1 part sand can be used, and the soil should be changed and fertilized regularly. If over-fertilization causes "root burn", the pot should be tipped out to remove the fertilizer, and the soil ball flushed with clean water, then replaced with new soil for cultivation.
2. Watering: Watering is the key point in cultivating asparagus fern. Too much watering and overly wet potting soil easily cause root rot, while too little watering causes the leaf tips to wither and turn yellow. Therefore, in the process of watering, it should be determined according to the weather, the growth condition and the dryness or moisture of the potting soil, so as to water only when dry and water thoroughly when watering. In hot, dry weather, the leaves can be sprayed with water to increase humidity and lower temperature; in winter, water less.
3. Fertilizing: Asparagus fern does not like much fertilizer, but it cannot lack fertilizer either. Limited by the potting soil of container cultivation, asparagus fern must be supplemented with nutrients in time to meet its growth requirements. When fertilizing asparagus fern, apply small amounts frequently, and never apply concentrated fertilizer, otherwise yellow leaves will result. Generally, applying a thin, thoroughly decomposed liquid fertilizer once a month is sufficient. After the plant has grown and taken shape, fertilization can be appropriately reduced. During the growing season, apply a thin fertilizer containing nitrogen and phosphorus 1-2 times a month to encourage lush branches and leaves; other liquid fertilizers may also be used. Note that during the flowering period, do not fertilize too much; applying liquid fertilizer twice each in May-June and September-October is sufficient.
4. Light: Asparagus fern must not be exposed to the scorching sun. In hot seasons, it should be placed in a cool, ventilated place. At the same time, during the flowering period, asparagus fern fears both wind and rain, so good ventilation should be ensured; in good weather it can be appropriately placed outdoors to receive sunlight. In winter, the temperature for potted asparagus fern should be kept above 5°C to prevent frost damage.
5. Placement: Asparagus fern loves a clean environment with circulating air. If stimulated by smoke, dust, coal gas, pesticides and other harmful gases, the leaves will turn yellow, curl up and even die. Therefore, asparagus fern should be placed in a clean, well-ventilated environment, away from marble-type decorative materials that release mercury vapor.
6. Plant pruning:
Pruning for missing cladodes: When the growth position of the small cladodes on the main branch is unsatisfactory or they are missing for some reason, short pruning can be carried out at an appropriate position on the main branch to force the dormant buds there to sprout. Generally, the height at which the cut is made is the height at which the cladodes will sprout, and the position of the thorns on the branch is the position where the cladodes will sprout; the greater the thickness of the branch, the higher the sprouting rate of the dormant buds.
Renewal pruning of the whole plant: If the branches and leaves of the whole plant grow poorly due to severe sunburn, overly dry potting soil, lack of fertilizer, or some unknown reason, the whole plant can be renewed. During renewal pruning, all cladodes can be cut off, but attention should be paid to the positions of the recurved thorns on the branches, because they determine whether the distribution of the retained branches is even. Pruning in the growing season generally makes it easy for new branches to sprout; after pruning, watering should also be appropriately reduced, and the potting soil must absolutely not be kept too wet, otherwise the pruning will fail.
II. Bonsai making
Asparagus fern has a graceful posture, with slender, soft branches and distinct, orderly layers. After being designed and composed into a bonsai and displayed on a balcony or indoors, it appears even more elegant and serene. The making method is as follows:
Material selection: First, one asparagus fern about 20 cm tall, and two asparagus ferns selected at just over 10 cm tall; an irregular-shaped white marble shallow pot and its matching stand; several landscape stones about 10 cm tall; an appropriate amount of potting soil and green moss.
Bonsai shaping: Spread a thin layer of potting soil on the surface of the white marble shallow pot. Plant the tallest asparagus fern at the right end of the pot with its curved branches and leaves facing left. Plant the second-tallest asparagus fern to the left of the first asparagus fern, not far away, at an appropriate position near the back edge of the pot. Then plant the shortest asparagus fern at the boundary between the 1/3 and 2/3 marks of the pot's length, with its curved branches and leaves also facing left, so as to achieve a coordinated and unified orientation for the three asparagus ferns. Then adjust the positions of the asparagus ferns in the pot until they achieve a natural and graceful look.
Placing stones and laying moss: Place several landscape stones at an appropriate position toward the right rear of the pot surface, and cover the potting soil on the pot surface with green moss to achieve a greening artistic effect. Finally, spray clean water on the asparagus fern and the green moss to moisten the potting soil.
III. Shaping methods
1. Pot control method: The size ratio of the flower pot to the plant should be 1:3; this can limit the growth of the root system and keep the plant's size unchanged.
2. Removing the growing points: When new buds grow to 2-3 cm, remove the growing points. This can promote the regrowth of branches and leaves on the stems, control it from growing vines, make the branches and leaves spread out flatly, and keep the plant shape continuously full.
3. Using the phototropism of asparagus fern: Turning the direction of the flower pot at the right time can correct the growth shape of the branches and leaves and keep the plant shape unchanged.
4. Object-shading method: That is, using a piece of cardboard to press down on the branches and leaves or to block the sunlight, so that when the branches and leaves grow, upon meeting the obstruction they turn or bend, thereby achieving the purpose of shaping.
5. Comprehensive application of several shaping methods:
(1) Tower style: Select 2-3 tall, upright and elegant stems as the main peak, remove all the growing points on the stems, and set the plant height at 30-35 cm. The remaining stems and newly grown stems should not be taller than the main peak. For new buds, whether to remove the growing points can be decided according to the thickness of their stems. If the stem is thicker than that of the main peak, it should be removed; if it is thinner than that of the main peak, it need not be removed and can be allowed to grow. At the same time, the object-shading method and its own phototropism should also be used to continuously adjust the plant shape.
(2) Double-clump style: Plant two asparagus ferns, one tall and one short, in the pot, with the tall one about 30 cm and the short one about 18 cm. During the growing period, shape them in the same way as the tower-style asparagus fern.
(3) Natural style: Mainly follow the naturally grown plant shape of the asparagus fern, still using the basic methods of removing growing points, object shading and making use of its phototropism, so that the branches and leaves spread out and give people a natural sense of beauty.
It should be noted that the shaping of asparagus fern must be combined with the control of fertilizer and water. That is, at a room temperature of 15-18°C, water thoroughly once a week to keep the potting soil moist (it should be suitable if it can be pressed down with a finger). Do not fertilize or fertilize only a little.
Asparagus fern should be repotted once a year, with the pot gradually increased in size. If not moving to a larger pot, the pot can be turned out to remove part of the small root tubers, replace with new soil, and replant in the original pot. Usually pay attention to renewing the stems and branches, and remove aged, diseased and damaged stems and branches at any time.
IV. Pest and disease control
When humidity is too high and ventilation is poor, leaf blight is prone to occur; air humidity should be appropriately reduced and attention should be paid to ventilation and light transmission. After onset, spray 200-times Bordeaux mixture, or 50% carbendazim wettable powder at 500-600 times dilution, or 50% thiophanate wettable powder at 1000 times dilution for control. In summer, pests such as scale insects and aphids are prone to occur and can be killed by spraying 40% omethoate at 1000 times dilution.
How to propagate asparagus fern: The propagation methods for asparagus fern
Although asparagus fern is not bamboo, its branches have nodes like bamboo and its posture is very beautiful. How is asparagus fern propagated? Below, the propagation methods for asparagus fern are explained.
Asparagus fern propagation mainly has two methods: sowing and division.
1. Sowing
Sowing is the main method of propagating asparagus fern. When the seed coat of asparagus fern seeds turns black and soft, they are ripe. At this time, they should be gradually harvested according to the degree of ripeness, the flesh rubbed off, rinsed clean with clean water, dried until half-dry, and stored for later use. Sow in early April, and in the autumn of the same year they can become commercial seedlings or be displayed indoors. The sowing medium is generally fine sand, and the container is a clay pot or wooden box. Place the seeds on the potting soil at a spacing of 2-3 cm, with 2-3 seeds per hole. After sowing, cover with fine sand 5 mm thick, and cover with glass or plastic film, keep the temperature at 20-25°C, and spray water frequently to keep the potting soil moist. About 30 days after sowing, germination and sprouting begin. When the seedlings are 4-5 cm tall, transplant them for cultivation; when 8-10 cm tall, they can be planted into pots.
2. Division
Home pot cultivation can also use division propagation. Asparagus fern has a strong clumping habit. Plants 4-5 years old can continuously send up root-sucker shoots from the root crown, continuously expanding the clump. In spring, together with repotting, the potted plant can be divided into several clumps and planted separately into pots, thus obtaining new plants.
Notes on propagating asparagus fern:
Asparagus fern propagation is mainly based on sowing and division. Sowing is carried out in March-April. Before sowing, soak the seeds for 24 hours, sow them in a 10 cm deep pot by dibbling, cover with glass or plastic film to prevent water evaporation, keep at 20-25°C and keep the potting soil moist; they can germinate in 20-30 days, and when the seedlings are 5 cm tall they can be put into small pots. For those planted in large pots, division propagation should be carried out in spring. Division is best done with large plants that have grown for 2-3 years. According to the size of the plant, divide one pot into two or three pots. The division operation is very simple: use your hands to pull the roots of the asparagus fern apart; as long as too many roots are not damaged, plant the divided plants into flower pots and water thoroughly once and they will survive. When dividing, 3-4 pieces of horse hoof slices or sesame paste residue and other organic fertilizers should be applied in the pot as base fertilizer.
When indoors is not ventilated, scale insect damage is prone to occur; spray 2000-times dichlorvos emulsion for control. In summer, red spider mite damage is prone to occur; spray special acaricides such as dicofol. Diseases include gray mold and leaf blight damaging the leaves; spray 50% thiophanate-methyl wettable powder at 1000 times dilution.
Asparagus fern likes a clean environment with circulating air. If stimulated by smoke, dust, coal gas, pesticides and other harmful gases, the leaves will turn yellow, curl up and even die. On warm sunny days, from 10 a.m. to 3 p.m., open the windows for ventilation to keep the indoor air fresh and well ventilated.
When the leaves and branches of asparagus fern grow too long, give it a trellis, or cut it shorter, to facilitate ventilation and light transmission.
Because the branches and leaves of asparagus fern spread out horizontally, they easily collect dust, which not only affects growth but also easily turns the branches and leaves yellow. Therefore, they need to be sprayed with clean water to remove dust. Before spraying, it is best to shake off part of the floating dust on the stems and leaves with your hands, then spray and wash with a fine-nozzle watering can, and gently shake off the water droplets attached to them.
How to propagate dwarf asparagus fern: The propagation methods for dwarf asparagus fern (cutting/sowing/division)
Dwarf asparagus fern, a beautiful foliage plant, has a short, sturdy plant and feather-like leaves that look both graceful and delicate, and is deeply loved by flower lovers. In daily life, many people want to grow dwarf asparagus fern, but rather than buying one to grow, it is better to propagate it yourself and raise it step by step. So, how is dwarf asparagus fern propagated? Below are three propagation methods for dwarf asparagus fern; let's take a look!
I. How to propagate dwarf asparagus fern: cutting/sowing/division
There are generally three methods for propagating dwarf asparagus fern: cutting, sowing and division. Among them, cutting is selecting a vigorously growing dwarf asparagus fern branch, treating it, and inserting it into the soil, then planting it into a pot after it takes root; sowing is scattering dwarf asparagus fern seeds on the soil, and transplanting them into pots after the seedlings grow to a certain height; division is carried out together with repotting, dividing the plant into several parts and planting them in separate pots.
II. The three propagation methods for dwarf asparagus fern
(1) Cutting propagation of dwarf asparagus fern
1. Cutting time: Generally speaking, cuttings of dwarf asparagus fern can be taken throughout the year, but the most suitable time is when the temperature is between 20-30°C.
2. Selection of cuttings: In a pot of healthy, growing dwarf asparagus fern, select a vigorously growing branch, scrape away the surrounding potting soil below it to expose the junction of the branch and root, and make a small cut with a knife half a centimeter from the soil. Then apply a layer of washed fresh moss over the wound and keep it moist frequently.
3. Taking the cutting: After about 10 days, the fresh moss can be removed; by then the wound has healed. Afterwards, cut off the selected branch close to the root, keep two branches and shorten them by one third, cut off all the rest, and what is finally obtained is the dwarf asparagus fern cutting.
4. Preparing the cutting bed: Choose a cloth bag 8-10 cm tall and 6 cm in diameter, fill it with moist sandy soil as the cutting bed. Then use a bamboo stick to make a hole in the center of the cloth bag so that the cutting can be inserted easily.
5. Starting the cutting: Insert the treated cutting into the prepared cutting bed to a depth of 2 cm and press firm. After inserting, arrange the cloth bags one by one upright along the inner wall of the cutting pot, place a wide-mouthed glass bottle of moderate height in the center of the pot, and wrap a 60-70 cm gauze strip once around the outside of each cloth bag, with both ends of the strip extending into the bottom of the glass bottle.
6. Filling soil after cutting: After completing the above steps, fill the cutting pot with soil so that the mouth of the glass bottle is slightly higher than the soil surface. Then spray the soil thoroughly with water once and fill the glass bottle with water. Afterwards, keep the glass bottle continuously filled with water, then place the cutting pot in a windless, shady place. In about 20 days new roots will appear, and after 1 month it can be planted into a pot for final planting.
(2) Sowing propagation of dwarf asparagus fern
Besides cutting, the most commonly used propagation method for dwarf asparagus fern is sowing. Choose the time in March-April, soak the dwarf asparagus fern seeds in water, then scatter-sow them in a fine-soil seedbed and cover with about 1 cm of soil. Then cover the sowing pot with plastic film to retain moisture, and they can germinate in about one month. When the seedlings are 5-10 cm tall, transplant them into pots.
(3) Division propagation of dwarf asparagus fern
Besides cutting and sowing, the propagation method for dwarf asparagus fern can also use division. Specific operation: Cut the roots of the dwarf asparagus fern plant into several pieces, smear the wounds with plant ash for disinfection, and place them in a shaded place after division. Then care for them according to the cultivation methods for dwarf asparagus fern, and before long you will have several pots of beautiful dwarf asparagus ferns.
In general, when propagating dwarf asparagus fern, whether by cutting, sowing or division, all can survive, but the most suitable for home propagation are still sowing and division. Of course, methods are fixed while people are flexible; everyone can choose a method to propagate according to the actual situation. That is all for the introduction to the propagation methods for dwarf asparagus fern; I hope it can be helpful to everyone.