A Detailed Guide to Off-Season Peony Cultivation, Helping You Enjoy Colorful Seasons
Peonies generally bloom in April and May each year, but through cultivation, peonies can also be made to bloom off-season. So what exactly should be done when cultivating off-season peonies? Are there any methods, tips, or tricks? Let's take a detailed look together with the editor of Yiqizhuangxiu.com.
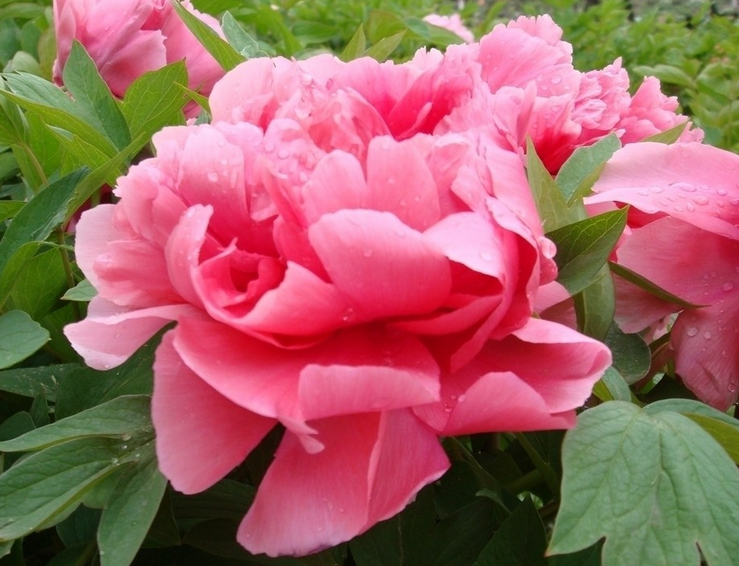
An Analysis of Off-Season Peony Cultivation Methods: Enjoy Colorful Seasons
Off-Season Peony Cultivation Methods
First, the nutrients of off-season peonies come from the root system. The more numerous and thicker the roots, the more abundant the nutrients. Therefore, when choosing potted flowers, pay attention to selecting peonies planted in appropriately larger and deeper pots when the plants are sturdy. It is best to have about 10 sturdy branches in one pot, most flower buds should preferably be at the initial opening stage, and the leaves should be flat, extended, and strong.
Second, peonies are light-loving plants. Off-season peonies simply involve controlling light, temperature, moisture, and so on to create a suitable environment and prompt them to bloom on demand, but they must still follow their light-loving nature. During the bud stage, they should be placed in a spot with ample light. During full bloom, they can be placed in a spot with diffused light. Only then will the incompletely developed buds develop normally, the buds will not become stunted, and the flowers will be large, firm, richly colored, and bright. Likewise, the leaves will be flat, extended, and sturdy.
If the edges of new peony leaves curl, scorch, or wither, it may be because the indoor temperature is too high and the humidity too low. Water should be sprayed on the leaves in time to increase humidity, and the air humidity should be relatively increased. In addition, it may be caused by placing the potted flowers outdoors or in a drafty spot indoors and exposing them to direct cold winter wind, causing freeze damage. The preventive measure is to avoid cold wind exposure.
For off-season peonies indoors, the daytime temperature is best above 10°C, and the nighttime temperature around 8°C. Although this will make some flowers that have already shown color open faster, it will also allow some buds that have not yet shown color to develop and bloom normally.
Because peonies have fleshy root systems, off-season peony plants do not need to be too moist, and the potting soil should be kept slightly on the dry side. Water about 250ml every 2-3 days. Also, be careful to remove flower buds on side branches in time to ensure only one flower at the top of each branch, and remove basal shoots and spent flowers at the same time.
After flowering, the soil should be changed in time. The potting soil for off-season peonies is mostly garden soil or fine soil mixed with coal cinder. Although it drains well, it has no nutrients. Choose a deep pot, place a layer of base fertilizer at the bottom, then cultivate with river sand and fertile garden soil mixed at 1:3. If roots are found to be rotten or dead, they can be cut off and disinfected with 1% copper sulfate or carbendazim powder.
Finally, note that when spring comes, as soon as flower buds appear on the plant, they should be removed in time to avoid a second bloom and excessive nutrient consumption by the plant. After buying off-season peonies and taking them home, a single flower generally lasts 3-5 days, and a single plant can bloom for 15-20 days.
Next let's look at the rejuvenation management methods for off-season peonies.
1. Hardening seedlings after flowering
For off-season peonies after the flowers fade, remove the remaining buds to reduce nutrient consumption. Adopt a method of gradually lowering the temperature, ventilate frequently, and gradually extend the ventilation time to enhance the plant's ability to adapt to the external environment. For watering, follow the principle of "do not water if not dry, and water thoroughly when watering," preventing both water shortage and root rot. Topdressing should also be increased and foliar fertilizer sprayed.
2. Repotting and transplanting
In April, as the outside temperature rises, the plant can gradually adapt to the external environment. At this time, the off-season peony should be removed from its pot and the original plant planted in the ground. It can also continue to be maintained in a pot, but ground planting gives better results. When transplanting, properly prune the branches and leaves of the plant, cutting off diseased and weak branches, leaving 4-6 healthy branches per plant, removing 1/3-1/2 of the leaf mass, and also removing diseased and rotten roots to promote new root regeneration, enhance water absorption capacity, and ease the water balance between the aboveground and underground parts. Apply sufficient base fertilizer when planting, and water thoroughly immediately after planting.
Afterward, carry out routine maintenance: for watering, follow the principle of "do not water if not dry, and water thoroughly when watering." On sunny days, spray the plant once a day until before the rainy season. Avoid water accumulation during the rainy season. Fertilization is carried out in the form of foliar spraying and liquid fertilizer watering, mainly with quick-acting fertilizers, following the principle of "small amounts, many times," applied about once every 20 days. During the rainy season, the concentration of liquid fertilizer can be appropriately increased, and foliar spraying can be done about once every 10 days. During cultivation, loosen the soil and remove weeds in time.
3. Shading for summer
During rejuvenation cultivation, because the plant is relatively weak, attention should be paid to shading the peony during hot summer weather and strong light. Generally about 50% sunlight is needed, and good ventilation must be ensured. At this time, water evaporation is very high, so watering should be timely, and after each watering, loosen the soil, remove weeds, and pay attention to pest and disease control. A soilless cultivation nutrient solution can be sprayed once a week, but remember not to apply topdressing. This is the key during this period.
4. Autumn and winter management
After the Start of Autumn, the temperature gradually decreases and rainfall increases, and the root system of off-season peonies grows rapidly. At this time, the concentration of liquid fertilizer applied can be appropriately increased, following the principle of "small amounts, many times," so that the root system grows rapidly and robustly. Foliar spraying is done about once every 10 days until leaf fall. In mid-to-late September, the shade net can be removed. Before winter begins, apply additional compound fertilizer. In winter, pay attention to cold protection and freeze resistance.
5. Rejuvenation management in the second year
After a year of maintenance and rejuvenation management, by the spring of the second year, the plant's growth vigor has gradually recovered. After the weather warms up in spring, supplement with quick-acting fertilizer. After leaves begin to unfold, carry out foliar spraying, using small amounts many times and light fertilizer frequently, once every 10 days, until leaf fall. At the same time, carry out root topdressing once a month. After a year of careful cultivation, some off-season peony plants can already show flower buds. To fully restore their growth vigor, all flower buds should be removed. It should also be noted that pest and disease control for peonies should focus on prevention.
An Analysis of Hibiscus rosa-sinensis Cultivation Methods: Teaching You to Easily Grow Hibiscus rosa-sinensis
Hibiscus rosa-sinensis is a famous flower in China, with large blooms and many flower colors. Although each flower fades quickly, blooming continues without end, the flowering period is long, and it blooms most abundantly in summer and autumn. It is deeply loved by people, and many want to grow Hibiscus rosa-sinensis themselves but do not know how. Let's take a detailed look together with the editor of Yiqizhuangxiu.com.
An Analysis of Hibiscus rosa-sinensis Cultivation Methods: Teaching You to Easily Grow Hibiscus rosa-sinensis
Hibiscus rosa-sinensis Cultivation Methods
1. Because Hibiscus rosa-sinensis is a sun-loving flower, it should be placed in a spot with long sunlight hours so it can fully receive sunlight. In summer, full sunlight can be given. Insufficient light easily causes flower buds to drop, flowers to become smaller, and flower color to become dull.
2. Both excessive dryness and excessive moisture will affect flowering. During the peak flowering period in summer, depending on the temperature and the dryness or moisture of the potting soil, water 1-2 times a day, but make sure to water thoroughly after the soil dries out, preventing root rot caused by high-temperature water accumulation. Watering is best done before 9 a.m. or after 5 p.m., minimizing the temperature difference between air temperature and water temperature. At noon, water can be sprayed on the leaves and around the flowerpot to lower leaf temperature and maintain air humidity. The flowers of Hibiscus rosa-sinensis are very delicate, and water must not be sprayed directly on the flowers, otherwise it can easily cause flower scorch.
3. Repot every year, using decomposed bean cake and poultry manure as base fertilizer, and afterward apply compound fertilizer that is well absorbed and quick-acting. Every 7-10 days, spray 0.2% potassium dihydrogen phosphate once on the leaves to promote emerald-green leaves and more flower buds.
4. Hibiscus rosa-sinensis is not cold-tolerant, so whether it can safely overwinter is key. The winter temperature should be kept at 12-15°C; below 5°C it is very likely to freeze to death. But note that the temperature should also not exceed 20°C, as too high a temperature will cause excessive growth of branches and leaves, affect dormancy, and lead to poor flowering the next year. In winter, the potting soil should maintain about 30% relative humidity, and large amounts of water should not be given. Generally no fertilization is needed in winter; if fertilizing at all, apply only a small amount of liquid fertilizer.
5. In spring, pruning should be carried out, leaving sturdy branches to ensure concentrated nutrients and more vigorous flowering.
Hibiscus rosa-sinensis Propagation Methods
1. Hibiscus rosa-sinensis cuttings
Cuttings are the most commonly used method for propagating Hibiscus rosa-sinensis. They can be taken anytime from early spring to late autumn, with the highest survival rate during the plum rain season. In winter, they can only be done in a greenhouse. The best cuttings are one-year-old semi-lignified ones, about 10 cm long; remove the lower leaves, keep the top leaves, make the cut flat, insert into a sand bed, spray water daily, and maintain relatively high air humidity. Roots form three weeks after insertion, and after 45 days of growth they can be potted. Generally, Hibiscus rosa-sinensis propagated by cuttings in the same year can bloom the following year.
2. Hibiscus rosa-sinensis air layering propagation
This is mainly for lignified branches and is relatively commonly used among woody plants. Hibiscus rosa-sinensis can also be tried with it. Compared with cuttings, air layering is safer, at least it will not die, haha. Below is a sample image of air layering; the plant in the image is not Hibiscus rosa-sinensis.
3. Ground layering propagation
This is also very simple: press the branches of Hibiscus rosa-sinensis into the soil to let them root, then cut them off after rooting. The principle is similar to air layering, only with slight differences according to actual conditions. These three methods are all very simple and highly practical, and flower enthusiasts can all give them a try.
An Analysis of Hibiscus rosa-sinensis Cultivation Methods
Hibiscus rosa-sinensis is a famous flower in China, with large blooms and many flower colors. Although each flower fades quickly, blooming continues without end, the flowering period is long, and it blooms most abundantly in summer and autumn. Many people want to grow Hibiscus rosa-sinensis themselves. Let's take a detailed look together with the editor of Yiqizhuangxiu.com at what cultivation methods there are for Hibiscus rosa-sinensis.
An Analysis of Hibiscus rosa-sinensis Cultivation Methods
Hibiscus rosa-sinensis Cultivation Methods
1. Because Hibiscus rosa-sinensis is a sun-loving flower, it should be placed in a spot with long sunlight hours so it can fully receive sunlight. In summer, full sunlight can be given. Insufficient light easily causes flower buds to drop, flowers to become smaller, and flower color to become dull.
2. Both excessive dryness and excessive moisture will affect flowering. During the peak flowering period in summer, depending on the temperature and the dryness or moisture of the potting soil, water 1-2 times a day, but make sure to water thoroughly after the soil dries out, preventing root rot caused by high-temperature water accumulation. Watering is best done before 9 a.m. or after 5 p.m., minimizing the temperature difference between air temperature and water temperature. At noon, water can be sprayed on the leaves and around the flowerpot to lower leaf temperature and maintain air humidity. The flowers of Hibiscus rosa-sinensis are very delicate, and water must not be sprayed directly on the flowers, otherwise it can easily cause flower scorch.
3. Repot every year, using decomposed bean cake and poultry manure as base fertilizer, and afterward apply compound fertilizer that is well absorbed and quick-acting. Every 7-10 days, spray 0.2% potassium dihydrogen phosphate once on the leaves to promote emerald-green leaves and more flower buds.
4. Hibiscus rosa-sinensis is not cold-tolerant, so whether it can safely overwinter is key. The winter temperature should be kept at 12-15°C; below 5°C it is very likely to freeze to death. But note that the temperature should also not exceed 20°C, as too high a temperature will cause excessive growth of branches and leaves, affect dormancy, and lead to poor flowering the next year. In winter, the potting soil should maintain about 30% relative humidity, and large amounts of water should not be given. Generally no fertilization is needed in winter; if fertilizing at all, apply only a small amount of liquid fertilizer.
5. In spring, pruning should be carried out, leaving sturdy branches to ensure concentrated nutrients and more vigorous flowering.
Hibiscus rosa-sinensis Propagation Methods
1. Hibiscus rosa-sinensis cuttings
Cuttings are the most commonly used method for propagating Hibiscus rosa-sinensis. They can be taken anytime from early spring to late autumn, with the highest survival rate during the plum rain season. In winter, they can only be done in a greenhouse. The best cuttings are one-year-old semi-lignified ones, about 10 cm long; remove the lower leaves, keep the top leaves, make the cut flat, insert into a sand bed, spray water daily, and maintain relatively high air humidity. Roots form three weeks after insertion, and after 45 days of growth they can be potted. Generally, Hibiscus rosa-sinensis propagated by cuttings in the same year can bloom the following year.
2. Hibiscus rosa-sinensis air layering propagation
This is mainly for lignified branches and is relatively commonly used among woody plants. Hibiscus rosa-sinensis can also be tried with it. Compared with cuttings, air layering is safer, at least it will not die, haha. Below is a sample image of air layering; the plant in the image is not Hibiscus rosa-sinensis.
3. Ground layering propagation
This is also very simple: press the branches of Hibiscus rosa-sinensis into the soil to let them root, then cut them off after rooting. The principle is similar to air layering, only with slight differences according to actual conditions. These three methods are all very simple and highly practical, and flower enthusiasts can all give them a try.