How to Propagate Michelia figo and Solutions for Yellow Leaves and Black Rot
Doesn't the name Michelia figo sound like a refined young lady, a bit shy and bashful? How do you propagate Michelia figo? And what should you do if black rot and yellow leaves appear during cultivation?
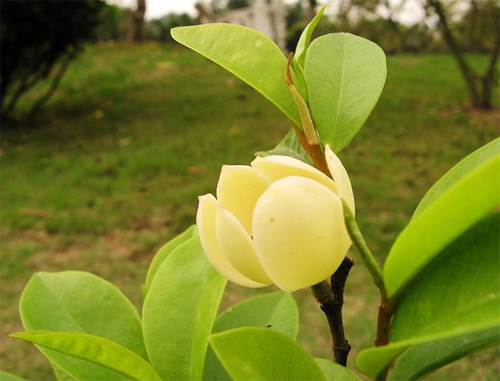
Propagation methods for Michelia figo:
1. Cutting propagation
The cutting method is best done from late July to early September. You can take a lignified branch that has not yet sprouted new buds but still has 3 to 8 leaves, or a terminal bud of about 15 cm, dip the base of the cutting in rooting powder, and insert it into sandy soil. Provide appropriate shade and keep the environment moist. Roots will form in about 2 to 3 months, and then transplant in the following spring.
2. Air layering propagation
For air layering propagation, select in April a well-developed, plump and robust 2-year-old branch. Make a ring cut 0.5 cm wide at a suitable spot on the branch, deep enough to reach the xylem, apply moist moss to the ring-cut area, wrap the outside with plastic film, and tie it tightly at the top and bottom. Roots will form in about 2 months. After the new roots have fully developed, cut it off and pot it up. After potting, water thoroughly, then water once a day or not at all. Begin fertilizing when the new shoot has grown to about 7 cm.
3. Grafting propagation
The grafting method, which is less commonly used in the industry, is best carried out from May to June, often using Magnolia as the rootstock, and after it takes, it can grow quickly. Michelia figo has thick, fleshy roots and does not tolerate transplanting well. If transplanting is truly necessary, it is best to keep more of the root ball, and pruning and shaping of the plant are best done before overwintering.
Pest and disease control for Michelia figo:
Common diseases of Michelia figo include leaf blight and anthracnose. When disease occurs, immediately remove the diseased leaves and burn them, and spray with medication.
For leaf blight, spray lime sulfur mixture once every 15 days in early spring; after the disease occurs, spray with zineb.
During the onset of anthracnose, spray with Bordeaux mixture or carbendazim, once every 10 days or so.
To control sooty mold, clean up diseased and dead leaves, with pest removal as the main measure. When pests and diseases are mild, you can wash with clean water and pay attention to proper ventilation and light penetration. When the disease is more severe, spray with tuzet solution, once every 10 days, and 2-3 times will suffice.
What to do about yellow leaves and black rot in Michelia figo?
Diseases of Michelia figo include black mold disease and chlorosis. You can spray Bordeaux mixture, or wipe away the mold stains with 5% alcohol;
Spray with ferrous sulfate solution to control chlorosis.
The main pests include scale insects, aphids and red spider mites, which can be killed by spraying with a 1000-1500 times dilution of 80% dichlorvos.
When controlling, first properly thin out overly dense branches to allow the tree body good ventilation and light penetration. When pest infestation is mild, you can manually remove them gently with a brush; during the nymph hatching period, you can spray with a 2000 times dilution of 40% omethoate emulsifiable concentrate to kill them.
That covers the propagation methods and some pest and disease control methods for Michelia figo.
How to Grow Dieffenbachia seguine 'Camille' and What to Do About Root Rot and Yellow Leaves
Dieffenbachia seguine 'Camille' is a very well-known foliage plant that everyone loves to grow. Its leaves come in two colors, and the leaves will not wither no matter the season. What are the cultivation methods for Dieffenbachia seguine 'Camille'? What should you do if root rot and yellow leaves appear during cultivation?
Cultivation methods for Dieffenbachia seguine 'Camille':
It likes a warm and humid environment. When grown indoors, you can spray water frequently, though the leaves are quite drought-tolerant. Generally, just keep it in a ventilated spot with bright light. It easily dies from exposure to intense sun, and the leaves will get scorched.
Except in summer, a little light in other seasons is fine. As long as the potting soil drains well, it can survive above zero degrees.
1. Potting soil selection
For potted plants, organic humus soil is best. A mix of sandy soil and humus soil gives the best growth. Drainage must be good, with no water accumulation. For ground planting, there is no need to be so particular; just find a shaded spot and plant it there.
2. Sunlight and temperature
It is a fairly shade-tolerant indoor plant and cannot tolerate intense sun. It is best kept in a shaded, ventilated spot where it can receive a little light. In winter, keep it warm and protect it from cold wind and frost damage. Its optimal growing temperature is 20-28 degrees, and it should be moved indoors in winter.
3. Watering and fertilizing
This plant likes a slightly moist and warm environment. If the environment is too dry, the leaf edges tend to scorch; if the potting soil is not loose or has water accumulation, the leaves tend to turn yellow. Normally, water only when the soil has dried out, and water thoroughly. You can spray water frequently.
There is no need to fertilize frequently; also follow the principle of light and infrequent fertilizing. Fertilize once each in spring and autumn.
4. Special note:
The entire plant is toxic, so do not ingest it by mistake. Its sap can easily cause skin itching, so do not get it in your eyes or swallow it by mistake.
Wear gloves when repotting, or disinfect and wash your hands afterward. Ordinary brief contact will not have any effect. This is the same as Alocasia macrorrhizos (most plants in the Araceae family are toxic; as long as you do not ingest them by mistake, there is no major problem).
5. Propagation introduction
Propagating this plant could not be simpler. Just snap off a segment at random, and it can grow whether in water or stuck into slightly moist sandy soil.
As shown in the picture above, just snap off a segment, or divide the plant when repotting; either way works.
Remove the lower leaves from the snapped-off rhizome, let the wound dry, then pot it up, and it will basically survive.
Of course, there are also some more extreme hobbyists who just cut it off directly. When planted in the ground, if it propagates too quickly, they sometimes cut it off to let it grow new small shoots. Don't worry that it will easily die; its small shoots grow out very quickly!
Before long, it will fill a pot again
Re-planted cuttings will also quickly grow side shoots. The soil chosen for propagation must be loose, well-draining and breathable.
What to do about root rot and yellow leaves in Dieffenbachia seguine 'Camille'?
It has very few pests and diseases. Generally, yellow leaves, root rot and stem rot are caused by improper care. Yellow leaves are usually due to overwatering; control water appropriately and improve ventilation. A stuffy, hot environment can also cause yellow leaves!
Another cause is leaves becoming scorched and yellow after intense sun exposure; find the cause yourself.
Root rot is usually caused by compacted potting soil, water accumulation, or overwatering; in rare cases, it is due to the potting soil not being sterilized and pathogen infection.
Cut off the rotten parts promptly, wash them clean, soak them in carbendazim (5 minutes), then replant in fresh potting soil.
That covers the cultivation methods for Dieffenbachia seguine 'Camille' and how to deal with yellow leaves and root rot during cultivation. Come and grow Dieffenbachia seguine 'Camille' now! Your home will have greenery all year round.
What to Do About Yellow Leaves in Gardenia and How to Grow Gardenia
Gardenia is also called yellow gardenia and zhizi. We often see it on Chinese soil, and it is now very popular among people. What should you do about yellow leaves in gardenia? Here we will tell you.
Causes of yellow leaves in gardenia:
First, improper watering
a. Overwatering: in this case, the young leaves of the gardenia turn dull yellow and lose their luster, but the old leaves show no obvious change. At this point, simply take the plant out of the pot and place it in a ventilated, shady spot, then put it back after the soil dries.
b. Lack of water: the leaf tips or edges wither and dry out, and the old leaves turn yellow from the bottom up and fall off, but in this case the new leaves grow relatively normally. At this point, water sufficiently and thoroughly.
Second, improper lighting
a. Excessive light: yellow spots appear on the sun-facing part of the leaves. At this point, simply move it to a shady spot for care and it will recover, and newly grown leaves will no longer have yellow spots.
B. Insufficient sunlight: at this point the leaves will turn yellow and even fall off. Just place it in the sun to supplement sunlight and it will be fine.
Third, improper fertilizing
a. Overfertilizing: mainly shown by brown tips on new leaves, thick but lusterless leaf surfaces, and old leaves turning scorched yellow and falling off. At this point, immediately stop fertilizing, and in severe cases, flush the soil to reduce the concentration. b. Insufficient fertilizer: insufficient fertilizer can also cause the plant to turn yellow, such as iron deficiency, where the leaves become pale yellow or white while the veins remain green. At this point, spray with 0.2%-0.5% ferrous sulfate solution for control; for magnesium deficiency, the old leaves turn yellow first, then the new leaves turn yellow, while the veins remain green. At this point, you can spray with 0.7%-0.8% boron-magnesium fertilizer for control.
Fourth, temperature too low. Too low a temperature can also cause leaf yellowing; just move it to a warmer place.
Solution: Gardenia likes sunlight by nature, but it is not suitable for direct exposure to strong sunlight. So when planting in the ground, there should be an environment shaded by large trees. Potted gardenias should be kept in a shady spot for care, and should not be placed on a balcony or terrace directly exposed to sunlight, otherwise the gardenia will easily be scorched, causing yellow and scorched leaves.
How to grow gardenia:
Placement: Gardenia likes a warm, humid and sunny environment, and avoids direct sunlight, otherwise the leaves will turn withered and yellow. You can place the gardenia in a spot with scattered light.
Temperature: The growing temperature for gardenia should not be too low. The suitable temperature during the growing season is 18-22°C. In winter, the temperature should be kept above 5°C. If it falls below minus 10°C, it will suffer frost damage. In the north, good insulation measures should be taken in winter.
Air humidity: Gardenia likes a humid environment. You can frequently spray clean water on the gardenia leaves to increase the air humidity of the surrounding environment.
Fertilizing: Gardenia likes fertilizer, but you must not add too much fertilizer at once. Be sure to fertilize lightly and frequently.
Pruning: Gardenia has lush branches and leaves, so it should be pruned regularly. When pruning, it is best to keep 3 main branches, and at any time cut off new shoots sprouting from root suckers. After the flowers fade, the branches should be cut back promptly. When the new branches grow three nodes, pinch off the tips to prevent blind growth.