Methods for Propagating Aglaia odorata (Mock Lime) from Cuttings and Post-Cutting Care Points
Aglaia odorata (Mock Lime) is a beloved flowering plant, its fragrance filling the air when it blooms. As an edible flower, it can be used to extract essential oils, such as Aglaia odorata flower tea. Potted Aglaia odorata can be displayed in the living room, study, and porch, offering a fresh and elegant atmosphere that soothes body and mind. In southern courtyards, Aglaia odorata is also an excellent landscape tree. Placed indoors, it can absorb sulfur dioxide and chlorine from the air, purifying it. Today, we bring you the cutting propagation method for Aglaia odorata. Let's take a look at the details.
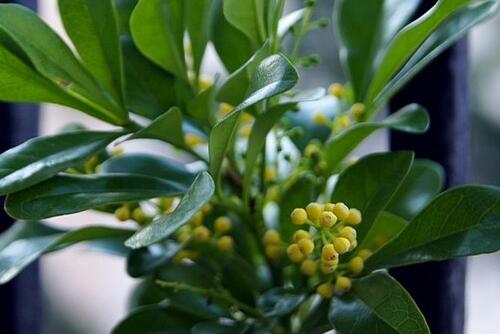
Cutting Propagation Method for Aglaia odorata:
Choosing the Medium:
Before cutting, a cutting bed must be prepared. Depending on the number of cuttings, use containers of different diameters. For fewer cuttings, a flower pot can be used; for more cuttings, a wooden box or other larger-diameter container can be used. Fill the bottom of the pot with broken tile pieces to enhance drainage.
Choosing the Branches:
The cutting method for Aglaia odorata is generally divided into two types: one using current-year softwood branches, and the other using older stems from the previous year. Each method has its pros and cons; choosing current-year branches gives a slightly higher survival rate.
Steps and Method:
Actually, the cutting method is very simple. Just follow the steps below.
First, insert the branch into the previously prepared soil and water thoroughly.
Then place the flower pot into a plastic bucket. You can place a brick at the bottom of the bucket, then add a small amount of water.
Then cover the bucket opening with glass. Open the cover every 3-5 days to let in air. #p#Subtitle#e#
Post-Cutting Care:
After cutting, place the plant in a shaded area for care, control the temperature at 25-28°C, frequently mist the leaves to increase the humidity of the surrounding environment and promote growth.
The cutting cycle for Aglaia odorata is relatively long, requiring 50-60 days to succeed. If during this period the branches do not wilt and the leaf color does not turn yellow, this indicates that the base of the branch has fully healed. After some more time, new buds will emerge between the leaf and stem, indicating that roots have formed.
TIPS:
This propagation method by cuttings is mainly carried out from June to August. You can cut healthy, already lignified current-year branches as cuttings, about 10 cm in length, leaving 2-3 small leaves at the tip, removing the lower leaves, and inserting them into a cutting bed with peat as the medium or sand and perlite as the medium, inserting about 4 cm deep. Then water thoroughly and seal the pot opening with plastic film to retain heat and moisture.
Maintain the indoor temperature at around 28°C and humidity at around 95%, keeping the cutting bed moist. Roots should form and the plant can be transplanted in about nearly 2 months. If before cutting, you soak the cut end of the cutting in a 500 ppm naphthaleneacetic acid solution for about 20 hours, rinse it clean, and then insert it, it can promote earlier rooting of the cutting.
How to Propagate Aglaia odorata: Sharing the Cutting Method for Aglaia odorata
For propagating Aglaia odorata, it is generally better to do so during the plum rain season in summer, because the temperature is high and humidity is high at this time, making propagation easy and more likely to succeed. So how do you propagate Aglaia odorata? The propagation methods for Aglaia odorata can generally be divided into three types: layering, air layering, and cuttings, with cuttings and air layering being the main methods. Below, follow the editor of wed114 wedding website to take a look at the cutting method for Aglaia odorata and related content.
Aglaia odorata Image
How to Propagate Aglaia odorata: Cutting Method for Aglaia odorata
Propagating Aglaia odorata by cuttings is simple and easy, and produces a large quantity. The cutting method for Aglaia odorata can be divided into two types: one is cutting with old branches from the previous year, which can be done from April to May; the other is cutting with current-year softwood branches, which can be done from June to July.
For selecting cuttings, whether using old branches from the previous year or current-year softwood branches, you should choose healthy, plump branches with good growth vigor as cuttings.
Softwood cutting propagation is generally done by collecting branches and cutting from June to July each year. Select healthy current-year branches, cut them to about 10 cm in length, remove the lower leaves, and keep 2-3 small leaves at the top. Before inserting, it is best to soak them briefly in vitamin B12 injection solution to promote rooting.
Use a flower pot as the cutting bed, with vermiculite or river sand as the cutting medium. Insert 4-5 cm deep, press firmly after inserting and water thoroughly, then cover with plastic film. Maintain high temperature and high humidity, with a temperature of 28-30°C. Afterwards, mist water 2-3 times daily to keep the soil layer moist. Roots will form in 40-50 days.
Aglaia odorata Image
How to Propagate Aglaia odorata: Air Layering Method
The air layering method is best carried out under conditions of relatively high temperature and high humidity. The layering time is generally from May to August, with early June during the plum rain season being the best, as the survival rate is high and rooting is fast. This is because during this period, the environmental humidity is relatively high. Practice has proven that air layers started during this period will successively root after 40 days, and by October, with proper care, they can even bloom 1-2 times. Starting air layering in July is also possible, but this is the peak of midsummer heat, with intense sun, rapid water evaporation, and dry conditions, so the branches and leaves at the air-layered site are prone to scorching, and healing and rooting will be slower. Therefore, after air layering, the potted mother plant of Aglaia odorata should be placed in a spot with half shade and half sun or half-day sunlight, otherwise it is prone to scorching.
For selecting the air layering site, without affecting the overall shape of the mother plant, choose a healthy, lignified branch from the previous year. At a length of 15-25 cm, remove the leaves and perform ring bark girdling.
For air layering, select healthy, pest-free current-year semi-lignified branches with a diameter of 0.5 cm or more. Make a ring bark girdle 7-8 cm below the branching point, wrap the girdled area with a mud ball or moist vermiculite and moss, then wrap tightly with plastic film, leaving an opening for watering. Keep it moist at all times. After 2-3 months, roots will form, and it can be cut from the mother plant and potted up, where it will bloom easily. Air layering can be divided into the pot-nesting type and the mud-wrapping type.
① Pot-nesting type: Select a healthy, one-year-old lignified branch, and fit over it a flower pot with an enlarged drainage hole at the bottom, making sure the pot sits securely and firmly. On the Aglaia odorata branch inside the pot, make a ring bark girdle 1 cm wide, then fill around it with soil and press firmly, water thoroughly. Afterwards, water daily, always keeping the enclosing soil moist. Generally, roots will form in two months; then cut it from the mother plant and cultivate separately.
② Mud-wrapping type: Select a healthy, one-year-old lignified branch. At a position about 10 cm from the base of the branch, make a ring bark girdle, keep 4-5 small branches above it, and cut off all lower side branches. Use pre-prepared mud (made by mixing fertile soil and moss, drying over a fire, then kneading with boiling water and letting it cool) to wrap the girdled area, then wrap the outside with plastic film, tie tightly with string, ensuring the bottom does not leak water while the top is slightly loose for adding water. The wrapped portion should be 10 cm long and 5 cm in diameter. Afterwards, add water daily to the wrapping to keep it moist. Roots will form in two months, then cut from the mother plant and plant separately.
For beginners at air layering, ring bark girdling is very important. If done well, most will root and survive; otherwise, they will not. The ring bark girdling method is: use a small knife to make two circular cuts at the selected branch location, with a spacing of 1.5 cm, without damaging the xylem, then peel off (or remove) the bark layer in between. However, the bark layer that should be removed must be peeled cleanly, peeling until the xylem appears all around and is smooth. Only then can it heal and root normally; otherwise, it is very difficult to survive.
You can also use the "fingernail peeling method." The method is: after selecting the ring bark girdling site, use your thumbnail to peel from top to bottom, peeling off the bark layer around a height of about 1-1.5 cm. The requirements for this peeling method are the same as above. After ring bark girdling, use pre-prepared mud (half a bowl of fertile soil plus half a bowl of moss, dried over a fire, then kneaded with boiling water) to wrap the girdled area, about 10 cm long and about 5 cm in diameter. Wrap the outside with plastic film and tie tightly with string so it does not leak water (the top opening should allow watering). If the air-layered branch extends horizontally rather than upward, use string to pull it toward the main trunk, or set up a separate support to facilitate watering. Always keep it moist; this is the key to survival. If one day you neglect to water it and the soil inside the plastic bag dries out, the new roots will immediately die. Generally, new roots will form in 2 months. If there are not many new roots, wait longer. As long as you manage it carefully and do not let it dry out, it will always root and survive.
To judge whether an air-layered Aglaia odorata has rooted, observe whether the leaves at the air-layered portion turn pale yellow (not scorched yellow) after air layering. If they appear pale yellow, it indicates that healing has begun. After some more time, if you can see through the plastic bag that white tender roots have grown and gradually fill the bag, it proves that it has not only survived but is growing well. At this point, you can cut it off together with the plastic bag using sharp scissors, gently remove the plastic bag (do not break the mud ball), plant it separately in another pot, water thoroughly, and place it in a half-shade half-sun or shaded area. After about 10 days, some yellow leaves will fall off, and it can be placed in a spot with sunlight. Soon after, new leaves will grow, flower buds will emerge, and fragrance will be released.
Aglaia odorata Image
How to Propagate Aglaia odorata: Cultivation and Management
Cultivation environment: For potted Aglaia odorata seedlings, pay attention to shading; avoid strong direct sunlight. After the seedlings grow new leaves, fertilize once every 2 weeks, but watering must be controlled and should not be too wet. Except for shading at noon in midsummer, it should receive plenty of sunlight, so that Aglaia odorata will not only bloom more frequently but also have a richer fragrance. North of the Yangtze River, it must be moved indoors for winter care.
Aglaia odorata prefers moisture, and watering should be moderate during the growing period. If watered too much, it easily causes root rot and yellowing and falling of leaves; if watered too much during the flowering period, it easily causes flower and bud drop; if watered too little, it causes dry leaf edges and withered buds. Therefore, when summer temperatures are high, besides watering 1-2 times daily, also frequently spray and wash the branches and leaves with clean water and sprinkle water on the ground where it is placed to increase air humidity. At the same time, fertilization should also be appropriate. Since Aglaia odorata blooms many times in a year, after each bloom, timely apply 2-3 rounds of fully decomposed dilute liquid fertilizer, so that it will bloom continuously with a rich fragrance. Aglaia odorata prefers acidic soil; for potting, use a culture soil mainly composed of leaf mold. During the vigorous growth period, spray 0.2% ferrous sulfate solution once a week, and the leaves will be green and the flowers abundant.
For potting, use loose soil with good drainage and aeration. Repot once every 1-2 years, and fertilize once every 1-2 weeks during the growing period. In the south, it is mostly planted in courtyards; in the north, it is potted, and in spring, summer, and autumn it should be placed outdoors in a spot where direct sunlight reaches it. In winter, move it indoors to a spot with direct sunlight, with a wintering temperature above 10°C.
After blooming, the mature mother plant produces small red fruits that are oval and resemble the fruit of the chinaberry tree. When the fruits turn reddish-brown, pick them, soak them in warm water until soft, peel off the fleshy fruit skin, and then sow the seeds immediately in a sandy soil pot. If sown in summer or autumn, they will germinate in about one month. Seedlings need two to three years to become mature plants before they can bloom, unlike small plants propagated by air layering, which can fill the branches with wonderful fragrance in the same year.
Reasonable fertilization. Aglaia odorata has strong flowering capacity and blooms many times, so nutrients must be supplemented in time. After each bloom of Aglaia odorata, promptly supplement nutrients. Insufficient fertilizer is the main reason why Aglaia odorata only grows leaves without blooming or drops leaves and buds. Therefore, when temperatures rise, Aglaia odorata should be moved outdoors for care. After one week, loosen the soil and apply some dilute nitrogen fertilizer. Either 10% to 20% decomposed cake fertilizer water or human manure and urine can be used. Afterwards, apply liquid fertilizer about once every 10 days to promote branch and leaf growth. Starting in June, Aglaia odorata enters its vigorous growth and flowering period, lasting until mid-October. Every 15 days or so, apply a stronger fertilizer mainly based on phosphorus fertilizer, or spray 0.3% monopotassium phosphate solution once every 15 to 20 days, and it will bloom even more abundantly.
Pay special attention that during the flowering period, phosphorus fertilizer must be the main component; otherwise, it will only grow leaves without blooming. During the flowering period from June to October, if fertilization is insufficient, not only will the number of blooms decrease and the flowers lack fragrance, but the flower buds that have already appeared will also wither and fail to open.
Aglaia odorata Image
How to Propagate Aglaia odorata: Pest Control
1. Aphids: Spray the plant with cigarette butt or chili pepper water. Spraying with 800 times diluted aphid-killing solution also works. If the number is small, use a small brush to remove them manually. For other control methods, refer to roses.
2. Scale insects: Spray with 1500 times diluted scale-killing solution. If the number is small, use a brush to remove them manually. For other control methods, refer to Clivia.
3. Red spider mites: Spray the plant with 1000 times diluted dichlorvos solution or 2000 times diluted dimethoate solution. For other control methods, refer to crabapple.
4. Sooty mold: This disease easily occurs under high temperature and high humidity with poor ventilation.
Cutting Method for Aglaia odorata: Soil Should Be Loose / Cuttings Should Be Healthy
There are many people in our country who grow Aglaia odorata, so many people are also quite concerned about how to propagate Aglaia odorata. In fact, there are many propagation methods for Aglaia odorata, among which cuttings is the most common method and has a very high survival rate. So what exactly is the cutting method for Aglaia odorata? Below, the editor will guide everyone to understand it.
Cutting Method for Aglaia odorata
Regarding the cutting method for Aglaia odorata, there are many points to note, such as the selection of soil and cuttings, and subsequent management. These points are introduced in detail below. Interested friends can take a look.
1. Soil Selection
Before cutting Aglaia odorata, we first need to choose the right soil, so that the survival rate will be relatively higher. For soil, we can choose relatively fertile and highly loose soil. This kind of soil has better drainage, which is more conducive to its growth.
2. Cutting Selection
In the cutting method for Aglaia odorata, the selection of cuttings is also very important. Whether the selected cutting is suitable directly determines the survival rate. In this regard, we should preferably choose branches that are relatively healthy and free of pests and diseases, so the survival rate will be higher. If the selected branch looks very weak, it will basically be difficult to survive.
3. Cutting Method
After completing the preliminary work, we can proceed with the cutting. As for what the cutting method for Aglaia odorata is like, it is actually very simple. First, we need to find a chopstick and use it to poke a hole in the center of the pot soil, then insert the cutting into the soil, and finally press the pot soil flat, after which we can water.
4. Watering Management
In the cutting method for Aglaia odorata, watering is also a very important part. After the cutting is completed, we need to water for the first time. When watering, it is best to use a spray bottle, so that the water is applied more evenly. Water thoroughly once, but do not cause water accumulation, otherwise root rot is very likely to occur. After 1-2 months of care, roots will form.
5. Follow-up Management
Once Aglaia odorata has rooted, the cutting is basically declared successful. Then we can proceed with normal care. For care methods, everyone can refer to the article on cultivation methods for Aglaia odorata, which has detailed instructions. The editor will not introduce too much here.