Do water-grown lilies need sunlight? What to do if the leaves turn yellow
Lilies are something many people absolutely love. The flowers are beautiful to look at and their meaning is quite good too. Let's take a look: do water-grown lilies need sunlight? What to do if the leaves turn yellow:
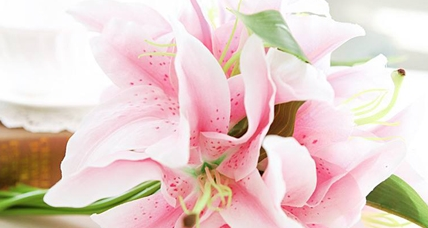
Do water-grown lilies need sunlight:
Water-grown lilies can be placed in sunlight, but you need to pay attention to the method. Most varieties of lilies prefer light; in the southern regions they should be planted in a shaded, semi-shady spot. Lilies do best in fertile, loose, well-drained soil, and their demand for humus is not too high. The pH should be neutral or slightly acidic. Lilies are short-day plants that require a warm, humid and cool climate, and they are afraid of high temperatures and intense heat.
Lilies are fairly easy to grow, but when grown in pots they generally degenerate. It is best to plant them in the ground. If you can only grow them in pots, choose a larger and deeper pot, because bulbous and scaly-bulb plants like lilies have very well-developed root systems, and lilies are special in that they have double roots: roots grow below the bulb, and roots also grow at the base of the stem. It is better to plant them deep and give them plenty of sun; wind and rain do not matter, and you do not need to worry about them freezing to death. However, if they are covered by snow in winter, it is best to clear the snow as soon as possible, because lily stems are very tender and can be crushed and broken, and once broken they cannot bloom.
What to do if lily leaves turn yellow:
1. Overwatering causes lily leaves to turn yellow (water-yellow): Tender leaves turn dull yellow and lose their luster, old leaves show no obvious change, branches are thin and yellow-green, and new shoots shrink and stop growing, indicating overwatering.
Solution: Take the plant out of the pot, place it in a ventilated, cool spot to let the soil ball dry on its own, then put it back in the pot.
2. Long-term lack of water causes lily leaves to turn yellow (drought-yellow): Yellowing from lack of water is different from yellowing from too much water. Drought-yellow shows as leaf tips or edges becoming withered and dry, with old leaves turning yellow and dropping from the bottom upward, but new leaves growing relatively normally.
Solution: Just be careful to water thoroughly and sufficiently.
3. Intense sun exposure causes lily leaves to turn yellow (sunburn-yellow): Strong direct sunlight shining on some shade-loving flowers easily causes leaf tips and leaf edges to wither, and yellow spots appear on the sun-facing parts of the leaves.
Solution: Simply move it to a shady spot.
Water-grown lilies can be placed in sunlight, and yellowing lily leaves can also be dealt with.
Causes of yellowing leaves on lotus bamboo and what to do about it
Lotus bamboo (Dracaena sanderiana) is a species in the genus Dracaena of the family Asparagaceae (formerly Liliaceae), suitable for water growing, potting and hydroponics. It has extremely high ornamental value and is one of the few greenery and decorative items that can be kept indoors for a long time. If the lotus bamboo you are growing has yellow leaves, hurry and take a look at the causes of yellowing leaves on lotus bamboo and what to do about it!
Causes of yellowing leaves on lotus bamboo:
Sunburn caused by intense sunlight
Lotus bamboo likes a shaded environment. Grown indoors with little light, it can still grow very well as long as water and nutrients are sufficient. Some growers worry it lacks light and place it on a balcony or windowsill, not knowing that strong light can damage lotus bamboo leaves. Strong direct sunlight shining on lotus bamboo easily causes leaf tips and leaf edges to wither, and yellow spots appear on the sun-facing parts of the leaves.
Yellowing leaves caused by lack of light
Although lotus bamboo likes a shaded, cool environment, leaving it in such an environment for a long time with no photosynthesis at all is also not good. Placed in a shaded environment for a long time, the leaves cannot get enough sunlight and cannot form chlorophyll, so the whole plant's leaves turn yellow and then drop.
High fertilizer concentration or too much fertilizer
Yellowing of lotus bamboo caused by too much fertilizer or too high a concentration shows as dry brown tips on new leaves; generally the leaf surface is thick and lacks luster, and is uneven and not spread out, while old leaves turn scorched yellow and drop.
Yellowing leaves caused by lack of fertilizer
Growers using soil culture or hydroponics have all had this experience: after not fertilizing the plant for a long time, they notice the leaves at the tips of the branches starting to turn yellow. This is yellowing caused by lack of fertilizer. It shows as tender leaves becoming lighter in color, turning yellow or pale green, while old leaves remain relatively normal or gradually turn from green to yellow.
What to do about yellowing leaves on lotus bamboo:
Handling light conditions
Lotus bamboo likes a cool, shady environment, but it cannot always go without sun. Occasionally move it outside for photosynthesis so the plant's leaves become greener and more beautiful.
When moving it out for sun, avoid sun exposure when the light is strong. Otherwise, strong light will scorch the leaves, and yellow spots are not good.
Handling water and fertilizer
If the fertilizer concentration is high or too much fertilizer was applied, stop fertilizing immediately; in serious cases, use a large amount of clean water to rinse out some of the fertilizer.
For yellowing leaves caused by lack of fertilizer, apply thin fertilizer frequently and add some alum water at the appropriate time. In addition, lotus bamboo is a foliage plant, so fertilizer mainly based on nitrogen should be applied, which can make the leaves dark green and fresh.
Complete guide to water-growing flower techniques
Complete guide to water-growing flower techniques
With advances in technology, hydroponic flowers are becoming more and more popular. Water-grown flowers are not only beautiful but also clean and tidy, making people feel relaxed and happy when they look at them! Below, we introduce the water-growing techniques for several common flowers!
Clivia (Clivia miniata)
The hydroponic method is as follows:
Choosing a container
To grow Clivia hydroponically, you must first choose a good container. Generally, a transparent glass container is best. If growing a single seedling, just a glass jar is enough. If growing many in water, you can weave a metal mesh with openings of 1 cm using thin wire, and make a glass hydroponic box slightly smaller than the metal mesh; or use a goldfish tank instead. Then cover the hydroponic box with the metal mesh, insert the Clivia seedlings through the mesh openings into the nutrient solution, with the depth of the flower roots in the solution not exceeding the pseudobulb at the base.
Preparing the nutrient solution
Nutrient solutions are divided into inorganic and organic types. The inorganic nutrient solution can be prepared in the following proportions: calcium 1.5 g, ferrous sulfate 0.01 g, urea g, monopotassium phosphate 1 g, magnesium sulfate 0.5 g. After these 5 inorganic salts are all assembled, dissolve them in 1000 g of water and it is ready to use. The organic nutrient solution is prepared as follows: 100 g of roasted hemp seed meal, 100 g of bone meal (made from unsalted fresh bones), 150 g of soybean cake meal, 50 g of roasted sesame powder, then dissolved in 1000 g of water. Comparing the two nutrient solutions, the organic one is rich in ingredients but has low nutrient content, while the inorganic one has relatively single ingredients but strong fertilizer effect and quick results. To make up for each other's shortcomings, the two can be used together. If used alone, apply the inorganic fertilizer once a week and the organic fertilizer once every 5 days.
Water to use
For hydroponic Clivia, you cannot use tap water directly; you must use water that has been "aged." So-called "aged" water means putting tap water in a container and exposing it to sunlight for 3-5 days, so that bleaching powder and other chlorides harmful to Clivia roots settle out. In "aged" water, from the appearance, the sediment changes from strips to clumps, and the water color is best when green. After the water is "aged," when submerging the root area, you must not submerge the pseudobulb. If the water level is too shallow, Clivia cannot get a sufficient water supply; if the water level is too deep (submerging the pseudobulb), it will cause root rot. During cultivation, pay attention to observing changes in water quality. If the roots are somewhat yellow or black, it means the water has both too little oxygen and too little fertilizer, and you must change the water immediately.
Air, sunlight, temperature
Whether the ventilation around the roots of hydroponic Clivia can be handled well is the key to success or failure in hydroponics. After a period of cultivation, a layer of moss grows on the roots of hydroponic Clivia. When the moss is too thick, it seriously affects root respiration and corrodes the nutrient solution. At this time, use a soft, clean bristle brush to gently brush away the moss layer on the roots (there is no need to brush it very clean, because a small amount of moss on the roots has little effect). In addition, always check whether the oxygen in the water is sufficient. The checking method is: put two or three small fish into the hydroponic box. If the small fish swim freely in the water, it means the water is not lacking oxygen; if the small fish always float to the surface with their mouths and gills exposed to breathe, it means the water is lacking oxygen. After discovering a lack of oxygen in the water, you must replenish oxygen. There are two methods: one is to change the water, and the other is to use a small oxygen pump to supply oxygen to the water. In terms of sunlight, Clivia is a semi-shade, semi-sun plant, so pay attention to light. Especially in summer, avoid direct strong sunlight and let it receive scattered light. In addition, according to the light-facing characteristic of Clivia leaves, pay attention to making the leaves receive light evenly; otherwise the leaves will differ in length and the growth direction will also be staggered front and back. Generally, adjust the lighting angle once every two or three days. In terms of temperature, the suitable environmental temperature for adult Clivia is 11°C-25°C; seedlings can be slightly higher, 20°C-35°C is fine. When growing Clivia in water, master the day-night temperature difference. In winter, keep it around 20°C during the day and not lower than 15°C at night.
Chinese rose (Rosa chinensis)
After Chinese roses finish blooming, cut off the spent flowers and let the flowering branches grow for several days. Wait until the first axillary bud on the flowering branch grows thicker and sturdier and accumulates nutrients, then cut a 3-node cutting, remove the leaf stalk at the bottom layer, use a sharp blade to cut the back side of the bottom bud into a slant, and immediately insert it into a prepared bottle full of clean water. The cutting can be inserted 1/3 into the water. To reduce water evaporation from the leaves, some leaves can be trimmed off. In dark conditions, the cut easily grows new roots, so use a brown bottle. If there is no brown one, wrap the bottle in a layer of black plastic film. Place the bottle on a south-facing windowsill, but do not put it in direct sunlight.
When the temperature is relatively high, change the water once a week. At temperatures of 15-25°C, roots can grow in only about 20 days. When the young roots grow to 1-2 cm long, they can be transplanted into pots. Because the young roots grew in water, to help them adapt to the environment, water once a day at first when transplanting, then gradually reduce. After shading for one week, they can receive sunlight morning and evening, and they will survive.
The advantages of the water-cutting method are: the method is simple, the survival rate is high, it is not limited by season, and cuttings can be taken right after the flowers fade...
Azalea (Rhododendron)
The characteristic of soilless cultivation is replacing soil with artificially made substrate. The Hunan Provincial Forestry Research Institute used solid substrate for soilless cultivation of azaleas and obtained very satisfactory results. The variety was summer azalea. The soilless-cultivated plants had compact crown structure, abundant flowering, large flower diameter and few pests and diseases. It not only improved flower quality but also greatly reduced heavy physical labor, making it a cultivation method worthy of vigorous promotion.
1. Preparation of the substrate
Azalea roots are very fine, requiring loose substrate to facilitate aeration and drainage. Use 1 part vermiculite, 1 part pearl sand, 1 part river sand and 1 part coal cinder mixed in proportion. After mixing, sterilize the substrate with 0.1% carbendazim solution, mix it evenly into the substrate, and cover with plastic film for 1 day. Then rinse it repeatedly with clean water. After air-drying, mix evenly with 0.4% agricultural compound fertilizer solution, cover again with plastic film for one month, and then it can be used for potting.
2. Preparation of the nutrient solution
Azaleas have relatively strict fertilizer requirements. During the growing period, apply thin fertilizer frequently. According to experiments, using agricultural compound fertilizer as the main component, supplemented with trace elements, controlling the pH at around 5, and spraying low-concentration foliar fertilizer can achieve good results.
Preparation of macronutrients: add 2 g of agricultural compound fertilizer and 0.5 g of magnesium sulfate to 1 liter of water as the standard solution.
Preparation of trace elements: add 20 g of disodium edetate, 15 g of ferrous sulfate, 4 g of manganese sulfate, 6 g of boric acid, 0.2 g of zinc sulfate, 0.1 g of copper sulfate and 0.2 g of ammonium molybdate to 1 liter of water as the stock solution. When using, add 1 ml of trace element stock solution to 1 liter of standard solution to make the full-strength element solution. Preparation of foliar fertilizer: add 1 g of urea, 1 g of monopotassium phosphate, 0.02 g of boric acid and 0.1 g of V.B1 to 1 liter of water.
3. Water and fertilizer management
Because the substrate has good drainage and aeration but poor water retention, the watering amount is generally a bit more than for soil cultivation, just enough to keep the substrate moist. At this time it is exactly the period of bud formation and leaf bud sprouting, so fertilizer demand is relatively high; water with full-strength nutrient solution about once every 10 days. From March until the flower buds open, spray foliar fertilizer about once every 15 days. After flowering, water demand is high, so besides watering every day, sprinkle water on the leaves in the evening. At this time fertilizer demand is also high, so you can change to watering with nutrient solution once a week and spraying foliar fertilizer once, to promote sturdy new branches and benefit flower bud differentiation. After the dog days begin, pay attention to keeping the substrate moist and sprinkle water on the leaves; the fertilizing amount can be reduced to watering with nutrient solution about once every 20 days. After autumn cools, gradually increase the amount of fertilizer, apply full-strength nutrient solution about once every half month, and spray foliar fertilizer 1-2 times to promote healthy and strong growth of flower buds. After winter begins, azalea physiological activity is weak, so it is not suitable to fertilize; just water appropriately according to how dry or wet the substrate is. During the cultivation process, basically no pests or diseases occurred.
Hyacinth
Hyacinth is a plant in the family Asparagaceae (formerly Liliaceae) and is also a bulbous flower. The hyacinth inflorescence is full, the colors are diverse, and the root tendrils are pure white.
Key points for hydroponics:
(1) Choose a container whose mouth can hold the bulb in place, preferably a gourd-shaped container that is small at the top and large at the bottom, with transparent glass being better. Some household items such as goblets and wine bottles can also be used, and wide-mouthed containers can also be chosen.
(2) The water temperature should not be high; below 15°C is better.
(3) Place the bulb on the bottle neck. After roots begin to grow, lower the water level until the roots just touch the water surface. This allows the roots to fully absorb oxygen and promotes root tendril growth. After the roots develop, cover the cultivation container with black cloth to let the bulb develop further.
(4) In winter, move the container to a place with sufficient sunlight to encourage larger and stronger flowers.
(5) You can also plant several hyacinths in a fish tank, using sand as the substrate and adding shade-loving ferns to form a small scene full of wild charm, which is also very unique.
Gerbera (Gerbera jamesonii)
A perennial herb in the Asteraceae family, with relatively large flower diameter, rich flower colors, and blooming all year round. It likes a warm, sunny and airy environment, is a semi-cold-tolerant flower, and likes fertile, loose soil. Gerbera is a very good cut flower variety, lasting a long time in water and highly ornamental, and it is also good at absorbing formaldehyde.
Growing these plants in water generally requires no special management. Any container with a certain volume that allows roots to spread can be used, and glass containers with open mouths are more favorable for maintaining water quality and root growth. When planting, avoid letting leaves sink into the water to prevent rot; place them under suitable light conditions and they will soon take root; when you notice the water is low, add some water to prevent the roots from drying out; when the water becomes cloudy, take out the plant, clean the container, and refill with water. Generally for water-grown plants, change the water once every three days and apply nutrient solution once; the ratio and amount of nutrient solution depend on the size of the plant.
Asparagus fern (Asparagus setaceus)
Family and genus: Asparagaceae (formerly Liliaceae), genus Asparagus
Morphological characteristics: The asparagus fern has an elegant plant shape, with slender and beautiful leaf-like branches shaped like cloud layers, resembling bamboo but not bamboo, with a clear and free posture. Its water-grown roots are fleshy and pure white. Paired with a scenic transparent container, it is both dignified and beautiful and appears noble and elegant, making it an excellent choice for hydroponics.
Growth habits: Likes warm, humid and semi-humid environments, suitable temperature 15-25°C, minimum winter temperature not lower than 5°C, likes scattered light, avoids direct strong light, and avoids dry air.
Key points for hydroponics:
1) Material selection: Choose a soil-grown plant with a good plant shape and vigorous growth, wash off the soil and cut off rotten roots, then plant it in a hydroponic container, adding clean water up to one-third to one-half of the root system.
2) Maintenance: At first, change the clean water once every 2-3 days and remove rotten roots promptly. After two weeks, the root system has basically adapted to the environment and has grown water roots. After that, change the clean water once every 5-6 days. When the plant shows relatively strong growth, switch to nutrient solution culture. The nutrient solution should be shallow rather than deep. In summer, replenish it about once every 10 days. When the sediment in the nutrient solution increases enough, replace the nutrient solution; generally replace it once every 1-2 months. In summer, avoid direct strong light; in winter, place it in a warm place with relatively strong light.
Keep the room temperature above 5°C. When the air is dry, often spray water on the leaves to maintain relatively high air humidity and keep the branches and leaves clean.
Ivy (Hedera helix), also known as English ivy
Family and genus: Araliaceae, genus Hedera
Because of its dense vines and leaves, it is the most ideal material for vertical greening of indoor and outdoor walls, and it is also an excellent groundcover plant. It is suitable to let it climb on buildings, walls, steep slopes, rock faces and ground under tree shade. The demand for potted plants is increasing day by day.
(1) Morphological characteristics and varieties
Evergreen climbing vine, with slender and soft branches and vines, bearing aerial roots. The vine tips grow in a spiral shape and can climb onto other objects. Leaves alternate, leathery, dark green, with long stalks. Leaves on vegetative branches are triangular-ovate, entire or with 3 shallow lobes; leaves on flowering branches are ovate to rhombic. Racemose inflorescence, small spherical flowers, pale yellow. Drupe spherical, black.
Commonly cultivated plants in the same genus include Chinese ivy (H. nepalensis var. sinensis), Japanese ivy, variegated ivy (CV. discolor), goldheart ivy, silver-edge ivy (CV. siluerquetn), etc.
(2) Ecological habits
Ivy is a typical shade-loving vine, but it can also grow in full-light environments. It grows well under warm and humid climate conditions and is not cold-tolerant. It is not strict about soil and likes moist, loose, fertile soil, and is not salt-alkali tolerant.
(3) Propagation method
The nodes of ivy can naturally take root in humid air, and after touching the ground they will naturally enter the soil. Therefore, cutting propagation is mostly used. Use vegetative branches as cuttings. After cutting, shade promptly, keep air humidity high, and do not let the bed soil be too wet. Roots will form in about 20 days.
(4) Cultivation techniques
Ivy cultivation and management are simple and extensive, but it needs to be planted in a place with moist soil and air circulation. Transplanting can be done in early autumn or late spring. After planting, pruning is needed to promote branching. In the south, it is mostly planted in shaded spots in gardens, letting it naturally creep on the ground or on rockeries. In the north, it is mostly potted. Potted plants can be tied to various supports and trained into shape. In summer, maintain them under a shade frame, water less, otherwise stem rot is likely to occur. If this disease occurs, separate diseased plants from healthy ones, and alternately spray carbendazim and thiophanate-methyl. In winter, put them in a greenhouse to overwinter. Indoors, maintain air humidity and do not let it be too dry, but the potting soil should not be too wet. Hydroponic ivy can use whole plants or cuttings, and it is best done in spring and autumn. After the root system grows roots in the cutting bed, it can be placed in a planting basket for root induction and variation. Once cultivated well, ivy is extremely easy to maintain and also clean and hygienic, making it an excellent item for viewing at home. For well-cultivated plants, you can use general-purpose nutrient solution from the market or foliage plant nutrient solution. The nutrient solution concentration is generally 1/4 of the original formula.
(4) Other effects
Ivy is not only a very good landscaping plant; the whole herb can also be used as medicine. It has the effects of dispelling wind, promoting diuresis, activating blood and reducing swelling, and mainly treats rheumatic joint pain, waist pain and traumatic injuries. Grinding it into juice or decocting it in water to wash the affected area can treat sores, swellings and toxic conditions, urticaria and eczema.
Euphorbia (Euphorbia)
Euphorbia is usually propagated by cuttings. From April to early September, cut healthy and vigorous branches as cuttings. The wound on the newly cut stem segment will exude white latex. You can dip it in plant ash or charcoal powder to stop the latex from flowing out, then dry it in a cool, ventilated place for 3 to 4 days. After the cut has shrunk and dried, insert it for cutting. Euphorbia is not closely related to aquatic plants. When hydroponically growing it, you must strictly follow the principles of pollution-free cultivation and regularly replace the nutrient solution frequently to increase dissolved oxygen. In winter the temperature must not be too low, otherwise it will drop leaves. The nutrient solution concentration must not be too high, and it must not be overly shaded, otherwise it will revert to ancestral traits and grow the columnar fleshy stems of the original species, affecting the ornamental effect; in serious cases it will cause root rot and death. The white latex of Euphorbiaceae plants is toxic. Especially do not let it get into the eyes, and be careful not to let children accidentally get it into their mouths or eyes.
Agave
Common variants of agave include: golden-edge agave, golden-center agave, silver-edge agave, green-edge agave and narrow-leaf agave, etc.
It is robust by nature, likes sunlight and is not shade-tolerant. It is slightly cold-tolerant and can be grown outdoors at temperatures above 5°C. Adult agave leaves suffer only mild frost damage at a low temperature of -5°C; at -13°C the aboveground parts freeze and rot, but the underground stem does not die and can sprout and grow leaves normally the next year. It has strong drought tolerance. It likes well-drained, fertile and moist sandy loam. In its place of origin it generally takes several decades to bloom, and after blooming the mother plant dies. It does not bloom in the Nanjing area. Cross-pollination is required for it to set seed.
Agave can be hydroponically grown all year round in a heated environment. During hydroponics, all its roots need to be removed, disinfected with a disinfectant solution, then soaked in rooting solution for a certain time. During hydroponics, be careful that cabbage caterpillars eat its leaves and heart, thereby losing commercial and ornamental value. If insects are found, they can be caught manually, or insecticide can be used to kill them.
For hydroponic root-viewing plants, often take them to a sunny place; do not leave them in a dark place for a long time, otherwise the leaves easily turn white and become thin, thereby losing ornamental value. In winter, pay attention to keeping them warm. During the day, place them by the window where there is sunlight; at night, in rooms without heating, put the glass bottle in plastic or a cardboard box. If the leaves turn yellow or droop listlessly, it may be frost damage, and at this time you need to give it some warmth-preserving measures. Then place it away from doors and windows, and remember not to put it in a place facing north. When changing the water in winter, you can use warm water of 12°C to 18°C. Agave is highly resistant, and as long as you pay attention to management it can overwinter safely.
Money tree (Pachira aquatica)
The money tree has a graceful posture, a majestic leaf crown and emerald-green leaves. Placed in a family living room, it is both elegant and generous, and also likable.
The money tree is a perennial evergreen shrub, native to the Malay Peninsula and the Nanyang Archipelago area. In recent years, through cultivation and selection, it has widely entered urban and rural households in our country. For home cultivation, based on its living habits of liking high temperature and high humidity and not tolerating frost or dryness, focus on grasping the following four points:
First, pay attention to sunlight. The money tree likes high temperature, humidity and sunlight, and cannot be shaded for a long time. Therefore, during maintenance and management it should be placed in a sunny indoor spot. When placing it, the leaf surface must face the sunlight. Otherwise, because the leaves are phototropic, the entire branches and leaves will twist. In addition, every 3 to 5 days, use a spray bottle to spray water on the leaves once. This not only helps photosynthesis but also makes the branches and leaves look more beautiful.
Euphorbia trigona (African milk tree)
Hydroponic method for Euphorbia trigona
Family Euphorbiaceae, genus Euphorbia, also known as triangular spurge. Native to South Africa.
Characteristics
Euphorbia trigona is a perennial succulent plant. The stem is upright, with 3-4 ribs, dark green, and the center of the stem has irregular beautiful gray-green markings. The rib edges have tooth-like protrusions, and obovate leaves grow at the protrusions. It has many branches, all growing vertically upward, forming a unique plant shape. The whole plant contains repeated latex. Euphorbia trigona has a peculiar shape and is rich in exotic flavor, making it an excellent choice for tabletop greenery decoration.
Habits
Euphorbia trigona likes semi-shade but requires sufficient scattered light. It can tolerate a low temperature of 5°C. Euphorbia trigona likes dryness and avoids long-term moisture, yet it is very suitable for hydroponic conditions.
Propagation
Euphorbia trigona is usually propagated by cuttings. From May to September, take branches about 10 cm long from the mother plant as cuttings for propagation. The cut cuttings should not be inserted immediately; inserting immediately will cause the cut to rot and lead to failure of the cutting. The cut of Euphorbia trigona will exude latex. When cutting, dip it in plant ash or charcoal powder, and dry it in a cool place for several days. After the cut is fully dry, insert it for cutting, and it roots very easily.
Key points for hydroponic maintenance
1: If mealybugs occur, besides moving it to a ventilated and light-transmitting place, you can use a toothbrush to brush off the mealybugs and then spray 250 times diluted washing powder solution to kill them.
2: The white milky liquid in the stem of Euphorbia trigona is toxic. Especially be careful not to get it into the eyes.
Methods for obtaining hydroponic material
Cuttings and root washing. Cut branches should first be dried in a cool, ventilated place for several days. After the cut is dry, insert them into water, otherwise they will rot. After one month, new roots can grow.
Cyclamen
Hydroponic method for cyclamen
Choosing cyclamen and container: Choose 1-year-old to 3-year-old cyclamen plants that are free of pests and diseases, growing vigorously, and with buds about to open. It is best to use soilless cultivation substrate such as perlite, vermiculite, wood chips, etc. After a change of environment, they do not damage roots, do not need slowing down, and adapt quickly. Water-growing containers are simple and economical, and in daily life can serve to reuse waste. Any container that can hold water, such as fish tanks, teacups, beverage boxes, wine bottles, and vases, can be used; transparent containers are best, as roots, stems, leaves, flowers and fruits can all be fully viewed. No matter what container is used, its size, height and color must all be coordinated with the cyclamen plant, so that the exquisite, crystal-clear and elegant charm of the water-grown cyclamen can be shown.
Water culture timing and method: Cyclamen generally blooms from October to June of the following year, so the water culture period is generally from September to April of the following year. Remove the selected cyclamen plant from its pot, wash the substrate clinging to the roots with warm water at 20°C, being careful not to damage the roots. Then place it directly into a previously prepared container, with the water level even with the root zone, and no deeper than 1/3 of the corm, to avoid corm rot. Finally, place it in a suitable indoor location, adding water and nutrient solution regularly. After two to three months of water culture, once the flowers fade, take the plant out and plant it in a growing substrate to spend the summer.
Water quality and water temperature: The water used for water-cultured cyclamen is best as mountain spring water or magnetized water, with clean water quality that is not cloudy and does not form sediment, and that contains various trace elements essential to plants; no water changes are needed throughout the entire water culture period. Tap water contains chlorine, which is unfavorable for flower growth, and it easily becomes cloudy and forms sediment, requiring water changes every few days, so it should be avoided as much as possible. The water temperature should be close to the indoor temperature at the time, generally 10°C to 20°C.
; Light and indoor temperature: Cyclamen likes a sunny environment. The water culture container should be placed on an indoor tabletop or windowsill with ample sunlight, not directly on a radiator. The most suitable indoor temperature is 15°C to 20°C, with a maximum not exceeding 25°C and a minimum not below 10°C. Adding nutrient solution: Water-cultured cyclamen also needs regular nutrient supplementation during the flowering period. Generally, every 10 days, add 50 ml of 1:100 diluted flowering-plant nutrient solution per plant; mountain spring water should also be used to prepare the nutrient solution. If yellow leaves, small leaves, small flowers, etc. are found, after ruling out root rot, an appropriate amount of additional nutrient solution may be added as circumstances require.
Ribbon grass family and genus name:Poaceae
Latin scientific name:Arrhenatherumelatius
Characteristics:Perennial herb
Plant height:Height 50-100 cm
Flowering period:Summer (June-August)
Cold hardiness: Cold hardy (above -5°C)
Shade tolerance:Sun-loving
Morphological characteristics:Underground stems are white and bead-like; aboveground stems are clustered and smooth. Leaves are clustered, linear-lanceolate, 30 cm long, about 1 cm wide, with yellow-white margins. The panicle has a long stalk, about 50 cm, and is branched; spikelets have two flowers, the upper flower bisexual or female, the lower male; flowering period June-July. Native to Europe.
Habits:Extremely robust, cold hardy and drought tolerant, not selective about soil. In midsummer, the aboveground parts often wither and go dormant, then sprout and grow again in early September.
Propagation and cultivation:Usually divide plants once every 2-3 years, in spring from March to April or in September after dormancy when new leaves first sprout. Dig up the old plant and separate it, with each division preferably bearing 2-3 new shoots, separated together with the bead-like underground stems. Old plants should be pruned carefully every year, and leaves should not be too long; when the underground stems are exposed, soil should be mounded promptly, so the clump remains vigorous and graceful. If too much fertilizer is applied during cultivation, or if fertilizer is excessively lacking, the white spots on the leaves will disappear and they will turn entirely green, affecting the ornamental effect.