A Detailed Guide to the Correct Pruning Methods and Propagation Techniques for Holly
Holly is a common woody plant, and people can often see its lush green figure near flowerbeds. Many people also grow a few holly plants in their own yards.
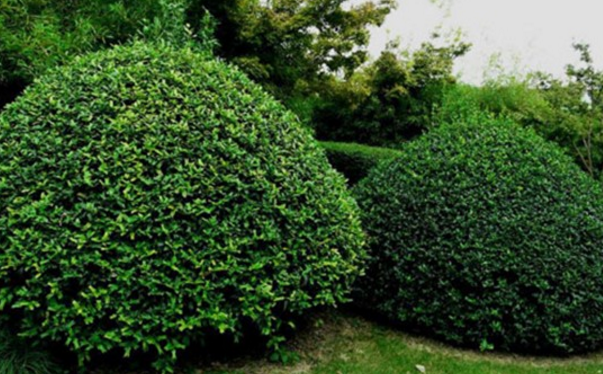
How to correctly prune holly
1. The pruning time for holly
The branches, leaves and young buds of holly grow very quickly, and many new buds sprout every year, so holly is a very pruning-tolerant plant, and there is no need to worry that excessive pruning will affect the plant's growth.
In summer, holly has more branches and leaves and grows more vigorously, so pruning can be done in summer. By autumn, you can prune holly into the ideal shape according to your design. At this time, in addition to shaping the holly, you should also thin out some of its branches.
2. The parts of holly to prune
We generally prune the thin, curved branches of holly that have weaker growth vigor, usually cutting off about one fifth of the whole branch and keeping only the flower bud portion, and appropriately pruning the flowering branches at the top of the holly crown.
We can also prune it into a suitable shape according to the needs of garden decoration. Generally, appropriate pruning should be carried out according to the growth condition and crown form of the holly. When pruning, you can cut the holly a little lower than your ideal height, and the holly will soon grow to a suitable shape and size, looking more natural.
After pruning holly into the ideal shape, you should regularly prune the newly grown branches, because holly has very strong growth ability. If it is not pruned in time, the holly shape that has already been created will easily be ruined.
When pruning, also pay attention to pruning some side branches to increase the light penetration and air circulation of the holly, which can prevent pests from reproducing.
3. Care after pruning holly
After pruning branches, wounds will appear on the holly tree. We should pay attention to preventing wound infection, which can cause diseases in the holly tree. Infection of the cuts can easily cause branch blight in holly trees. If symptoms appear, drugs should be used promptly for treatment. A little quicklime can be applied to the wounds to prevent infection.
What propagation methods are there for holly
1. Seed propagation of holly
Collect ripe holly fruit in autumn, rub off the fruit skin and wash it clean with water. The seeds need to be stratified for germination; they can be treated by low-temperature stratification with wet sand and sown before March of the following spring. Seedlings grow slowly in the seedling stage, so attention should be paid to care and management. If holly seeds are not treated for germination, they often do not sprout until the year after next.
2. Cutting propagation of holly
Cuttings of holly can be taken in all four seasons, and it is suitable to do so in late spring and early summer and in late summer and early autumn. Generally, softwood cuttings are taken during the plum rain season. The cuttings are 6 to 8 cm long; remove the lower leaves, keep 1-2 leaves and shorten them, insert to a depth of 1/2. Sandy soil should be used as the substrate. After inserting, build a shade frame, spray water frequently, and keep the soil moist. Roots can form in about one month.
3. Precautions for holly propagation
After the seedlings have been cultivated in the nursery for 2 or 3 years, they can be transplanted and planted out. Transplanting is best done in spring. Be careful and meticulous when digging up the seedlings to avoid damaging the roots, and transplant with soil around the roots. At the initial planting stage, do well in intertillage and weeding, water reasonably, and strengthen management. In addition, holly is easily harmed by white wax scale and sooty mold, so pay attention to timely prevention and control.
After holly cuttings are taken, a shade frame needs to be built to reduce transpiration and also weaken direct sunlight on the seedbed. If cuttings are taken in early spring or late autumn, plastic film needs to be added to prevent winter damage. After cuttings are taken, water frequently to keep the soil moist. Topdressing for cuttings can be done together with watering, or potassium dihydrogen phosphate plus urea can be used for foliar spraying. Weeding should be done carefully to avoid knocking against the cuttings.
Fruit tree planting methods_When is the best time to plant fruit tree saplings?
Content summary: Fruit has rich nutritional value and a delicious taste, and is the best choice for modern health nourishment. Growing fruit trees at home yourself and enjoying the fruits of your own labor has become the best way to relax in your spare time. To have comprehensive fruit tree planting techniques, you should first master fruit tree planting information, so when is the best time to plant fruit tree saplings? What are the fruit tree planting methods?
[Complete list of fruit tree sapling varieties]
Varieties for potted planting: sugar mandarin, orange, lemon and many others.
Varieties for courtyard planting: apple, snow pear, lychee, mango, wampee, wax apple, perfume lemon, Sanhua plum, hawthorn, fig, papaya, grape, Hami melon, sugarcane, emblic, banana, blueberry, peach, cherry and many others.
Varieties for hillside planting: sugarcane, loquat, persimmon, fig, wax apple, ganlian, chestnut, walnut and many others.
[When is the best time to plant fruit tree saplings]
Planting time
The planting of fruit tree saplings has certain planting rules. Spring planting is mostly chosen. To improve the survival rate of planting, it is generally possible to choose March-April in spring. During this stage, the temperature is suitable, neither severe heat nor severe cold, and the seedlings are easy to survive.
Planting precautions
1. Climate observation: First, a suitable planting site should be chosen according to the variety of fruit tree sapling you are planting. Certain consideration is required for climate, temperature, humidity, light, ventilation and so on. Second, for the planting of fruit tree saplings, market seedlings are mostly chosen, and it is required to have a certain understanding of this kind of fruit tree sapling and to master the correct planting techniques.
2. Understanding habits: Similar to choosing the planting site, it is required to have a certain understanding of the growth habits of the plant being grown, which can make daily care easier after planting.
3. Growth state: Having a certain understanding of the growth state of the planted plant can establish a reference for judging whether there are growth problems such as diseases in your own fruit tree planting.
[Fruit tree sapling propagation methods]
Cutting propagation
This propagation method has the advantages of being easy to survive and convenient to transplant. It is mostly done in spring. Cut 1-2 year old hard branches from the mother plant, about 20 cm in length, use diagonal cutting, then dilute a fungicide to 50% with water, and directly insert the cuttings at a spacing of about 4 cm.
When taking cuttings, you can directly cover two thirds with soil. The soil chosen is mostly loose sandy soil, which has breathing advantages, avoids the phenomenon of roots being unable to sprout or being suffocated, and enhances propagation ability.
Grafting propagation
By using grafting, fruit trees of different varieties can be attached to the same type of fruit tree. Seedlings are mostly grafted onto adult fruit trees, and the survival rate is relatively high. Grafting mainly uses two methods: twig grafting and bud grafting.
When using twig grafting, in spring, the newly sprouted tender shoots can be brought into contact, and then the cut-grafting method is directly used; these are mostly 1-2 year old seedlings. The bud grafting method uses one-year-old seedlings, but the grafting time is mostly carried out in autumn each year, and a "T"-shaped grafting pattern can be used.
Seed propagation
Seed propagation is the slowest propagation method and is suitable for plants that have fruit seeds. For fruit seed propagation, the seeds are mostly soaked before sowing for about one week, which can increase the germination rate. The sowing time is spring, and later it is combined with transplanting and other tasks to improve productivity.
[Fruit tree sapling planting methods]
1. Raising seedlings
For raising seedlings, you can combine it with the propagation method of the fruit tree sapling, and then directly choose seedlings about 25 cm or more in height. After appropriate pinching, they can be transplanted, which can improve the sturdiness of the seedlings. The transplanting time is early spring or autumn. The selected seedlings should be wrapped with soil, with the roots protected by soil in a ball shape. At this time, the crown shape of the seedling is relatively natural, with many slender branches and leaves.
2. Crown training
To improve the sturdiness of the seedlings before transplanting, the crown is mostly adjusted. The shape of fruit tree saplings is mostly cup-shaped, spherical or open. At this time, generally no more than 2 main trunks are reserved, and excess branches need to be pruned manually. After about 1 year of seedling cultivation, before transplanting, a fixed-trunk shape will appear. At this time, the seedling has grown to 40 cm, and excess branches and leaves can be pruned manually. Second, the sprouting tiller branches attached to the main trunk also need pruning, mainly following the natural crown type. This can not only improve ornamental value, but also enhance the germination rate and fruiting rate.
3. Transplanting
For transplanting fruit tree saplings, greenhouse and open-field planting are mostly chosen, and there are many choices of soil, such as sandy soil, acidic soil, alkaline soil and so on. Fruit trees can be determined according to variety. At the same time as transplanting, a certain spacing should be maintained between each plant, and the drainage performance of the plants should be ensured. After planting out, cover with soil, then water thoroughly to settle the roots, and avoid being blown over by wind.
4. Fertilization
There are many kinds of fertilizer suitable for fruit tree sapling planting, such as nitrogen fertilizer, phosphorus fertilizer, potassium fertilizer and so on. Base fertilizer can also be blended according to the particularity of the fruit plant, and there may also be integrated dilution. For fruit tree saplings, the suitable fertilizer amount, fertilization frequency and fertilizer choice differ in the seedling stage, growth stage, flowering stage and fruiting stage. Second, before and after fruit harvest, additional post-harvest fertilizer should also be applied, which can account for about 20 percent of the whole year.
5. Field management
Fruit tree saplings often suffer from pests and diseases that hinder growth, so planting should pay attention to field pathogen infection and avoid the occurrence of pest diseases. Second, you should master familiar fruit tree sapling planting techniques and be able to provide solutions for various diseases. In addition, during periods of relatively high rainfall, you should also pay attention to drainage in your field, mostly using furrows, which can avoid root rot in fruit tree saplings and also enhance drainage capacity.
6. Pruning
In fruit tree planting, pruning is mostly natural pruning, which mainly means promptly removing dead branches and rotten leaves to avoid contagion and affecting the growth of the whole plant. Second, the pruning period is mostly autumn, in the late stage after fruit harvest, which can improve the yield for the next year. In addition, overly dense branches and leaves can also be appropriately pinched and pruned, which can improve the light conditions of the fruit tree and make the branches sturdier. When pruning, strong branches at the tips also need to be removed promptly.
Summary: The fruit tree planting methods and planting time are introduced above, and the biggest enemy of fruit tree planting is various pest diseases, such as leaf rot, scale insects, red-necked longhorn beetle, brown marmorated stink bug and many others. Therefore, during the fruiting period, daily care should be done well to avoid pest damage, and discovered pests and diseases should be handled promptly.
[More related information] Hairy holly pictures Boston ivy pictures Broccoli planting techniques Dahlia flower language What plants protect against computer radiation Water lily flower language
77 Questions on Growing Flowers at Home (Part Four)
38. How should garden shrubs be pruned?
Garden shrubs can generally be divided into three types: those grown for flowers, those grown for fruit, and those grown for branches and trunks. Different pruning methods should be adopted according to different ornamental purposes. For shrubs grown mainly for flowers, common ones in the Beijing area include winter jasmine, forsythia, yellow rose, redbud, lilac and so on. Their flower buds are all formed on the branches of the previous year, so pruning should be done after flowering in May and June. Summer pruning is mainly branch thinning and shaping, cutting off crossing branches, water sprouts, densely growing branches, diseased and pest-infested branches, and dead branches, so as to facilitate ventilation and light penetration and concentrate nutrients. Residual branch tips after flowering can be shortened to promote growth and encourage more flowering the following year. For shrubs that bloom in summer, such as rose, hibiscus, goji and crape myrtle, they bloom on new shoots sent out in spring of the current year, so pruning is carried out after leaf fall in winter. Remove overly dense branches, dead branches, and diseased and pest-infested branches. When thinning branches, the remaining stubs should not be left too long. Generally, the upper cut should be made from the branching point at a 45 degree angle, and the cut should be smooth. Weak branches should be pruned heavily, strong branches lightly, and 4-6 buds can be retained on each branch, with the rest cut off. For shrubs that can be viewed both for flowers and fruit, such as holly and Amur honeysuckle, after flowering, appropriately cut off some overly dense branches and diseased and pest-infested branches to allow ventilation and light penetration and favor fruiting. For some shrubs grown for their branches and trunks, such as red-twig dogwood and kerria, since they are mainly grown to appreciate their bright young branches, heavy pruning can be carried out every winter, leaving only 15 cm to 20 cm above ground and cutting off the rest, to encourage more new branches to sprout the following year.
39. How should seeds be treated before sowing?
General seeds, such as seeds of wax begonia and garden balsam, need no treatment and can be sown directly. Seeds with an oily or waxy outer shell, such as magnolia, can only be sown after mixing them with a paste made of plant ash and water. Lotus, canna and others have relatively hard seed coats, so before sowing the seed coat needs to be scarified, soaked in warm water for 24 hours, and then sown. Seeds of flowering almond are sown before the ground freezes in early winter and watered thoroughly; in winter the seed coats are cracked by freezing, and they can germinate in the spring of the second year. Before sowing, all kinds of seeds need a germination rate test. Generally, take 100 seeds, soak them until swollen in warm water, place them in a container lined with moist gauze, and germinate them at about 22°C to check the seed germination rate so as to determine the sowing amount.
For woody flowers with thicker seed coats, germination is generally promoted before spring sowing to facilitate quick and uniform emergence and a high seedling rate. Water soaking and stratification are mostly used for promoting germination. (1) Water soaking to promote germination. Three water temperatures can be used: first, cold water soaking to promote germination, with water temperature above 0°C, suitable for seeds with thinner seed coats, such as wisteria, palm, wintersweet and deodar cedar. Second, warm water soaking to promote germination, with water temperature 40°C-60°C, suitable for peony, Chinese peony, redbud, Chinese wingnut, Chinese scholartree, Chinese arborvitae and golden larch, which have thicker seed coats. Third, hot water soaking to promote germination, with water temperature 70°C-90°C, suitable for seeds with hard seed coats, such as silk tree, black locust and camphor tree. When soaking seeds, the amount of water used is about 3 times that of the seeds. Stir when pouring in the water so that the seeds are heated evenly. When soaking seeds with hot water, wait until the water temperature drops to natural temperature, then stop stirring and soak for 13 days. After the seeds absorb water and swell, remove them and place them at 18°C-25°C to promote germination, pour warm water over them 1-2 times a day, and be careful to turn them gently. After the seeds split open, they can be sown. (2) Stratification to promote germination. So-called stratification to promote germination means mixing three parts moist sandy soil with one part seeds, then keeping them moist and cold-stored at 0°C-7°C. Southern magnolia, banana shrub, white magnolia, Caprifoliaceae and seeds that can only germinate the year after next all need stratification to promote germination. In addition, for long-dormant seeds or seeds that sprout the year after next, the variable-temperature germination method can be used, that is, after soaking, keep 25°C-30°C during the day and about 15°C at night, repeating for about 10-20 days, which can promote germination. For example, osmanthus, holly and coral tree can all use this method.
40. How is division propagation carried out?
Separating small plants from the mother plant or separating bulbs from the mother plant and planting them separately to form independent new plants is called division propagation. This method is divided into two types: division of plantlets and division of bulbs.
(1) Division of plantlets. Separate the root suckers, stem suckers, suckers, runners and rhizomes produced on the mother plant and cultivate them into independent new plants. The timing of division propagation varies with flower species. Generally, those that bloom in spring are divided in autumn; those that bloom in autumn are divided in spring. Autumn division should be carried out when the aboveground part has entered dormancy while the underground part is still active, such as peony and Chinese peony. Spring division should be carried out before sprouting, such as hosta and iris. Foliage flowers mostly use the division method. The division time is generally suitable in early spring from March to April. When dividing, for perennial root flowers, first remove the old soil attached to the roots, then use your hands or a sharp knife to separate them in order along the natural gaps in the roots, so that each small plant after division has at least 2-3 buds. For flowering shrubs, there is no need to knock the mother plant out of the pot; you can use a garden trowel to dig away the soil and dig out young plants from one side of the root zone for planting. When dividing, damage the root system as little as possible to favor survival.
(2) Division of bulbs. The propagation of bulbous flowers mainly uses this method. The division time should be after dormancy; dig out the bulbs and separate them from the mother plant to cultivate independent new plants. For example, the small bulbs of hyacinth generally form around the base. After separation from the mother plant and cultivation for about 4 years, they can reach the size of the mother plant. Small narcissus bulbs can grow into large bulbs after 3 years. A large tulip bulb can form 2-3 small bulbs after 1 year of growth, and the small bulbs can grow into large bulbs after 1-2 years of growth. A gladiolus corm can form 1-4 large corms after one year of growth and can produce many small corms.
41. What is the key to successful grafting?
Grafting is the artificial joining of the branch or bud of one flowering plant to the stem or root of another flowering plant. The grafted part is called the scion, and the flowering plant used as the rootstock is called the stock. Grafting is divided into two major categories: twig grafting and bud grafting. This method can maintain the characteristics of the original variety, overcome the difficulty of being hard to propagate by other methods, improve resistance to adverse environmental conditions, promote or inhibit the growth and reproduction of flowering shrubs, and enable earlier flowering and fruiting. This method is mostly used for woody flowers, and a few herbaceous flowers can also use grafting.
The keys to successful grafting are:
(1) Master the grafting time well. It should generally be carried out when sap begins to flow but buds have not yet sprouted. Twig grafting is mostly in early spring from February to March, and bud grafting is mostly in July to August.
(2) The scion and stock should be selected from plants with close kinship and compatibility. For example, plants of the same family, such as using privet as the stock to graft osmanthus or lilac.
(3) The stock should preferably be a vigorous 1-2 year old seedling or a 1-year-old cutting seedling. If the stock is older, it will affect survival. The scion should be selected from high-quality, robust and mature 1-year-old branches.
(4) Pay attention to the key points of operation when grafting. First cut the stock, then cut the scion (to shorten the water evaporation time); the tool should be sharp and the cut smooth; the cambium layers should be aligned, the thin-walled cells should be pressed close, the joint should fit tightly, and the binding should be appropriately tight.
(5) Check promptly after grafting. For plants that have successfully taken, the binding material should be removed in time, otherwise the seedlings are easily constricted and normal growth is affected. For those grafted by the mound-layering method, once new buds are found to have sprouted, the mound of soil should be removed immediately to prevent the young buds from turning yellow due to lack of sunlight.
42. How is cut grafting propagation carried out?
Cut grafting is a commonly used twig grafting method, mostly carried out in spring. Generally, a stock 1 cm-2 cm thick at the root crown is selected, cut off about 5 cm-10 cm above the ground, and the cut is smoothed. On the smooth side of the stock, make a straight, smooth downward cut about 2.5 cm deep between the xylem and phloem, then select a robust branch from the previous year, take its middle section and cut it into a piece about 5 cm-10 cm long, each piece with 2-3 buds as the scion. Cut off about 1/3 of the xylem on one side of the lower end of the scion, about 2 cm long, and cut a small cut surface about 0.5 cm long on the other side to make it wedge-shaped. Immediately insert the large cut surface facing the stock xylem into the cut, so that the cambium of the scion and stock fit tightly (at least one side must be pressed tightly together). After joining, wrap the bark flap cut open on the stock around the outside of the scion, tie the interface tightly from bottom to top with a plastic strip (when tying, be careful not to move the joint, to prevent the cambium layers on both sides from becoming misaligned), and cover it well with moist soil. The soil mound should preferably be about 5 cm higher than the scion.
43. What are the commonly used cutting methods?
Cutting propagation is a commonly used propagation method in flower cultivation at present. It is a method of cutting part of the root, branch, bud, leaf and so on of a flowering shrub, inserting it into a substrate, and causing it to take root and sprout to form a new plant. This method is determined by the regeneration ability of the various organs of different flowering plants. According to different cutting materials, it can be divided into the following 3 methods:
(1) Stem cuttings. Also called shoot cuttings. It is a widely used method for mass-propagating seedlings. It is divided into hardwood cuttings, softwood cuttings and single-bud cuttings and so on.
(2) Root cuttings. Divided into the burying method, straight insertion method and so on.
(3) Leaf cuttings. Divided into the straight insertion method, flat placement method and so on. In addition, there is also the water-cutting method and so on.
44. How are stem cuttings taken?
(1) Softwood cuttings. Also called greenwood cuttings. Azalea, camellia, osmanthus, Chinese rose, plum blossom, jasmine, rose, nandina, croton, monstera, pothos, ivy and other flowering shrubs, as well as chrysanthemum, geranium, dahlia, scarlet sage and other herbaceous flowers, all commonly use this method. It is carried out when new shoots or branches are half-mature, mostly in summer and autumn. Generally, the cutting length is about 5 cm-10 cm, with 2-4 leaves kept at the top. The lower cut of the cutting should be made below a node to make rooting easier. Clean sand or vermiculite and so on are used as the cutting substrate. The cutting is inserted to a depth of about 1/3 of its length. After insertion, spray water, water, and shade, and keep the temperature at 20°C-25°C, which is suitable.
(2) Hardwood cuttings. This method is suitable during the dormant period of the plant. For deciduous flowering shrubs, after leaf fall and before sprouting; for evergreen flowering shrubs, after growth stops and before sap flows in spring. Winter jasmine, hibiscus, cotton rose, crape myrtle, oleander, banana shrub, gardenia and so on are suitable for propagation by this method. In the north, mostly after leaf fall in winter, cut the current year's branches into sections 20 cm-30 cm long, tie them into bundles and bury them in moist sandy soil to overwinter, then take them out in the following spring and insert them in the open field. Cuttings can also be taken in spring before sprouting together with pruning. The cutting should have at least 2-3 buds, the cut should be smooth, the upper end cut into a horizontal plane, and the lower end cut into a slanted surface. Post-insertion management is the same as for softwood cuttings.
(3) Single-bud cuttings. This method uses one bud and one leaf as the cutting, such as for camellia, osmanthus, rubber tree and other flowering shrubs. The cutting is generally below 10 cm. After insertion, special attention should be paid to spraying water, shading and wind protection to prevent the cutting from losing water and affecting survival.
45. How can the survival rate of cuttings be improved?
(1) Choose good cuttings. The mother plant from which cuttings are taken should have conditions such as good quality, robust growth and no pests or diseases. On the same plant, choose the sunny branches from the middle and upper parts of the current year's growth, requiring shorter internodes, thick branches and leaves, and plump bud tips. Branches about to flower and water sprouts should not be chosen. On the same branch, hardwood cuttings should preferably use the middle and lower parts, while chrysanthemum and so on should use the tender top part.
(2) Choose a cutting substrate suitable for rooting. This substrate should have characteristics such as being easy to raise soil temperature, retain water, and allow air circulation.
(3) Correctly handle the cuttings. Treating with chemicals before cutting has the effect of promoting rooting. Softwood cuttings are generally cut into sections 8 cm-12 cm long, with 2-3 buds on them. The lower cut of the cutting should preferably be 0.5 cm below a node. The cut should be smooth. Cut off the lower leaves, keeping only 2-3 leaves at the top. The insertion depth is generally 3 cm, which is suitable.
(4) Create environmental conditions suitable for rooting. The suitable temperature for rooting of most flowers is 20°C-25°C. Flowers native to the tropics require 25°C-30°C or above. Generally, soil temperature being 3°C-5°C higher than air temperature is favorable for rooting. The relative air humidity of the cutting bed being 80%-90% is favorable for rooting. Softwood cuttings require about 30% light. Moisture should be moderate, slightly greater at the initial stage of cutting and slightly drier later. Therefore, the suitable period for open-field softwood cuttings in North China and other places is mid-to-late June to mid-August. This period coincides with the rainy season in North China, which can better satisfy the temperature and humidity conditions required for cutting rooting and is favorable for the survival rate of cuttings.
(5) Strengthen management after cutting. After insertion, water, cover with plastic film, and place in a relatively shady place to prevent direct sunlight; however, increasing light at night is favorable for cutting survival. Open the plastic film 1-2 times a day (if small holes have already been made in the film, it is not necessary to open it), to supplement the needed oxygen and prevent the occurrence of pathogens. Spray water frequently to keep the cutting bed moderately moist, but do not spray excessively, otherwise the cutting bed will be too wet and affect the healing and rooting of the cuttings; when the new roots of the cuttings have grown to 2 cm-3 cm, they can be transplanted into pots at the appropriate time.
46. How can flowering shrubs that are difficult to root be made to root?
To promote rooting in flowering shrubs that are difficult to root, such as Aglaia odorata, crape myrtle, honeysuckle, wintersweet, osmanthus, camellia, azalea and white magnolia, in addition to using growth hormones such as naphthalene acetic acid,