How to Plant Forget-Me-Not Seeds? A Detailed Guide to Shaping and Pruning
Forget-me-nots are deeply loved for their beautiful colors and their meaningful symbolism - forget deep affection, forget me not. So what kind of results will you get when you plant forget-me-not seeds at home? Follow along with the editor to see how to plant forget-me-not seeds.
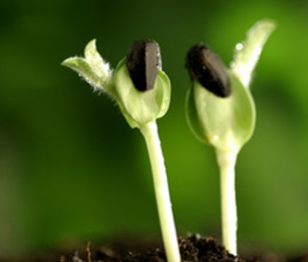
How to Plant Forget-Me-Not Seeds
1. Sowing Forget-Me-Not Seeds
Sowing is generally done from September to January of the following year. The seeds are photophobic (light-sensitive), so after broadcasting the seeds, cover them with a thin layer of soil and maintain moisture. Under the optimum temperature of 15-20°C, germination occurs in 10-15 days. When sowing, be careful that the temperature does not exceed 25°C. After the sprouts emerge, ventilation is needed. When the seedlings have more than 5 true leaves, they can be transplanted. Tissue culture propagation: culture flower seedlings in a seedling tray, and transplant when they have 4-6 leaves.
Forget-me-nots prefer dry, fertile, well-aerated, slightly alkaline sandy loam. So when planting, you can evenly mix decomposed organic fertilizer and slow-release compound fertilizer into the soil. Space each forget-me-not plant 3-4 cm apart, and plant at a depth where the substrate is slightly above the root crown. After planting, control the temperature below 15°C for 2 months to ensure the plants pass through the vernalization stage, which is beneficial for normal flowering of forget-me-nots.
2. Light Requirements for Forget-Me-Nots
Forget-me-nots like ample sunlight, but the ambient temperature should not be too high or humid. So during regular care, you should give forget-me-nots enough sunlight. Insufficient light will cause the foliage to grow lushly, which will affect flowering. But in summer, try to provide shade to avoid sunscald.
3. Temperature Requirements for Forget-Me-Nots
The optimum growing temperature for forget-me-nots is 22-28°C. When the temperature is above 30°C or below 5°C, the growth of forget-me-nots will be hindered. Therefore, when planting forget-me-nots, try to first carry out low-temperature treatment to let them fully receive low temperatures and complete vernalization. After normal growth begins, try to control the temperature within the suitable range.
4. Watering Methods for Forget-Me-Nots
The forget-me-nots you usually see are cut flowers, which look dry, so some people think that the growing environment of forget-me-nots is also dry. That is wrong. Forget-me-nots are fairly water-loving, but they fear waterlogging. During the care period, keep the soil of forget-me-nots slightly moist, but do not let water accumulate at the root area. When sunlight is ample, you can water a bit more appropriately to increase air humidity. During the non-growing season, you can keep the potting soil slightly moist to slightly dry.
5. Fertilization Methods for Forget-Me-Nots
When planting forget-me-nots, apply sufficient base fertilizer, mixing the fertilizer evenly into the soil. When the leaves of forget-me-nots grow to 6-8 leaves, you can apply one additional urea solution. When forget-me-nots begin to send up flower stems, apply 0.1% potassium dihydrogen phosphate solution 2-3 times.
How to Shape and Prune Forget-Me-Nots
1. Fixing the Flower Stems of Forget-Me-Nots
When growing forget-me-nots, in order to produce good cut flowers, the flower stems need to be fixed, generally by using netting.
Before the forget-me-not plants bolt, you can set up a net frame. The net frame can be placed 20 cm above the ground. After the plants grow flower stems, set up a second layer of netting. As the flower stems of forget-me-nots grow, fix the flower stems in time.
2. Shaping and Pruning of Forget-Me-Nots
During the growth period of forget-me-nots, timely pruning and shaping are needed.
Newly grown flower stems of forget-me-nots can be handled according to the size of the plant. For larger plants, you can keep 4-5 branches on each plant to continue growing and flowering. For smaller forget-me-not plants, you can cut off the flowering branches, so that they temporarily do not flower, allowing the plant to grow, and the flowers that bloom later will be better.
During this period, regularly prune away new, relatively thin and weak branches. This reduces nutrient consumption, allowing nutrients to be concentrated on the flowering branches. It also improves ventilation and light penetration for the forget-me-not plants and reduces blind flowers. In addition, after one round of flowering, when the cut flowers have reached 50%, it is necessary to cultivate flowering branches for the next crop. During the growing period of forget-me-nots, keep a few new flowering branches. After the previous batch of flowers has been completely cut, the retained branches will have grown to a suitable height and can be ready to bloom. In this way, forget-me-nots can bloom continuously.
After pruning, the flowers of forget-me-nots will surely get better and better.
A Brief Discussion of Forget-Me-Not Propagation Methods and Pest and Disease Control Techniques
Forget-me-nots, as their name suggests, give people a romantic impression. They are not only beautiful in flower form but also romantic in flower language, and are much loved by young women in daily life. Below are the propagation methods and pest and disease control techniques for forget-me-nots. Those who like them should save this quickly.
I. Propagation Methods
Forget-me-nots are mainly propagated by two methods: sowing and tissue culture.
1. Sowing Propagation
As long as the temperature is suitable, it can be done throughout the year. Since the optimum germination temperature for seeds is 15-20°C, when grown as an annual in cool summer regions, it can be sown in early spring; when grown as an annual in hot summer regions, it is mostly sown in autumn. Because the seeds have a shell and a low germination rate, they need to be rubbed before sowing to remove the shell, which can increase the germination rate. For sowing, mix 4 parts leaf mold soil, 4 parts garden soil, and 2 parts sandy soil evenly. Since the seeds are photophobic (light-sensitive), cover with soil after broadcasting, with the coverage being just enough that the seeds are no longer visible. Under the optimum temperature of 15-20°C, maintaining sufficient humidity, germination occurs in 10-15 days. After the sprouts emerge, attention must be paid to ventilation. When the seedlings grow more than 5 true leaves, they can be transplanted.
2. Tissue Culture
The explants used for tissue culture of forget-me-nots include young inflorescences, sterile young buds, and so on. The medium for bud induction can be MS + 2.0 mg/L BA + 0.2 mg/L NAA, and the rooting medium is 1/2 MS + 0.5 mg/L NAA. The suitable substrate for transplanting test-tube plantlets is peat soil : perlite = 1:1. When the test-tube plantlets have 4-6 leaves, they should be transplanted.
II. Cultivation Techniques
1. Cultivation Substrate
Forget-me-nots do not have high soil requirements; loose, well-aerated sandy loam is best for cultivation. Base fertilizer accounts for 70% of the total fertilizer used. Base fertilizer is generally compound fertilizer and decomposed organic fertilizer. When cultivating, level the soil and make beds, with the bed height around 20 cm. Seedlings should not be planted too deep; the planting depth should be such that the root crown is level with the soil surface. After planting, water thoroughly in time.
2. Fertilizer and Water Management
When the seedlings survive and begin to grow, apply topdressing every 10 days along with irrigation, adding a mixed solution of 200 mg/L nitrogen fertilizer and 100 mg/L potassium fertilizer to the water. During the seedling stage, the soil needs to remain moist, and frequent cultivation and weeding are needed to promote strong root development of the seedlings. About 2 months after the seedlings are transplanted, they begin to send up flower stems. When entering the flowering period, water and fertilizer must be sufficient; otherwise, the flower stems will be short and the flowers will not be luxuriant. You can add 200 mg/L nitrogen-potassium mixed solution to the irrigation water and fertilize about once every 10 days. This can improve the yield and quality of forget-me-not cut flowers.
3. Temperature Management
Forget-me-nots prefer cool environments and fear high temperatures. The best temperature during cultivation is 12-20°C.
4. Light Regulation
Forget-me-nots like to grow under sunlight. If the environment is shaded, it will result in fewer flower stems. Therefore, ensure full sun for better growth. When light is insufficient, supplemental lighting is needed.
5. Flower Stem Fixing, Shaping, and Pruning
To produce high-quality forget-me-not cut flowers, netting is usually used to fix the flower stems. The specific method is: before the plants bolt, set up a layer of netting 20-30 cm above the ground. After the plants grow flower stems, put up a second layer of netting at a height of 45 cm above the ground. As the flower stems grow, guide and support them into the net grids in time to keep the flower stems upright.
During the growth period of forget-me-nots, the newly grown flower stems should be handled differently according to the size of the seedlings. For larger plants whose leaves basically close the rows between plants, keep 4-5 flower stems per plant to grow and flower; for smaller seedlings, you can remove the flowering stems to inhibit flowering temporarily, allowing the plants to grow fully and laying the foundation for producing high-quality cut flowers. Wait until the plants have grown sufficiently before letting them enter the flowering stage. During this period, also regularly remove newly grown thin and weak flower stems to concentrate nutrients for the flowering stems, improve ventilation and light conditions inside the plants, reduce the number of blind flowers in the middle and lower parts of the plants, and improve the quality of individual flower stems. After the cut flower volume exceeds 50%, begin cultivating flowering stems for the next crop. The method is to retain a small number of newly grown flower stems during this period. After the previous crop has been completely cut, the retained flower stems will have grown to a certain height, effectively shortening the time between two crops of flowers, so that forget-me-nots can bloom continuously and supply the market.
6. Pest and Disease Control
Forget-me-not diseases include gray mold, powdery mildew, viral disease, and so on. Gray mold can be controlled by continuously spraying 800-1000 times diluted chlorothalonil or thiophanate-methyl 3-4 times. Powdery mildew can be controlled by spraying fenarimol and similar products. For viral disease, the main measures are promptly removing and burning diseased plants and spraying insecticides to prevent insect transmission of the disease.
Scale insects are the most common pest of Monstera deliciosa. When few in number, they can be cleaned off with an old toothbrush and then killed by spraying with 1000 times diluted 40% omethoate emulsifiable concentrate.
7. Cut Flowers and Market Launch
When the petals on each small flower branch have unfolded to 30% and the entire inflorescence has colored, they can be harvested. When harvesting flowers in the morning or evening, cut from the base of the plant. Especially in the early harvesting period, cut above one large leaf on the flower stem, which can promote the germination of axillary buds on the plant. After harvesting, immerse the base of the flower stems in preservative solution so that the flower stems remain sufficiently hydrated for market. Forget-me-not cut flowers can be stored for 2-3 weeks at around 2°C.
Forget-me-nots are common cut flowers in the flower market and sell very well. They can be planted on a large scale and also grown in pots. Those who like flowers and plants can try growing them themselves.
Podocarpus Bonsai Pictures and Making, Auspicious Guardian God
Notonly can Podocarpus bonsai be enjoyed for viewing, but the wood of Podocarpus is also a good material for construction, medicinal use, and carving. Therefore, the value of Podocarpus is extremely high, which has directly led to the bad phenomenon of illegal logging of Podocarpus. So we must protect every Podocarpus well, starting with getting to know Podocarpus.
Podocarpus Bonsai Pictures and Making, Auspicious Guardian God
——————————————————————————————————————————————
[Plant Profile]
——————————————————————————————————————————————
Chinese name:Podocarpus
Scientific name: Podocarpus macrophyllus
Alternative names: Luohanshan, Changqing Luohanshan, Tushan, Jinqiansong, Xianbai, Luohanbai, Jiangnanbai
Family:Podocarpaceae
Genus:Podocarpus
Origin and distribution:Podocarpus is commonly found in southern China, including the Hong Kong, China area.
Morphological characteristics:An evergreen tree that can reach up to 18 m tall; it is usually pruned to keep it low. Leaves are alternate and arranged in a spiral. It blooms in early summer, and is also dioecious. Male flowers are cylindrical, clustered 3-5 together in leaf axils; female flowers are solitary in leaf axils. The seed receptacle is larger than the seed and turns red when mature. Together with the green seed, it looks like a bald monk wearing a red monastic robe, hence the name Luohansong (Arhat Pine).
How to Make Podocarpus Bonsai
——————————————————————————————————————————————
▲ Potting: Podocarpus is usually potted before sprouting in spring. Use loose, well-drained, slightly acidic sandy loam as the potting soil. Shaping: Podocarpus is mostly shaped during the dormant period. Common techniques include clipping, wiring, pressing, binding, and hanging. Among these, clipping is relatively simple, while shaping techniques such as wiring, pressing, binding, and hanging are more difficult. Common forms include curved-trunk style, slanting-trunk style, lying-cloud style, cliff style, and exposed-root style. Branches and leaves can be pruned into layered or bun-shaped forms. When shaping, the grower must carry out artistic processing according to the natural beauty of the Podocarpus itself, adapting measures to the tree and making it even more beautiful, achieving a strong and powerful shape with clear layers.
▲ Maintenance: Podocarpus bonsai does not have strict requirements for maintenance and management. In the spring and autumn growing seasons, it is enough to apply 1-2 topdressings mainly of nitrogen. For Podocarpus bonsai that has already been shaped, prevent excessive growth of branches and leaves, and pay attention to frequent pinching and pruning during the growing season. Podocarpus bonsai grown indoors should be placed in a ventilated area for maintenance all year round and should not remain indoors for a long time; otherwise, the leaves of Podocarpus may turn yellow and fall off, or even cause death. In summer, it should not be exposed to strong sun; place it in a semi-shaded area for maintenance. In summer, when the potting soil is dry, water in time, and water thoroughly; in autumn and winter, it can be appropriately reduced. In winter, when the temperature drops to 5°C, it should be moved indoors for overwintering, and the amount of watering should be controlled, with the potting soil better kept on the dry side.
Feng Shui Effects of Podocarpus
——————————————————————————————————————————————
Because Podocarpus has an ancient and elegant tree form and a unique combination of seed and seed stalk, it is very appealing and is widely planted in temples and courtyard homes in the south. Placing Podocarpus bonsai indoors has the feng shui effect of guarding auspiciousness and blessing longevity, and it is called a guardian god. In two villages in China, there are magical stories about Podocarpus showing miracles. Many elderly people believe that Podocarpus can bring good luck and protect the peace of a place.
" Conclusion:After looking at the Podocarpus bonsai pictures, everyone should have gained a bit more understanding and knowledge of this ancient and auspicious plant. If you like it, you might as well make a Podocarpus bonsai to add some variety to your life.
【More Plant Encyclopedia】
Poppy Night-blooming jasmine Rose Azalea Lavender Golden pothos Asparagus fern Peperomia Hyacinth Anthurium Cherry blossom Calla lily
African jasmine Rose Spring Festival flowers Succulents Tropical plants Tumi flower Agave Canna Red spider lily Forget-me-not Dandelion
Dendrobium officinale Chinese yew Kapok Osmanthus Begonia Hydroponic plants Home feng shui plants Bedroom feng shui plants Plum blossom Aloe
Jasmine Radiation-resistant plants Pennywort Potted plants Bonsai making Drug plants Mistletoe Indoor flowers Money tree Lucky bamboo Lucky bamboo
Potted plant making Anthurium Mint Living stones Geranium Garden Christmas cactus Peace lily Snake plant Kunlun snow chrysanthemum Water lily Blue enchantress