When is the best time to graft osmanthus? A detailed explanation of grafting methods
Osmanthus is loved by a huge number of people. When this osmanthus blooms, it really smells so good. What are the grafting methods for this osmanthus? When is the best time to graft osmanthus:
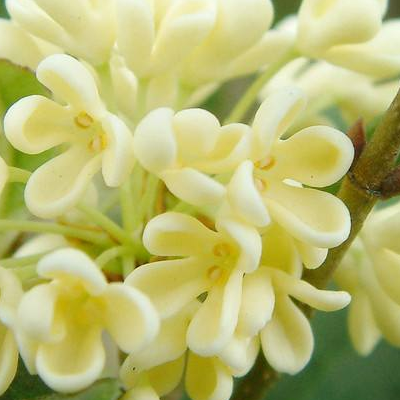
Osmanthus grafting methods:
Grafting methods: Generally, side grafting and approach grafting are used.
1. Side grafting: Side grafting means trimming the rootstock before grafting, cutting it all off 6—7 cm above the soil surface, and making a slanting cut near the rhizome. Be sure not to injure the pith. For the scion, use 2—3-year-old branches (without leaves), about 10 cm long. It is more suitable if it has 2—3 nodes. Then cut the scion's graft interface into an unequal-sided wedge shape and insert it into the cut on the rootstock so that they fit closely together. After tying it with plastic or hemp fiber and mounding soil up to the top of the scion, it is considered complete.
2. Approach grafting: For approach grafting, first place the rootstock in a pot and keep it alive. Generally, during the plum rain period in June—July, select a 2-year-old osmanthus seedling branch similar in thickness to the rootstock and approach-graft it while still connected in the pot. After it survives, cut it off before “Bailu” (White Dew). This becomes a new plant, and this kind can bloom in the same year.
3. After the graft survives, when the new shoot of the grafted plant reaches 10-15 cm, all remaining rootstock branch suckers can be cut off at this time. Because the rootstock easily sprouts adventitious buds, they should be peeled off at any time. From June—August, carry out drought resistance measures, apply topdressing, and weed. For potted seedlings, when the new shoots reach about 15 cm, pinch off the growing tips, which can promote side branch growth and form a shrub shape.
When to graft osmanthus:
Grafting osmanthus in early spring is better. Whether it survives can be determined in the same year, which is convenient for management. Osmanthus can also be grafted in autumn, and skilled grafters have a relatively high survival rate.
The introduction to osmanthus grafting methods ends here. Pay attention to the grafting methods.
Osmanthus grafting methods | How to graft osmanthus?
What osmanthus grafting methods are there? This article mainly introduces how to graft osmanthus.There are many methods for grafting osmanthus, among which approach grafting is a commonly used one. In China, approach grafting is mostly used for potted osmanthus. Its advantages are: a long suitable grafting period, easy survival, fast shaping, and early flowering. The key points of osmanthus approach grafting techniques are introduced as follows:
I. Grafting methods
(1) Move the scion close to the rootstock. Methods such as propping, padding, framing, hanging, and tying can be used to place the selected osmanthus branch as the scion close to the rootstock branch in the same direction. Then specifically determine the suitable grafting positions of the rootstock and scion, and fix the positions well.
(2) Cut the interface slant. Cut interface slants at the determined grafting positions on the rootstock and scion respectively. The slant is oval, 3-5 cm long, and the depth of the slant generally does not exceed half the thickness of the branch.
(3) Cut the rootstock. After grafting and tying are completed, cut off the rootstock branch 1 cm above the interface.
(4) Remove sprouts. After grafting, if branches sprout below the rootstock interface, remove them promptly. 31-35 days after grafting, cut off the scion from below the interface and let it separate from the mother plant.
(5) Check survival. 3-5 days after cutting off the scion, if the branches and leaves of the scion grow normally, it has survived; if the leaves appear wiltedII. Cultivating rootstock
The rootstock tree species used for grafting osmanthus include glossy privet (Ligustrum lucidum), Chinese fringetree (Chionanthus retusus), and others. The rootstock used for grafting needs to grow robustly and be free from pests and diseases, with a thickness of more than 1 cm, either 2-3-year-old saplings or 2-3-year-old branches on perennial trees.III. Selecting scions
Osmanthus includes varieties such as golden osmanthus, silver osmanthus, red osmanthus, and four-season osmanthus. First, choose the osmanthus variety according to preferences, needs, and resource conditions, and then from the selected osmanthus tree choose 2-3-year-old branches that grow robustly, are well developed, free from pests and diseases, and moderate in size as scions.
Key points for potted osmanthus care and osmanthus grafting methods
When arranging and decorating the home, many people choose to place several pots of osmanthus, which has a beautiful plant shape and pleasant floral fragrance. So, how should potted osmanthus be cared for? How is osmanthus grafted? Below, the key points for potted osmanthus care and osmanthus grafting methods are introduced.
Key points for potted osmanthus care
1. Watering: For potted osmanthus, master the principle of not watering when the soil is not dry, and watering thoroughly when watering. However, spray clear water on the leaf surface once a day, evenly moistening all branches and leaves, until water droplets begin to drip down, so as to keep the leaves moist and wash away dust adsorbed on the leaves. After Qingming Festival, move the osmanthus to the open air and water it thoroughly once. In summer, water in the morning and evening, while in winter water around noon, so that the water temperature is close to the soil temperature and does not cause sudden cold or heat. Be careful not to let water accumulate. In winter, keeping the pot soil moist is enough.
2. Fertilizing: Osmanthus is mainly grown for its flowers, so sufficient fertilizer should be supplied. When shoots are budding, apply nitrogen fertilizer 1-2 times to promote branch and leaf growth; before flower bud differentiation and flowering, mainly apply phosphorus fertilizer. In spring, after moving the osmanthus to the open air, begin watering with fully decomposed dilute soybean cake, sesame paste, fishy water, etc., once every half month, once a week from the end of May to before flowering, gradually increasing the fertilizer concentration. From July—August, apply a 0.5% potassium dihydrogen phosphate solution as topdressing once every half month. After flowering, apply a light fertilizer solution once to avoid triggering autumn branches. In winter, apply more organic fertilizer and phosphorus-potassium fertilizer. Generally, every 15-20 days apply to the roots 25-30 grams of composted, fully decomposed and deodorized cake fertilizer and 10-15 grams of potassium dihydrogen phosphate, mixed with 2-3 jin of clear water and poured on, and every 10-15 days spray the leaves once with a mixed solution of 1000 times nucleotide and 600 times high-efficiency biological phosphorus-potassium fertilizer, evenly moistening all branches and leaves, until water begins to drip. Before fertilizing, the pot soil should be slightly dry, and it is advisable to loosen the soil first to facilitate fertilizer absorption. On the second day after fertilizing, water once. If using compost or barnyard manure, it must be completely decomposed before use (the sign is that the fertilizer liquid turns black). If using the chemical fertilizer superphosphate, its concentration must not exceed 2%, and the urea concentration is 0.5-1.0%.
3. Repotting: Potted osmanthus should be repotted and have its soil changed once every 2-3 years. Cut off part of the old roots and dead roots, and use a bamboo stick to remove part of the old soil. Before potting, place a layer of river sand or vermiculite at the bottom of the pot to facilitate ventilation and drainage, and place decomposed cake fertilizer at the bottom of the pot as base fertilizer. The filling soil must be pressed firmly, which can promote lush flowers and leaves in osmanthus. The soil ratio for potted osmanthus is not very strict. Usually, garden soil, composted barnyard manure, and river sand can each account for 1/3 of the mixture. If it is too acidic, add some lime powder or plant ash; if it is too alkaline, add some aluminum sulfate or ferrous sulfate, etc. In spring, after potted osmanthus is planted, water it thoroughly, then move it to a shaded place for about 10 days to let it "adjust to the pot." During the pot-adjustment period, do not fertilize. Water and fertilize only after it resumes growth and grows new leaves. For the texture of the flowerpot, purple clay ceramic pots or glazed ceramic pots are better; colors such as purple or ochre are better, as they can form a sharp contrast with the colors of the flowers and leaves and increase the ornamental effect.
4. Pruning and shaping: For osmanthus styling, it is best to make curved-trunk, slanting-trunk, or elegant styles. The tree posture spreads obliquely, with dense branches and leaves, simple and natural, and is most enjoyable to appreciate. When flowering, the rich fragrance fills the air and refreshes the heart. Osmanthus shaping generally adopts a combination of bending and pruning. The trunk can be bent into a curved-trunk or slanting-trunk form. The shaping and pruning of osmanthus should be carried out after autumn. For plants that grow very tall with very sparse lower branches and a poor tree shape, cut off all the top branches at 2/3 or 3/4 of the height. For plants that are "top-heavy," cut off the overly dense upper branches and keep only the smaller lower branches. For plants with overly dense branches, carry out thinning pruning. After flowering, another pruning should be done to cut off leggy branches, dead branches, pest- and disease-damaged branches, and dense weak branches.
5. Overwintering: Room temperature should be kept at 0-5°C, and relative humidity should be kept at 50-80%. In winter, a cold room should have good light, especially before buds begin to sprout in early spring, when sufficient sunlight is even more required. In the spring of the following year, in North China after Grain Rain (around Awakening of Insects in the Yellow River-Huai River basin), arrange for potted osmanthus to be moved outdoors. After moving outdoors, first place them together in a windproof, sunny place outdoors, and later spread them out in rows so they gradually adapt to the external environment.
6. Pest and disease control: Common diseases of osmanthus include leaf spot disease, sooty mold, algal leaf spot, root rot, iron deficiency, etc., and control should be carried out according to the disease situation. Leaf spot disease, sooty mold, and algal leaf spot can be controlled by spraying 0.5 Bordeaux mixture or 5% carbendazim 500-1000 times solution; for root rot control, attention should be paid to keeping the soil loose and breathable, and do not let water accumulate; if root rot is caused by fungi, irrigate the roots with 200-300 times amobam solution. Common insect pests of osmanthus include sawflies, whiteflies, mites, white scale insects, and yellow thorn moths. Sawflies, whiteflies, and mites can be killed by spraying 40% dimethoate 1500-3000 times solution. For white scale insects, besides manual brushing off, during the first and second instar nymph stages, spray 40% omethoate 1000 times solution or 40% fenitrothion 500 times solution.
Osmanthus grafting methods
Mostly use 1-2-year-old nursery stock such as glossy privet (Ligustrum lucidum), small-leaf privet, and small-leaf ash as rootstock. Among these, using glossy privet to graft osmanthus has a high survival rate and fast initial growth, but the wound heals poorly and is prone to breaking off when exposed to strong wind or external collision.
1. Approach grafting method:
Osmanthus grafting propagation generally uses the approach grafting method. Because glossy privet has strong adaptability and is cold-resistant and waterlogging-resistant, small-leaf privet is mostly used as rootstock. The suitable time for approach grafting is April-June. For the scion, choose a robust small branch about 0.7-0.8 cm in diameter from a 2-year-old plant. The thickness of the rootstock is best equal to that of the scion. During approach grafting, place the rootstock pot close to one side of the mother plant so that the grafted parts can be brought together and fitted closely. Then, on the mother plant branches and trunk where the two are equal in height, select a straight, smooth, node-free part and cut an oval cut surface about 3-4 cm long on each, cutting to expose the cambium and reaching the xylem. Then immediately bring the two cuts together, align their cambiums, then wrap them tightly with moist hemp strips and cover with plastic film to maintain internal humidity. After the approach grafting operation is completed, the wound heals after about 2 months, and a tumor-like mass forms at the wound and tender roots grow out. When the new roots grow to 2-3 cm long, they can be cut away from the mother plant. The newly planted plant only needs to be placed in a cool place, protected from sunlight, kept moist, and watered appropriately. If managed suitably, it can bloom in the same year.
2. In addition to approach grafting, cleft grafting and side grafting are also commonly used in production:
These two grafting methods are carried out around Qingming Festival. For the scion, it is advisable to select fully lignified 1-2-year-old robust, disease-free branches from an adult tree, remove the leaves, and keep the petioles. For cleft grafting, before spring nursery stock buds sprout, cut the rootstock off 4-6 cm above the ground before grafting. The thickness of the scion should match the thickness of the rootstock, and the cut surface of the scion should be smooth. The key to successful cleft grafting is that the cambiums of the rootstock and scion must be aligned and the binding must be tight. For side grafting, there is no need to cut off the rootstock; directly insert the grafted bud into the rootstock, and cut off the rootstock after the graft succeeds. No matter which grafting method is used, take the scion and graft it as soon as possible. For scions taken from other places, be sure to maintain the freshness of the scion branches. It is best to choose sunny, windless weather for grafting. After grafting, pay attention to checking the survival rate, and do a good job in supplementary grafting, bud removal, rootstock cutting, removing binding strips, water and fertilizer management, and pest and disease control.
3. Soil-mound grafting:
Soil-mound grafting of osmanthus uses the cut grafting method. When grafting, first soak the scion for a day and a night so that it absorbs enough water. Cut the rootstock off 3-5 cm above the ground, cut down 2-3 cm from one side of the cut surface, cut the lower end of the scion into a slant 2.5-3.0 cm long, shave off some cortex on the reverse side, and make both cuts flat. Then insert it into the rootstock so that the cortices are closely connected, tie it with hemp fiber, smear the interface with wet mud, and finally fill and seal the lower part of the scion with moist sandy soil, leaving the upper end exposed 2-3 cm. Be careful not to let the scion loosen. After this method successfully grafts, the hemp fiber rots by itself, and there is no need to remove the rootstock.
4. Rootless grafting technique:
Reverse the normal order of cutting and grafting, that is, first graft the osmanthus bud onto a small-leaf privet cutting, then directly insert the grafted cutting into a leveled bed to take root, and the cutting and scion survive together. In this way, the problem of low labor efficiency caused by squatting in the field to graft after the cutting has survived is avoided. New branches sprouting from small-leaf privet need to be cut off promptly to ensure the normal growth of the Fodingzhu osmanthus.
The above are the key points for potted osmanthus care and osmanthus grafting methods introduced for everyone. Is everyone clear now? For more home knowledge, please pay attention.