How to Repot Potted Plants and Tips for Pest and Disease Control
Potted plants are something many people love to grow. On balconies in big cities, growing potted plants is the only option. How do you repot potted plants? What should you do about pests and diseases on potted plants?
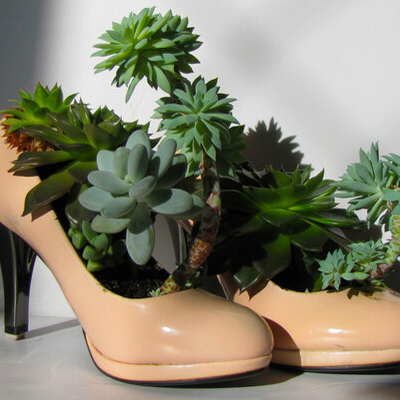
How to repot potted plants:
Potted flowers keep growing, and once they reach a certain size, the space in the pot is no longer enough, so repotting becomes necessary. Many potted flowers just bought from the flower market have soil that is either single-ingredient or unsuitable for growing flowers, so they also need repotting and a change of nutrient soil. However, repotting a potted plant is like performing surgery on a person, and it will more or less sap its vitality, so repotting should not be done too frequently. Generally speaking, repotting should not be done more than twice within a year (except for annual and biennial herbaceous flowers). In addition, potted plants must not be repotted during the flowering period, otherwise it will cause bud drop.
When repotting a potted plant, first use a trowel to dig down along the edge of the pot, pry the potting soil loose, then turn the pot over and gently tap the pot wall to loosen the root ball so it separates from the pot. If the bottom of the pot and the root ball are stuck firmly together, use a wooden stick to poke the tile covering the drainage hole at the bottom of the pot so the root ball separates from the bottom. Remove part of the old soil and cut away bad roots and old roots.
If the drainage hole at the bottom of the pot is relatively large, after taking out the root ball, cover the drainage hole at the bottom of the new pot with a tile, but do not cover it too tightly; leave some gaps. Sprinkle a layer of crushed stone at the bottom of the pot as a drainage layer to increase drainage and air permeability at the bottom, then sprinkle a thin layer of base soil over the crushed stone; garden soil and a small amount of fine sand can be used as the base soil. The purpose of sprinkling base soil is to reduce the loss of base fertilizer through the drainage hole. Then spread a layer of base fertilizer, generally organic compound fertilizer; the base fertilizer should be sufficient. If the flower does not like heavy fertilizer, then use manure fertilizer with caution. After the base fertilizer is spread, the potting soil for the potted flower can be filled in.
If the potted flower comes with a root ball, when the potting soil has been filled to a certain depth, place the root ball in, continue filling with potting soil, and then press it down slightly firm. If the flower is bare-rooted, when half the soil has been added, lift the flower gently so the roots spread out, then continue filling soil and press firm.
After repotting, water once thoroughly so the potting soil absorbs enough water. However, for succulents, do not water after repotting; instead use the method of planting in moist soil and keeping it dry, that is, spray a small amount of water into the soil when filling it so the soil is slightly damp (note: damp, not wet), and water again four or five days after repotting.
What to do about pests and diseases on potted plants:
1. Scale insects. Scale insects tend to appear when ventilation is poor. Their characteristic is that first cotton-like tufts of white fuzz appear, and afterward oval small insects from needle-tip to rice-grain size appear. Scale insects are piercing-sucking pests, and their body surface has a waxy layer that can block liquid medicine, so ordinary stomach-poison insecticides are ineffective against them. To kill scale insects, use an insecticide containing a wax-dissolving agent; I use Plant Insect Killer King. Scale insects rebound very easily, so both the insect bodies and the white fuzz must be cleaned away thoroughly, especially scale insects hidden in leaf folds, which can be removed with tools such as a brush or a probe. Another method is to singe them quickly with fire. The white fuzz of scale insects is as flammable as willow catkins, and a quick pass with fire can burn it away. I once used a lighter to kill scale insects on a miniature parlour palm, and the effect was very good. However, this method requires attention to two points: first, you must control the heating time, because a slightly longer time will scorch the flower leaves; second, if this method is used improperly it may cause a fire, and minor children must not use it.
2. Spider mites, aphids, whiteflies. Such pests are extremely harmful to flowers, but common insecticides can kill them. My glass begonia and Alocasia have both had spider mites, and as long as the pesticide is sprayed thoroughly, they can still be wiped out quickly.
3. Pests in potting soil and small flying black insects. Such pests are often caused by fertilizer in the soil not being thoroughly decomposed. A very effective way to deal with such pests is to soak a big handful of cigarette butts in water for one day, then filter, add water to dilute, and pour it into the flowerpot, watering thoroughly; two to three waterings are enough.
4. Earthworms. Earthworms are beneficial insects in farmland, but in flowerpots they create a large number of burrows in the potting soil, and their droppings form hard soil balls, which adversely affect plant growth. If earthworms are found, they can be removed by hand when repotting, or the potting soil can be watered with a 500-fold dilution of deltamethrin.
That is all for the introduction to methods of repotting potted plants. If pests and diseases occur, there are also ways to deal with them.
How to prevent and control pests and diseases on potted aloe? Methods for preventing and controlling pests and diseases on potted aloe
How to prevent pests and diseases on potted aloe? Do you all understand the methods for preventing and controlling pests and diseases on potted aloe? Aloe is an evergreen, succulent herbaceous plant and is widely grown. The prevention and control of pests and diseases on potted aloe is key. Next, the editor will introduce in detail the methods for preventing and controlling pests and diseases on potted aloe.
Methods for preventing and controlling pests and diseases on potted aloe:
Common diseases of aloe mainly include anthracnose, brown spot disease, leaf blight, southern blight, and bacterial diseases. For household potted aloe, disease control should focus on prevention. Before disease occurs, choose disease-resistant varieties and high-quality disease-free seedlings; their ornamental value has already declined. Before disease occurs, or after removing diseased parts from plants that have already become diseased, apply 0.5 to 0.8 Bordeaux mixture with equal parts lime together with new high-lipid film to the aloe leaf surface, which can effectively prevent and inhibit pathogen invasion and spread. Disease treatment. After disease occurs, systemic therapeutic agents such as thiophanate-methyl and metalaxyl, as well as antibiotics such as streptomycin sulfate, agricultural streptomycin, kasugamycin, and validamycin, can be applied directly to kill pathogenic bacteria inside the aloe and control the spread of the disease.
Propagation methods and pest and disease control cultivation techniques for potted aloe
How to grow potted aloe? Many people now like to keep a pot of aloe at home, so today the editor will introduce an article on the key points of potted aloe cultivation techniques. Aloe likes high temperatures and fears waterlogging. The soil should be loose, fertile, breathable, water-retentive, fertilizer-retentive, and well-drained sandy soil.
1 Propagation
(1) Cutting propagation
This can be done in March to April in spring. Select strong branches 10 to 15 cm long for cuttings, trim the cut end flat with a sharp knife, remove the left and right leaves at the bottom, and place them in a dry place for 4 to 7 days. After the cut end dries and hardens and forms a hard film, insert it into coarse sand mixed with a small amount of potting soil. Insert about 2 cm deep, keep the sandy soil slightly moist, and place it in a semi-shaded environment. The cutting temperature is about 25°C to 28°C. After insertion, roots will form in 35 to 40 days, after which it can receive light all day, but not direct strong light. After two months it can be potted.
(2) Root division propagation
This is done in March to April. Use a sharp knife to cut apart overly dense plants with roots from the main root, and plant them in new pots. Do not water in the first week; after the wound forms a film, water thoroughly. Management is the same as for mature plants.
1.1 Potting management
Cutting seedlings can be transplanted into pots after two months, while root-division seedlings can be potted directly. When planting, it is best to choose clay pots, purple clay pots, or porcelain pots, as these pots have good air permeability and drainage and are beneficial to aloe root growth. Before potting, adjust the moisture content of the prepared potting soil well, with the standard being that it forms a ball when squeezed by hand and breaks apart when dropped. When potting, the plant roots must be in close contact with the potting soil. After planting, do not water for 2 to 3 days according to the temperature and humidity of the weather and soil, and spray water on the leaf surface with a watering can every day. When starting to water, water less; after 1 week, water thoroughly. When potting, the size of the pot should be in corresponding proportion to the size of the aloe plant. Newly potted aloe should not be exposed to direct sunlight, so as to avoid water loss and excessive nutrient consumption. It should be kept in a semi-shaded place for care, then moved to a sunny place after the seedlings recover, and only after rooting can it receive more sunlight. After 1 to 2 years of cultivation, potted aloe can be moved to a larger pot.
1.2 Watering
Before aloe turns green and roots form, it should not be watered much; generally, do not water if the soil is not dry, and water thoroughly when dry. After rooting, water can often be sprayed on the leaf surface, which can accelerate greening and rooting. Improper watering or long-term failure to water aloe will cause poor plant growth or even death. Water according to changes in temperature and humidity. When the temperature is low, water less; when the temperature is high, water more. In summer, water 1 to 2 times a day; in spring and autumn, water once each season. Water when the potting soil is dry. Keep the potting soil alternating between dry and moist. Spray water on the leaf surface every day so the leaves absorb water and a certain air humidity is maintained, which is beneficial to plant growth. In winter in the north, place it indoors and water the potting soil less, once a week. But spray water on the leaves. During the dormant period, keep the soil even drier; otherwise, in a low-temperature, damp environment, roots and leaves rot very easily.
1.3 Fertilizing
After potted plants have been grown for a long time, the potting soil lacks nutrients, so it is advisable to use cake fertilizer soaked and fermented, then diluted with water for topdressing. For inorganic fertilizers, urea, compound fertilizer, diammonium phosphate, and potassium dihydrogen phosphate can be selected. During the aloe growing season, apply liquid fertilizer once every 15 to 20 days; apply 1 part fermented cake fertilizer liquid diluted with 4 parts water; apply urea and compound fertilizer at a concentration not exceeding 2%. Use potassium dihydrogen phosphate at 0.1% concentration for leaf surface fertilizer. In winter, especially when the temperature is low in the north, aloe stops growing and should not be topdressed.
1.4 Light
When light is sufficient, the plant is sturdy, the leaves are thick, and the leaf color is dark green. When light is insufficient, it can still grow under slightly shaded conditions, but it easily becomes leggy, making the plant slender and weak, with thinner leaves and lighter leaf color. Excessively strong sunlight can also cause the plant to go dormant and grow slowly. Especially for newly planted seedlings, under overly strong light the leaves will turn purplish red and growth will be slow. In production, properly shading newly planted seedlings can shorten the seedling recovery period. At noon in summer, the light is strongest and exceeds the light saturation point range of aloe. In production, appropriate shading can reduce light intensity to about 50% of natural light. But avoid excessive shading, otherwise it will cause leaf rot.
1.5 Temperature
Aloe is a warmth-loving plant, characterized by loving warmth and fearing cold. The most suitable growth temperature is 25°C to 30°C. Below 10°C it stops growing. At 0°C to 5°C, although it will not suffer frost injury, the leaves will grow weakly, making it susceptible to multiple diseases, and the root system will rot, leading to large-scale death in severe cases. When the temperature is below 0°C, ice crystals form inside the aloe cells, and the affected parts wilt and die.
1.6 Repotting
Repot once every 2 to 3 years. Repotting should be done in April in spring; other seasons are also possible, but improper management can easily cause death. When repotting, use a pot one size larger, remove the soil outside and above and below the roots, and remove rotten roots. Place a tile at the bottom of the pot, then place 2 to 3 cm of furnace ash slag, stones, bricks, etc. as a drainage layer, then add 1 layer of potting soil, set the plant upright, fill the surrounding area with new soil, press gently firm, and water once thoroughly, to the extent that a little water drips from the drainage hole [Jishan Huayao].
2 Pest and disease control
2.1 Diseases
Common diseases in the Zhuhai area of Guangdong include anthracnose, brown spot disease, leaf blight, southern blight, rust disease, spot disease, root rot, white root disease, bacterial soft rot, and so on.
① Anthracnose. It mainly harms leaves, and stems can also be affected. It mostly occurs on older leaves and leaves with wounds, and can cause leaves to bend and dry up, affecting growth. Control methods: properly control nitrogen fertilizer application and avoid excessive watering. Aloe anthracnose is easily transmitted to other plants. Cut off diseased leaves and bury them deeply in a centralized place; it is best to burn the cut diseased leaves. Small diseased spots can be removed locally, and medicine should then be applied to the wound for protection. Plants that are diseased and not yet recovered should be isolated from healthy ones. In seasons when the disease is prevalent, selectively spray 50% thiophanate-methyl 600 to 800 times solution, 50% mancozeb, or 25% Shibaoke 600 times solution, etc., 3 to 5 times, with an interval of 7 to 10 days.
② Brown spot disease, also known as black spot disease. It harms leaves, and in severe cases the spots are densely distributed, causing leaves to rot. Control methods: choose and plant relatively disease-resistant types such as Aloe vera, Chinese aloe, and Aloe arborescens. Fertilize and water scientifically, pay attention to balanced nitrogen, phosphorus, and potassium fertilizers, and prevent waterlogging. Spray 77% copper hydroxide wettable powder for protection at the seedling stage, once every 15 to 20 days, 3 to 4 times within 1 year. Disinfecting seedlings and soil with metalaxyl plus nano-silicon can effectively control brown spot disease at the aloe seedling stage. Timely cut off diseased leaves or take them out of the cultivation area and bury them deeply, and spray 75% chlorothalonil 600 times solution. Once every 7 to 10 days, spray continuously 3 to 4 times.
③ Leaf blight. Brown small spots mostly appear from the leaf tip or leaf margin, then expand into semicircular blight; the lesions shrink, the center is grayish brown, the edge has a water-soaked dark brown ring band, and later small black dots arranged in concentric rings appear on the lesions. Control methods: at the early stage of disease, spray 27% copper hydroxide suspension 600 times solution or 1000 times Bordeaux mixture, 75% chlorothalonil wettable powder 600 times solution. Once every 7 to 10 days, spray continuously 3 to 4 times.
④ Root rot. At the early stage of disease, water-soaked light brown lesions appear at the base of the seedlings and gradually shrink around the stem and become brown rot. Control methods: at the early stage of disease, use 20% chlorothalonil wettable powder 400 times solution, or 50% Likuijing wettable powder, or 72% Kelu wettable powder 600 times solution to drench the roots, once a week, continuously drenching the roots 3 to 4 times.
⑤ White root disease. White powder-like material appears on aloe roots. Control methods: spray with dimethoate 1000 to 1500 solution, once every 3 to 5 days, continuously spraying 3 to 5 times.
⑥ Bacterial soft rot. Affected parts are translucent and water-soaked, and can expand rapidly, causing the whole leaf to rot. It usually starts from the heart leaf part and stem of the plant, making the stem and leaves rot into a pool of water. Control methods: timely remove weeds in the field, strengthen management, implement a crop rotation system, avoid partial application of nitrogen fertilizer, and try not to cause overly large wounds when weeding. Before disease has formed, spray 7.5% chlorothalonil wettable powder 500 times solution or 50% carbendazim wettable powder 800 to 1000 times solution, once every 7 to 10 days, continuously spraying 3 to 5 times.
2.2 Insect pests
Common insect pests include cotton bollworm, scale insects, spider mites, aphids, and noctuid moths.
① Cotton bollworm. Cotton bollworm is currently the most dangerous insect pest occurring on aloe. It mainly bites and eats tender leaves and flowers, causing incomplete leaves and flower drop. Control methods: use black light lamps or poplar woods to trap and kill adults. Do a good job of unified control of other plants around the planting area. Chemical control: at the early larval stage, choose 40% omethoate emulsifiable concentrate 600 times solution, or 50% fenitrothion emulsifiable concentrate 1000 times solution, or 40% jusha emulsifiable concentrate 2000 to 2500 times solution, or 50% phoxim emulsifiable concentrate 1000 times solution, etc. for spray control, once a week, continuously spraying 3 to 4 times.
② Scale insects. Scale insect larvae often stick to the underside of leaves, and sometimes also occur on the upper side of leaves. Control methods: spray with 50% parathion emulsifiable concentrate diluted 1000 times. At the seedling stage, use 50% phoxim diluted 3000 times for spraying, once a week, continuously spraying 3 to 4 times.
③ Spider mites. They easily occur in dry weather, with the severe period from May to July, and they also cause damage in August to September. Spider mites usually occur on the underside of leaves, using piercing-sucking mouthparts to suck aloe sap, often causing leaves to discolor or even curl. Control methods: when spider mites break out in large numbers from May to July, spray with 40% dimethoate 1000 to 1500 times solution, once every 3 to 4 days, continuously spraying 3 to 4 times.
④ Noctuid moths. These include tobacco cutworm, silver-striped noctuid, cabbage moth, and so on. The damage period is from June to September. Young larvae nibble tender branches, tender leaves, and the epidermis. Mature larvae eat a great deal and have voracious feeding habits. In addition to biting pseudo-leaves and tender branches, they also damage young stems and nibble the epidermis of old stems, affecting ornamental value. Control methods: use 90% trichlorfon crystals 800 to 1000 times solution, or 40% chlorpyrifos 800 to 1000 times solution. Spraying in the evening is more effective than during the day, once a week, continuously spraying 3 to 5 times.
The above is all the content on potted aloe cultivation techniques. Friends who grow aloe can study it more. For more techniques on growing flowers, plants, and seedlings, visit Huinong Network!