What to Do When Ivy Leaves Wilt and What Are the Cutting Methods
Ivy is also a plant very well suited to growing at home, where it can form a cascading, waterfall-like display. So what should you do when ivy leaves wilt? What cutting methods are there for ivy?
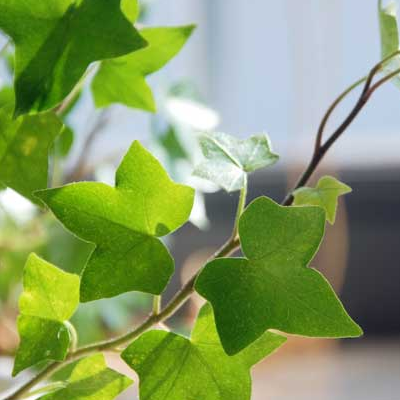
What to Do When Ivy Leaves Wilt:
1. Unsuitable environment
Ivy needs to grow under semi-shade or scattered light. Strong light and an overly shaded environment are both unfavorable to its growth. Newly cut and transplanted plants, or those just repotted and not yet recovered, can also cause ivy leaves to wilt. You can gradually increase the air humidity to ease this, and do not fertilize the roots in the near term.
2. Improper watering
Watering should keep the soil slightly moist, or water thoroughly promptly when the surface of the potting soil is dry. Avoid accumulated waterlogging and long-term drought.
3. Improper fertilizing
Do not apply too much fertilizer at one time or use unrotted raw fertilizer, otherwise it will cause serious fertilizer burn and make the ivy wilt or even die. Fertilizing should be done in small amounts and more often. Light fertilizer applied frequently is the basic principle for growing ivy well.
4. Unsuitable temperature
Too high a temperature will cause ivy leaves to turn yellow or even wilt. The suitable growing temperature for ivy is 18-30 degrees, and it is best to keep it within this temperature range.
What cutting methods are there for ivy:
1. Preparing the cuttings
Pinch off a branch about 30 cm long from the top of the ivy. Before cutting, be sure to carefully check the leaves and stems for signs of insects, especially for plants brought back from the wild, where bringing back pests is most taboo. Cutting off branches will not affect the growth of the mother plant, and can even encourage the mother plant to branch and grow more new shoots. Cut the ivy into small sections about eight or nine cm long. Be sure to use scissors and not pinch with your hands, otherwise the plant tissue at the cut end will be damaged. Also cut off the leaves at the bottom, leaving only the 2-4 leaves at the top.
2. Cutting medium
Prepare several disposable plastic cups and cut three or four holes in the bottom to use instead of flower pots. This kind of "flower pot" has several advantages. First, it holds little soil, so wet and dry alternate quickly, and the cuttings will not rot because the soil stays too wet for too long. Second, the transparent cup lets you clearly observe the rooting of the plant, and transplanting after the roots have developed well helps survival. Third, transplanting is convenient. When transplanting, turn the cup upside down and slip out the intact clod of soil, which ensures the roots of the young seedlings are not damaged. Fourth, it takes up little space. After cutting the holes in the bottom of the cup, put in soil with good air permeability, sandy soil is also fine, poke a hole in the soil in the middle of the cup with a finger or chopstick, place at least one branch node with the leaves removed into the soil, then fill in soil and press the soil around the cutting slightly so that it does not wobble when watered.
3. Cutting management
1. Watering management: After watering the ivy thoroughly, place it in a bright spot without direct sunlight. For the first few days, water about once every two days. After about a week, gradually reduce the frequency of watering, and water again after observing that the soil is slightly dry. Be careful not to let the soil dry out completely.
2. Rooting and transplanting: With proper management and suitable temperature, cut ivy will root in about 15-20 days. After rooting, do not rush to transplant. Let the young seedlings continue to grow in the cup for a period. After about a month and a half, when the root system has developed well, they can be transplanted into larger flower pots.
3. Care after planting: After the young ivy seedlings are transplanted, water them thoroughly and first place them in a spot without direct sunlight to recover for two or three days, after which they can be exposed to sunlight. The shape can be chosen according to personal preference. If you like a lush, vigorous large pot, place it in a spot with ample sunlight, mix urea or nitrogen fertilizer into the water when watering, and frequently pinch off the tips to encourage more branching. If you like a slender, graceful elegance, place it indoors in a bright spot without direct sunlight, do not fertilize, and let it grow freely.
Alright, that is all for the introduction to ivy. Now you know how to do cuttings, right?
What to Do When Ivy Leaves Wilt and Ivy Care Methods
English ivy is a common indoor foliage plant, but during cultivation you may encounter the situation of ivy leaves wilting. What should you do when ivy leaves wilt? Let us take a look together at ivy care methods.
What to Do When Ivy Leaves Wilt
One: An unsuitable care environment may cause ivy leaves to wilt. Ivy needs to grow under semi-shade or scattered light. Strong light and an overly shaded environment are both unfavorable to its growth.
Two: Ivy that is newly cut and transplanted, or just repotted and not yet recovered, causes ivy leaves to wilt. You can gradually increase the air humidity to ease this, and do not fertilize the roots in the near term.
Three: Improper watering may also cause ivy leaves to wilt. Watering should keep the soil slightly moist, or water thoroughly promptly when the surface of the potting soil is dry. Avoid accumulated waterlogging and long-term drought.
Four: Improper fertilizing may also cause ivy leaves to wilt. Do not apply too much fertilizer at one time or use unrotted raw fertilizer, otherwise it will cause serious fertilizer burn and make the ivy wilt or even die. Fertilizing should be done in small amounts and more often. Light fertilizer applied frequently is the basic principle for growing ivy well.
Five: Unsuitable temperature may also cause ivy leaves to wilt. Too high a temperature will cause ivy leaves to turn yellow or even wilt. The suitable growing temperature for ivy is 18~30 degrees, and it is best to keep it within this temperature range.
Ivy care methods:
Ivy likes warmth, fears heat, is not cold-tolerant, likes light, and is also fairly shade-tolerant. Grown under semi-light conditions, the internodes are shorter, the leaf shape is consistent, and the leaf color is vivid, so it is best kept indoors in a bright spot. If in spring and autumn you can each choose a period to place it outdoors in a shaded spot so that the ivy sees more sunlight in the morning and evening, it will be full of vitality with bright green leaves. But be careful to prevent direct strong light, otherwise it easily causes sunscald. During the growing season, watering ivy should follow the principle of watering when dry and withholding when wet. Do not let the potting soil become too wet, otherwise it easily causes root rot and leaf drop in ivy. In winter, when room temperature is low, watering especially should be controlled, and keeping the potting soil slightly moist is enough. The winter climate in the north is dry, so it is best to spray and wash it once a week with clean water close to room temperature to maintain air humidity, so that the ivy looks lively with tender green, glossy leaves. If you have leftover beer, use it to spray the leaves, and the ivy's color will be dark green.
What to Do When Ivy Leaves Turn Yellow: Causes and Solutions for Ivy Leaves Turning Yellow
Many people encounter ivy leaves turning yellow when cultivating ivy. What should you do when ivy leaves turn yellow? Below we tell everyone the causes and solutions for ivy leaves turning yellow.
1. The first case is the very common yellowing of old leaves. This is a very normal metabolism, and there is no need to worry too much about it. Just do the cleanup work promptly.
2. Regardless of the ivy variety, in winter the potting soil must stay moist, not too dry or too wet. Pay attention to indoor air humidity. If it is too low, it easily causes the leaf edges to wither and yellow, so in winter we should always pay attention to indoor air humidity, and if the humidity is insufficient we should promptly take measures to add moisture.
3. The influence of light: Avoid direct sunlight in summer. If exposed to direct sunlight, it easily causes necrosis on the leaf surface. In winter there is no need to shade, and the light can be appropriately stronger.
4. The influence of temperature: Ivy has a habit of preferring coolness, but ivy is especially afraid of frost. It can also grow indoors under conditions without heating. In addition, it grows poorly during high summer temperatures, so it should be placed in a ventilated, cool spot.
5. The influence of water: During the growing period of ivy, the potting soil must be kept moist, but water accumulation in the pot is taboo. In winter, the amount of watering can be reduced to avoid the potting soil becoming too dry.
6. The influence of humidity: In hot and dry seasons or indoors, you should often spray water on the leaves and around the plant, and frequently clean the leaf surfaces.
7. Pests and diseases: When this situation occurs, we should observe with the naked eye whether it is insects, or how it differs from before, and we can use a low-concentration pesticide spray to solve this problem.
8. Lack of iron: A lack of iron starts with the young leaves turning yellow. If this situation occurs, you can place a certain amount of iron filings in the soil, which can solve this problem very well.
9. If the original environment differs from the current environment, the plant will temporarily be unable to adapt and the leaves will turn yellow as a result.