What to Use to Disinfect Orchids When Dividing Them? A Detailed Guide to the Precautions
Orchids are loved by many people and are super beautiful and easy to grow. One pot can become many pots. So what should be used to disinfect orchids when dividing them? What are the precautions for dividing orchids?
First of all, dividing is not simply pulling the orchid seedlings apart. The best approach is to find the right division point, so that the orchid's vitality is not harmed. Orchid seedlings have a pseudobulb, and after new seedlings grow, they form new pseudobulbs. Generally, you have to wait until 3 or 4 years later for the connection point of the pseudobulbs to gradually separate and move down, so that the pseudobulbs of the new and old seedlings can slowly separate. Dividing at this time will not affect the orchid plant at all.
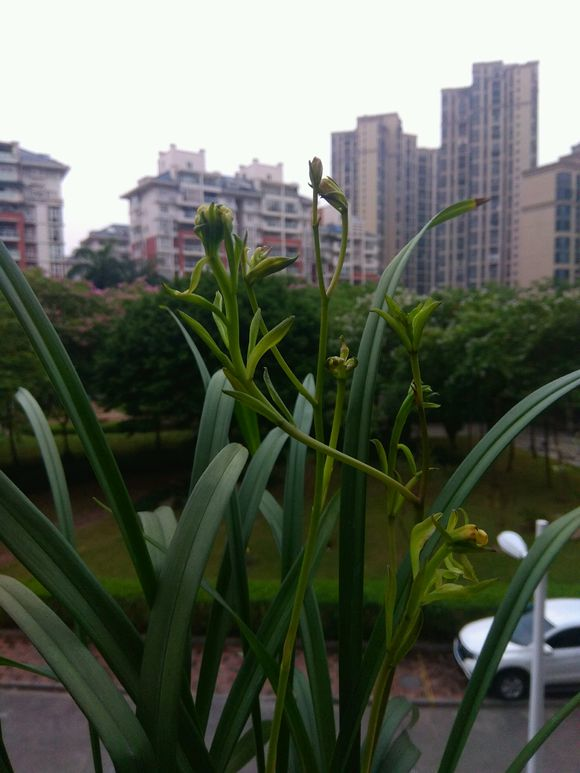
Precautions for dividing orchids:
The orchid must have grown to more than 5 seedlings, and it is best if they are connected seedlings on a single growth. Such orchid seedlings have strong resistance and will not be affected in any way after separation. The orchid's ability to adapt to growth is also relatively strong, making it very suitable for dividing expensive orchids.
Never force orchid seedlings apart, especially those that have not yet matured, or those whose pseudobulb connections are not obvious. After separation, the wounds are large and prone to bacterial infection, which can cause root rot, and the survival rate is not high.
If you want orchids to bloom, they must have enough nutrients. Choose an organic fertilizer specially made for orchids. It is rich in nitrogen, phosphorus, and potassium, and also promotes root growth and orchid bud development. Because orchid buds are relatively weak, you should use a safe orchid fertilizer. Also be careful to apply thin fertilizer frequently, diluted 1000 times with water, once every 2 weeks is enough.
When dividing, if you see small buds, be sure to protect them carefully and do not damage the buds. When dividing, look at how many roots there are. If there are many roots, they can be divided; if there are few roots, division is not recommended. All divided orchid plants must have roots.
After dividing, it is best to apply a carbendazim solution to the wounds. After they dry, plant them in new potting soil. This can help avoid bacterial infection. Then use an organic nutrient solution as the settling water, diluted 800 times. This can promote wound recovery, supplement enough nitrogen, phosphorus, and potassium, and promote vigorous orchid growth.
That is all for the methods of dividing orchids. Be sure to disinfect, otherwise they are prone to rot.
How to Divide an Overgrown Orchid? Orchid Division and Propagation Techniques
Growers who cultivate orchids all know that after being grown for many years, an orchid will inevitably become a large clump, and at this point it needs to be divided. The key to dividing the pot is actually the division of the plants. So how do you divide a potted orchid? Let us take a look below at the techniques for orchid division and propagation.
I. Conditions and Timing for Orchid Division and Propagation
1. Conditions for orchid division: Division is usually carried out after two or three years of growth after planting, when the orchid plants have already filled the whole pot; it is also done to increase the germination rate, or to rapidly increase the number of propagated varieties, by dividing connected orchid clusters with more than 4 plants; and it is also done to prevent the degeneration of a mutated rare plant by dividing a connected parent-and-child cluster consisting of just one old and one new plant.
2. Time for orchid division: Orchid division and propagation can generally be carried out throughout the year, but to ensure the survival rate, it is often done when the temperature is between 12°C and 30°C. According to its physiological characteristics, the best time is at the end of the flowering period. This is because at this time the orchid plant's vegetative growth is weary, not only have new buds not germinated, but even the growth points of the buds have not yet swollen, so division is unlikely to cause accidental damage. At the same time, since the flowering period has ended, generally no more flower buds will grow, so there is no problem of damaging flower buds due to division. In addition, through division, the activity of vegetative growth can also be promoted, improving the orchid plant's ability to rejuvenate and its budding rate.
II. Key Technical Points for Orchid Division and Propagation
1. Lifting the plant.
When dividing and repotting, the potting soil should be somewhat dry. If the potting soil is too wet, it is inconvenient to work with and the fleshy roots are easily broken and damaged. When repotting, after turning out the mother plant, gently remove the clumps of soil and shake off the substrate from the root ball. If the substrate is compacted or sticky, rinse it apart with water before dividing the clusters.
2. Washing the roots and drying the roots.
It is best to wash the roots with running tap water; soaking in water can easily spread diseases and pests. After the substrate is washed off, spread the orchid plant in sunlight and cut off rotten roots and broken roots. Rinse the roots and leaves clean with water, and after drying until the orchid roots become soft, use scissors to cut at the pseudobulb where the gap is large. Apply charcoal powder or sulfur powder to the cut, to prevent bacterial infection, and then wait to plant.
3. Choosing the pot. How well a orchid pot ventilates and breathes directly relates to how well the orchid grows. Generally speaking, clay pots have the best ventilation and breathability, purple clay pots are next, and porcelain pots are the worst. When using a new clay pot, note that it should first be soaked in clean water for 3 days, then soaked in disinfectant water for 2 hours, and used after drying. For orchids that are harder to grow, clay pots are more suitable. If they need to be displayed indoors or at a venue, a porcelain or glazed pot can be placed outside the clay pot, and the bottom of the pot must be filled with relatively coarse material to ensure ventilation and breathability.
4. Dividing and potting.
When potting an orchid, the filling layer generally accounts for 1/4 of the orchid pot's height, while the length of the root mass is best at 1/3 of the orchid pot's height. Therefore, an ideal orchid pot is generally taller than other flower pots. The waist of the pot can be large or small according to actual needs. In short, the orchid roots must have enough space to grow.
Potted orchid plants are generally divided into units of two or three connected generations, and according to the size of the pot, an appropriate number of natural clusters are planted, then fine soil is added until it is 2 to 3 cm from the pot rim. Lift the orchid plant slightly so that the roots spread out naturally. The lifting height should be based on the upper end of the pseudobulb being level with the soil surface, and it must not be too deep or too shallow. Then shake the pot to make the soil and roots come into close contact. Press firmly with your hand along the edge of the pot, to avoid forming empty spaces when watering.
5. Management after potting.
Place a layer of lichen or broken tiles on the top layer of the flower pot, so that watering does not easily cause the potting soil to become compacted and to reduce evaporation of water from the potting soil. For the first watering, it is best to use the sitting-pot method, that is, place the planted orchid pot in water with the pot surface exposed 3 to 5 cm above the water, so that water slowly seeps upward from below. When the water has seeped up to the soil surface, take the orchid pot out of the water and place it in a shady place for about 15 to 30 days, where it cannot be exposed to direct sunlight. During this period, watering must be controlled and it must not be too wet. Afterward, move it to a place with half shade and half sun, good ventilation, and morning sunlight. Whether it is balcony cultivation or courtyard cultivation, it is best to place the flower pot on an orchid rack that is open on all sides. A closed balcony should have sliding windows, which is very beneficial for reducing orchid diseases and pests.
That is all for orchid division and propagation. Division propagation is asexual propagation and is the most traditional propagation method. It has the advantages of simple operation, high survival rate, fast increase in plant number, earlier flowering, and ensuring quality characteristics.
Illustrated Guide to Orchid Division
Orchid division is actually not difficult; you just need to be careful. The key is still to master the timing of orchid division. In this article, we will first talk about the timing, and then refer to other growers' illustrated division guides for reference.
1. Timing for orchid division:
When the potting medium in the orchid pot has been used too long and has aged, or when there are too many seedlings and no room to grow, division or repotting must be carried out. Generally speaking, the most suitable times for division are spring and autumn. At these times the orchid plants are in their mature stage, and the damage rate can be reduced to the minimum. In the first half of the year, it is best from the Spring Equinox to Grain Rain. At this time the flowering period has ended, the leaf buds have not yet sprouted, and they are not easily damaged by cold, so repotting can be done at the right time. In the second half of the year, it is best from the Autumn Equinox to Frost's Descent. The orchid will enter a dormant state, so repotting at this time will have less impact on the orchid's growth. After resting and recuperating through winter and accumulating nutrients, by spring it can bloom and sprout very well. Mastering the timing of orchid division and propagation is also an important part of caring well for orchids.
2. Illustrated guide to orchid division (from: Anji Menghu):
1. Turning out the pot (a rare Cymbidium goeringii plant grown for many years in one pot)
2. Tool preparation (medical surgical scissors / surgical scalpel / alcohol lamp for disinfection). If conditions do not allow, other sharp tools are also acceptable, such as a blade.
3. Inspection (carefully examine the seedling structure and look for the best division point.)
4. Sorting the roots (after choosing the division point, first comb through the root system and separate the roots that are intertwined and tangled, being careful and slow to reduce root breakage.)
5. Twisting (hold the roots with both hands and gently twist to find the connection point; do not rudely pull the pseudobulb apart with your hands, as this easily damages new buds and leaves.)
6. Cutting (at the position you have identified, cut decisively. Note: each time you make one cut, orchid plants will definitely separate. Before you see one split into two, do not make a second cut; the result of careless cutting is to split the orchid plant into fragments.)
7. Trimming (cut off the withered yellow sheaths, as that is where dirt and grime collect.)
8. Rinsing (rinse clean with running water.)
9. Fine division (for orchid plants that need to be further divided, look again for suitable connection points. Generally 3-4 seedlings per plant, so there is less damage and it is easier to rejuvenate.)
10. Cutting apart (use a surgical scalpel to carefully cut open, so the wound is small and easy to heal. Note: the surgical blade should be changed for each pot to prevent virus transmission.)
11. Applying medicine (all separated wounds should be treated with a sterilizing agent. I use "Baitou" original powder to apply directly to the wounds, which can effectively prevent the occurrence of stem rot in summer.)
End (after the orchid plants are separated, they should be cooled for 1 day, and after the root system becomes soft and the wounds slightly shrink, they can be potted. Note: do not water within 3 days after potting, which is beneficial for wound healing and prevents diseases caused by dividing the pot.)