How to Grow a Potted Ornamental Onion After It Sprouts Without It Rotting
Onion is a vegetable that many people love to eat; it is truly delicious and tasty. So how do you turn a sprouted onion into a potted ornamental plant? Will a sprouted onion rot when turned into a potted plant?
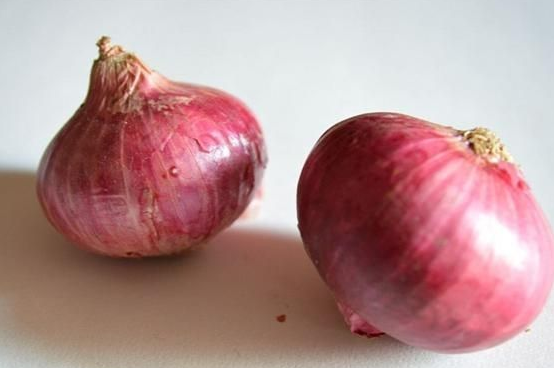
How to turn a sprouted onion into a potted plant:
1. First, you need an onion that has already sprouted. Those of you whose hands are itching to try growing one can also buy a few and leave them to sprout.
2. Just like when we normally peel an onion, first remove those papery thin outer layers, being careful not to damage the roots underneath.
3. Cut open the sprouted onion, doing so carefully and trying not to damage the sprouting part in the center.
4. Remove the excess onion so that only the central part remains. The parts you removed can still be eaten, so don't waste them.
5. Plant it in the potting soil in a container with the root end facing down.
6. Water it, then put it in the sun and observe the onion's growth process. When the season comes and you see the onion bulb pushing up through the soil, you can pull the onion up. Of course, the onion leaves are also edible, and they taste quite good.
Will a sprouted onion rot when turned into a potted plant?
When an onion sprouts, at first it is a small sprout, very cute, but it changes every day, growing bigger and bigger, and then no matter how tall it grows, the leaves droop down and it no longer looks good. After sprouting, the onion will keep growing, and the onion bulb will rot. This is true for water culture, and the same for soil culture.
That is all for the introduction on how to make a potted plant from a sprouted onion. If you use water culture, then you can see the onion rot.
It is just an onion, really just an onion!!
Summary: Onion, doesn't it instantly feel a bit lowbrow? But when an onion transforms into a classy potted plant, would you still be willing to eat it?
Two weeks ago, I remembered that I still had onions in my fridge that I had bought a long time ago. When I opened it, they had all sprouted. Most importantly, I felt these tender green little sprouts were actually quite pretty, so I got the idea to turn them into potted plants.
There are roughly two growing methods you can choose. If you choose water culture, you should choose a relatively attractive glass bottle. For soil culture, you can choose an opaque vase. It is suggested that it should still have some aesthetic appeal, and it is best not to choose plastic bottles or drink bottles.
Mainly because there were quite a lot of onions left, I tried both methods separately. I used a discarded water cup as the container for growing the onions. First, wash the glass cup until it is crystal clear with dish soap, put in the onion, and add water until it just covers the bottom of the onion.
For this soil-cultured one, can you tell what container I used? That's right, it is the Go chess box from my home. It belongs to my dad, and fortunately he wasn't very angry. For soil culture of onions, first add soil, only about 3 cm deep, put in the onion, press down slightly, and it will take root. Of course, if the vase is relatively large, you can also add other plants to decorate it.
Two weeks later, the onions I grew had changed a little, but personally I think they still look quite nice, very artistic, right?
Are you still buying potted plants?
Are you still buying potted plants? Too behind the times? Take a look at this.Do you throw away the seeds left after eating fruit? If you can't finish the vegetables bought from the market and some rot, do you throw them away too? Find a container, and many fruits and vegetables can transform into fun potted plants!
[Radish Potted Plant]
When cutting vegetables, cut off a large piece from the head of a nice, plump carrot and throw it into a water container, and let it grow wildly like this.
Tip: Try to grow it in a slender water container, and the leaves will shoot straight up very high. Remember to change the water often. After it grows more leaves, take it out and place it in a suitable pretty container, so the shape will be more upright and lively. Otherwise, its leaves will spread out as they grow, making it feel lifeless.
[Taro Potted Plant]
Taro can be grown both as a vegetable and as an ornamental plant. Its form is similar to Alocasia and Alocasia amazonica, and placed at home it is a beautiful scenery line.
Taro has no strict requirements for soil, water, fertilizer or light, has almost no pests or diseases, has a long ornamental period, and its edible parts and time are also long. It is very suitable for friends who want to grow vegetables on a balcony!
For planting taro, you can choose edible taro bought at a vegetable market or supermarket. The soil does not need to be particular, and no fertilizer is needed after planting. It only needs one to two hours of scattered light per day. Note! It absolutely must not lack water. Water it once or twice a day, and also spray water on the leaf surface and around it from time to time.
[Potato Potted Plant]
When buying potatoes, choose ones with many eyes, as these potatoes have a high sprouting rate. After buying them, put them in a plastic bag and let them sprout under natural conditions. Wait until some white little roots grow out on the surface of the potato like bared fangs and claws; then it can be planted!
1. Cut a potato into two to four pieces, and each piece must have a sprout. Try to make the buds on each potato piece evenly distributed.
2. Dig a small hole in a flower pot filled with soil, and bury the potato in it.
3. After planting, level the soil. If it is too dry, water it.
[Cabbage "Flower"]
Most cabbages are too big, and you often can't finish them. In that case, you might as well use half for eating and half for viewing!
Cut the cabbage in half horizontally. Use the upper half for eating, and put the lower half in a container filled with clean water. Just like that, a cabbage potted plant is ready!
Tip: Since there are many varieties of cabbage, friends can plant several different varieties of cabbage, and then you can have cabbages of many colors!
[Onion Potted Plant]
Everyone knows that eating more onions is good for your health. But if you buy too many onions, they will rot and produce a pungent smell. Rather than letting them go to waste, you might as well grow them. And please rest assured, an onion potted plant will not give off a pungent smell that makes you cry. Instead, it can help prevent colds.
Cut off the fibrous roots at the top of the onion, and place it in a bowl, or in a glass cup that can hold the lower half of the onion. Add a small amount of clean water, just enough to touch the lowest layer of the onion. Absolutely do not soak the onion bulb in water, otherwise the onion bulb will rot.
Tip: Putting two aspirin tablets in the water appropriately will help it sprout quickly. If you grow it in a glass cup, you can also enjoy the beautiful shape of the fibrous roots hanging down.
[Longan Forest]
Longan is actually very easy to grow. When eating longan, you might as well keep the seeds and try. Before soaking longan seeds in water, you need to remove the flesh and white soft tissue at the top completely, otherwise they will easily attract insects later.
1. After soaking longan seeds in water for two days, the outer shell has gradually cracked open, and you need to change the water every day.
2. After soaking for about a week, plant them in a container with the sprouting point facing up, arranged from the outside inward.
3. Spray water twice a day, and after a week they will begin to sprout.
4. After more than ten days, the small sprouts begin to "compare heights."
5. After about a month, the little forest has grown! Can you connect it with the longan you ate?
6. The greatest ornamental point of a longan potted plant is its color-changing leaves. New leaves are red, then turn yellow, and then turn green.
[Lemon Forest]
1. Soak the leftover lemon seeds in water for a bit.
2. Use tweezers to remove the outer shell.
3. Then find a container or cup you like and fill it with moist soil. Arrange all the seeds with the small end facing up.
4. Then cover them with coarse sand or small stones. You can also cover with plastic wrap, spray a little water every 2 to 3 days, and they will sprout in about a week.
5. After sprouting, also spray a little water every 2 to 3 days to keep it moist and help growth.
6. This is the finished picture, very beautiful. Add a touch of green to your office desk or study desk! If it grows this tall and you think it is too dense, you can separate a few plants and cultivate them elsewhere.
[Dragon Fruit Forest]
A ripe dragon fruit has red skin and white or red flesh inside. Just a little bit of seeds separated from dragon fruit flesh is enough to grow a potted plant.
1. Cut the dragon fruit in half, and gently scrape the flesh into a container with a stainless steel spoon.
2. After diluting the flesh with water, gently rub it with your fingers, trying to separate the flesh from the seeds.
3. Then pour the mushy flesh into a short stocking and continue rubbing a few times. Next, soak it in water for 1 day. Do not soak it for more than two days, otherwise it will sprout. The next day, continue rubbing so that all the flesh can be squeezed out, leaving only black seeds that look a bit like black sesame.
4. Lift the stocking to drain the water. You can use toilet paper to blot the water from the seeds. Take out the seeds and spread them flat on a plate. Use an electric fan to blow gently so the seeds dry completely and separate grain by grain, and then you can start planting.
5-9. Choose a suitable container without holes, or fill the hole of a container with holes, put in sterile potting soil, about nine-tenths full, and spray some water to make the surface soil very moist. Then evenly spread the seeds on the potting soil.
10. After spraying water on the seeds several times, wrap it with plastic wrap to keep the surface moist, then uncover it once a day to spray water until new sprouts grow, and only then uncover it completely.
11. After a week, it will cover the entire pot surface, about 1 cm tall. The outer shells of the seeds will fall off one after another, and the whole pot will feel like green grass, thriving and full of green.
12. After two weeks, it has grown a bit taller, about 2 cm tall. The leaves are denser and thicker, and the color of the two leaves turns yellow-green. It is very suitable to place in an office or living room, giving a fresh and comfortable feeling.
After about four months, the second layer, like the small spines of a cactus, will begin to grow. This is how it looks after six months, turning into a plump, chubby cactus, super cute.
[Pomelo Potted Plant]
5. Cover the top with coarse sand or small stones.
6. You can also cover the top with plastic wrap, spray a little water every 2 to 3 days, and it will sprout in about a week.
7. After sprouting, also spray a little water every 2 to 3 days to keep it moist, which helps growth.
8. Finished picture, very beautiful, right!
1. These are the seeds left after eating pomelo~
2. Use tweezers to remove the outer shell.
3. Soak them in water for 5~7 days, changing the water every day, so the water will not smell bad and the seeds will not spoil.
4. Find a container or cup you like and fill it with moist soil. Arrange the soaked pomelo seeds in the container with the small end facing up.