Clematis Propagation Methods and How It Differs from Clematis patens
There are many propagation methods for clematis. It is a plant with strong growth vigor and is suitable as an ornamental plant. So what are the propagation methods of clematis? And how does it differ from Clematis patens?
Clematis propagation methods:
1. The cutting propagation method of clematis
Hybrid clematis cultivars mainly use cuttings as the primary propagation method. In July—August, take semi-mature branches and cut at the internode (that is, in the middle between the upper and lower nodes; the node should have 2 buds). Use a medium of half peat and half sand. Insert the cutting at a depth where the buds on the node are just exposed above the surface. Bottom temperature 15-18°C. After rooting, pot into 3-inch pots and overwinter in a frost-proof hotbed or greenhouse. In spring, transfer to 4—5-inch pots and move outdoors. In summer, shade is needed to protect against rain showers. Plant out at the end of October.
2. The seed propagation method of clematis
High-quality varieties can be propagated by sowing. If sown in spring, germination takes about 3—4 weeks. If sown in autumn, germination occurs when spring warmth arrives. However, some seeds must go through a low-temperature vernalization stage before they can germinate, and only when the first pair of true leaves appears can they grow normally. Some varieties need to go through two low-temperature stages. For vernalization treatment, place the seeds in a 0-3°C environment for cold storage for 40 days; germination takes about 9-10 months. The time is long, so wait quietly.
3. The layering method of clematis
In March, use mature branches from the previous year for layering. They usually root within 1 year.
4. The grafting method of clematis
For hybrid clematis species, single-node scions can be grafted onto rootstock using the cleft grafting method. The node should have 1—2 buds, and the section below the node should be 5-10 cm long. Grafting in a heated and enclosed environment easily promotes survival.
5. The division method of clematis
Generally, only plants that have grown for 3-4 years will form clumps. Clumping plants can be divided.
Differences between clematis and Clematis patens:
1. Differences in roots
Both belong to the Ranunculaceae family. Although both have woody stems and fleshy roots and grow as climbers, there are obvious differences in the shape and color of their roots. First, the colors are different: the yellow-brown roots are clematis, while the roots of Clematis patens are reddish-brown. Second, in shape, clematis has slender roots with many fibrous roots, while Clematis patens has very thick and short roots with very few fibrous roots.
2. Different flowering characteristics
For clematis sold as potted seedlings, customers cannot directly see the bare roots, so they can distinguish whether it is clematis by observing the flowering characteristics.
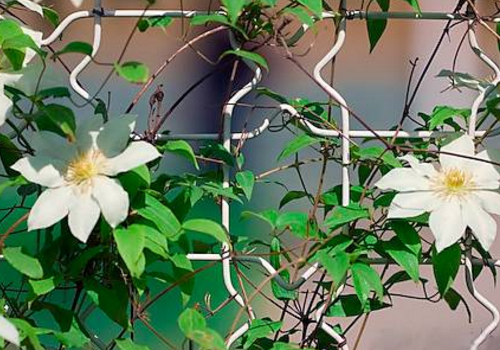
Clematis has a relatively large number of flowers, a very long flowering period, and very bright flower colors; in addition, the colors are also very rich. By comparison, Clematis patens has extremely strong adaptability, commonly known as wild nature, and is very cold-hardy. It does not need much care and can overwinter outdoors in cold conditions. Its flower colors are fewer than those of clematis, only white or yellow, and only one flower blooms on a single vine, so the flower quantity is extremely small. Therefore, the one with rich flower colors is the genuine clematis.
3. Different flowering positions
In addition to the differences in roots and flower color, the third method is to separately observe the flowering positions of Clematis patens and clematis.
Clematis flowers grow in the leaf axils, while the flower stalks of Clematis patens are very straight and thick, and the flowers grow at the tips of the branches and stems, usually as a single lonely flower. If the clematis you purchased has flowers at every leaf axil, then it is genuine clematis.
In fact, you can also identify clematis and Clematis patens by observing the morphological characteristics of the leaves, but this observation method is relatively difficult unless you are a veteran clematis enthusiast. Once we have mastered the above three methods, we can make a correct judgment about whether it is genuine clematis.
Alright, friends, do you all understand clearly now? Do you know how clematis is propagated?
Clematis cultivation methods and precautions for clematis
Clematis, known as the "Queen of Climbing Flowers," is a species under the genus Clematis in the Ranunculaceae family. Most are deciduous or evergreen herbaceous vines. So what are its cultivation methods and precautions? And what effects and functions does it have? Let's learn about it together with the editor below!
Clematis cultivation methods
Temperature
The most suitable temperature for its growth is between 15-17°C at night and 21-25°C during the day. In summer, when the highest temperature during hot weather reaches 35°C, it will cause the leaves of clematis to turn yellow and even drop. In summer, we need to take cooling measures for it. In November, the temperature will continue to drop. If it reaches 5°C, clematis will enter a dormant period. In December, it will be in complete dormancy, and once it enters dormancy, leaf drop will begin within one to two weeks.
Light
Clematis generally needs more than six hours of direct light, which is very beneficial to its growth. Although hot weather may cause some spots, it does not hinder its good growth.
Watering
It is very sensitive to moisture. It cannot be too wet or too dry. Especially in hot summer weather, its substrate must not be too wet. Generally, during its growing period, it can be given a thorough watering every 3-4 days. When watering, do it when the substrate has dried out but the plant has not wilted. When watering, it must never be allowed to become waterlogged, otherwise it will easily cause diseases.
Fertilizing
From late February to early March, before it sprouts new buds, we can appropriately apply a compound fertilizer to speed up its growth. In April or June, apply a phosphate fertilizer once to promote flowering. At ordinary times, water-soluble fertilizer can be used. During the peak growing season, spray 2-3 times per month.
Pruning
The purpose of pruning it is actually to allow the plant to produce more flowers. Pruning can generally be done once a year. Cut off some overly dense or weak branches and let its new branches extend in all directions. The timing of pruning should be determined according to the flowering time of different varieties, but do not prune branches that have already become woody. If pruned earlier, it may fail to bloom that year.
Precautions for clematis
1. Sufficient moisture
In the first few months after planting, pay attention to providing sufficient water. The watering area should have a diameter of no less than 50 cm so that the roots can extend in all directions.
2. Pay attention to drainage
When planting clematis, generally dig a hole 40 cm deep and 60 cm in diameter. After loosening the hard soil at the bottom of the hole, put in a large amount of humus, then add topsoil mixed with bone meal. In poorly drained clay soil or light sandy soil, after loosening the bottom of the hole, mix in a shovel of peat soil or humus. In places where water may accumulate, the bottom should be raised with stones or rubble, 25 cm above the surrounding soil surface.
3. Pay attention to fixing
If the branches are brittle and easy to break, pay attention to guiding and fixing them.
Clematis propagation methods
1. Clematis seed propagation method
Original species can be propagated by sowing. For seeds of the epigeal type (achenes relatively small, seed coat relatively thin), if sown in spring, germination takes about 3-4 weeks. If sown in autumn, germination occurs when spring warmth arrives. For seeds of the hypogeal type (larger, seed coat thicker), they must go through a low-temperature vernalization stage before they can germinate and the first pair of true leaves appears; some species must go through two low-temperature stages before they can germinate, such as Clematis patens. For vernalization treatment, if seeds are cold-stored at 0-3°C for 40 days, germination takes about 9-10 months. Treatment with a certain concentration of gibberellin can also be used.
2. Clematis cutting propagation method
Hybrid clematis cultivars mainly use cuttings as the primary propagation method. In July—August, take semi-mature branches and cut at the internode (that is, in the middle between the upper and lower nodes; the node should have 2 buds). Use a medium of half peat and half sand. Insert the cutting at a depth where the buds on the node are just exposed above the surface. Bottom temperature 15-18°C. After rooting, pot into 3-inch pots and overwinter in a frost-proof hotbed or greenhouse. In spring, transfer to 4—5-inch pots and move outdoors. In summer, shade is needed to protect against rain showers. Plant out at the end of October.
3. Clematis layering propagation method
In March, use mature branches grown on clematis in the previous year for layering. They usually root within 1 year.
4. Clematis division propagation method
Clematis is a clumping plant and can be propagated by division, which is also one of the relatively simple propagation methods.
5. Clematis grafting propagation method
For hybrid species such as Jackman clematis, single-node scions can be grafted onto C. vitalba or C. viticella rootstock using the cleft grafting method. The node should have 1—2 buds, and the section below the node should be 5-10 cm long. Grafting in a heated and enclosed grafting box easily promotes survival.
Effects and functions of clematis
1. Clematis has the effect of beautifying the environment and purifying the air. This plant mostly climbs on some tall trees or shrubs. It is a commonly used plant for green fences or green vegetation in some areas. Its flowers are white, and growing together with green leaves they are especially beautiful and attractive. It is an important landscape in some scenic areas.
2. Clematis can also be cultivated as a potted plant. Placing it indoors can not only beautify the environment and purify the air, but also has a strong decomposing effect on common radiation sources in the home, reducing radiation damage to people from computers, mobile phones, televisions and other items.
3. Clematis can also be used as medicine. After being used medicinally, its greatest effects are regulating qi, relieving constipation, and detoxifying. It is mostly used to treat rheumatoid arthritis and difficult urination in humans. In addition, it also has a certain therapeutic effect on constipation with abdominal bloating, toothache, and jaundice in some people. Furthermore, its detoxifying effect is also suitable for venomous snake bites. If it is crushed directly and applied to the wound, it can prevent the spread of snake venom.
Why do clematis leaves curl slightly and the edges turn black?
① Too much fertilizer, especially unfermented fertilizer or chemical fertilizer, most easily burns the root system and causes leaf curling.
② Too much watering, causing waterlogging damage to the root system. In addition, accidental continuous drought and stuffy heat can also cause leaf curling and blackening.
The leaves at the bottom of clematis are starting to turn yellow. What causes this?
① Improper repotting and soil changing. Make sure the root system is closely combined with the soil. You can gently tamp it down or use a thin wooden stick to firm it slightly. When applying base fertilizer, use fully decomposed fertilizer, preferably away from the roots, and do not let it directly touch them. Water thoroughly immediately after repotting, first place it in a cool place for care, and the second watering should be done when the potting soil is slightly dry. After that, water alternately dry and wet. After repotting, there is no need to fertilize again in the short term; it is best to wait at least three weeks before fertilizing.
② There is a problem with the soil used, such as containing lime powder or being too acidic.
③ Improper fertilizing: Fertilizing should preferably be light and frequent. Compound fertilizer is preferable. It can be applied in holes or by watering. Never apply undecomposed organic fertilizer or large doses of chemical fertilizer, otherwise both will scorch the root system, causing the plant to wilt and die.
④ Improper watering, excessive watering.
⑤ Iron deficiency. The solution is to water with ferrous sulfate.
Alright, that's all for today. If you want to learn more, please follow Fengqiao Ju Flower Network.
How to cultivate clematis and clematis propagation methods
Clematis, also known as iron wire peony and gold-wrapped silver. Most are deciduous or green herbaceous vines. The flowering period is from early spring to late autumn, and it fruits in summer. Clematis can be used for garden ornament and can also be used as medicine. Clematis has long had the reputation of "Queen of Climbing Flowers." Let's take a look below at how to cultivate it.
Herbaceous vine, about 1-2 m long. Stems brown or purplish-red, with six longitudinal lines, enlarged at the nodes, sparsely covered with short soft hairs. Biternate compound leaves, up to 12 cm long including petiole; leaflets narrowly ovate to lanceolate, 2-6 cm long, 1-2 cm wide, apex bluntly pointed, base rounded or broadly wedge-shaped, margin entire, very rarely lobed, hairless on both surfaces, veins inconspicuous; petiolules clearly visible, short or up to 1 cm long; petiole 4 cm long.
Flowers solitary in leaf axils; pedicels about 6-11 cm long, nearly hairless, with a pair of leaf-like bracts in the lower middle part; bracts broadly ovate or ovate-triangular, 2-3 cm long, base sessile or with a short stalk, covered with yellow soft hairs; flowers open, about 5 cm in diameter; sepals 6, white, obovate or spoon-shaped, up to 3 cm long, about 1.5 cm wide, apex relatively pointed, base gradually narrowed, inner surface hairless, outer surface along three straight midveins forming a linear-lanceolate band, densely tomentose, margins hairless; stamens purplish-red, filaments broadly linear, hairless, anthers lateral, oblong-rectangular, shorter than the filaments; ovary narrowly ovate, covered with pale yellow soft hairs, style short, upper part hairless, stigma swollen into a head shape, slightly 2-lobed.
Achenes obovate, flattened, margins thickened, persistent style elongated into a beak shape, slender, lower part with spreading short soft hairs, upper part hairless, swollen stigma 2-lobed. Flowering period January to February, fruiting period March to April.
Cultivation of clematis:
1. How to choose clematis
Choosing clematis seedlings is very important. First, choose a good variety. Many varieties have proven to be relatively weak varieties, such as Hagley Hybrid, Patricia Ann Fretwell, Niobe, Kyoko, Purple Dream, and many others. So beginners must choose carefully. Second, choose a good seller.
2. How to mix soil
The medium is the most important thing in potted clematis cultivation. One major principle is breathability and moisture retention. Based on this principle, some flower friends, combining the soil mixes of experienced growers, believe that the best and most economical soil mix is coconut coir 3, peat 1, perlite 1. Of course, large-particle media such as volcanic rock, kanuma soil, clay pellets, and bark can also be added. Coconut coir bricks are cheap, coarse-fibered, most breathable, and easy to moisten. Peat helps retain water. Perlite is also used for aeration. For small seedlings, it is best not to put organic fertilizer in the first year; adding some slow-release fertilizer is best. When repotting in autumn of the second year, an appropriate amount of organic fertilizer can be added at the bottom, but it must be separated from the root system. Be sure to remember not to use organic fertilizer. During ordinary watering, fertilizers such as Peters Professional, Huahuaduo, and Biwang can be added for irrigation.
Whether the soil mix is good can be judged by the speed at which water flows away. That is, after mixing the soil, fill a 1-gallon pot with it and pour in water. If the water drains away as soon as you pour it in, the soil mix is good. Also, clematis should be planted shallowly in spring, especially in the south. The root-stem junction is best left exposed. Because spring air humidity is high in the south, if soil covers the weakest part of the small clematis at the root-stem junction, it is very easy for bacteria to invade and cause wilt. Some clay pellets can be placed at the root-stem junction to cover it, which is both attractive and protective. (The editor suggests not placing too many, because under hot and humid spring conditions it will increase the reproduction of pathogens.) When autumn comes, clematis can be planted deeply, allowing it to root at multiple layers, so that if wilt occurs it can recover faster.
3. Watering and pest and disease management
In many cases, clematis is killed by water damage. It has fleshy roots and is very afraid of waterlogging. But it also likes to remain moist. Therefore, generally in winter, water should be controlled, basically once every half month. In summer, water more, generally once every 3 days. Because summer weather is too hot, it is best to supply water from the tray in the morning. Do not water directly at noon, otherwise it will rot the roots. Watering follows the principle of watering when dry and keeping moist, not watering every day. In spring and autumn, watering can be more casual, because clematis is in a vigorous period and uses water quickly. The so-called "water thoroughly when dry" does not mean using a lot of water; seeing water flow out is enough, and it is not necessary to repeatedly irrigate with a lot of water. Also, it is very afraid of water because its root system is generally very fine, obviously similar to that of geraniums.
Clematis is most afraid of wilt. Wilt disease is like a person catching a cold; so far there is no absolute preventive medicine. But in the south, during the unsettled spring season, it is best to use carbendazim or potassium permanganate to prevent clematis wilt. Plant ash is also a very good preventive material. An old farmer told the editor that in the past when there were no organic pesticides, they used plant ash when there was morning fog, scattering it on beans and other plants, which could effectively prevent wilt and pest occurrence. After wilt occurs, first water a small amount to see whether the drooping is caused by lack of water. But if it is still drooping after watering overnight, then it can be confirmed as wilt. Immediately remove the top, cut off the leaves, and observe along the vine until you find the place where it has wilted and turned black, then cut it directly with scissors. The wilted vine can also be trimmed and directly used for cuttings. After pruning wilted clematis, it should be drenched with carbendazim or potassium permanganate for root disinfection, placed in a cool place for one week to recover, and wait for new shoots to grow again. But generally, once 1-year-old small seedlings wilt, it is very difficult for them to recover. Clematis seedlings of 2 years or more can definitely send out new shoots. So generally when small seedlings wilt, you must be mentally prepared to buy new seedlings, while for large seedlings you can simply wait.
4. Pruning
There is no absolute rule for pruning clematis. But generally speaking, after flowering, if seeds do not need to be kept, the 3 nodes of branches below the flower can be cut off for cuttings. In autumn and winter, when clematis enters dormancy, pruning should be done immediately. Small seedlings can generally be cut back to soil level, while large seedlings can retain strong branches. Especially for double-flowered ones such as Daniel Deronda, Arctic Queen, Josephine, and Crystal Fountain, old branches should be retained.
5. Winter care
Most clematis can overwinter outdoors in the south, and in the north large-year plants also have no problem. In winter, if they are small seedlings, after pruning they should be covered with dry peat or coconut coir. Large seedlings can generally be placed casually. The most important point in winter is to control water. In fact, just spraying some water on the surface of the peat or coconut coir is enough; never use a lot of water. After clematis sprouts, it can be repotted. Put some fermented organic fertilizer at the bottom of the new pot, remember only a small amount. Then put a layer of new medium before placing the clematis. Generally, 1-year-old clematis should it is best not to casually switch to a large pot. Be sure to remember not to switch to a large pot, do not add organic fertilizer, and you can add an appropriate amount of mixed fertilizer.
6. Ground planting of clematis
Clematis is very suitable for ground planting. In the south, small sturdy seedlings can be planted in the ground, but in the north, generally seedlings of 2 or more should be chosen for ground planting. The editor suggests using the method of planting in the ground with the pot to grow small seedlings, and the effect is very good. That is, make as many holes as possible in the bottom of the pot, so that the clematis root system can feel the ground energy and can drill out from the bottom of the pot. You can use blackcurrant pots or two-color pots to grow them, and you do not need to worry about damaging the pot. The reason this method is very good is, first, the plant receives the essence of heaven and earth, and second, the pot wall is higher than the surroundings, which can effectively prevent water accumulation. Ground-planted clematis basically rarely withers, and it will also bring you the shock of explosive flowering that cannot be surpassed by pot planting. As long as there is no water accumulation and there are not too many ground insects, you can let go and not manage it too much. After all, clematis are all improved from wild clematis. Letting clematis return to nature has many benefits.
Clematis propagation methods
Seed sowing, layering, grafting, division, or cutting propagation are all acceptable.
Seed sowing
The original species can be propagated by sowing. For seeds of the epigeal type (achenes relatively small, seed coat relatively thin), if sown in spring, they can germinate in about 3 to 4 weeks. If sown in autumn, they will germinate when spring becomes warm. For seeds of the hypogeal type (larger, seed coat thicker), they must go through a low-temperature vernalization stage before they can germinate, and the first pair of true leaves emerges; some species must go through two low-temperature stages before they can germinate, such as Clematis patens. For vernalization treatment, if seeds are refrigerated at 0 to 3 C for 40 days, germination takes about 9 to 10 months. Treatment with a certain concentration of gibberellin can also be used.
1. Spring sowing
Spring-sown seeds should be subjected to germination acceleration treatment. First soak the seeds in 40 C warm water for 24 h, remove and drain them, then keep them covered to accelerate germination, and once most seeds "show white," they can be sown. Generally, the suitable sowing period in northern Xinjiang is early April, and the suitable sowing period in southern Xinjiang is early March. Before sowing, finely prepare the land until the terrain is level and the soil is fine and crumbly. Then make ridges and beds, with beds 6 m long and 4 m wide. Clematis is usually sown in rows, with a row spacing of 50 to 60 cm, a furrow depth of 2 cm, and after sowing cover with soil at a thickness of 1.5 cm, then press lightly.
2. Autumn sowing
Autumn sowing does not undergo germination acceleration and is sown directly, generally carried out in early November. Seedlings emerge in the following spring. Autumn sowing generally emerges more uniformly and grows faster than spring sowing.
Layering
In March, use mature branches from the previous year for layering. Usually roots form within 1 year.
Division
Clumping plants can be divided.
Cutting
For cultivated varieties of hybrid clematis, cuttings are the main propagation method. In July to August, take semi-mature branches and cut between nodes (that is, cut in the middle between the upper and lower nodes; the node has 2 buds). The medium is half peat and half sand. The cutting depth is such that the buds on the node are just exposed above. The bottom temperature is 15 to 18 C. After rooting, place into 3-inch pots and overwinter in a frost-protected hotbed or greenhouse. In spring, change to 4- to 5-inch pots and move outdoors. In summer, shading is needed to prevent rain showers, and final planting is done at the end of October.
Pot cultivation techniques
Seedling selection
Because the clematis root system does not have enough competitiveness, when selecting seedlings, choose plants with full roots, multiple stems, and sturdy dark green growth.
Prepare the substrate before planting
Generally, a fertile substrate with good drainage can be used for growing clematis. We choose a substrate mixed with peat and perlite at a ratio of 3:1 or 2:1, with the EC value of the substrate controlled at 60 to 80 mg/kg and the pH value between 5.8 and 6.5.
Support: The final size and growth vigor of clematis are both related to the support. The support should be thin (diameter less than 1.5 cm) so that the petioles can twine around it. The support can be thin bamboo poles or plastic-coated wire mesh, etc., with a height between 1 and 2 m.
Container: The container should be at least 35 cm deep and 25 to 30 cm wide, and of course the larger the better. The container is best made of wood or ceramic, which is not only attractive but also beneficial to the growth of the clematis root system.
Planting
Before planting, cut the clematis stems to a height of 30 cm, which helps branching and can avoid stem breakage during planting. The base of the clematis stems should go 3 to 5 cm below the soil surface. After placing the plant at the appropriate depth, cover with soil, press firm, and water.
The clematis root system likes a cool environment. Covering the planting substrate with a 3 to 5 cm thick mulch (such as bark, moss, etc.) can provide a very good and cool root environment, which is beneficial to the growth of the plant root system.
The planting time is arranged from March to May or from September to October.
After reading the above introduction to clematis cultivation and propagation methods, do you have a better understanding of clematis cultivation and propagation? If you want to know more about clematis, please continue to follow.