Oleander Planting Methods and Pest and Disease Control Tips
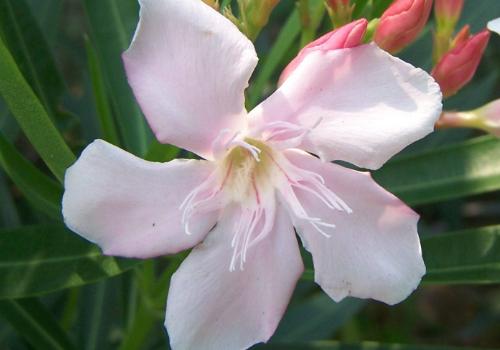
Oleander is a flowering plant that loves fertilizer and water, and prefers neutral or slightly acidic soil. So how do you grow oleander? How do you control oleander pests and diseases?
How to grow oleander:
1. Pruning
The upper branches of oleander have a characteristic of splitting from one into three. You can prune and shape it as needed. If you want a three-fork nine-top shape, you can cut off a portion from the top of the three forks, and nine tops will emerge. If you want nine tops and eighteen branches, you can keep six branches and cut from the leaf axils at the top, and eighteen branches will grow. Pruning should be done after each flowering. In the north, the flowering period of oleander is from April to October. Spent flowers should be removed promptly to ensure concentrated nutrients.
Generally, pruning is done four times: first, after Grain Rain in spring; second, during July and August; third, during October; fourth, winter pruning. If you want it to bloom indoors, move it to a spot indoors with sunlight at around 15°C. Prune immediately after flowering, otherwise, flowers will be few and small, or it may not bloom at all. Through pruning, the branches are evenly distributed, flowers are large and colorful, and the tree shape is beautiful.
2. Root thinning
Oleander's fine hair roots grow quickly. A three-year-old oleander planted in a pot with a diameter of 20 cm can fill the pot with roots by July of that year, forming a ball that hinders the penetration of water and fertilizer and affects growth. If roots are not thinned in time, wilting, leaf drop, and death may occur. The best time for root thinning is from early August to late September. At this time, the roots are dormant, making it a good opportunity for root thinning.
Root thinning method: Use a sharp shovel to cut away the surrounding yellow hair roots; then use a three-pronged hook to loosen along the main root. Remove about half or one-third of the yellow hair roots, then replant in the pot. After root thinning, place in shade and water thoroughly, keeping the potting soil moist. Keep in shade for about 14 days, then move to a sunny spot. For field-planted oleander, in mid-September, you should also cut the yellow hair roots around the main trunk. After cutting roots, water and apply diluted liquid fertilizer.
3. Fertilizer and water
Oleander is a flowering plant that loves fertilizer and water, and prefers neutral or slightly acidic soil. For fertilization, organic mixed fertilizer should account for about 20% of the potting soil. If using chicken manure, 15% is sufficient. Fertilization timing: once before Qingming, once after Autumn Equinox. Method: Dig a ring-shaped trench around the pot edge, apply fertilizer, then cover with soil. After fertilizing at Qingming, apply water-diluted soybean cake liquid every ten days or so as a supplementary feeding; after fertilizing at Autumn Equinox, apply soybean cake water or peanut cake water, or ten times diluted chicken manure liquid every ten days or so. If the above fertilizers are unavailable, you can use human urine that has been decomposed for more than seven days, diluted with water five to seven times, pour along the pot edge, then water thoroughly. For fertilizers with high nitrogen content, the principle is dilute, light, little, and frequent, strictly preventing root burn.
Proper watering is the key to good oleander management. Improper watering in winter and summer can cause leaf drop, flower drop, and even death. In spring, water once a day; in summer, water once each in the morning and evening, keeping the potting soil moisture at around 50%. The leaves should be frequently misted. Excessive dryness easily causes leaf drop and wilting. In winter, reduce watering, but the potting soil moisture should be maintained at around 40%. The leaves should be regularly rinsed with clean water to remove dust. If you want it to bloom in winter, keep the room temperature above 15°C; if you do not want it to bloom in winter, lower the room temperature to 7-9°C and place it in a bright spot indoors without direct sunlight. In the north, field-planted oleander needs to be wrapped with straw mats for frost and cold protection, and the protective covering removed around Qingming. Although oleander is easy to manage, you should not be negligent.
4. Pot cultivation
For potted oleander, in addition to requiring good drainage, it also needs sufficient fertility. In spring, shaping and pruning are needed when it sprouts. For leggy branches and weak branches on the plant, you can cut them from the base. For overly dense branches in the inner canopy, you should also thin out some. At the same time, apply wound healing and antiseptic membrane to the pruning cuts to protect the wounds, so that branches are evenly distributed and the tree shape remains full. After 1-2 years, repot once, and repotting should be done after pruning. Summer is the period of vigorous growth and flowering for oleander, requiring a large amount of water. In addition to watering once each in the morning and evening, if the potting soil appears too dry, add another misting to prevent tender branches from wilting and to avoid affecting flower longevity. After September, reduce watering to inhibit continued growth of the plant, allowing branch tissues to mature and increasing nutrient accumulation for safe overwintering. The overwintering temperature should be maintained at 8-10°C. When the temperature is below 0°C, oleander will drop its leaves. Oleander is a fertilizer-loving plant. For pot cultivation, in addition to applying sufficient base fertilizer, apply fertilizer once a month during the growing season.
How to control oleander pests and diseases:
1. Brown spot disease
Damage symptoms: Brown spot disease is an important disease of oleander, commonly occurring in various places and causing serious damage.
It mainly damages leaves. Initially, purple-red small spots appear at the leaf tip or leaf margin. After expansion, they form circular, semicircular to irregular brown lesions. The lesions have concentric rings. In the later stage, the center fades to white, and the red-brown edge is relatively wide. When humidity is high, a gray-brown mold layer can grow on both sides of the lesions, which are the pathogen's conidiophores and conidia.
Control methods
Agricultural control: Reasonable dense planting, avoid planting too densely; scientific fertilizer and water management, cultivate strong seedlings; remove diseased leaves and burn them in a concentrated manner to reduce sources of inoculum.
Chemical control: At the early stage of disease onset, spray 50% benomyl wettable powder at 1000 times dilution or 25% carbendazim wettable powder at 600 times dilution, or 36% thiophanate-methyl suspension concentrate at 500 times dilution.
2. Black spot disease
Damage symptoms: Lesions occur at the edge or middle of the leaves, semicircular or circular. When several lesions connect, they form a wave-like pattern, present on both sides, with the front side darker in color than the back. The lesions are gray-white or gray-brown. In the later stage, the lesions produce a black powdery layer, generally occurring on overwintering leaves.
Control methods
Horticultural control: Strengthen management and increase tree vigor.
Chemical control: When necessary, spray 75% chlorothalonil at 700 times dilution.
Do you know what diseases it can have?
How to control oleander pests and diseases
Oleander is also known as red-flowered oleander, willow-leaf peach, and half-year red. It belongs to the Apocynaceae family, Nerium genus. When I was young, I often grew it at home, but at that time I did not pay attention to its pests and diseases. Today I will share with everyone the control of oleander pests and diseases.
In spring and summer growing seasons, oleander's terminal buds are susceptible to aphid damage.
Brown spot disease
Brown spot disease is an important disease of oleander, commonly occurring in various places and causing serious damage. It mainly damages leaves. Initially, purple-red small spots appear at the leaf tip or leaf margin. After expansion, they form circular, semicircular to irregular brown lesions. The lesions have concentric rings. In the later stage, the center fades to white, and the red-brown edge is relatively wide. When humidity is high, a gray-brown mold layer can grow on both sides of the lesions, which are the pathogen's conidiophores and conidia.
Control methods
(1) Agricultural control.
Reasonable dense planting, avoid planting too densely; scientific fertilizer and water management, cultivate strong seedlings; remove diseased leaves and burn them in a concentrated manner to reduce sources of inoculum.
(2) Chemical control.
At the early stage of disease onset, spray 50% benomyl wettable powder at 1000 times dilution or 25% carbendazim wettable powder at 600 times dilution, or 36% thiophanate-methyl suspension concentrate at 500 times dilution.
Commonly used chemicals: benomyl, carbendazim, thiophanate-methyl.
The above is the control of oleander pests and diseases.
How to grow Wrightia antidysenterica: Cultivation methods and pest and disease control
Wrightia antidysenterica is native to Southeast Asia and is an evergreen shrub or small tree of the genus Wrightia in the Apocynaceae family. Its flowers are elegant and fragrant, making it a suitable ornamental plant for garden cultivation. Below let us take a look at how to grow Wrightia antidysenterica, its cultivation methods, and pest and disease control.
Introduction to Wrightia antidysenterica
Wrightia antidysenterica is an evergreen shrub or small tree of the genus Wrightia in the Apocynaceae family. It is native to tropical regions from Thailand to Vietnam. Wrightia antidysenterica is an important hedge plant in Southeast Asia. In Thailand, Vietnam, and other places, it is often planted in temples. The flowers of Wrightia antidysenterica are elegant and fragrant, so it is suitable for garden cultivation and viewing.
I. Morphological characteristics
Branches and leaves: The branches of Wrightia antidysenterica grow in all directions. The lanceolate leaves are opposite, papery and smooth, with wavy leaf margins.
Flowers: The cymes of Wrightia antidysenterica grow from the tips of small branches. The pedicels are slender, with 5 white petals and united stamens.
From spring to autumn, it is covered with white, delicate, drooping flowers. Especially during the plum rain season, when rainfall is abundant, flowering is most vigorous. The flowers emit an elegant fragrance, and in environments after rain or with high humidity, the scent becomes more pronounced. The flowering period of Wrightia antidysenterica is from spring to autumn.
II. Ecological habits
Wrightia antidysenterica prefers a warm climate. It can grow in full sun or partial sun. The soil must have water retention capacity, and fertile loam is most suitable for cultivation.
How to grow Wrightia antidysenterica——Cultivation methods for Wrightia antidysenterica
During the high-temperature period in summer, water supply must be sufficient to avoid water shortage affecting growth and flowering. The branches tend to grow in all directions and must be pruned and shaped.
Propagation uses air layering or cuttings. In late spring or early autumn, cut branches for cuttings. Production is mainly based on garden tree specifications of pots 1 chi or larger, with a few young plants in 7-cun pots. Select those with strong main trunks and dense fine branches. It tolerates pruning and has good branching, and can grow very densely. Because of this characteristic, it is also an excellent material for making bonsai. In gardens, it is used as single-plant plantings or multiple plants clustered together, with pruning and shaping. Because the flowers droop and the flower diameter is relatively small, it needs to be planted nearby for convenient viewing.
Pest and disease control for Wrightia antidysenterica
There are many reasons for bud drop and yellow leaves in Wrightia antidysenterica. Insufficient nutrition during the growing period and hormonal imbalance within the plant are internal causes. Unsuitable conditions such as light, temperature, humidity, and fertilizer and water, as well as pest and disease infestation, are external causes:
1. Soil pH
Sandy loam with a pH value of 5 to 6.5 is more suitable. Soil that is too acidic or too alkaline, heavy clay soil, saline-alkali soil, calcareous soil, etc. will all cause poor growth of Wrightia antidysenterica, and certain trace elements cannot be absorbed. Lack of nutrient elements such as phosphorus, iron, and sulfur in the soil can also cause chlorosis and bud drop. In response, spray 0.2% ferrous sulfate solution weekly according to the symptoms.
2. Apply thin fertilizer frequently; never apply raw or concentrated fertilizer
From early spring to before flowering, apply a mixed liquid fertilizer of nitrogen and phosphorus once or twice to prevent bud drop, but nitrogen fertilizer should not be excessive. By autumn, sufficient nutrients for flowering should be stored, so that at flowering time the flowers are abundant and colorful. From September to October, apply diluted fertilizer with high phosphorus content, such as chicken manure, once a month to strengthen buds. Stop fertilizing in November. Never fertilize during the winter dormant period; even applying thin fertilizer can easily cause bud drop.
3. Watering
Wrightia antidysenterica likes moisture and hates waterlogging. If the root soil is too wet for a long time, the roots will suffocate, causing all flower buds to drop in mild cases, or death in severe cases. To keep buds, the potting soil should be kept appropriately moist but slightly dry. If too dry, fleshy fibrous roots will dehydrate and die; if too wet, the fibrous roots will suffocate and rot due to waterlogging and die. When the plant cannot get water supply, it will first drop buds and then drop leaves. If the potting soil is already too dry, first water a small amount to gradually moisten the soil, then water thoroughly. Otherwise, the root tips lose water and cannot adapt to a sudden heavy watering, and bud drop is inevitable. In winter, water only when the soil is about 70% dry, and water with warm water at noon on sunny days.
4. Pay attention to temperature regulation
When the temperature drops to near 0°C, move Wrightia antidysenterica indoors to a bright spot, and cover with a curtain at night for insulation. During overwintering, maintain 3°C to 5°C. Above 16°C, it will sprout early, causing leaf drop and bud drop. Below 0°C, the flower buds will freeze and be damaged. In the early flowering stage, the temperature should not be lower than 5°C to 7°C. During the flowering period, the temperature should be 10°C to 15°C, with a maximum of 20°C. In winter, above 2°C is enough to keep the flower buds. Wrightia antidysenterica is most sensitive to large temperature differences; if it is sometimes hot and sometimes cold, all flower buds will fall off.
5. Ventilation
Some bud drop is caused by poor ventilation. Especially in winter, being kept indoors for a long time with poor ventilation, stale air, or a room temperature above 20°C can also cause bud drop and leaf drop.
6. Pest and disease control
Diseases of Wrightia antidysenterica include anthracnose, sooty mold, and gray leaf spot, among which anthracnose is the most serious.
The main pest of Wrightia antidysenterica is scale insects. When pests and diseases are found, spray pesticides promptly for control; otherwise, serious bud drop will occur.