Reasons Why Pedilanthus tithymaloides Does Not Bloom and How to Care for It
Pedilanthus tithymaloides is so beloved, so how should you grow it? Why does Pedilanthus tithymaloides not bloom? How to grow it:
Why Pedilanthus tithymaloides does not bloom:
1. Temperature
It is native to Central America and the West Indies. It likes warmth and thrives in places with ample but not too intense sunlight and good ventilation. In environments with excessively high temperatures, it can also adapt to semi-shaded conditions. It requires loose, fertile, well-drained soil for cultivation.
2. Light
Pedilanthus tithymaloides likes warmth and is drought-tolerant, with an optimal growing temperature of 23°C to 30°C. After being frozen, the leaves will turn white and fall off. It is shade-tolerant, and semi-shade at the cultivation site is beneficial for blooming, and the leaf color is more attractive. It is afraid of wind, and is suitable for growing in a dry, windless environment.
The cultivation soil should be a sandy loam with good drainage and aeration. Repot once a year or every other year. When branches are too long, cut them back or provide stakes for support. If there are few branches, prune the branches as appropriate to encourage more side branches.
How to grow Pedilanthus tithymaloides:
1. Light: Pedilanthus tithymaloides is not very demanding about light. Under strong light, the leaves tend to be reddish, and under semi-shade they tend to be green. But do not let strong sunlight hit it directly in summer, and do not place it in too dark a place indoors.
2. Temperature: Pedilanthus tithymaloides likes warmth, and in spring, summer and autumn, ordinary room temperature is suitable for growth. In winter, when the temperature is below about 13°C, the leaves can turn white and fall off.
3. Watering: Pedilanthus tithymaloides is a succulent plant with strong drought tolerance. During the growing season, wait until half of the potting soil is dry before watering each time. In winter, water a small amount only when the potting soil is dry. Too much watering will cause mold disease, and in more serious cases, the stem base will rot.
4. Fertilizing: During the growing season, apply a compound fertilizer to the plant once a month.
5. Potting soil: Pedilanthus tithymaloides is suitable for a well-drained, loose and fertile sandy loam.
6. Propagation: Pedilanthus tithymaloides can be propagated by cuttings using 5—15 cm long stem segments. Like other Euphorbiaceae plants, Pedilanthus tithymaloides exudes white milky sap as soon as it is cut. If the cut is immersed in water, the bleeding can be stopped. The cuttings should be dried in the shade for a day, and after the cut has dried and sealed, they can be inserted into the substrate.
Now you know why Pedilanthus tithymaloides does not bloom.
Pedilanthus tithymaloides Pedilanthus tithymaloides Illustrated Guide: How to grow Pedilanthus tithymaloides / How to propagate Pedilanthus tithymaloides
Pedilanthus tithymaloides ProfilePedilanthus tithymaloides
Cultivation Methods and Precautions for Pedilanthus tithymaloides Introduction to Pedilanthus tithymaloides
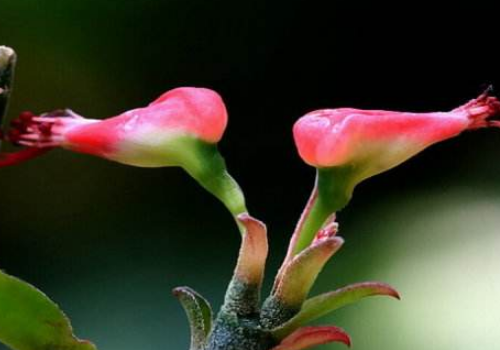
Pedilanthus tithymaloides is an evergreen shrub with green stems that often grow in a zigzag bending pattern, are succulent, and contain white toxic milky sap. The leaves are alternate, green, ovate-lanceolate, leathery, with the midrib protruding beneath in a keel-like shape. The cup-shaped inflorescences are arranged in terminal cymes, with bright red involucres, and the flowering period is in summer. It blooms red or purple flowers throughout the year, and its tree shape resembles coral, hence the name Pedilanthus tithymaloides.
Pedilanthus tithymaloides, also known as iron-stem clove, belongs to the Euphorbiaceae family and the genus Pedilanthus. It is an evergreen shrub. The stems are green, often grow in a zigzag bending pattern, are succulent, and contain white toxic milky sap.
Pedilanthus tithymaloides is native to Central America and the West Indies. It likes warmth and thrives in places with ample but not too intense sunlight and good ventilation. In environments with excessively high temperatures, it can also adapt to semi-shaded conditions. It requires loose, fertile, well-drained soil for cultivation.
Morphological Characteristics of Pedilanthus tithymaloides
Pedilanthus tithymaloides is an evergreen shrub with green stems that often grow in a zigzag bending pattern, are succulent, and contain white toxic milky sap. The leaves are alternate, green, ovate to ovate-oblong, with the midrib on the underside protruding in a keel-like shape, the leaf surface uneven, the apex shortly pointed, the margins wavy, ovate-lanceolate, leathery, with the midrib protruding beneath in a keel-like shape. The cup-shaped inflorescences are arranged in terminal cymes, with bilaterally symmetrical, closed involucres, bright red or purple, and the flowering period is in summer.
It blooms red or purple flowers throughout the year, and its tree shape resembles coral, hence the name Pedilanthus tithymaloides. Pedilanthus tithymaloides is native to Central America and the West Indies. It likes warmth and thrives in places with ample but not too intense sunlight and good ventilation. In environments with excessively high temperatures, it can also adapt to semi-shaded conditions. It requires loose, fertile, well-drained soil for cultivation.
Pedilanthus tithymaloides is leathery, with the midrib protruding beneath in a keel-like shape. The cup-shaped inflorescences are arranged in terminal cymes, with bright red involucres, and the flowering period is in summer.
Ecological Habits of Pedilanthus tithymaloides
Pedilanthus tithymaloides likes a warm and dry environment, with a suitable growing temperature of 15-25°C. It fears cold and wind, likes light, and is also tolerant of semi-shade. It requires loose soil with good drainage.
Pedilanthus tithymaloides likes warmth and thrives in places with ample but not too intense sunlight and good ventilation. In environments with excessively high temperatures, it can also adapt to semi-shaded conditions.
Cultivation Techniques for Pedilanthus tithymaloides
Potted Pedilanthus tithymaloides needs to be repotted once a year or every other year, carried out before it is moved outdoors in spring. The potting soil is usually a mixture of pond mud, leaf mold and sand in equal parts. The flowerpot should also be chosen slightly smaller than a normal pot, and if conditions permit, a layer of charcoal can be placed at the bottom of the pot to enhance drainage. Usually, do not water too much; keep it appropriately dry, and water only after the soil has dried out. It is best to have 3 hours of light each day. Pedilanthus tithymaloides is not demanding about fertilizer; during the growing season, watering with a dilute fertilizer 1-2 times a month is enough. In winter, move it indoors and keep it above 5°C to survive the winter safely. At this time, do not let the humidity be too high, otherwise the roots can easily rot.
The cultivation site for Pedilanthus tithymaloides should be well ventilated and well lit, and the humidity should not be too high. Water normally during the growing season, but do not let it become too wet. Apply fertilizer as appropriate according to the plant's growth. As long as the leaf color is normal and the stems are green, fertilizer may be omitted. Provide shade in summer and avoid direct exposure to the scorching sun. In winter, the plant is in a semi-dormant state; at this time keep the potting soil dry, place it in a sunny spot indoors, and maintain the room temperature at 10°C, and it should not be too high. Repot every spring, and each time add some new fertile cultivation soil. Prune regularly to encourage branching and develop a full plant shape.
Humidity Management
It likes a moist or semi-dry climate environment, and requires the relative air humidity of the growing environment to be 50-70%. When the relative air humidity is too low, the lower leaves turn yellow and fall off, and the upper leaves lose their luster.
Temperature Management
Because it is native to subtropical regions, it has very strict temperature requirements for winter. When the ambient temperature is below 8°C, growth stops.
Light Management
It has strong adaptability to light. When caring for it indoors, place it in a place with bright light as much as possible, such as a well-lit living room, bedroom, study, and similar places. After keeping it indoors for a period (about one month), move it outdoors to a shaded place (with insulation conditions in winter) for a period (about one month), and alternate back and forth in this way.
Fertilizer and Water Management
For potted plants, in addition to adding organic fertilizer when potting, appropriate fertilizer and water management should also be carried out during normal care. Spring, summer and autumn: these three seasons are its peak growing seasons. Fertilizer and water management follows the cycle of "Flower Treasure" - clear water - "Flower Treasure" - clear water, with an interval of about 1-4 days. On sunny days or during high temperatures, the interval is shorter; on rainy days or during low temperatures, the interval is longer or no watering is done. Winter: during the winter dormant period, the main task is to control fertilizer and water. Fertilizer and water management follows the cycle of "Flower Treasure" - clear water - clear water - "Flower Treasure" - clear water - clear water, with an interval of about 3-7 days. On sunny days or during high temperatures, the interval is shorter; on rainy days or during low temperatures, the interval is longer or no watering is done.
For plants grown in the ground, apply fertilizer and water 2-4 times in spring and summer according to drought conditions: first dig a small trench in a ring 30-100 cm outside the root collar (the larger the plant, the farther from the root collar), with the trench width and depth both 20 cm. Sprinkle 25-50 jin of organic fertilizer, or 1-5 liang of granular compound fertilizer (chemical fertilizer), into the trench, then water thoroughly. After winter begins and before spring begins, apply fertilizer once more in the same way as above, but do not water.
Pruning
In winter, when the plant enters dormancy or semi-dormancy, cut off thin and weak, diseased and pest-infested, dead, and overly dense branches. You can also tidy up the branches in combination with taking cuttings.
Repotting
As long as it is cared for properly, it will grow very quickly. When it grows to a certain size, consider giving it a larger pot so that it can continue to grow vigorously. The cultivation soil and component ratios for repotting can use one of the following: vegetable garden soil: furnace slag = 3:1; or garden soil: medium-coarse river sand: sawdust (mushroom residue) = 4:1:2; or one of paddy soil, pond mud, or leaf mold.
Removing from the Pot
Place the flower to be repotted on the ground. First pat the sides of the pot gently with your palm so that the root system is shaken and separates from the pot wall. Turn the flowerpot upside down on your left hand, gently pinch the plant between the index and middle fingers of your left hand, brace the rim of the pot with your wrist and fingertips, pat the bottom of the pot with your right hand, then use your thumb to push the root soil downward from the bottom hole to let the plant come out. After it comes out, pat the potting soil gently with both palms to let excess soil fall off.
Flowerpot Preparation
Choose a flowerpot of appropriate size. Cover the bottom hole of the pot with two pieces of tile or thin foam pieces, ensuring both that the potting soil is not washed out by water and that excess water can flow out in time. On top of the tile or foam, place a layer of expanded clay pellets or crushed red bricks as a drainage layer, about 2-3 cm thick. On the drainage layer, place organic fertilizer, about 1-3 cm thick. On top of the fertilizer, place a thin layer of substrate, about 2 cm thick, to separate the root system from the fertilizer. Finally, place the plant in, fill with nutrient soil, and leave about 2-3 cm from the rim of the pot.
Cultivation Methods and Care Points for Pedilanthus tithymaloides
Pedilanthus tithymaloides likes warmth and is drought-tolerant, with an optimal growing temperature of 23°C to 30°C. After being frozen, the leaves will turn white and fall off. It is shade-tolerant, and semi-shade at the cultivation site is beneficial for blooming, and the leaf color is more attractive. It is afraid of wind, and is suitable for growing in a dry, windless environment. The cultivation soil should be a sandy loam with good drainage and aeration. Repot once a year or every other year. When branches are too long, cut them back or provide stakes for support. If there are few branches, prune the branches as appropriate to encourage more side branches.
During the growing period, watering should be controlled; generally, water after the soil has dried. Fertilization can use organic fertilizer or a small amount of nitrogen, phosphorus and potassium fertilizer. In winter, reduce the amount of fertilizer and water supplied. Pedilanthus tithymaloides is propagated by cuttings. Cuttings can be taken throughout the year in a greenhouse, but taking cuttings in the warm season is better. Take stem tips or tender stems and cut them into 10 cm long stem segments as cuttings. The cuttings should first be dried, or the cut ends inserted into dry ash or dry soil so that the sap is absorbed, and then inserted for rooting. The medium can be yellow sand, perlite or rice husk ash. After the cuttings take root, they can be transplanted into pots.
Daily Care
1. Light
Pedilanthus tithymaloides is not very demanding about light. Under strong light, the leaves tend to be reddish, and under semi-shade they tend to be green. But do not let strong sunlight hit it directly in summer, and do not place it in too dark a place indoors.
2. Temperature
Pedilanthus tithymaloides likes warmth, and in spring, summer and autumn, ordinary room temperature is suitable for growth. In winter, when the temperature is below about 13°C, the leaves can turn white and fall off.
3. Watering
Pedilanthus tithymaloides is a succulent plant with strong drought tolerance. During the growing season, wait until half of the potting soil is dry before watering each time. In winter, water a small amount only when the potting soil is dry. Too much watering will cause mold disease, and in more serious cases, the stem base will rot.
4. Fertilizing
During the growing season, apply a compound fertilizer to the plant once a month.
5. Potting Soil
Pedilanthus tithymaloides is suitable for a well-drained, loose and fertile sandy loam.
6. Propagation
Pedilanthus tithymaloides can be propagated by cuttings using 5-15 cm long stem segments. Like other Euphorbiaceae plants, Pedilanthus tithymaloides exudes white milky sap as soon as it is cut. If the cut is immersed in water, the bleeding can be stopped. The cuttings should be dried in the shade for a day, and after the cut has dried and sealed, they can be inserted into the substrate.
Propagation Methods for Pedilanthus tithymaloides
Pedilanthus tithymaloides is mainly propagated by cuttings, which can be done throughout the year in a greenhouse, with May and June being the best. Take stem tips with 2-3 nodes, about 8 cm long. Wait for the milky sap at the cut to dry and the cut to shrink slightly, then insert into a medium such as sand. The medium should have a certain moisture level. Do not water immediately after insertion, and do not cover with plastic film. Place in semi-shade, water thoroughly once after 2 days, then keep slightly moist, and roots can form in about 40 days.
Pedilanthus tithymaloides is mostly propagated by cuttings. In spring, cut off sections with the top shoot as cuttings. Coat the cut surface of the cut sections with charcoal powder or burn it with fire, then insert into sandy soil. The cutting medium should have a certain moisture level, and the insertion depth should be half the length of the cutting. Do not water immediately after insertion; water thoroughly once after two days, and roots can form in about 30-45 days.
Seed Propagation
For tiny seeds that are difficult to pick up with hands or other tools, moisten one end of a toothpick with water and stick the seeds one by one onto the surface of the substrate, then cover with 1 cm of substrate. Then place the sowing pot into water, with the water depth at 1/2 to 2/3 the height of the pot, and let the water slowly soak up (this method is called the "pot soaking method"). For larger seeds that can be picked up by hand or other tools, place the seeds directly into the substrate and sow them in spots at a spacing of 3 x 5 cm. After sowing, cover with substrate to a thickness 2-3 times that of the seeds. After sowing, use a sprayer or a fine-holed watering can to moisten the sowing substrate. Later, when the potting soil is slightly dry, water again, but still be careful not to water with too much force, so as not to wash the seeds out.
Before sowing, the seeds must first be selected. Whether the seeds are well selected is directly related to whether sowing can succeed.
1. It is best to use seeds harvested in the current year. The longer the seeds are stored, the lower their germination rate.
2. Choose seeds that are plump and free of defects or deformities.
3. Choose seeds that are free of pests and diseases.
Disinfection
Disinfection includes two concepts: one refers to disinfecting the seeds, and the other refers to disinfecting the sowing substrate. For household seed disinfection, it is common to soak the seeds in hot water at about 60°C for a quarter of an hour, then use warm water to promote germination for 12-24 hours. The best way to disinfect the sowing substrate is to put it in a pot and heat it by stirring until hot; any pests and diseases will be killed by the heat.
Promoting Germination
Soak the seeds in warm water (at a temperature similar to face-washing water) for 12-24 hours, until the seeds absorb water and swell. For very common seeds that germinate easily, this step can be skipped.
Management After Sowing
After sowing in late autumn, early spring or winter, when encountering a cold wave and low temperatures, you can wrap the flowerpot in plastic film to help keep it warm and moist. After the seedlings emerge, uncover the film in time, and let the seedlings receive sunlight before 9:30 every morning or after 3:30 in the afternoon, otherwise the seedlings will grow very weak. After most of the seeds have sprouted, appropriate thinning is needed: pull out the diseased and unhealthy seedlings so that the remaining seedlings have a certain amount of space from each other. When most of the seedlings have grown 3 or more leaves, they can be transplanted.
Cutting Propagation
Softwood cuttings are often taken from current-year branches in late spring and early autumn, or hardwood cuttings are taken from last year's branches in early spring.
Cutting Substrate
This refers to materials such as nutrient soil, river sand, or peat soil used for cuttings. For home cuttings, it is difficult to obtain an ideal cutting substrate due to limited conditions, and medium-coarse river sand can also be used, but it should be rinsed several times with clean water before use. Do not use sea sand or river sand from saline-alkali areas; they are not suitable for the growth of flowers and plants.
Selection of Cutting Branches
When taking softwood cuttings, during the period of vigorous growth from late spring to early autumn, select robust current-year branches as cuttings. After cutting off the branches, select the sturdy parts and cut them into segments 5-15 cm long, each with more than 3 leaf nodes. When cutting the cuttings, note that the upper cut should be made flat about 1 cm above the topmost leaf node, and the lower cut should be made at an angle about 0.5 cm below the bottommost leaf node. Both the upper and lower cuts should be smooth (the knife must be sharp). When taking hardwood cuttings, after the temperature rises in early spring, select robust branches from last year as cuttings. Each cutting usually retains 3-4 nodes, and the cutting method is the same as for softwood cuttings.
Management After Cutting
Temperature
The optimal temperature for rooting of cuttings is 20°C-30°C. Below 20°C, rooting of cuttings is difficult and slow; above 30°C, the upper and lower cuts of the cuttings are easily infected by pathogens and rot, and the higher the temperature, the greater the proportion of rot. When low temperatures are encountered after cutting, the main measure to keep warm is to wrap the flowerpot or container used for cuttings with plastic film. When the temperature is too high after cutting, the main measure to cool down is to shade the cuttings, blocking 50-80% of sunlight, and at the same time spray the cuttings with water 3-5 times a day. On sunny days when the temperature is higher, spray more often; on rainy days when the temperature is lower and the humidity is greater, spray less often or not at all.
Humidity
After cutting, the relative air humidity must be maintained at 75-85%. The basic requirement for rooting of cuttings is that before the cuttings root, they must be kept fresh and tender so they can carry out photosynthesis to produce rooting substances. However, cuttings that have not rooted cannot absorb enough water to maintain their internal water balance. Therefore, spraying must be used to reduce water evaporation from the cuttings: under shaded conditions, spray the cuttings 3-5 times a day. The higher the temperature on sunny days, the more often you spray; the lower the temperature on rainy days, the less often you spray or do not spray. However, excessive spraying makes cuttings easily infected by pathogens and rot, because many kinds of pathogens exist in water.
Light
Cutting propagation cannot do without sunlight, because the cuttings still need to continue photosynthesis to produce nutrients and rooting substances to supply their rooting needs. However, the stronger the light, the higher the temperature inside the cuttings, the more vigorous the transpiration of the cuttings, and the more water is consumed, which is not conducive to the survival of the cuttings. Therefore, after cutting, 50-80% of sunlight must be blocked. After the root system grows out, gradually remove the shade net: on sunny days, remove the shade net at 4:00 every afternoon, and cover it again before 9:00 the next morning.
Layering Propagation
Select a robust branch, and from about 15-30 cm below the top shoot, peel off a ring of bark. The width of the wound after peeling should be about 1 cm, and the depth should be just enough to peel off the outer bark. Cut a piece of plastic film 10-20 cm long and 5-8 cm wide, place some moistened garden soil on it, and wrap it around the girdled part like bandaging a wound. Tie the upper and lower ends of the film tightly, with the middle bulging. Roots form in about four to six weeks. After rooting, cut off the branch together with the root system, and it becomes a new plant.
Potting or Transplanting
When potting small seedlings or repotting large plants that have been grown for several years, first place a 2-3 cm thick layer of coarse granular substrate at the bottom of the pot as a drainage layer, sprinkle a layer of fully decomposed organic fertilizer on top as a base fertilizer, about 1-2 cm thick, then cover with a thin layer of substrate, about 1-2 cm thick, and then place the plant in, so as to separate the fertilizer from the root system and avoid burning the roots. The substrate used for potting can use one of the following: vegetable garden soil: furnace slag = 3:1; or garden soil: medium-coarse river sand: sawdust (mushroom residue) = 4:1:2; or one of paddy soil, pond mud, or leaf mold. After potting, water thoroughly once, and place in a shaded environment for one week of care. When transplanting small seedlings, first dig the planting hole, sprinkle a layer of organic fertilizer at the bottom of the planting hole as a base fertilizer, about 4-6 cm thick, then cover with a layer of soil and place the seedling in, so as to separate the fertilizer from the root system and avoid burning the roots. After placing the seedling in, backfill the soil to cover the root system, press the soil firm with your foot, and water thoroughly once.
Variety Classification of Pedilanthus tithymaloides and Varieties of the Same Genus
Varieties such as Pedilanthus tithymaloides, variegated Pedilanthus tithymaloides and curly-leaf coral, as well as the same-genus white Pedilanthus, resemble Pedilanthus tithymaloides, but the leaf midrib does not protrude, the leaves are thinner, and irregular white patches are mixed in among the green.
Variegated Pedilanthus tithymaloides
Variegated Pedilanthus tithymaloides is a variety of Pedilanthus tithymaloides. It is a perennial herbaceous plant with a plant height of 3-4 m. The stems and leaves are thick and succulent, with many branches. The stems are green and regularly curved, which is quite peculiar, and contain white milky sap, which is toxic. The leaves are alternate, ovate-oblong, with the apex gradually sharp or acute, the base obtuse, the margins entire, the leaf surface often uneven and twisted, the leaves green, and the leaf margins have milky white, milky yellow and pink markings.
Distribution Area of Pedilanthus tithymaloides
Pedilanthus tithymaloides is native to Central America and the West Indies.
Dietary Therapy or Medicinal Value of Pedilanthus tithymaloides
The medical information and health dietary therapy information on Hugflower Network is for reference only and cannot be used as a basis for diagnosis or medical treatment. For any health problem, consult professional medical personnel, and for the treatment of any disease, follow doctor's orders.
Ultimate flower-protecting mission: love yourself, start from reality, and follow doctor's orders. Toward illness, do not be careless, do not delay, do not give up hope; face it bravely, use love to warm the silent world, and use your heart to care for the flower field within.
Medicinal Value
[Aliases]: twisted grass, slipper flower, green bamboo mark, hundred-foot grass, red sparrow palm
[Source]: The whole plant of Pedilanthus tithymaloides, a plant of the genus Pedilanthus in the Euphorbiaceae family. It can be collected throughout the year, and is mostly used fresh.
[Nature, Flavor and Meridian Entry]: Sour, slightly astringent, cold. Slightly toxic.
[Functions and Indications]: Clears heat and detoxifies, disperses blood stasis and reduces swelling, stops bleeding and promotes tissue regeneration. For external use, it treats traumatic injuries, fractures, external bleeding, boils and sores, and keratitis.
[Usage and Dosage]: For external use, an appropriate amount, mash the fresh product and apply to the affected area.
[Excerpt]: "National Compendium of Chinese Herbal Medicines"
The Role, Uses and Application Value of Pedilanthus tithymaloides
The stems, branches and leaves of Pedilanthus tithymaloides are dark green, with a graceful posture, and remain evergreen all year round, suitable for indoor and balcony decoration. The stems of Pedilanthus tithymaloides are green and regularly curved, which is quite peculiar. The involucres are bright red, shaped like a small bird's crest, beautiful and elegant. It is suitable for potted decoration of desks, tables, and similar places.
Potted Ornamental Use
Pedilanthus tithymaloides, also known as red sparrow coral, is an evergreen shrub of the Euphorbiaceae family with succulent, green stems. Its branches constantly change direction as they grow, and very regularly, causing the stems to form a "Z" shape. A variegated variety is also commonly cultivated, whose green leaves are milky white with a pale red tinge; its distinctive posture and leaves composed of red, green and white are all very distinctive, making it an excellent potted ornamental.
Landscape Uses of Pedilanthus tithymaloides
The genus Pedilanthus, of the Euphorbiaceae family, has about 14 species distributed in tropical America. The species introduced and cultivated in China is Pedilanthus tithymaloides, used for garden ornament.
Cultural Background and Origin of the Name of Pedilanthus tithymaloides
Pedilanthus tithymaloides blooms red or purple flowers throughout the year, and its tree shape resembles coral, hence the name "Pedilanthus tithymaloides."
Legend
Legend says that Pedilanthus tithymaloides was originally an extremely beautiful bird, with multicolored feathers all over its body and an elegant crest on its head. When it soared into the sky, it shone with dazzling colors. It lived in the coldest icy snowfields, and its fiery red beak could sing heavenly songs, guiding lost people out of the snowy mountains. But it fell in love with a human. When the one it loved was hungry, it would use its beautiful beak to chip open the hard ice and catch fish for him to eat. When the one it loved was cold, it would cut open its own heart to warm him. That is how it treated its love without hesitation, even when betrayed. But even after it died, its love still would not end. Its body turned into a red light, guiding the direction home for the one it loved. The crimson radiance left red fluorescence all along the way, and in an instant the icy snowfield was covered with Pedilanthus tithymaloides. When the last trace of light went out, its beloved finally walked out of the snowy mountains.
Pedilanthus tithymaloides Flower by Bing Yun
Holding up the sky, the keel is majestic. Jade trees form a forest of green. Hearing the sound, one searches as sparrow calls seethe. As if from deep and distant reaches.
Endless birdsong plays with a pleasing face. Just like coral splendor. Spreading wings as if about to fly. Utterly enchanting.
The Flower Language of Pedilanthus tithymaloides
The flower language of Pedilanthus tithymaloides: harmony and friendship.
Pedilanthus tithymaloides Pictures
Can Pedilanthus tithymaloides Be Placed in the Bedroom? How to Grow Pedilanthus tithymaloides
Can Pedilanthus tithymaloides Be Placed in the Bedroom?
Pedilanthus tithymaloides is an evergreen shrub. The stems are green, often grow in a zigzag bending pattern, are succulent, and contain white toxic milky sap. The leaves are alternate, green, ovate-lanceolate, leathery, with the midrib protruding beneath in a keel-like shape. The cup-shaped inflorescences are arranged in terminal cymes, with bright red involucres, and the flowering period is in summer. It blooms red or purple flowers throughout the year, and its tree shape resembles coral, hence the name Pedilanthus tithymaloides.
Just from its name, you can tell that Pedilanthus tithymaloides must be very beautiful. Do you all also want to grow it? But when growing flowers, you need to know whether they are toxic and whether they are suitable for growing indoors. Next, let us discuss whether Pedilanthus tithymaloides can be placed in the bedroom.
Is Pedilanthus tithymaloides Toxic?
The stems of Pedilanthus tithymaloides are green and succulent, and always appear in a "zigzag" form. Isn't that interesting? However, the milky sap it contains is white and toxic.
Can Pedilanthus tithymaloides Be Placed in the Bedroom?
We have learned that Pedilanthus tithymaloides is a toxic plant, and containing toxins means it has a certain level of harm. Therefore, it is best not to grow the toxic Pedilanthus tithymaloides in the bedroom, because once you accidentally get poisoned during the growing process, it will cause damage to our body. So, for the sake of your own health, it is recommended not to place Pedilanthus tithymaloides in the bedroom for cultivation.
If you like Pedilanthus tithymaloides and hope to grow it, then how should you grow it and where should you place it? I can also help you solve this problem, so that you can both admire the beautiful figure of Pedilanthus tithymaloides and reduce the possibility of poisoning.
Where Should Pedilanthus tithymaloides Be Placed for Growing?
Since Pedilanthus tithymaloides is toxic and cannot be grown in the bedroom, where should it be placed for growing?
In fact, Pedilanthus tithymaloides can be placed in a ventilated, sunny place, and in a place where you can often admire its figure, for care. Therefore, the most suitable places are the courtyard or balcony, and these places are even more beneficial to the growth of Pedilanthus tithymaloides. You must have thought of this too.
We have resolved whether Pedilanthus tithymaloides is toxic, and we also know where it should be placed for growing. Then, whether you, as a flower lover, will take good care of it depends on how careful you are. Happy flower growing, and you will also be a happy person!
How to Grow Pedilanthus tithymaloides
Growth Habits of Pedilanthus tithymaloides
Pedilanthus tithymaloides is native to Central America and the West Indies. It likes warmth and thrives in places with ample but not too intense sunlight and good ventilation. In environments with excessively high temperatures, it can also adapt to semi-shaded conditions. It requires loose, fertile, well-drained soil for cultivation.
Varieties of Pedilanthus tithymaloides
There are varieties such as Pedilanthus tithymaloides, variegated Pedilanthus tithymaloides and curly-leaf coral, as well as the same-genus white Pedilanthus, which resembles Pedilanthus tithymaloides, but the leaf midrib does not protrude, the leaves are thinner, and irregular white patches are mixed in among the green.
The Value of Pedilanthus tithymaloides
Pedilanthus tithymaloides can be used as medicine. It clears heat and detoxifies, disperses blood stasis and reduces swelling, stops bleeding and promotes tissue regeneration. For external use, it treats traumatic injuries, fractures, external bleeding, boils and sores, and keratitis.
How to Grow Pedilanthus tithymaloides
Pedilanthus tithymaloides likes warmth and is drought-tolerant, with an optimal growing temperature of 23°C to 30°C. After being frozen, the leaves will turn white and fall off. It is shade-tolerant, and semi-shade at the cultivation site is beneficial for blooming, and the leaf color is more attractive. It is afraid of wind, and is suitable for growing in a dry, windless environment. The cultivation soil should be a sandy loam with good drainage and aeration. Repot once a year or every other year. When branches are too long, cut them back or provide stakes for support. If there are few branches, prune the branches as appropriate to encourage more side branches.
During the growing period, watering should be controlled; generally, water after the soil has dried. Fertilization can use organic fertilizer or a small amount of nitrogen, phosphorus and potassium fertilizer. In winter, reduce the amount of fertilizer and water supplied. Pedilanthus tithymaloides is propagated by cuttings. Cuttings can be taken throughout the year in a greenhouse, but taking cuttings in the warm season is better. Take stem tips or tender stems and cut them into 10 cm long stem segments as cuttings. The cuttings should first be dried, or the cut ends inserted into dry ash or dry soil so that the sap is absorbed, and then inserted for rooting. The medium can be yellow sand, perlite or rice husk ash. After the cuttings take root, they can be transplanted into pots.
First, light: Pedilanthus tithymaloides is not very demanding about light. Under strong light, the leaves tend to be reddish, and under semi-shade they tend to be green. But do not let strong sunlight hit it directly in summer, and do not place it in too dark a place indoors.
Second, temperature: Pedilanthus tithymaloides likes warmth, and in spring, summer and autumn, ordinary room temperature is suitable for growth. In winter, when the temperature is below about 13°C, the leaves can turn white and fall off.
Third, watering: Pedilanthus tithymaloides is a succulent plant with strong drought tolerance. During the growing season, wait until half of the potting soil is dry before watering each time. In winter, water a small amount only when the potting soil is dry. Too much watering will cause mold disease, and in more serious cases, the stem base will rot.
Fourth, fertilizing: During the growing season, apply a compound fertilizer to the plant once a month.
Fifth, potting soil: Pedilanthus tithymaloides is suitable for a well-drained, loose and fertile sandy loam.
Sixth, propagation: Pedilanthus tithymaloides can be propagated by cuttings using 5-15 cm long stem segments. Like other Euphorbiaceae plants, Pedilanthus tithymaloides exudes white milky sap as soon as it is cut. If the cut is immersed in water, the bleeding can be stopped. The cuttings should be dried in the shade for a day, and after the cut has dried and sealed, they can be inserted into the substrate.