How to Grow and Shape a Potted Norfolk Island Pine
The Norfolk Island pine (Araucaria cunninghamii) is highly ornamental and is now often used for bonsai. How do you grow a potted Norfolk Island pine? How do you shape it:
How to grow a potted Norfolk Island pine:
1. When first transplanting it into a pot, take the Norfolk Island pine out of its original pot and remove a certain amount of soil from the bottom upward, but do not remove it all, so as not to damage the roots. Put 1 to 2 cm of growing medium into the prepared ceramic pot. After deciding on the viewing side, place the tree stock at one end of the ceramic pot, then straighten it, and continue adding growing medium until it is full. Press the soil down gently with your hand, then shape the upper part.
2. Shaping the upper part. First cut off the lowest whorled branch, then cut off the two horizontal branches above and below on the left side, then cut off one branch each at the front and back, and then slightly stretch a few individual branch pads on the upper part. You can place some uniquely shaped stones of different colors on the soil surface to add a bit of interest.
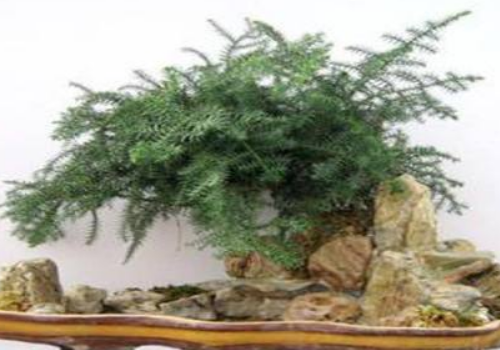
How to shape a potted Norfolk Island pine:
1. Slanting trunk style. When the trunk of the Norfolk Island pine grows to 3—5 cm thick, cut off 25—45 cm as needed, pot it according to the growth of the roots, and tilt it appropriately to the left or right when placing it. After one month, 1—4 new buds will grow from the leaf axils, and after the new branches spread out, they will grow obliquely into a dense umbrella-shaped crown.
2. Curved trunk style. When the trunk grows to 1—2 cm thick, wrap it with metal wire and twist it into the desired shape; the bending height of the trunk should be between 30—45 cm. After half a year or a year of growth, when the metal wire begins to cut into the bark, untie it. If the desired effect has already been achieved at this point, there is no need to continue wrapping; if the desired degree of bending has not been achieved, wrap and shape it again.
Have you learned how to shape a potted Norfolk Island pine?
Norfolk Island pine Araucaria cunninghamii Norfolk Island pine illustrated guide: how to grow Norfolk Island pine / how to propagate Norfolk Island pine
Norfolk Island pine profileNorfolk Island pine Araucaria cunninghamii
How to grow Norfolk Island pine and precautions Introduction to Norfolk Island pine
Norfolk Island pine is an evergreen tree native to Norfolk Island, Australia. It has many names: according to its place of origin it is called English pine, Australian pine, Norfolk Island pine, and Norfolk Island pine. According to its leaves it is called heterophyllous Norfolk Island pine, small-leaved Norfolk Island pine, and beautiful Norfolk Island pine; according to its form it is called tower-type Norfolk Island pine, Hainan Norfolk Island pine, and so on. Varieties introduced into China include Araucaria columnaris and Araucaria heterophylla. Araucaria columnaris has an upright trunk and the whole tree is tower-shaped, with branches in whorls extending horizontally, even spacing between whorls and distinct layers, no spines, and a neat appearance. It is a top-grade foliage plant, mostly grown in pots. Araucaria heterophylla is an excellent ornamental garden plant; planted in the ground it can reach a height of more than 30 m. It likes warmth and sunlight, can tolerate high temperatures of 40°C and low temperatures of minus 5°C, and can survive outdoors around the line of 27°C north latitude (Norfolk Island is located at 27°C south latitude).
Morphological characteristics of the Norfolk Island pine
Tree, up to 60-70 m tall in its place of origin, DBH more than 1 m, bark grayish brown or dark gray, coarse, with transverse fissures; Norfolk Island pine (ink line drawing) large branches spreading flat or extending obliquely, crown of young trees pyramidal, becoming flat-topped when old, side branchlets densely grown, drooping, nearly pinnately arranged. Leaves dimorphic: leaves of young trees and side branches loosely arranged, spreading, cone-shaped, needle-shaped, sickle-shaped or triangular, 7-17 mm long, about 2.5 mm wide at the base, slightly curved, slightly four-angled or with the ridge on the upper (ventral) side inconspicuous, with many stomatal lines on the upper side, stomatal lines on the lower side irregular or nearly absent, gradually narrowing upward, apex with a gradually pointed or slightly acute tip; leaves on large branches and flower and fruit branches closely arranged and overlapping, extending obliquely upward, slightly curved upward, ovate, triangular-ovate or triangular, without an obvious ridge on the back or with a longitudinal ridge on the lower side, 6-10 mm long. Cones ovate or elliptical, 6-10 cm long, about 4 cm wide, broad at the base, gradually narrowing or slightly rounded at the upper part, apex pointed or blunt, midrib obvious or not obvious, grayish green on the upper side, with white powder, with many stomatal lines, green on the lower side, with irregular sparse stomatal lines only in the middle and lower part. Male cones solitary at the branch tips, cylindrical. Cones ovate or elliptical, 6-10 cm long, 4.5-7.5 cm in diameter; bract scales wedge-shaped obovate, with thin wings on both sides, broad and thick at the apex, with a sharp ridge, with an acute long tail-like tip in the center, the tip obviously recurved backward; the tip of the seed-bearing scale is thin, not fleshy; seeds elliptical, with membranous wings formed by fusion on both sides.
Ecological habits of the Norfolk Island pine
It likes a warm climate, fresh and humid air, and soft and sufficient light. It is not cold-tolerant and avoids drought. In winter it needs sufficient sunlight, and in summer it should avoid strong direct sunlight. It fears the dry gales of northern spring and the scorching sun of midsummer. It grows best under environmental conditions of 25°C-30°C and relative humidity above 70%. For potting, it requires a loose, fertile growing medium with high humus content and strong drainage and aeration.
Cultivation techniques of the Norfolk Island pine Selection of mother plants for root cuttings
The root-cutting mother plant is the propagation parent that provides high-quality cuttings, and it must be strictly selected to ensure that the excellent characteristics of the mother plant are maintained. Generally, 5-10 year old trees suitable for use as landscaping seedlings are used, and the plants should be robust in growth, free of pests and diseases, dark green in leaf color, with closely arranged whorled branches, and with good expressed traits.
Collection of root cuttings
Every year, April-May is a good period for landscaping and also the best time for cutting propagation. Large numbers of landscaping seedlings leave the nursery; take this opportunity to collect the remaining root systems after the seedlings are dug up, or dig up part of the root system from the shallower parts of the soil surface of Araucaria heterophylla trees. Use these as material for cutting propagation.
Treatment of root cuttings
The treatment of root cuttings in asexual propagation is an important step related to the survival and rooting of cuttings. Araucaria heterophylla root cuttings should be treated promptly. The method is: choose roots with a cross-section of 0.8-1.2 cm, cut them to about 10 cm, arrange them in order from head to tail, tie 20-30 roots into a bundle, and place them in a cool, ventilated place to encourage the fleshy roots to evaporate excess water and prevent rot. The drying time is generally about one week. Selection of cutting medium and environment Selection of cutting medium: choose sieved pure river sand with a particle size of 0.5-1.0 mm as the cutting medium, which has the advantages of good aeration and drainage.
Construction of the cutting bed
The cutting bed is built with bricks, 25 m high and 10Ocm wide, with the length determined by the number of cuttings. The bottom of the bed is level, and the cutting medium is placed in the bed; it can be put into use after being slightly leveled and compacted.
Selection of the cutting environment
The selection of the cutting environment is very important for the survival of cuttings. The suitable rooting temperature for Araucaria heterophylla is 15-25 degrees, the humidity is 70%-80%, and there is sufficient light, with light shading being best. Choosing a cutting site under such humid conditions for cutting propagation makes it easy to form adventitious roots and adventitious buds, and the survival rate is high.
Cutting method Root cuttings are best inserted in rows, with a plant spacing of 4 cm and a row spacing of 6 cm. Use a strip 6 cm wide, 1OOcm long, and 2 cm thick as a ruler and place it on the sand bed for the row spacing. Use a small shovel to open slanted grooves along the edge of the wooden board to a depth of about 7 cm. Insert the cuttings into the sand bed to about 2/3 of their length, then place the cuttings neatly in the grooves at equal distances of about 4 cm, making sure the heads face upward, then cover with sand and press firmly. After inserting, water thoroughly once.
Transplanting seedlings
The Norfolk Island pine likes warmth and humidity, tolerates shade, and is not cold-tolerant. Seed-grown seedlings have long taproots and few fibrous roots. When transplanting seedlings, it is easy for them to die. To improve the survival rate of transplanted Norfolk Island pine seedlings, the following technical points should be handled well. One,Protecting the roots
Because Norfolk Island pine seedlings have few lateral roots and fine hair roots, they will wilt and dry up if slightly neglected, so protecting the seedling root system is very important. First, they should be transported with the pot and soil, and the original growing medium should be kept moist. Second, after the seedlings are bought back, they should be planted immediately. If there is no time to plant them for a while, they should be placed in a cool, humid place and must not be exposed to the sun, so as to protect the seedlings, especially the roots, and keep them fresh. In addition, when the winter temperature is low, the roots are easily frozen during transport, so attention should be paid to keeping them warm.
Two,Careful planting
When planting, keep as much of the original soil on the seedlings as possible. The planting soil should be loose and fine. Do not press the soil at the root too hard. After planting, water thoroughly to settle the roots. In addition, seed-grown Norfolk Island pine seedlings have long taproots, so it is advisable to plant them somewhat deep to avoid root exposure and lodging, which would affect survival.
Three,Keeping warm
The Norfolk Island pine is not cold-tolerant. If seedlings are bought and planted in winter or early spring, in addition to paying attention to preventing freezing during transport, warmth-retention measures should also be taken after planting, such as planting them in a greenhouse or covering them with an arched plastic film.
Four,Shading
The Norfolk Island pine is a shade-tolerant flowering plant, and seedlings are even more afraid of exposure to the sun, so they must be shaded immediately after planting.
Five,Treatment of broken and damaged seedlings
Norfolk Island pine seedlings have tender tissues and are easily broken and damaged. The following methods can be used for remedy. For seedlings with broken roots, wash them with clean water and insert them in plain sand; at a suitable temperature, they can grow new roots from the cut surface after 1-2 weeks, and can be planted after the root system is well developed. For seedlings with broken buds and broken stems but with leaves, they can be planted as usual, and after survival they will sprout new buds after a certain period of time.
Bonsai production
The process of making a Norfolk Island pine bonsai is not complicated. Its growth habits: it likes light, likes a humid climate, and likes acidic fertile soil. Before potting, first prepare the growing medium, then according to the size of the tree, choose an oval purple clay ceramic pot. In terms of material selection, seedlings are best; generally use seedlings about fifty cm in size. A Norfolk Island pine with thick and strong growth, short internodes, and dark green color is top grade.
When starting to pot it, first take it out of the clay pot and peel off an appropriate amount of soil from the bottom upward, being careful not to damage the water-absorbing roots. Then cover the bottom of the pot with a 1 to 2 cm thick layer of growing medium. After determining the viewing side, place the tree stock at one end of the pot, straighten the plant, then add growing medium and gently firm it, then shape the upper part. Shaping the upper part of the Norfolk Island pine is relatively difficult; each layer of branch pads from bottom to top consists of four to five whorled branches. First cut off the lowest layer of whorled branches, then cut off the two horizontal branches above and below on the left side of the tree, then cut off one branch each at the front and back, and then slightly pull a few individual branch pads on the upper part, so the branch supports appear natural and orderly. Because the base of the main trunk of the Norfolk Island pine seedling is about the same thickness throughout, use the prepared palm fiber pieces to wrap the main trunk into a tree body that is thick at the bottom and thin at the top, then gently tie it with fine cord twisted from palm silk; do not tie it too tightly. In this way, the base of the main trunk has a pleasing variation in thickness, forming a large-tree-shaped crown. If there are no protruding tree roots at the root plate at the base, several purplish-brown curved roots should be appropriately added to protrude above the soil surface to show stability, which solves the shortcoming of bonsai trees without roots looking like inserted wood. Finally, add a small brownish-yellow elephant-shaped stone, which gives it a rather interesting southern scenery flavor. In this way, a lush and elegant Norfolk Island pine bonsai is presented before your eyes.
After completing the above work, water thoroughly to settle the roots, place it in a shaded place for half a month for maintenance, and then it can be transferred to routine management. To promote vigorous growth, in summer and autumn spray the leaves once a month with a mixed solution of 0.3 percent potassium dihydrogen phosphate and urea, thereby maintaining a dark green leaf color.
Potted management Loosening soil and watering
After planting, water promptly and loosen the surface soil to reduce water evaporation. Water moderately at ordinary times; during the growing season, water frequently, 2-3 times a week, with penetration to 10-15 cm being suitable. As the seedling grows, reduce the frequency of watering, and often keep the pot soil and the surrounding environment moist, strictly preventing drought and waterlogging. In hot and dry periods, water or spray the leaves and surrounding environment frequently to increase air humidity and keep the soil moist. Avoid letting the pot soil become too dry in summer or the water amount become too large in winter; both excessive dryness and excessive moisture can easily cause the lower leaves to droop and soften. In summer, avoid strong direct sunlight; it can be placed in a shaded place inside a shed, and water can be sprinkled frequently to maintain relatively high air humidity.
Shaping management
The Norfolk Island pine is valued for its upright and straight plant posture. In the second year of cutting seedlings, or when seed-grown seedlings grow to about 50 cm, a stick should be set up and wrapped around them for support to prevent the plant from twisting and affecting the ornamental effect. Young trees should be repotted once a year or every other year in spring; plants more than five years old should have their pots and soil changed once every two or three years, combined with spraying chlormequat to control the height of the Norfolk Island pine. In northern regions, move them outdoors at the end of April or the beginning of May and place them in a wind-sheltered, sunny place for maintenance. In midsummer, appropriate shading is needed. During the growing season, turn the pot in a timely manner to prevent the tree shape from growing lopsided and affecting the ornamental effect. The Norfolk Island pine is not resistant to severe cold. In northern regions, move it indoors at the end of September or the beginning of October (Cold Dew), place it in a place with sufficient sunlight and good air circulation, stop fertilizing and control watering, and the room temperature must not be lower than 8°C.
Frequent fertilization
For potted Norfolk Island pine, it is best to use a mixture of leaf mold, peat soil, pure river sand, and a small amount of decomposed organic fertilizer. The pot soil is best mixed with 3 parts loam, 1 part leaf mold, 1 part coarse sand, and a small amount of plant ash. The depth of the soil layer should be controlled so that the bud points of the upper rooting points are just exposed on the soil surface. Starting from the sprouting of new buds in spring, apply 1-2 times a month of decomposed dilute organic liquid fertilizer and calcium fertilizer, which can keep the plant posture fresh and the leaf color glossy.
Monthly management
January: Do a good job of cold protection for overwintering. The room temperature should be above 10°C, control watering, stop fertilizing, and provide sufficient light.
February: Same management as the previous month.
March: The weather turns warmer; appropriately increase watering and fertilizing, and do a good job of indoor ventilation. At ordinary times, pay attention to protecting the side branches so as not to damage them and affect the plant shape. Under normal conditions, there is no need to prune or shape the Norfolk Island pine; it is better to let it grow naturally.
April: Repot once every 2-3 years. The pot soil can be made of peat soil and leaf mold plus about 1/4 river sand and a small amount of base fertilizer.
May: It can be moved outdoors, shading 50%-70% of the sunlight. During the growing season, in addition to watering, water should also be sprayed on the leaves and ground to lower the ground temperature and increase air humidity. During the growing season, topdressing should be applied 1-2 times a month. To keep a good plant shape, care should be taken to frequently turn the pot position so that it receives even light and keeps a straight plant shape.
June: For cutting propagation, terminal buds must be used, not side branches, because seedlings grown from side branch cuttings cannot grow upright and can only grow horizontally. The cuttings are about 15 cm long and are inserted in a cutting bed made of coarse sand or vermiculite, with about 1/3-1/2 of the cutting inserted into the bed. Keep the temperature at 20-25°C and relatively high air humidity; they can root in 4-6 months.
July: Same management as the previous month.
August: Same management as the previous month.
September: The weather turns cooler; control watering and fertilizing, and provide sufficient light. To avoid the plant growing crooked, insert a thin bamboo pole beside the seedling for support to ensure a proper and beautiful plant shape.
October: Move indoors, control watering, stop fertilizing, and increase light. To prevent the tree shape from becoming lopsided, turn the pot once every half month.
November: Do a good job of keeping warm in winter. Just keep the soil moist. Turn the pot once every half month.
December: Same management as the previous month.
Disease control of the Norfolk Island pine Anthracnose
[Symptoms]: The disease occurs on the leaves. Brown small spots first appear on the leaves, then expand and spread, causing local branches and leaves to turn brown and die.
[Pathogen]: Colletotrichum derridis
[Control methods]: 1. Clean the garden and remove diseased remains promptly, carry them out of the field and burn them or bury them deeply.
2. In the early stage of the disease, spray 50% carbendazim wettable powder 700 times liquid or 40% sulfur suspension 600 times liquid, once every 7-10 days, for 3-4 consecutive treatments.
Leaf blight
[Symptoms]: Part or all of the affected small needles turn grayish brown to grayish white and dry up, with dense small black grains on them.
[Pathogen and disease characteristics]: The pathogen is a fungus of the Deuteromycotina, mainly Macrophoma sp., and also Phyllosticta sp. and Diplodia sp. The pathogens survive the winter as mycelium and conidiomata in diseased leaves and diseased remains. Conidia are produced and spread by wind and rain to cause infection. More disease occurs in warm and rainy years and seasons.
[Control methods]: Refer to the control of Podocarpus leaf blight. You can also spray 40% sulfur multi-suspension concentrate 600 times liquid, or 30% copper oxychloride suspension concentrate 600 times liquid, or 25% myclobutanil emulsifiable concentrate 8000 times liquid, or 40% flusilazole emulsifiable concentrate 8000 times liquid, or 50% hymexazol aqueous solution 1500 times liquid, or 69% mancozeb + 75% chlorothalonil wettable powder 1500 times liquid, or 65% carbendazim wettable powder 600 times liquid. In gardens where the disease occurs frequently, combine garden cleaning in winter and spring with one spraying, combining ground and tree spraying for a better effect.
Scale insects
They can be controlled with 40% omethoate 1000-1500 times liquid.
Yellowing leaves
The causes of yellow leaves in the Norfolk Island pine can be summarized as the following 5 points:
1. Too little light. When grown in a place with good light, the Norfolk Island pine grows well. If kept in a place with less light for a long time, it will show leaf yellowing accompanied by leaf fall. It needs to be moved promptly to a place with better light, otherwise the plant condition will worsen further.
2. Too much watering. The watering principle for the Norfolk Island pine is to water when dry and not when wet. Never water too much or too frequently. Do not water if the pot soil is not dry, otherwise the roots will rot from lack of oxygen, making it difficult to absorb water and nutrients, and the plant will show discomfort symptoms. [3] 3. Damage from low or high temperatures. When the temperature is below 5 degrees, the Norfolk Island pine will develop yellow leaves and a small amount of leaf fall. During high temperatures, if the air humidity is low, a large number of yellow leaves will appear.
4. Air humidity that is too low or wind that is too strong causes acute dehydration and yellowing of the leaves. This requires placing it in a wind-sheltered place, or frequently spraying and sprinkling water to increase air humidity.
5. Infection by disease. Generally, drugs such as carbendazim and chlorothalonil should be sprayed for prevention.
Propagation methods of the Norfolk Island pine Seed propagation
Because the seed coat is hard and the germination rate is low, it is best to break the seed coat before sowing to promote germination. In addition, seedlings from sowing are easily harmed by pests and diseases, so the soil used should be strictly sterilized. The seeds are best germinated in a sand bed or by the above-mentioned shell breakingsowing method to increase the seed germination rate; generally they can germinate in about 30 days. Cutting propagation
Cutting propagation is relatively easy and is widely used. Generally, cuttings are taken in spring and summer, but the main branch must be selected as the cutting; plants grown from side branch cuttings are crooked and not upright. The cuttings are 10 to 15 cm long. After insertion, under conditions of 18°C to 25°C and relatively high air humidity, they can root in about 4 months. If before cutting the base of the cutting is soaked in 200 ppm indolebutyric acid (IBA) for 5 hours and then inserted, rooting can be promoted earlier.
To obtain more main branches as cuttings, the young tree can be cut back at the top so that many upright new shoots emerge from the top, and these can be cut in spring as cuttings. This top-cut mother plant can still continue to grow terminal buds afterward and be used as a permanent propagation mother plant. For potted Norfolk Island pine soil, it is best to use a mixture of 40% peat soil, 40% leaf mold, and 20% river sand. During the growing season, the pot soil should be kept moist; when too dry, the lower leaves will droop and soften, but in winter a slightly dry state should be maintained. In winter, the room temperature should be kept above 5%; low temperatures will freeze and kill the growing points.
Air layering method to renew plants
If conditions in the shed or greenhouse permit, after ring-barking the plant at an appropriate height, plant the whole plant in the ground, with the cut buried more than 10 cm deep. After about 1-2 years, when the plant has rejuvenated and new roots have grown sufficiently, lift the plant and pot it. At this time, the original old roots have already rotted and can be removed. The new plant is shorter and sturdier and even more ornamental.
Distribution range of the Norfolk Island pine
Native to the southeastern coastal areas of Oceania. It is cultivated in Guangzhou, Hainan Island, Xiamen, and other places in China as a garden tree; it grows fast. Norfolk Island pine - trunk, has already flowered and borne fruit; north of the Yangtze River it is grown in pots.
Australia and New Guinea, and Guangzhou, Hainan Island, Xiamen, and other places in China
Variety classification of the Norfolk Island pine
Bunya pine Araucaria bidwillii Hook.
Norfolk Island pine Araucaria heterophylla (Salisb.) Franco
Uses of the Norfolk Island pine Ornamental value
The Norfolk Island pine has a tall tree shape and graceful posture. Together with the cedar, Japanese umbrella pine, coast redwood, and golden larch, it is known as one of the world's 5 great park tree species. It is most suitable for solitary planting as a landscape tree or commemorative tree, and can also be used as a street tree. However, it is advisable to choose a site without strong winds to avoid a lopsided crown. The Norfolk Island pine is also a precious indoor potted decorative tree species. The Norfolk Island pine is a beautiful landscape tree and can be planted alone, in rows, or mixed in tree clusters. It can also serve as a background tree for large sculptures or landscape buildings. The Norfolk Island pine is also a precious indoor potted decorative tree species, used to decorate halls and interiors, appearing very elegant.
The Norfolk Island pine has a pyramidal tree shape and luxuriant branches and leaves, with triangular or ovate leaves, and is one of the world's famous garden trees; it can be planted in rows, alone, or mixed in tree clusters, and can also be used as a background tree for sculptures or landscape buildings. It can also be used as a street tree, but it is advisable to choose a site without strong winds to avoid a lopsided crown. Potted seedlings are suitable for decorating ordinary family living rooms, corridors, and studies; they can also be used to decorate various forms of meeting places and exhibition halls; they can also serve as gifts for relatives and friends on the happy occasions of opening a business or moving house.
Timber value
The Norfolk Island pine has excellent wood quality and is an important timber tree species in Australia and South Africa. It can be used for construction, utensils, furniture, and so on.
Norfolk Island pine pictures
How to grow Araucaria heterophylla The difference between Araucaria heterophylla and Araucaria cunninghamii
Araucaria heterophylla likes direct sunlight. When sunlight is sufficient, it can keep the dark green leaves beautiful in color. So how do you grow Araucaria heterophylla? What is the difference between Araucaria heterophylla and Araucaria cunninghamii? Let's learn about it together below.
One, How to grow Araucaria heterophylla
Araucaria heterophylla likes a warm, humid environment with sufficient sunlight and is slightly tolerant of partial shade. When growing it, choose a sunny place with fertile soil and good drainage. Spring, summer, and autumn are the growing seasons for Araucaria heterophylla. It can be placed outdoors in a well-ventilated, sunny place for maintenance. Water according to the principle of "do not water until dry, and water thoroughly when watering," and spray the plant when the air is dry to keep the leaf color fresh.
Apply a decomposed dilute liquid fertilizer or foliar fertilizer to Araucaria heterophylla about once every 20 days, which can make its leaf color dark green. In winter, place Araucaria heterophylla in a wind-sheltered, sunny place for overwintering, or move it indoors for overwintering. At this time, it is enough to control watering and keep the pot soil above 0°C without freezing.
Araucaria heterophylla has strong apical dominance. After the plant grows to a certain height, the top can be cut off to control plant height; side branches should also be thinned so that they are staggered in height and well spaced, meeting shaping requirements, but whorled branches should be selectively retained to highlight the variety's characteristics and maintain its unique style. Repot once every 1-2 years in spring. The pot soil should be loose, fertile, neutral to slightly acidic soil rich in humus.
Two, The difference between Araucaria heterophylla and Araucaria cunninghamii
1. Araucaria heterophylla is a species under the genus Araucaria. Araucaria heterophylla is mainly distributed on Norfolk Island and New Caledonia. The leaves are awl-shaped, usually flattened on both sides, four-rhombic; the cones are larger, nearly spherical; the apex of the bract scales has an acute triangular tip, and the tip bends upward (cultivated).
2. Araucaria cunninghamii is a tree, up to 60-70 m tall in its place of origin, DBH more than 1 m, bark grayish brown or dark gray, coarse, with transverse fissures; large branches spreading flat or extending obliquely, crown of young trees pyramidal, becoming flat-topped when old, side branchlets densely grown, drooping, nearly pinnately arranged. Araucaria cunninghamii is not cold-tolerant and avoids drought; in winter it needs sufficient sunlight; it is native to the southeastern coastal areas of Oceania, and is now cultivated outdoors in courtyards in Guangdong, Fujian, Taiwan, China, Hainan, Yunnan, Guangxi, and other places in China.
The above isHow to grow Araucaria heterophyllaandThe difference between Araucaria heterophylla and Araucaria cunninghamiiintroduction. Friends who like large potted plants can learn about it, and I hope it is helpful to everyone.