What to pay attention to in the daily care of Phalaenopsis
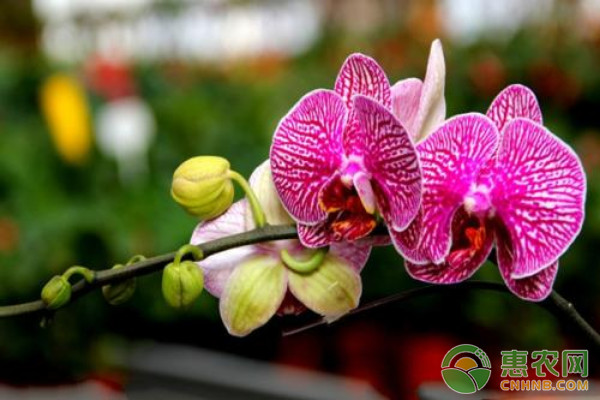
Phalaenopsis has large white flowers, with a yellow-red base on the lip and a pair of separate tendrils at the tip. It likes a warm, humid and semi-shaded environment. Potted Phalaenopsis is best grown in a porous, breathable unglazed clay pot. The material must be loose; for small and medium seedlings, a mix of equal parts sphagnum moss and snake wood shavings can be used. For mature plants, a mix of equal parts charcoal granules and snake wood shavings is suitable. When planting, the potting medium placed at the bottom of the pot should account for at least 1/2 of the pot's capacity.
Because Phalaenopsis has aerial roots and the root tips have symbiotic fungi, part of the roots should be exposed on the pot surface or in the space outside the pot; never bury them all deeply, otherwise their respiration and growth will be hindered. For Phalaenopsis grown in unglazed clay pots, it is best to repot and replace the potting medium after flowering each spring, otherwise dirt and moss tend to accumulate, and the potting medium also tends to rot and breed pests and diseases.
Phalaenopsis needs little light, about 1/3 of the light required by ordinary orchids, and must never be exposed to direct strong light. When grown outdoors, 80% shading is needed in summer, 60% in autumn and 40% in winter. When grown indoors, it can grow well with only 600~1000 lux of light intensity. The optimum growth temperature is 20~30 degrees Celsius; when summer exceeds 35 degrees Celsius or winter falls below 10 degrees Celsius, its growth and development will be inhibited; the overwintering room temperature should not be lower than 16 degrees Celsius.
Phalaenopsis is best grown in an environment with high air humidity, and the optimum daytime humidity is 75%~80%. Therefore, during the growing period, it is best to mist 2~3 times a day and frequently sprinkle water on the ground to increase air humidity. During the vigorous growth period of new roots, water more; during the dormant period after flowering, water less. In spring and autumn, water once a day; in summer, water once each morning and evening; in winter, water about once every 3 days.
Spring and summer are its vigorous growth period, when a dilute liquid fertilizer mainly based on nitrogen fertilizer can be applied once every 2 weeks; autumn and winter are the flower stem growth period, when a dilute liquid fertilizer mainly based on phosphorus and potassium fertilizers, such as a 0.5% calcium superphosphate aqueous solution, can be applied once every 10~14 days. After flower buds appear, stop fertilizing, otherwise the buds are prone to drop early.
Home-grown Phalaenopsis is generally propagated by dividing the rhizome; you can dig out the small plantlets growing from the roots of a mature large plant, take them with 2~3 roots, and pot them separately.
1 Cultivation
1.1 Spread a layer of sterilized wet pine needles on the bottom of the pot.
1.2 Place the Phalaenopsis into the pot and let the root system spread out fully and evenly.
1.3 Place pine needles at the plant's root system and press gently to firm.
1.4 After spraying with water, place the plant in a ventilated indoor spot and do not fertilize. After one month, carry out normal care.
2 Watering
2.1 In spring and autumn, water once a day around 5 p.m.
2.2 Summer is the plant's vigorous growth period; water once each at 9 a.m. and 5 p.m. every day.
2.3 In winter, watering once every 7 days is enough, and watering is best done before 10 a.m. If a cold wave occurs, do not water; wait until after the cold wave to resume watering. The water temperature for watering should be close to room temperature.
Tips for beginners:Tap water used for watering flowers should be stored for more than 72 hours.
3 Light
Generally speaking, place the Phalaenopsis in a spot indoors with ample but soft light, and avoid direct sunlight.
4 Temperature
4.1 The most suitable growth temperature is 18℃~30℃.
4.2 In low-temperature weather, immediately move the flower pot indoors so it can overwinter safely.
Tips for beginners:When moving the plant indoors in winter, do not place it too close to a radiator.
5 Fertilizing
5.1 Spring and summer are the growing period; apply a dilute liquid fertilizer once every 7~10 days, either organic fertilizer or a special nutrient solution for Phalaenopsis.
5.2 Stop fertilizing when there are flower buds, otherwise the buds will wither early.
5.3 After the flowering period, a topdressing of nitrogen fertilizer and potassium fertilizer can be applied.
5.4 Autumn and winter are the vigorous growth period of the flower stem; apply a dilute phosphorus fertilizer once every 15~20 days.
6 Pest and disease control
Common pests of Phalaenopsis include thrips, scale insects and mites, which can be controlled by spraying solutions such as Supracide and omethoate; the larvae of some butterflies and moths can be controlled by spraying solutions such as Lannate, dichlorvos and thiocyclam.
7 Pruning
Flower stems that have already bloomed should be cut off in time, leaving only the lower 3~4 nodes.
This is the end of Huinong.com editor's brief introduction for flower lovers on the daily care and management methods of Phalaenopsis in winter. If you also want to know how to manage and care for other flowers in winter, please follow our Huinong.com!
Efficient cultivation techniques and daily care management of Phalaenopsis in northern regions
Phalaenopsis is a flower that many friends like. Today the Huinong.com editor has compiled an article on the planting and management of Phalaenopsis in the north. Flower growers in the north, come and learn quickly.
1 Cultivation techniques of Phalaenopsis in northern regions
1.1 Cultivation containers
There are differences in cultivation methods, and the cultivation containers also differ. Generally, for large-scale cultivation of Phalaenopsis, tile pots or plastic pots can be used as cultivation containers. If in a flower shop or flower supermarket, decorative pots can be chosen as cultivation containers; if for commercial flowers, appropriate care is still needed before they go on the market, and at this time 5~13cm transparent plastic nutrition pots can be chosen as cultivation containers.
1.2 Cultivation substrate
In the process of cultivating Phalaenopsis, the substrate is best one with relatively good aeration and drainage. Generally, commonly used substrates include peat, sphagnum, wood shavings, coconut husk chunks, moss, etc., while in the Dalian area the commonly used substrate is sphagnum. Peat is also generally easier to manage than sphagnum for growing Phalaenopsis. For example, when growing Phalaenopsis with sphagnum, if the sphagnum is packed too tightly when repotting it will affect root growth, and if packed too loosely it easily causes the sphagnum to acidify and the Phalaenopsis to rot at the roots, whereas peat has good water permeability and can well avoid these problems, lowering the technical difficulty of potting.
2 Care techniques of Phalaenopsis in northern regions
2.1 Seedling care
In the process of caring for seedlings, the first step is the operation of potting small seedlings, that is, after the bottle seedlings are taken out of the bottle, they need to be transplanted into 5cm pots after 2~3 months, and then use premium sphagnum soaked 1d earlier (with a water content of about 30%) to wrap it around the root area of the small seedling, avoiding exposed roots. The leaves also must not be wrapped in the sphagnum; when wrapping, pay attention to tightness to avoid damage to the leaves and roots. After completing the potting operation, use a 1500-fold solution of thiophanate-methyl to water half through, or use a fungicide to spray on the 2nd day.
2.2 Medium seedling care
When repotting medium seedlings, there is also a certain standard: if after 3~4 months of repotting the small seedling its leaf length reaches 12cm and its width is also >3cm, it can be transplanted into an 8cm pot; if its root system is relatively robust, it can also be transplanted. In the process of repotting medium seedlings, the main step is to take the seedlings that have reached the standard out of the 4cm pot and handle them appropriately, removing rotten or old roots. After completing the repotting operation, care is needed: sterilize them 1d after repotting, and then carry out a sterilization operation every 10d afterward. Usually, the fungicide can be an 800-fold solution of zineb plus a 1000-fold solution of Yili, or a 3000-fold solution of 99% tetracycline, used alternately.
2.3 Large seedling care
When repotting large seedlings, it can generally only be done after the medium seedlings have grown for 2~3 months. At this time, if the leaf tip distance is 20cm and the root system is growing very robustly, they can be moved into 11~13cm pots. When repotting, first put a layer of foamed plastic granules into the transparent plastic pot, then add sphagnum, take the large seedling out of the 8cm pot, remove the previous rotten leaves and rotten roots, and wrap it with a layer of sphagnum. After completing the repotting, appropriate care is needed: place seedlings of different sizes separately to facilitate care, and sterilize them 1d after repotting, the same as the above operation.
2.4 Care during spike emergence
Usually, flower forcing takes about 50d. If the seedling begins to send out a flower stalk, stop the low-temperature flower forcing operation, and place the plants that have sent out flower stalks separately from those that have not. After the spike emerges, adjust the direction of the flower spike in time so that the leaves are in an east-west direction, and the direction of the flower stalk is based on the growth point facing south. During spike emergence, appropriate care is also needed: alternately irrigate the roots with fertilizer and water, usually 2 times fertilizer and 1 time water; for fertilizing, high-phosphorus fertilizer and balanced fertilizer can be used alternately, both at a dosage of 5000-fold solution.
2.5 Care during the flowering period
Flower buds will sprout 30d after the flower stalk emerges. At this time, the flower pot must not be moved over a large range, and clips need to be added in time; each flower spike can hold at most 3 clips, with the highest one clipped about 15cm below the 1st flower bud. During this period, it needs relatively strong light, and 20000~35000Lux is the optimal light intensity, so a suitable light position must be chosen. Temperature also needs appropriate control; during flowering, the daytime temperature is best at 22~28℃, and remember it must not be lower than 20℃ or higher than 30℃; the nighttime temperature needs to be controlled at 20~25℃, with the minimum not lower than 18℃ and the maximum not exceeding 25℃. In controlling humidity, during flowering the humidity is best kept at 60%~70%, with the minimum not less than 50% and the maximum not greater than 80%. Too high humidity easily causes disease in the plant, ultimately affecting its marketability; too low humidity will greatly shorten its lifespan, and ultimately symptoms such as flowers withering early may appear. After flowering, fertilizing can be appropriately reduced; during the period from flower bud to flowering, only 2 fertilizations are needed. In addition, trace elements also need to be appropriately supplemented to promote robust plant growth.
That is all about the planting and management techniques of Phalaenopsis in northern regions. Farmer friends in the north who have grown this flower must study the knowledge points of this article carefully.