What are the cultivation methods and precautions for Phlox drummondii
Phlox drummondii is also known as Fuluhua, Fulehua, and Wusemei. It originated in southern North America and is now widely cultivated in countries around the world. It is an annual herbaceous plant, not cold-tolerant, prefers warmth, and dislikes extreme heat. The flowering period is relatively long, and it is propagated by seed. When sowing, the soil covering should not be too thick; slight light exposure is best. The suitable germination temperature is 15-20°C. Phlox drummondii has many horticultural varieties and rich flower colors, including bright red, peach red, pink, rose red, pure white, and more. It has dense flowers and a long flowering period, and its management is relatively extensive, so it is a main planted variety for basic flower beds, and its potted effect is also very good. Plant height is 15-30 cm, mixed colors, growth period 4-6 months, with many flower colors, suitable for potted plants and flower beds.
Native to North America, it likes a cool climate and is tolerant of low temperatures; in the Beijing area it can overwinter outdoors. The suitable growth temperature is 15°C to 25°C, and it is suitable for growing in loose sandy loam. It is propagated by sowing, cuttings, and division, and tissue culture can also be used for rapid seedling propagation. After the first batch of flowers fades, pinch back promptly to encourage new branches to sprout, which can make Phlox drummondii bloom again. After pinching, apply 1-2 topdressings to make the second flowering of Phlox drummondii abundant.
It likes warmth, is slightly cold-tolerant, and dislikes extreme summer heat. In the North China area it can overwinter in a cold frame. It prefers well-drained, loose loam, is not drought-tolerant, and dislikes waterlogging. It is commonly propagated by sowing; sow in autumn in warm regions and in spring in cold regions. The suitable germination temperature is 15-20°C. Seed viability can be maintained for 1-2 years. For autumn sowing, after the seedlings undergo 1 transplanting, they can be moved to a cold frame to overwinter in early to mid-October, then moved to field beds in early spring, fertilized promptly, and planted out in mid-April. The flowering period is relatively long. The capsule maturation period is not uniform; to prevent seeds from scattering, the inflorescence can be cut off when most capsules turn yellow, then dried and threshed. Phlox drummondii plants are short and have rich flower colors, and can be used as plant material for flower beds, flower borders, and rock gardens, or potted for indoor decoration. Taller varieties can be used as cut flowers.
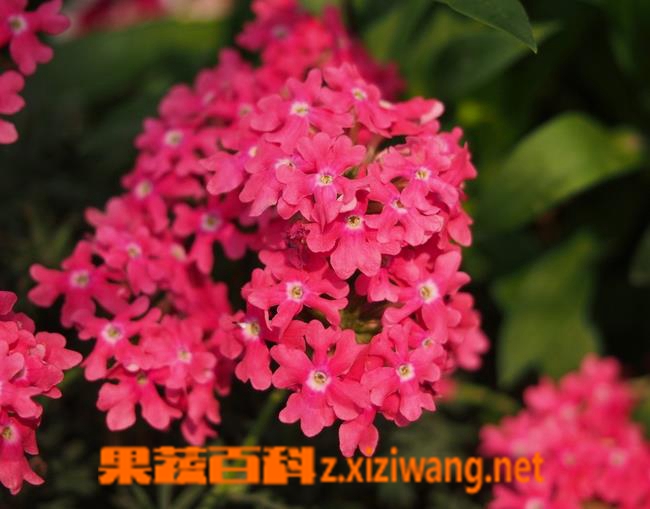
1. How to grow Phlox paniculata——cuttings
Phlox paniculata can mainly be propagated by cuttings and layering. Cuttings are a relatively easy method for growing Phlox paniculata, and cuttings increase its survival rate. Cuttings are usually taken in late spring and early summer, using healthy middle branches as cuttings. After the cut end of the cutting stops exuding sap, the branch can be inserted into the soil medium and left to take root and grow. After Phlox paniculata grows two leaves, it can begin the operation of transplanting into pots.
2. How to grow Phlox paniculata——layering
Phlox paniculata can also be propagated by layering. It is best to use second-year branches for layering. After peeling off some outer bark from the branch of Phlox paniculata, wrap it with plastic film and soil. In a sufficiently moist environment, the rubber tree will gradually begin to take root and gradually grow into a new Phlox paniculata.
3. How to grow Phlox paniculata——habits
Phlox paniculata loves fertile soil. During the seedling stage, attention should be paid to supplementing nutrients, using a small amount of cake fertilizer as base fertilizer to ensure the fertility of the soil. Do not use nitrogen fertilizer for Phlox paniculata; too much nitrogen fertilizer will cause the plant shape of Phlox paniculata to lean and look unattractive. Phlox paniculata likes moisture; in summer, provide plenty of water to retain moisture, watering every day but not causing waterlogging.
How to grow Phlox drummondii: cultivation methods for Phlox drummondii
The name Phlox drummondii sounds strange, but in fact Phlox drummondii is an annual herbaceous plant, with abundant flower colors, dense flowers, and a long flowering period, and it is very beautiful. So how do you grow Phlox drummondii? What are the cultivation methods? Let's learn about them together below.
1. How to grow Phlox drummondii
Phlox drummondii is suitable for growing in conditions of ample sunlight and a cool climate, so there is no need to use chlormequat to control plant shape. When environmental conditions are not ideal, spraying chlormequat 1-2 times can prevent excessive elongation. During cultivation, Phlox drummondii must maintain good plant and row spacing to prevent crowding from affecting plant shape and causing pests and diseases. Phlox drummondii plants are short and the branches and leaves are hairy, so when watering and fertilizing, avoid contaminating the leaf surface to prevent branch and leaf rot. The entire growth and development period is 10-14 weeks, related to pot size, light conditions, and seedling raising time.
After Phlox drummondii is planted out, pay attention to management such as watering, fertilizing, ventilation, and pest and disease control. The amount of watering varies according to the different seedling stages and depends on the soil condition. Topdressing for Phlox drummondii begins one month after planting out, applying a small amount of compound fertilizer; farmyard manure is even better, ensuring robust growth during the seedling stage. Phlox drummondii seedlings are prone to infection, damping-off, root rot, and other diseases. To avoid the occurrence of pests and diseases, spray once a week, mostly to prevent fungal infections and diseases, commonly using Bordeaux mixture, carbendazim, chlorothalonil, and others.
2. Cultivation methods for Phlox drummondii
Phlox drummondii is commonly propagated by sowing; sow in autumn in warm regions and in spring in cold regions. The suitable germination temperature is 15-20°C. Seed viability can be maintained for 1-2 years. For autumn sowing, after the seedlings undergo 1 transplanting, they can be moved to a cold frame to overwinter in early to mid-October, then moved to field beds in early spring, fertilized promptly, and planted out in mid-April. The flowering period is relatively long. Phlox drummondii can also be propagated by root cuttings, which can be done in spring and autumn. Combined with division planting, cut some roots into small sections about 30 cm long, bury them flat in plain sand, and at 15 to 20°C, keep the soil moist; in about 30 days new shoots can grow.
Phlox drummondii seedlings are not tolerant of transplanting, so it is better to do it early rather than late, and try to keep the seedling root system intact. They are often transplanted into pots within 4 weeks after emergence. For the variety 'Palona', it is suitable to use small pots about 10 cm and a potting medium that is well-drained, loose, and breathable.
The above is an introduction to how to grow Phlox drummondii and the cultivation methods for Phlox drummondii. I hope everyone will like Phlox drummondii. If you want to grow Phlox drummondii, you can refer to the above cultivation methods.