A detailed guide to daisy planting methods: easily master the cultivation techniques
The daisy is a biennial herbaceous plant with a cold-tolerant ecological habit, preferring sunny, cool climates. Daisy planting methods are relatively complex, so today we will introduce daisy planting methods in detail.
Planting methods:
Stage 1, plug seedling stage 1: the radicle germination stage begins when the radicle breaks through the seed coat, the young root contacts the soil, and ends when the cotyledons emerge, which is the first stage. The temperature should be maintained at 18°C. Daisy seeds require light to germinate, so there is no need to cover them with soil when sowing, but the growing medium must be kept moist; never let the medium dry out during this stage. During this stage, the pH value should be kept between 5.5 and 6.2, and the relative humidity at 100%. Direct sunlight should be avoided, and the seeds should be shaded after sowing.
Stage 2: cotyledon emergence and growth stage. From the emergence of the cotyledons to the emergence of true leaves is the second stage. The temperature is still maintained at 18°C. Appropriately lower the humidity of the growing medium, but it still must not be too dry; the humidity should be about 70% to 80%, so that the root system can penetrate the medium to absorb nutrients for the expansion of the cotyledons. The first and second stages require 14 to 21 days.
Stage 3: true leaf growth and development stage. From the emergence of true leaves until 80% of the seedlings are ready for sale is the third stage. Lower the temperature to about 15°C. Air humidity should also be gradually reduced; between two waterings, the substrate can be allowed to dry out once, thus forming a wet-dry cycle that helps promote root development.
Stage 4: hardening-off stage. At this stage, the root system has already formed well, the seedlings are basically ready for sale, and they become cold-tolerant through hardening off. This stage lasts about 7 days. Temperature, humidity, and fertilizer concentration are basically the same as in the third stage. Attention should be paid to timely transplanting and potting up. The third and fourth stages require 7 to 14 days.
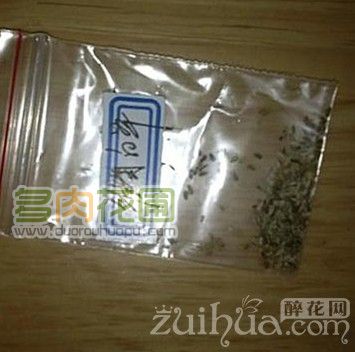
Daisy seeds are very small, with 4900-6600 seeds per gram. For home sowing, it is mostly done in September. The temperature difference between north and south is large; in the south, sowing is mostly carried out in autumn from August to September. In the north, sowing is mostly carried out in spring, and autumn sowing is also possible, but in winter the daisies must be moved into a relatively warm indoor environment.
For pot sowing, choose a loose, breathable flower pot. After disinfecting the flower pot, mix the seeds evenly with fine sand and broadcast sow, then cover with fine soil about 0.5 cm thick. After sowing, cover with a shade net and water thoroughly. Watering should be done with a fine spray to prevent the soil surface from crusting.
After sowing, maintain an indoor temperature of 18-22°C and a humidity of 80-90%. The radicle emerges in about a week. After germination, the medium should still be kept moist, and the pot needs to be placed on a balcony to receive light, but the light at germination must not be too strong, so appropriate shading is needed. In July and August, shading is still required around midday to lower the temperature.
When the daisy seedlings have 2-3 true leaves, they can be transplanted once. The pH value of the sowing medium is preferably 5.8-6.5, and the EC value is more suitable at 0.5-0.75. After sowing, maintain a room temperature of 18-20°C and a humidity of 80-90%, and they can germinate in 5-8 days.
Management after germination
First stage
Keep humidity at 70-80% so that nutrients can be absorbed for the expansion of the cotyledons. Control the room temperature at 16-20°C. Once the first pair of true leaves unfolds, fertilization can begin, mainly with water-soluble fertilizers. After that, one transplanting can be carried out.
Second stage
This is the rapid growth period of the seedlings; prevent the medium from becoming too wet, and flower-specific fertilizers need to be applied alternately. Due to differences in temperature and transpiration, generally apply liquid fertilizer once every 2-3 days instead of watering. If fertilizer is applied at intervals, the concentration can be relatively increased to 70-100 ppm.
Note: Between watering and fertilizing, the medium should be allowed to dry slightly, using alternating wet and dry conditions to promote seedling growth and root development. When the seedlings have 2-3 pairs of true leaves, the seedlings are 3-100px tall, and the root system is basically fully developed, they can proceed to the next stage of hardening off.
Third stage
The seedling root system has fully grown, and there are already 2 pairs of true leaves. The hardening-off process before potting up can be considered. The temperature is the same as in the previous stage, and the humidity is slightly reduced. Water control is especially important at this stage. Sufficient sunlight is needed, environmental ventilation should be strengthened, and indoor temperature and humidity should be controlled to prevent leggy growth.
The above is the daisy sowing method I have compiled, along with the management after germination. I hope it can be helpful to the many flower lovers, and please continue to follow Duorou Huapu to learn more about growing flower seeds.
Detailed explanation of daisy flower planting steps: how to grow daisies
The daisy is a biennial herbaceous plant, about 10 to 15 cm tall. The leaves are basal, spoon-shaped, with rounded blunt tips and bases gradually narrowing into stalks. The capitulum is solitary, and the scape is hairy. The ligulate flowers are strip-shaped, female, and spreading; the tubular flowers are bisexual. The achene is obovate, flat, with marginal veins, covered with fine hairs, and without a pappus. The daisy has a cold-tolerant ecological habit, preferring sunny, cool climates. It is not tolerant of shade, high temperatures, or severe frost. Under hot conditions, flowering is poor and the plant easily dies.
Planting methods:
Stage 1, plug seedling stage 1: the radicle germination stage begins when the radicle breaks through the seed coat, the young root contacts the soil, and ends when the cotyledons emerge, which is the first stage. The temperature should be maintained at 18°C. Daisy seeds require light to germinate, so there is no need to cover them with soil when sowing, but the growing medium must be kept moist; never let the medium dry out during this stage. During this stage, the pH value should be kept between 5.5 and 6.2, and the relative humidity at 100%. Direct sunlight should be avoided, and the seeds should be shaded after sowing.
Stage 2: cotyledon emergence and growth stage. From the emergence of the cotyledons to the emergence of true leaves is the second stage. The temperature is still maintained at 18°C. Appropriately lower the humidity of the growing medium, but it still must not be too dry; the humidity should be about 70% to 80%, so that the root system can penetrate the medium to absorb nutrients for the expansion of the cotyledons. The first and second stages require 14 to 21 days.
Stage 3: true leaf growth and development stage. From the emergence of true leaves until 80% of the seedlings are ready for sale is the third stage. Lower the temperature to about 15°C. Air humidity should also be gradually reduced; between two waterings, the substrate can be allowed to dry out once, thus forming a wet-dry cycle that helps promote root development.
Stage 4: hardening-off stage. At this stage, the root system has already formed well, the seedlings are basically ready for sale, and they become cold-tolerant through hardening off. This stage lasts about 7 days. Temperature, humidity, and fertilizer concentration are basically the same as in the third stage. Attention should be paid to timely transplanting and potting up. The third and fourth stages require 7 to 14 days.
Cultivation management
1. Transplanting and potting up. After hardening off, they can be transplanted. A 12 cm diameter nutrient pot or flower pot can be used for transplanting and potting up. After potting up, water thoroughly with settling water in time. For potted products, transplanting in early October is better than transplanting at the end of October, because if transplanted in early October, the plant root system can grow firmly in the container before frost arrives.
2. Substrate. Use a loose cultivation substrate with good drainage and air permeability. The clay content in the substrate should be 15% to 30%. About 15% organic fertilizer (such as compost) can be added. Apply 1 kg of completely balanced fertilizer and 2 kg of slow-release fertilizer per cubic meter of substrate.
3. Water. After potting up, water thoroughly once. Between two waterings, the substrate can be allowed to dry slightly, then water thoroughly again. Follow the principle of alternating dry and wet, which is beneficial to root growth and development. Attention should be paid to keeping the substrate moist, but not saturated. When buds appear, water should be controlled to prevent the flower stems from becoming too long.
4. Temperature. The suitable growth temperature is 10°C to 12°C. When cultivated outdoors, covering is needed. To obtain good plant quality, place daisies under cool conditions as much as possible, but avoid frost to prevent the plants from freezing. Daisies can overwinter safely above 5°C. When the temperature is below 6°C, growth is relatively slow and bud formation is delayed; when the temperature is above 12°C, the plant leaves enlarge, the flower stems become thin and weak, the number of flowers decreases, and growth vigor declines. After outdoor temperatures gradually become warmer, attention should be paid to timely ventilation.
5. Light. During both the growth period and the flowering period, relatively high light intensity is needed. Newly transplanted plants should not receive too much light. Sufficient light can promote plant growth, make the leaves tender green, and increase the number of flowers. However, during frost periods, partial shading is needed to avoid direct sunlight.
6. Fertilizer. Apply water-soluble fertilizer alternately every 7 to 10 days at a concentration of 150 ppm to 200 ppm. The daisy root system is sensitive to excessively high salt content in the substrate, so excessively high salt content should be avoided, and excessive ammonium and excessively high nitrogen concentration should also be avoided. Do not fertilize the plants in early October; reduce the amount of fertilizer in winter; in spring, apply a balanced nitrogen-potassium fertilizer. Before applying liquid fertilizer, the medium should be allowed to dry slightly, keeping it moist but not wet. Providing sufficient water and fertilizer during the growing season can both make the plants grow luxuriantly and extend the flowering period.
Pest and disease management
The main diseases of daisies include damping-off at the seedling stage, gray mold, brown spot, anthracnose, and downy mildew; pests include aphids, etc. Usually, prevention work against pests and diseases should be strengthened. During cultivation, dense planting should be avoided, and a cool environmental condition with ventilation, air permeability, and sufficient light should be maintained as much as possible; otherwise, the plants will become weak and leggy. Keep things clean. When infected plants or leaves are found, they must be removed and cleaned up at any time. When diseases occur, immediately take chemical control measures. Precautions: 1. Make the plants grow in a cool cultivation environment as much as possible, to help keep the plant shape compact. 2. Excessive relative humidity in winter and overly moist plant leaves can easily cause gray mold. During cultivation, a slightly moist environment can be chosen, but it must not be too wet. 3. Daisies have clustered basal leaves. If ventilation is not strengthened, the base is prone to rot, thereby becoming infected with pathogens.