How to Change the Soil for a Clivia? Detailed Guide to the Correct Method and Steps
The method and process for changing a Clivia's soil are both very simple. To be safer, here are some precautions for changing a Clivia's soil, to help flower growers do their homework on Clivia soil changing more thoroughly.
1. Timing of soil changing:
Generally speaking, Clivia should be repotted once a year, as this better helps its growth. However, this does not mean it can be done at any time. Soil changing is best done in spring and autumn, because the temperature is suitable at these times and the Clivia grows vigorously, so its growth will not be affected by the soil change.
Flower growers can, based on the actual conditions of their region, repot and change soil in March to April or in August to September, when the weather is warm and cool (note the difference between northern and southern regions; in the south it should be appropriately postponed) and the temperature is moderate. This is the second vigorous growth period of Clivia. According to the plant's growth condition, growers can carry out autumn repotting in mid-August.
2. Try to avoid changing soil during the flowering period:
After a Clivia has shot its flower stalk, or while it is budding and flowering, it is best not to change the soil, because at this stage the plant needs relatively more nutrients, and carrying out a soil change will affect the continuous supply of nutrients. However, if soil of poor quality causes root rot or yellow leaves and the soil must be changed, care should also be taken not to break up the root ball, and to minimize the damage to the root system caused by the soil change.
3. Avoid damaging the roots:
When taking the Clivia out with its soil ball, be careful not to let the soil ball break apart, so as not to damage the root system. Gently peel off the soil, and at the same time remove the aged and rotted fleshy roots (but do not cut off fleshy roots that are not rotted, no matter how long they grow, because these fleshy roots and their tips have many root hairs; besides absorbing water and nutrients, these root hairs can also secrete various acids that dissolve nutrients in the soil that are otherwise hard to dissolve, expanding absorption. If they are cut off, although the plant will not die, its growth will certainly be affected).
4. Acclimatization after repotting:
After changing the soil, the Clivia should be placed in a shaded spot for about 10 days to slow water evaporation and let it gradually recover its strength. After 10 days, light can be gradually increased.
5. The pot is not the bigger the better:
Prepare a suitable specialized pot according to the size of the Clivia (especially the number of roots), and avoid using a large pot to grow a small Clivia.
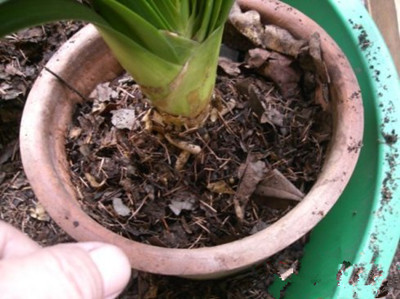
Clivia Root Breakage During Soil Change and Precautions for Changing Clivia Soil
What frustrates many flower growers is that Clivia roots break easily when changing soil, or they simply do not know exactly how to change it. So is root breakage during Clivia soil changing something to fear? Based on these questions, the editor has put together a summary of precautions for changing Clivia soil, hoping it can help everyone solve their problems.
1. Timing of soil changing: Generally speaking, Clivia should be repotted once a year, as this better helps its growth. However, this does not mean it can be done at any time. Soil changing is best done in spring and autumn, because the temperature is suitable at these times and the Clivia grows vigorously, so its growth will not be affected by the soil change.
Flower growers can, based on the actual conditions of their region, repot and change soil in March to April or in August to September, when the weather is warm and cool (note the difference between northern and southern regions; in the south it should be appropriately postponed) and the temperature is moderate. This is the second vigorous growth period of Clivia. According to the plant's growth condition, growers can carry out autumn repotting in mid-August.
2. Try to avoid changing soil during the flowering period: It should be noted that after a Clivia has shot its flower stalk, or while it is budding and flowering, it is best not to change the soil, because at this stage the plant needs relatively more nutrients, and carrying out a soil change will affect the continuous supply of nutrients. However, if soil of poor quality causes root rot or yellow leaves and the soil must be changed, care should also be taken not to break up the root ball, and to minimize the damage to the root system caused by the soil change.
3. Avoid damaging the roots: When taking the Clivia out with its soil ball, be careful not to let the soil ball break apart, so as not to damage the root system. Gently peel off the soil, and at the same time remove the aged and rotted fleshy roots (but do not cut off fleshy roots that are not rotted, no matter how long they grow, because these fleshy roots and their tips have many root hairs; besides absorbing water and nutrients, these root hairs can also secrete various acids that dissolve nutrients in the soil that are otherwise hard to dissolve, expanding absorption. If they are cut off, although the plant will not die, its growth will certainly be affected). 4. Acclimatization after repotting: After changing the soil, the Clivia should be placed in a shaded spot for about 10 days to slow water evaporation and let it gradually recover its strength. After 10 days, light can be gradually increased.
5. The pot is not the bigger the better: Prepare a suitable specialized pot according to the size of the Clivia (especially the number of roots), and avoid using a large pot to grow a small Clivia.
There is a lot of knowledge involved in changing Clivia soil. If you accidentally cause root breakage, just cut off the rotted part, then care for it for some days according to the Clivia's usual habits, and basically new roots will grow.
How to Change Clivia Soil_ The Most Detailed Introduction to Changing Clivia Soil
An introduction to changing Clivia soil by Grandpa Dong from Tianjin. Dong Ye grew award-winning Clivia on a balcony, and his experience is worth learning from and sharing among Clivia enthusiasts. As spring passes and autumn comes, it is once again time to repot and change soil for Clivia. For the vast majority of Clivia growers, this work is as natural as changing clothes with the seasons. But a small number of enthusiasts do not think so. Online, one often sees Clivia enthusiasts (and many have also sent me text messages) asking: Why should Clivia be repotted? Why can't small seedlings use large pots? Why can't large Clivia use small pots? How many times a year is best for changing Clivia soil, and if changing soil is too troublesome, can it be skipped? After changing soil, should you water immediately or not water first? How should you water? ... And so on. In response to these questions, I will offer my personal views for everyone's reference and discussion.I. Why should Clivia be repotted?
1. As everyone knows, Clivia goes from seed and seedling to mature plant through a physiological process of continuous growth and change. A seedling with one leaf generally has only one root, so a three-inch pot can hold 3 to 5 seedlings. As time goes on, especially after planting out, the roots and leaves continuously increase, so the Clivia must be given a suitable new pot regularly or irregularly according to its growth needs.
2. Clivia seedlings should not use large pots. If a small seedling uses a large pot, after watering the water evaporates too slowly, causing the potting soil to stay waterlogged for a long time, resulting in severe oxygen deficiency, or the water may not penetrate fully or evenly, all of which are unfavorable to the growth of small seedlings (small Clivia).
3. Large Clivia also should not use small pots. If a large Clivia uses a small pot, it is unfavorable for the root system to spread and grow, the small amount of nutrient soil leads to insufficient nutrients, and after watering the water evaporates too quickly, which is unfavorable to the growth of the Clivia. At this point, a small summary can be made of the above questions: Clivia must be repotted according to its growth needs; that is, neither should a small Clivia use a large pot nor a large Clivia use a small pot. In one sentence, use a pot as large as the Clivia (and also according to the number of roots).
II. Why should Clivia soil be changed twice a year?
1. The soil used for Clivia is a nutrient soil made mainly of leaf mold and pine needles, plus a small amount of river sand and charcoal residue. The nutrients in such nutrient soil last at most half a year before being used up by the Clivia. When changing the soil, you can see that after half a year the old potting soil has already turned muddy, not only lacking nutrients but also having extremely poor air permeability. Therefore, changing the soil twice a year is essential. Of course, if you insist on not changing the soil, it is not absolutely impossible. Clivia has strong stress resistance and can survive for dozens of days with bare roots. It will not die for a while without watering or changing soil, but growing well becomes difficult. I have seen Clivia that had only a few leaves after being grown for twenty or thirty years, which is related to not repotting, not changing soil, and inadequate management.
2. How should Clivia soil be changed?
(1) Prepare materials before changing soil: Mix leaf mold, pine needles, river sand, and charcoal residue (in autumn use a ratio of 5:2:2:1; in spring it can be adjusted) and set aside. Also prepare solid fertilizers such as large and small hemp seeds and sunflower seeds, roasted and set aside (note that the amount must not be too large). At the same time, choose some specialized pots suitable for the size of the Clivia and set them aside.
(2) Stop watering the Clivia for 5 to 15 days (depending on pot size) so that the moisture in the potting soil is close to zero. The purpose is to avoid damaging the roots during soil changing and to promote quick recovery.
(3) Turn out the pot and knock off the soil to check the root growth condition, remove rotted roots and hollow roots, and begin filling soil and repotting:
Step one: Use two pieces of tile to cover the pot hole. Cover but do not seal tightly, block but do not "kill," so as to achieve water and air permeability without leaking soil or exposing roots.
Step two: Spread bottom soil in the pot (you can also combine this with applying basal fertilizer). After spreading it, place the Clivia roots facing upward with the root crown exposed and fill with plain soil, then use the roots to wrap the soil in the root crown, and put the root bundle downward into the pot. Do not let the soil in the root crown scatter and fall.
Step three: With one hand supporting the root crown, use the other hand to fill soil along the inner wall of the pot (in autumn you can combine this by mixing solid fertilizer into the soil or using it as a waist fertilizer). The soil should be filled evenly, and while filling, straighten the Clivia and firm the soil. What should be noted here about filling soil is that the soil inside the pot wall and outside the root crown and the soil in the root crown should squeeze or "lock" the roots rather than press them down. The purpose is to let the root system spread and grow smoothly.
III. After repotting and changing soil, when should you water, and how should you water well?
After repotting and changing soil, you should water immediately, and water heavily and thoroughly, watering continuously for three days to prevent turbid air from damaging the roots, after which you can return to normal management. Some people, after repotting and changing soil, do not advocate watering immediately, the so-called practice of letting the Clivia acclimatize and watering less to let the roots slowly adapt. The author believes this lacks scientific and practical basis and is not advisable.