What to Do When Tulip Leaves Turn Yellow? 6 Major Causes Including Insufficient Light and Overwatering
As the national flower of the Netherlands, the tulip is certainly familiar to everyone. It is rich in varieties and pleasing in flower color, making it one of the favorites of many flower lovers. However, during the cultivation process, tulip leaves may show yellowing symptoms for various reasons. So what should be done when tulip leaves turn yellow? We need to start with soil, light, and so on. Below are the causes of tulip leaf yellowing and their solutions. If you love flowers, you must take a look~
I. What to Do When Tulip Leaves Turn Yellow: Find the Cause
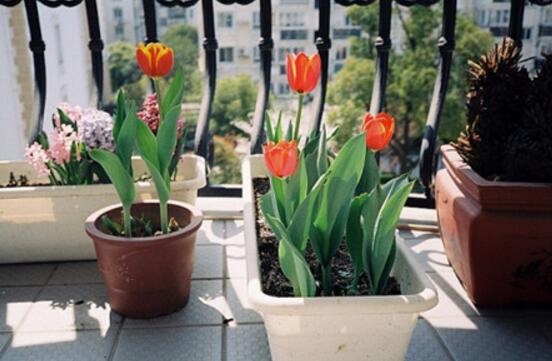
In the methods for cultivating tulips, we have learned about the tulip's requirements for soil, light, watering, and so on, and once these requirements are not met, yellowing leaves will come knocking. As for what to do when tulip leaves turn yellow, improper watering, improper fertilizing, and insufficient light can all be causes. For this, the editor has compiled 6 causes of tulip leaf yellowing and their solutions. Keep reading below.
II. Causes of Tulip Leaf Yellowing and Solutions
1. Leaf yellowing caused by environmental changes
According to research, many flower lovers buy their tulips online, and when they first receive the flowers, they look perfectly normal, but after caring for them for a while, the tulip leaves start to show yellowing symptoms. What is going on? Actually, this is caused by environmental changes. The tulip may be unable to adapt for a while because its growing environment has changed greatly all at once, thus showing yellowing leaf symptoms.
Solution: When buying tulips, communicate more with the shop and ask about its growing environment. After buying it back, it is best to keep its growing environment unchanged. If the leaf yellowing is caused by environmental changes, flower lovers can slowly change the environment and let the tulip gradually adapt. It should not take long before its leaves recover to health.
2. Insufficient light
When it comes to tulip leaf yellowing, besides environmental changes, light should be the first thing to think of, because sufficient light is essential for tulip growth. Once light is insufficient, it causes poor plant growth, bud drop, weakened plants, yellow leaf color, and other symptoms.
Solution: If you find that the tulip leaf yellowing is caused by insufficient light, flower lovers should ensure it receives sufficient light every day. Note: within more than half a month after the tulip is potted, it should be properly shaded to help the bulb develop new roots.
3. Excessive fertilizing or lack of fertilizer
Tulips relatively like fertilizer, and sufficient base fertilizer should be applied before planting. However, improper fertilizing is also very troublesome and can cause tulip leaves to turn yellow. With excessive fertilizing, new leaves are thick and fat, while old leaves show yellowing symptoms and may fall off; with lack of fertilizer, tulip branches become thin and weak, leaves become thinner, and yellowing symptoms appear.
Solution: For excessive fertilizing: immediately stop fertilizing, water appropriately to dilute it, and let the fertilizer flow out from the drainage holes at the bottom of the pot; for too little fertilizing: promptly repot, replace with new loose and fertile culture soil, and gradually increase applications of thin, fully rotted liquid fertilizer or compound flower fertilizer. After doing this for a period of time, the tulip will recover to health.
4. Overwatering
In the process of cultivating tulips, watering is very important. Within one week after planting, the water requirement is relatively high, so it should be watered sufficiently. However, watering should not be too much or too little. Once it is not up to standard, tulip growth will slow down, and yellowing leaf symptoms will appear.
Solution: When overwatered: immediately stop watering, loosen the soil, and then move the tulip to a ventilated place to air out. Or more simply, directly change the pot and soil to make the tulip fresh again; when underwatered: water appropriately, following the principle of "small amounts, many times."
5. Virus disease infestation
Besides the above points, the causes of tulip leaf yellowing also include virus disease infestation, mainly including mosaic virus and breaking virus. Among them, mosaic virus causes yellow stripes or granular spots to appear on affected leaves; breaking virus causes pale yellow or grayish-white stripes or irregular spots to appear on diseased leaves.
Solution: As with general viral diseases, treat with chemicals. As for the prevention and control of tulip pests and diseases, there is a detailed introduction earlier, so I will not say more here. It is worth mentioning that the place where tulips are planted should be kept away from lilies.
6. Soil problems
If none of the above points are the cause of tulip leaf yellowing, then flower lovers can consider soil problems. It is understood that tulips like slightly acidic soil. If the soil is on the alkaline side, its growth will have problems. Yellowing leaves are still mild; in severe cases, it can even cause the plant to die.
Solution: Tulips like fertile, loose, well-drained, water-retentive yet breathable slightly acidic soil. If the tulip leaf yellowing is caused by soil, flower lovers can change the soil and reselect soil that tulips like.
What to Do When Rose Leaves Turn Yellow: Solve 6 Points and Do Not Fear Yellowing / Insufficient Light, Too Much Watering
Roses are certainly not unfamiliar to everyone. They are not only beautiful in flower shape and color, but also carry extremely beautiful meanings, and are welcomed and favored by the vast number of flower lovers. However, during the cultivation process, rose leaves may show yellowing symptoms for some reasons. So what should be done when rose leaves turn yellow? First, find the cause of the yellowing, then solve it accordingly. Below are 6 causes of rose leaf yellowing and their solutions. Let's take a look together.
I. What to Do When Rose Leaves Turn Yellow: Find the Cause
In the methods for planting roses, it was once introduced that roses have requirements for light, watering, temperature, and so on, and once these requirements are not met, the leaves will turn yellow. So for what to do when rose leaves turn yellow, we need to find which aspect is causing the leaf yellowing, and then solve it accordingly. Below are 6 causes of rose leaf yellowing, with solutions attached. Let's keep reading.
II. Causes of Rose Leaf Yellowing and Solutions
1. Environmental changes
Online, quite a few flower lovers report that the roses they grow were fine when first bought, but before long, the leaves turned yellow, and they all want to know what to do when rose leaves turn yellow. For this, everyone should first consider the issue of environmental changes. If the growing environment changes greatly all at once, the rose will be unable to adapt, thus showing yellowing leaf symptoms.
Solution: Before buying flowers online, communicate with the shop and try to ensure that the rose's growing environment remains unchanged after purchase. If the leaf yellowing is caused by environmental changes, flower lovers can slowly change the environment and let the rose gradually adapt. It should not take long before it recovers to health.
2. Light too strong or insufficient
When it comes to the causes of rose leaf yellowing, light is the first thing to consider, because light that is too strong (direct strong summer sun) easily causes rose leaf tips and leaf margins to dry up, and the final result is yellow spots appearing on the side facing the sun; while insufficient light prevents roses from forming chlorophyll, and the entire plant's leaves will also turn yellow, or even fall off.
Solution: When light is too strong, shade appropriately or move it to a shaded place; when light is insufficient, move the plant to a place with sufficient light, but remember not to expose it to blazing sun.
3. Overwatering or underwatering
Roses are drought-tolerant but afraid of waterlogging, so for the causes of rose leaf yellowing, everyone should also consider whether there has been too much watering. Because overwatering easily causes root rot, leading to yellow leaves; however, long-term water deficiency can also cause rose leaves to curl and turn yellow.
Solution: For what to do when rose leaves turn yellow, if too much water was given, immediately stop watering, loosen the soil, and then move the tulip to a ventilated place; if it is water deficiency, it is very simple, just water sufficiently and thoroughly.
4. Excessive or insufficient fertilizing
Excessive or insufficient fertilizing is also one of the causes of rose leaf yellowing. With excessive fertilizing, the soil concentration is too high, old leaves cannot absorb nutrients, and thus turn yellow, wither, and fall; with insufficient fertilizing, new roots turn yellow, leaf color becomes lighter, and gradually turns yellow and dries up.
Solution: When fertilizing too much, immediately pause fertilizing, and wait until spring when a large number of new buds sprout to supplement topdressing according to growth conditions; when fertilizing too little, fertilize appropriately, but do not over-fertilize.
5. Temperature too high or too low
Besides the above points, temperature being too high or too low is also one of the causes of rose leaf yellowing. When the temperature is too high, leaves curl and turn yellow, and the whole plant wilts; when the temperature is too low, the plant enters dormancy, leaves turn yellow and fall off, and in severe cases it may even become completely bare.
Solution: When the temperature is too high, place the plant indoors in a cool, shaded place; when the temperature is too low, provide appropriate insulation, and the temperature should not be lower than 8 degrees. If conditions permit, turn on the air conditioner.
6. Pests and diseases
For what to do when rose leaves turn yellow, besides considering what was mentioned above, pests and diseases should not be ignored either. It is understood that when plants suffer from leaf spot disease and root rot disease, yellowing leaf symptoms appear; also, when attacked by aphids and red spiders, yellow leaf symptoms also appear.
Solution: Buy relevant chemicals at the flower market, then dissolve them in water in proportion and spray. As for exactly which chemical to spray, there is a detailed introduction in the prevention and control of rose pests and diseases, so I will not say more here.
What to Do When Tulip Leaves Turn Yellow, Causes of Tulip Leaf Yellowing
Tulips originated in the ancient Western Regions of China and the ** area of Tibet. As early as more than 1,300 years ago, the great Tang Dynasty poet Li Bai of China left the line "Lanling fine wine tulips, jade bowls filled with amber light" as clear evidence. Tulip leaf yellowing is a relatively common situation. Growing tulips is relatively difficult, and tulip leaf yellowing is one of the things that can happen. So, what should be done when tulip leaves turn yellow, and what are the causes of tulip leaf yellowing? Below the editor will introduce them.
Causes of Tulip Leaf Yellowing
This is generally because water has not kept up. Tulips like a moist and cool environment. They should generally be planted in October and November in autumn. They take root and sprout in low temperatures, bloom in April and May of the following year, and after flowering, just as midsummer begins, they enter dormancy. They sprout and grow again in autumn.
If transplanted in March, the time for moving the pot is late. The roots have not yet adapted to the soil, and the water supply is insufficient, causing yellow leaves. But do not worry, May is exactly when tulips begin summer dormancy, so just let them dormant in the pot soil. They will sprout in autumn, only the pot soil should be drier in summer, placed in a cool, ventilated place, and do not let them rot.
What to Do When Tulip Leaves Turn Yellow
When tulip leaf yellowing occurs, it is better to change the soil and grow it again. After that, also pay attention to the following aspects:
1. Watering: Tulips relatively like a slightly moist but on the dry side soil environment. After the plant buds, the amount of watering can be appropriately increased to promote the rapid emergence of the flower stem, which can make the tulip plant more ornamental. Throughout the entire flowering period management of tulips, one should grasp the principle of watering less when the temperature is low and watering more when the temperature is high.
2. Fertilizing: Because tulip bulbs contain relatively more stored substances, they are very significant for ensuring the plant blooms normally when fertilizer is lacking. Therefore, fertilizing has relatively little effect on how early or late the plant blooms. In flowering period control of tulips, usually when they grow 2 to 3 leaves and after the flower stem emerges, apply a thin liquid fertilizer rich in phosphorus and potassium once each time, which can basically ensure normal flowering of tulips.
3. Light: Tulips like strong light, and light is an important limiting factor for their flowering. During cultivation, it should be ensured that the plant receives no less than 8 hours of direct sunlight every day. This helps tulips accumulate more photosynthetic products, not only ensuring good plant growth, but also ensuring normal flower opening.
4. Flowering period management: After tulip flowers open, do not let the cultivation soil be too wet or too dry. Fertilizing should be stopped. Keep the environment bright, but avoid overly strong direct sunlight. Avoid high temperatures. Under cool and cold conditions, tulips not only have vivid flower color but also a long flowering period. It is best to control the ambient temperature at 8°C to 12°C. Because tulips like coolness, flowers easily decline when the temperature is too high.
The above is the main content of the article "What to Do When Tulip Leaves Turn Yellow, Causes of Tulip Leaf Yellowing." Tulips are commonly propagated by dividing bulbs and by sowing; tulip sowing propagation is mostly used for breeding new varieties. Seeds are collected before the capsule matures and splits, stored in sand until October, and sown indoors in pots. Keep them moist, and they will germinate only in spring of the following year. They bloom in about 3-4 years.