Bromeliad winter watering method: best to water and fertilize together
In flower cultivation, watering is a link that cannot be ignored. Once you get it wrong, it triggers all kinds of problems - you could say it is a real pain. And among these, watering bromeliads requires particular attention, because their roots cannot absorb water - all nutrients and moisture are absorbed through the leaves. So how do you water a bromeliad? Below are the summer and winter watering methods for bromeliads. Flower lovers, you must take a look~
1. How to water a bromeliad: water when the potting soil is slightly dry
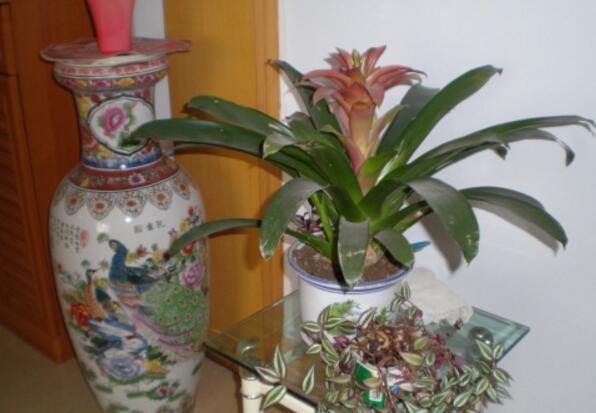
In the bromeliad cultivation methods and precautions, we have already explained that watering is very important for bromeliads. But bromeliads absorb water through their leaves, not their roots, so you cannot water too much or too little. The best watering method is: when the surface of the potting soil is slightly dry, start watering, but it must not be too wet - too wet easily rots the roots.
Can you water bromeliad leaves?
Other flowers absorb water through their roots, absorbing from the bottom up, but the bromeliad is an exception, because its roots cannot absorb water - nutrients and moisture are all absorbed through the leaves. So can you water bromeliad leaves? Absolutely yes. The reason is that bromeliads originally grew in the hot, humid regions of South America, and are a type of wild plant that attaches to tree branches and forks.
Why bromeliad leaves are watered
Because it attaches to tree branches and forks, the bromeliad does not come into contact with soil, so its roots naturally cannot absorb moisture from the soil. So what does it do then? To survive, the bromeliad evolved a function: absorbing water and nutrients through the leaf cup and other leaf tissue.
In modern times, bromeliads have gradually been cultivated artificially, but compared with other flowers, their roots are still frighteningly fragile. When we propagate bromeliads, we can hardly see any roots - all we can see is black soil. On top of that, bromeliad roots are also black and especially thin, so it absorbs nutrients and moisture through its leaves. This is why bromeliad leaves are watered.
2. Bromeliad winter watering method
In spring and autumn, the temperature is neither too high nor too low, so watering bromeliads appropriately is fine. What we need to pay attention to is winter watering. As for how to water bromeliads in winter, flower lovers only need to water inside the leaf tube, generally once every 8-9 days. Note that the water in the leaf tube must not be kept for more than a week, otherwise it becomes stale, and stale water carries pathogens.
Note: When blooming, do not pour water into the bromeliad's leaf tube; keep it in a place away from sunlight to extend the flowering period. After flowering, it enters dormancy, and the flower stalk must be cut off to reduce nutrient consumption. In winter, do not pour water into the tube.
3. How to fertilize a bromeliad
Moisture is absorbed through the leaves, and nutrients are also absorbed through the leaves, so if you fertilize a bromeliad, you must also dilute the fertilizer and pour it into the leaf cup - only then can it produce beautiful flowers. Note that you cannot water too much, otherwise the roots easily rot.
From late spring to autumn, during the growing period, you can appropriately increase the amount of watering, and you can also pour some clean water into the leaf tube, changing the water once every half month. At this time you can also water and fertilize together - only then can the bromeliad produce beautiful flowers. That is all for how to water a bromeliad. We hope it helps everyone.
How to water a bromeliad
Watering:When watering, for bromeliads (Bromeliaceae) the potting soil should be watered when the surface is slightly dry, that is, when the top 1-2 cm of soil is dry, then water a second time. It must not be too wet - too wet easily rots the roots.
The roots are tender. Bromeliads (Bromeliaceae) all have a leaf tube at the base of the leaves, and the leaf tube has a water channel. You must ensure there is always water in the channel and that it does not run out. The water in the leaf tube should be replaced after a period, say about ten days, to keep that water from going bad. Usually you can also spray some mist-like water on the surface, leaves and flowers.
Its leaves are staggered and overlapping, one on top of another, and there are no gaps underneath, so when you water, the water cannot leak out and can be held. Because its nutrients and moisture are absorbed through this leaf tissue, while other flowers rely on their roots, absorbing from the bottom up. Plants absorb water and nutrients through their roots - everyone knows this, and of course it includes all kinds of flowers. So why is the bromeliad an exception? It turns out that bromeliads originally grew in the hot, humid regions of South America and are a type of wild plant that attaches to tree branches and forks. Because it attaches to tree branches and forks and does not come into contact with soil, its roots simply cannot absorb moisture and nutrients from the soil, so it must find a suitable way to continue its own life. Therefore it relies on its own unique nutritional organs - the leaf cup and other leaf tissue - to absorb water and nutrients.
The bromeliad root, having lost its original function, is still useful. Since the bromeliad is an epiphyte, it must have a bond to attach by. The wild bromeliad root serves exactly this purpose: it uses its roots to firmly fix itself to the host plant. Up to now, although bromeliads have already been cultivated artificially, compared with other flowers, their roots appear so scarce and weak that you can hardly see them - it is all black soil. These roots are black and especially thin, basically invisible, so it absorbs nutrients and moisture through its leaves.
Moisture is absorbed through the leaves, and nutrients are also absorbed through the leaves, so if you fertilize a bromeliad, naturally you must also dilute the fertilizer and pour it into the leaf cup. Otherwise your bromeliad will never grow big, let alone produce beautiful flower spikes.
For bromeliads, water and fertilizer are poured directly into the leaf cup. If you pour too much, the roots easily rot. Generally, pour until it reaches between the leaves, and it should not leak. When it looks almost full, quickly stop - do not pour any more.
Do not use tap water for watering; you must use deionized water. Otherwise, if the sodium ions and chloride ions in the water are too high, a large amount of salt will accumulate in the soil, and over time the bromeliad's roots will rot. The flowers it produces will not only have small spikes and pale color, but also a large number of deformed flowers will appear.
Because of its beautiful and varied flower shapes and long ornamental period, the bromeliad has always been regarded as a symbol of good fortune and prosperity. So, now that you understand bromeliad care methods, don't you also want to buy a pot to place at home and add a touch of holiday atmosphere? Ornamental bromeliads are extremely easy to care for. As long as you grasp their habit of liking high temperatures, humidity and semi-shade, they can be placed in a warm, bright room all year round. In winter they can have full sun; in spring and autumn they should have morning and evening light; in summer avoid direct sunlight. With bright light, the leaf color is vivid. The overwintering temperature should preferably not be lower than 10°C; above 20°C is unfavorable for the plant's dormancy and will affect the next year's growth and flowering.
From late spring to autumn, during the growing period, you can appropriately increase the amount of watering, and you can also pour some clean water into the leaf tube. You should change the water once every half month to prevent the water from deteriorating and smelling bad. Frequently spray water on the leaf surface. In winter, the pot surface should be on the dry side, but not too dry. From May to September, apply nitrogen fertilizer once a week, and appropriately increase phosphorus and potassium fertilizer before flowering to promote larger flowers and richer color. When blooming, do not pour water into the tube; keep it in a place away from sunlight to extend the flowering period. After flowering, it enters dormancy, and the flower stalk must be cut off to reduce nutrient consumption. In winter, do not pour water into the tube.
The root system of ornamental bromeliads is not very developed and has no main root. Some roots even like to be exposed to air, so planting in small, shallow pots will grow and develop better than in large, deep pots. The potting soil is best made of leaf mold plus a small amount of garden soil, or half peat and half perlite mixed together.
After flowering, the central leaf rosette dies, but the side offspring continue to grow. When this offspring reaches 15 cm in height, it can be removed from the mother plant together with its roots and planted separately. Doing this, however, only allows a "single-line succession from generation to generation," so the number propagated is limited. Therefore, it is best to combine this with spring repotting: cut off the small tubers growing from the mother plant's tuber portion for cuttings, or divide the rooted young shoots sprouting from the roots of the old plant. In all cases, keep them shaded, moist and warm. When the root system grows to 2-3 cm, they can be planted in place. If cultivated properly, one mother plant can propagate about 10 plants per year.
In daily care, bromeliads (Bromeliaceae) should be placed in a semi-shaded, ventilated place and grown under scattered light. Strong light easily scorches the leaves and causes mottled spots; but be careful not to leave them in too shady a place for a long time, because the beautiful leaf color often becomes lighter and paler as a result, causing regret in ornamental value.
Under conditions of drought, muggy heat and low humidity, the leaf margins and leaf tips of bromeliads very easily develop scorched, withered symptoms. Therefore, keep the potting soil moist, spray clean water on the leaf surface 1-2 times daily, and fill the cup-shaped area at the center of the leaf rosette with clean water. Bromeliads (Bromeliaceae) were originally parasitic plants, and their root systems are not developed enough - they only have small, short roots. Therefore, never apply too much fertilizer, to prevent root rot and yellowing leaves; apply thin, diluted fertilizer water instead.
Bromeliad cultivation techniques
Ornamental bromeliads are ornamental plants of the Bromeliaceae family. Their plant shape is elegant, their leaves and flower spikes are brightly colored, and their flower shapes are unusual. The flowering period can last as long as 2-6 months, making them a new generation of indoor potted flowers.
1. Propagation methods
For small-scale production and home cultivation of ornamental bromeliads, offset cuttings are generally used. Before and after the original bromeliad blooms, multiple offsets are produced at the leaf axils at the base. When the offsets grow to about 10 cm with 3-5 leaves, use a sharp knife to cut them off close to the mother plant together with the shortened stem. Disinfect the wound with fungicide, let it dry slightly, dip it in 300-500 mg/kg naphthalene acetic acid, and insert it into perlite, coarse sand or culture soil. Keep the substrate and air moist and provide appropriate shade. After 1-2 months, new roots grow and normal management can begin. Note that if the offsets are too small, cuttings do not easily take root and the propagation rate is low.
2. Cultivation management
1. Cultivation substrate: Most ornamental bromeliads grown in production are epiphytic species, requiring a substrate that is loose, breathable and well-draining, with an acidic or slightly acidic pH. In production, materials with good permeability should be chosen, such as bark, pine needles, ceramsite, rice husk, vinegar residue, perlite, etc., mixed with leaf mold or cow dung. For example, 3 parts pine needles + 1 part peat + 1 part cow dung, or 3 parts peat + 1 part sand + 1 part perlite, etc.
2. Fertilizer and water management: The root system of epiphytic ornamental bromeliads is relatively weak, mainly serving to fix the plant, with absorption as a secondary function. The water and nutrients needed for growth and development are mainly stored in the groove formed by the clasping leaf bases, absorbed by the absorption scales at the leaf base. Even if the root system is damaged or absent, as long as there is a certain amount of water and nutrients in the groove, the plant can grow normally.
In the summer and autumn peak growing season, pour water into the groove once every 1-3 days, and spray the leaf surface 1-2 times daily. Keep water in the groove, the leaf surface moist, and the soil slightly dry; in winter, spray less water, keep the potting soil moist and the leaf surface dry.
Ornamental bromeliads are rather sensitive to phosphorus fertilizer. When fertilizing, nitrogen and potassium fertilizer should be the main focus, with a nitrogen:phosphorus:potassium ratio of 10:5:20, at a concentration of 0.1-0.2%, using 0.2% urea or potassium nitrate and other chemically complete fertilizers. In production, thin alum fertilizer water can also be used (before leaving the nursery, the center of the leaf rosette needs to be rinsed with clean water), applied by foliar spray or poured into the groove. In the peak growing season, spray once every 1-2 weeks; in winter, spray once every 3-4 weeks.
3. Environmental regulation: The optimum temperature for ornamental bromeliads is 15-20°C, not lower than 10°C in winter, and humidity should be maintained above 70-80%. In northern China, summers are hot, winters are severely cold, and the air is relatively dry. To allow normal growth, the growing micro-environment must be controlled artificially. In summer, shading and transpiration methods can be used to cool down, keeping the environmental temperature below 30°C. In May, add a shade net with 50-70% light transmission 20-30 cm above the greenhouse film, which can both cool down and prevent bromeliad leaves from being scorched. Around midday in summer when the temperature is high, use micro-sprinklers to spray water on the leaves. Depending on temperature and light, generally spray for 5-10 minutes every 1-2 hours, keeping the leaf surface and environment moist, while increasing ventilation. Through water evaporation, the leaf surface temperature is lowered while air humidity is increased. In winter, cover with double-layer film and install heating equipment such as heaters and hot-air stoves inside to maintain the indoor temperature above 10°C, so the bromeliads can overwinter safely.
4. Flowering period control: The natural flowering period of ornamental bromeliads is mainly late spring to early summer. To make bromeliads bloom at New Year's Day and Spring Festival, the flowering period can be controlled artificially. Pour an aqueous solution of ethephon at a concentration of 50-100 mg/kg into the groove of the bromeliad after the water has been drained out. After 7 days, pour it out and replace it with clean water poured into the groove. After treatment, they can bloom in 2-4 months.
Bromeliad care is relatively simple.
The key is the watering method. You must not only water the potting soil - the main thing is to water into the leaf cup, that is, the depression in the middle of the leaves!!!
Bromeliads at home are generally in the flowering period, so generally there is no need to apply much fertilizer, or no fertilizer at all is needed. This is especially true for some bromeliads professionally produced in greenhouses, whose fertilizer is far more than enough to meet the needs of the flowering period.
When there is heating or air conditioning at home, frequently spray the whole plant with warm water to increase humidity. If conditions allow, you can turn on a humidifier!
The placement environment needs scattered light. Do not place it in too shady a spot. Even in winter, plenty of light shining on it is fine; in other seasons, appropriate shading is needed!
Bromeliads at home do not need to be thrown away immediately after flowering. When the lower young shoots grow to about 20 cm, they can be separated from the mother plant and planted in another pot for cultivation. When their leaves grow out fully and evenly, flowering can be forced (using ethephon or acetylene aqueous solution).
Fertilize frequently but lightly, ensure there is water in the leaf cup, and just do not let it dry out!!
The suitable growth temperature is between 15-28°C. Bromeliads are indoor ornamental flowers for winter and spring, evergreen in all four seasons, with beautiful and varied inflorescences and rich colors. Commonly cultivated varieties include bright red, pink, golden yellow, rose red and so on. Bromeliads have a relatively long flowering period and are suitable for home cultivation. Their winter management should note the following points: 1. The suitable growth temperature is 15°C to 22°C, and the minimum winter temperature must not be lower than 10°C, otherwise the plant will suffer cold damage, the leaf color will turn yellow, and healthy growth will be affected. 2. For bromeliad leaves to be bright in color and to bloom regularly, light is very important. In winter, there must be at least 4 to 5 hours of direct sunlight daily. On cloudy and rainy days, lights can be used to increase lighting. In summer, the seedling pots should be placed in tree shade; indoor cultivation can also use shade netting as needed. 3. Bromeliads are suited to loose, fertile, humus-rich soil. For home cultivation, choose 2 parts peat soil mixed with 1 part fine sand to make the culture soil. Bromeliads bloom in winter and require sufficient fertilizer. Usually apply a thin organic liquid fertilizer once every two weeks, for example soaked liquid of bean cake or sesame paste residue (a concentration of 20% is suitable). Soybean soaking liquid or fermented rice-washing water can also be used. 4. Bromeliads like a humid environment. Ordinarily, just keep the potting soil moist; on cloudy and rainy days, generally do not water. For home cultivation, it is best to use water that has been left to stand in the sun; do not directly use tap water for watering. Bromeliads are flowers that can be enjoyed both for their blooms and their foliage. It is best to spray clean water on the leaf surface once daily to remove dust, make the leaf color bright and beautiful, and also help photosynthesis, promoting healthy plant growth. 5. Pest and disease control: In environments with high temperature and humidity and poor ventilation, bromeliads are prone to pest and disease damage, such as sooty mold, powdery mildew, red spider mites, scale insects, etc. If disease is found, promptly spray carbendazim; for pests, spray omethoate. Whichever medicinal solution is sprayed, it must be done outdoors. Buy sterilizing and insecticidal tablets from the flower market and bury them in the potting soil to eradicate pests and diseases. , to prevent polluting the indoor environment. In addition, you can also go to the flower market to buy sterilizing and insecticidal tablets and bury them in the potting soil to eradicate pests and diseases.
For bromeliads, watering is as simple as filling the leaf tube every two or three days, and fertilizing is also as simple as pouring water and fertilizer into the leaf tube.
Tip: Bromeliads like semi-shade. Prevent exposure to scorching sun. Place them in a semi-shaded spot or at a bright window, indoors.
The temperature suitable for bromeliads: in winter, if it does not drop below about 15°C, there should be no problem. Most homes have heating, so there should be no problem. In fact, once you remember these points, caring for bromeliads becomes much easier. But there is one more thing to remind you: because the bromeliad's biggest weakness is not fear of cold, but fear of being waterlogged, there is a lot of knowledge involved in watering.
What to do if insects appear in bromeliads: bromeliad pest and disease control / 3 pests, 3 diseases
The beauty of the bromeliad is 80% shown in its flowers, after all, it only blooms once a year. But because some flower lovers care for them improperly, bromeliads can be infested by insects, reducing their ornamental value. So what do you do if insects appear in bromeliads? Actually, there is no need to panic. You only need to identify which pest it is and then solve it accordingly. Below is the prevention and control of common bromeliad pests and diseases. Let's take a look together.
1. What to do if insects appear in bromeliads: spray pesticide to kill them
In bromeliad cultivation methods, the points to note during their growth have already been introduced. If flower lovers do not pay attention, insects will come calling. What to do if insects appear in bromeliads? Identify which insect it is, then solve it accordingly. Below are three common bromeliad pests, as follows:
1. Scale insects
Scale insects harm all flowers, so they are also one of the pests of bromeliads. According to observation, scale insects mainly harm bromeliad leaves; in severe cases, the leaves turn yellow, wither, and even fall off. The solution for yellowing bromeliad leaves has already been introduced earlier. Let's look at the method for dealing with scale insects.
Solution: When scale insect damage is found, it should be dealt with immediately. When there are few scale insects, they can be directly scraped off. When there are many scale insects, 50% parathion can be used for spray-killing.
2. Tobacco cutworm
The tobacco cutworm, also called the lotus-pattern noctuid, is also one of the pests of bromeliads. It generally hides in dark places such as the potting soil and the bottom of the pot during the day, and comes out in the evening to feed on bromeliad petals, stamens and pistils.
Solution: When this insect is found, spray pesticide immediately. As for which pesticide to use, any insecticide on the market will do.
3. Red spider mite
The red spider mite is one of the common pests of bromeliads. It mainly inhabits the underside of bromeliad leaves or the base of the leaf axils, piercing and sucking leaf, bud and flower sap, affecting normal growth and development. When attacked by this pest, in mild cases it affects appearance, and in severe cases it can even cause the whole plant to wither and die.
Solution: Red spider mites are small and hard for us to spot with the naked eye, but once found they should be dealt with quickly. When there are few mites, rinse with clean water; when there are many mites, spray a 1:1000 dimethoate solution once every 4 days, for 2-3 consecutive times.
2. Bromeliad diseases and solutions
What to do if insects appear in bromeliads - after reading the above, everyone should know what to do! But besides insect damage, diseases also constantly threaten bromeliads. The main bromeliad diseases are 3 kinds: heart rot, root rot and leaf tip yellowing. The specific symptoms and solutions are as follows:
1. Heart rot
This disease is not common, but it is one of the common diseases of bromeliads. When affected, the tissue at the base of the bromeliad leaf tube becomes soft and rotten, with a foul odor. With a light pull on the leaf or leaf tube, the leaf or leaf tube can be taken out. If left alone, the leaf tube will collapse by itself after a long time.
2. Root rot
After being affected by this disease, the bromeliad root tips turn black-brown or rot and do not grow lateral roots, thereby affecting the plant's absorption of water and fertilizer, causing the bromeliad to grow slowly and become weak. It is understood that in high-temperature, high-humidity seasons, both heart rot and root rot can occur.
Solutions for heart rot and root rot: After discovering the above symptoms, flower lovers can use 75% oxadixyl-mancozeb 400x solution or 40% fosetyl-aluminum 400x solution to irrigate the leaf tube, once a month, for 3 consecutive times to cure it.
3. Leaf tip yellowing and withering
Another bromeliad disease, it is generally related to water. Once watering is improper, or air humidity is low, it causes the salt content in the soil to be too high and leads to salt damage. At this point, leaf tip yellowing and withering will come calling: in mild cases it causes leaves to turn yellow, and in severe cases the plant dies directly.
Prevention and treatment method: When watering, try to choose water with lower salt content. If using household water, it should be used after being exposed to the sun.