A detailed guide to wax begonia (Begonia semperflorens) cutting propagation, teaching you to propagate it correctly
Wax begonia (Begonia semperflorens) has delicate, glossy leaves, flowers in clusters, vivid colors, and blooms in all four seasons, making it an excellent flowering houseplant. The cuttings of wax begonia do not need to be too long; generally, a length under 10 cm is recommended. Cuttings that are too long lead to difficulty in water transport, difficulty in supporting the stem, and a tendency to rot. Besides soil propagation, water propagation is also possible (placing the stems in a water bottle). The most important cultivation point for wax begonia is that it must not be too wet; being a little dry does not matter. In addition, its ability to resist intense sun exposure is also very strong, so there is no need to shade it.
Its cutting propagation should follow these steps:
1. Cutting time. Wax begonia roots very easily, but cutting in summer is not recommended. In high temperatures it is often in a semi-dormant state, so cuttings do not easily survive and the cuttings tend to rot. It is best to take cuttings in spring and autumn, when the survival rate is very high. Generally no special treatment is needed; it is very simple. For home propagation, it is best done between April and May, when the temperature rises above 20°C. At this time the air humidity is high, the temperature is warm, management is simple, and it is suitable for the rapid rooting of wax begonia.
2. Cutting selection. For cuttings, generally choose healthy, disease-free growing tips, about 5—6 cm long, that is, 3-4 nodes, with each cutting bearing at least 2 buds. Cut at 1 cm below the node on the stem of the cutting. After cutting, the leaves near the base can be removed; if there are flower buds, remove them, then cut the top into a flat shape and the bottom into a horseshoe shape, to enlarge the contact surface with the sand, promote rooting, and then insert for cutting.
3. Cutting medium. Wash river sand, dry it in the sun, and place it in a pot. River sand that has been washed and then sun-dried basically achieves the purpose of disinfection, and the sun-dried river sand helps raise the temperature under daytime sunlight, promoting the healing and rooting of the cut surface of the cutting.
4. Cutting and management. Insert into the sand pot at a spacing of 3 cm × 4 cm. When cutting, first use a bamboo stick of the same thickness as the cutting to poke holes in the pot sand, then insert the wax begonia stem. Within 2 days after insertion, do not water, to help the cut surface form a callus. On the 5th day, spray-water with water at about the same temperature as the sand; water until water flows out from the bottom of the pot. Place in a shady spot, and generally do not water again. After about 10 days, roots 3~4 cm long can grow; at this point place the pot in the sunlight and water according to the weather. After another 6~7 days, it can be potted and planted out.
Propagation methods for wax begonia
[Common questions] Propagation methods for wax begonia
[Expert answer]
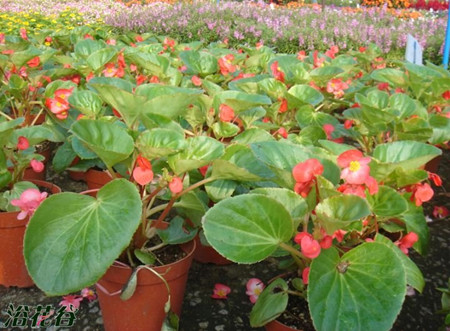
Image: wax begonia
1. Cutting time.Wax begonia roots very easily, but cutting in summer is not recommended. In high temperatures it is often in a semi-dormant state, so cuttings do not easily survive and the cuttings tend to rot. It is best to take cuttings in spring and autumn, when the survival rate is very high. Generally no special treatment is needed; it is very simple. For home propagation, it is best done between April and May, when the temperature rises above 20°C. At this time the air humidity is high, the temperature is warm, management is simple, and it is suitable for the rapid rooting of wax begonia.
2. Cutting selection.For cuttings, generally choose healthy, disease-free growing tips, about 5—6 cm long, that is, 3-4 nodes, with each cutting bearing at least 2 buds. Cut at 1 cm below the node on the stem of the cutting. After cutting, the leaves near the base can be removed; if there are flower buds, remove them, then cut the top into a flat shape and the bottom into a horseshoe shape, to enlarge the contact surface with the sand, promote rooting, and then insert for cutting.
3. Cutting medium.Wash river sand, dry it in the sun, and place it in a pot. River sand that has been washed and then sun-dried basically achieves the purpose of disinfection, and the sun-dried river sand helps raise the temperature under daytime sunlight, promoting the healing and rooting of the cut surface of the cutting.
4. Cutting and management.Insert into the sand pot at a spacing of 3 cm × 4 cm. When cutting, first use a bamboo stick of the same thickness as the cutting to poke holes in the pot sand, then insert the wax begonia stem. Within 2 days after insertion, do not water, to help the cut surface form a callus. On the 5th day, spray-water with water at about the same temperature as the sand; water until water flows out from the bottom of the pot. Place in a shady spot, and generally do not water again. After about 10 days, roots 3~4 cm long can grow; at this point place the pot in the sunlight and water according to the weather. After another 6~7 days, it can be potted and planted out.
[Editor's summary]
Wax begonia, also called wax begonia and clam-flesh begonia, is the most common species in the Begoniaceae family. Because of its graceful flower shape and blooming in all four seasons, it is one of the common ornamental flowers. The propagation methods of wax begonia include sowing, cutting, and division into clumps. The editor of First Agricultural Economics introduces the cutting propagation method of wax begonia in this article, hoping it will be helpful to you.
How to grow wax begonia
Wax begonia likes sunlight, tolerates slight shade, fears cold, and likes a warm, slightly shady and humid environment and moist soil, but fears heat and waterlogging. In summer, pay attention to shading, ventilation, and drainage.
Wax begonia is propagated by sowing or cutting. Wax begonia easily produces large amounts of seeds, and its germination ability is very strong, so seed propagation is generally mostly used. After the seeds are harvested, sow them immediately; generally sow in August-September in a shallow pot. Note that the surface soil should be fine, because the seeds are tiny and their germination ability is strong, so do not sow too densely. After sowing, do not cover with soil; soak the pot soil wet, cover with glass, place in a semi-shady spot, and keep it consistently moist. Seedlings can emerge after one week.
(1) In summer, wax begonia cannot tolerate direct sunlight and rain, so it should be shaded and protected from rain. If it is exposed to rain for a long time, the flower stems and leaves easily rot. In winter it likes sufficient sunlight; if the light is insufficient, growth becomes weak, the plant becomes thin and tall, and the leaf color and flower color fade. If the light is too strong, the leaves shrivel and scorch spots appear. When fertilizer is insufficient, the plant is short and the leaves turn red.
(2) Watering: When watering potted wax begonia, water only after the pot soil has dried. If the pot soil is kept moist for a long time, it easily causes root rot and leads to damping-off disease.
(3) Fertilizing: Wax begonia has fibrous roots and grows vigorously. During the growing period, pay attention to fertilizer management, applying dilute liquid fertilizer once a week, preferably a compound fertilizer at 150-200 ppm. Watering should be sufficient. Generally, after 2 years of cultivation the plant gradually grows weaker and its shape becomes untidy, so it needs to be replaced. In production, it is usually grown as an annual. However, in horticultural cultivation it can be grown as a perennial.
(4) Disease and pest control: Under conditions of high temperature and high humidity, wax begonia is highly prone to bacterial leaf spot disease. At first, dark brown spots appear on the leaf surface, gradually spreading into dark brown concentric rings. Before the disease occurs, an equal-part Bordeaux mixture can be sprayed for prevention, and attention should be paid to improving cultivation conditions and management methods. In the early stage of the disease, diseased leaves should be promptly removed and burned to prevent further spread. Summer is a period of high incidence of aphids and red spider mites, so timely control with pollution-free pesticides is needed.
