How to prune the Malabar chestnut? Pruning methods and tips after repotting
As an ornamental plant, the Malabar chestnut's greatest feature lies in its evergreen leaves, but after a period of time, its luxuriant branches and leaves may also affect its appearance, so we need to prune it. So what are the methods and tips for pruning the Malabar chestnut? Let us understand in detail from two aspects: pruning of branches and leaves, and shaping.
Methods and tips for pruning the Malabar chestnut
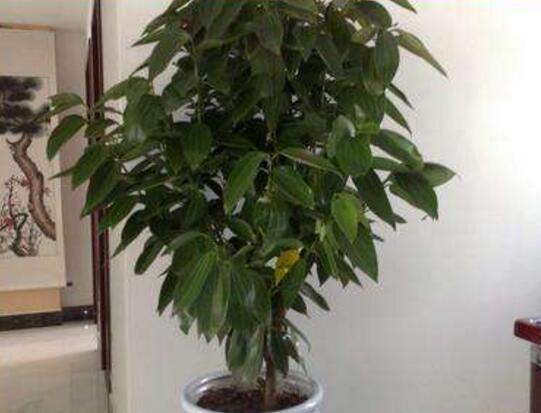
Although the Malabar chestnut does not grow fast, after a period of development it will show a reduction of lower leaves and an increase in height, which will have a certain impact on people's appreciation. Therefore, pruning it is very necessary. Below we will understand in detail the methods and tips for pruning the Malabar chestnut.
1. How to prune the branches and leaves of the Malabar chestnut
First, the most appropriate pruning time is in spring, because at this time the Malabar chestnut is about to enter its vigorous growth period, and many new branches and leaves will grow out in late spring. Pruning the old branches and leaves can allow the new branches and leaves to develop more smoothly. However, pruning can be done in all four seasons of each year; whether pruning is needed depends on the condition of the Malabar chestnut.
Second, when pruning branches and leaves, mainly shorten the branches, and remove old leaves that are fat or even yellowing. The cut should be made at a certain distance from the bud eye on the stem node, avoiding cutting the bud eye; after pruning, the wound can be smoothed.
2. How to shape the Malabar chestnut by pruning
Shaping by pruning refers to shaping the Malabar chestnut. You can cut off overly dense branches and old branches, and you can also control its height by pinching off the top. The specific shape to prune into can be decided according to your own preference; the principle is simply not to affect the normal growth of the Malabar chestnut.
How to prune the Malabar chestnut after repotting
We know that the Malabar chestnut needs to be repotted every so often, so how should it be pruned after repotting? The answer is to try not to prune too much, because after repotting the Malabar chestnut needs a period of time to adapt to the new soil and environment, and may even show drooping leaves, so it is impossible to judge which leaves need pruning.
You can start pruning about 2 weeks after repotting the Malabar chestnut. At this time it has basically passed the adaptation period, and the old dead branches have basically become apparent. Cutting off these excess dead branches and old leaves will not have a negative impact on the growth of the Malabar chestnut.
Summary: This article introduces in detail the methods and tips for pruning the Malabar chestnut. Although pruning is not a necessary process, it can bring many benefits, such as increasing the beauty of the Malabar chestnut and promoting the growth of new branches, so pruning it is beneficial and harmless. Of course, after pruning, be sure to properly care for it; for methods, you can refer to the cultivation methods for the Malabar chestnut, so as to ensure that the Malabar chestnut is healthier.
How to grow the radermachera to make it lush: introduction to the correct pruning methods
The radermachera is very suitable for growing in offices and homes. But some beginners at growing plants may not know much about growing the radermachera, and some die after being grown for a period of time. This is because they have not mastered the cultivation techniques. So how do you grow the radermachera to make it lush? What are the correct pruning methods for the radermachera?
How to grow the radermachera to make it lush
1. Environmental requirements:
Cultivation temperature: The radermachera likes warm and hot environments, and the suitable growth temperature is 22-28°C. In high-temperature seasons, when the ambient temperature exceeds 30°C, spray water on the leaves as much as possible to lower the temperature, or move it to a shaded, ventilated and cool place to spend the summer.
When autumn comes and the temperature drops to around 10°C, the plant must be moved indoors to a warm place for care. Throughout winter, the temperature should preferably be kept at 8°C, and must not be lower than 5°C. The plant can be moved indoors where there is air conditioning or an electric heater to ensure the room temperature is not lower than 8°C, so that it can pass the winter safely.
Cultivation humidity: For home growers, spray water and mist on the plant leaves and surroundings as much as possible to increase the relative air humidity. The radermachera likes a moist environment, and being too dry is unfavorable to its growth, but in winter the frequency of spraying water should be reduced.
Cultivation light: The radermachera likes light and can also tolerate slight shade. Full sun and semi-shade environments are both acceptable. In summer, it is best to avoid the strong light at noon. When placed at home, it is best to place it behind a glass window, so that it can get sufficient light while effectively avoiding direct strong light. In winter, even more attention should be paid to supplementing the plant's light needs.
2. Fertilizer and water management:
The radermachera's water requirement is a moderately moist level. Too dry or too wet will cause the plant's root system to rot. During the growth period, water should be supplied sufficiently to keep the potting soil moist, but it should not be waterlogged. For plants placed outdoors, standing water in the pot should be poured out promptly after rain during the plum rain season.
For fertilizer, a slow-release fertilizer with balanced nitrogen, phosphorus and potassium can be used. Generally, in spring, when repotting, mix the fertilizer into the substrate. Once a month, use a 3000-fold solution of monopotassium phosphate plus a 5000-fold solution of urea, dilute and water with it. In addition, whenever the potting soil is dry, just water with clear water.
During the growing season, apply a nitrogen-based fertilizer once every half month to make the branches strong and the leaves glossy. However, nitrogen fertilizer should not be applied too much, otherwise the leaf stalks and internodes will become longer and the plant shape will become loose.
In winter, the substrate should be kept somewhat dry; as long as the leaf tips do not show drooping symptoms, you do not need to water. In order to enhance the plant's resistance to low temperatures in winter, spray a 5000-fold solution of monopotassium phosphate once every half month.
3. Pest and disease control:
The main disease of the radermachera is leaf spot, and the main pests are scale insects, mites and aphids. Growers should pay attention to observing scale insects during routine care and management, and spray more water and mist. When new leaves grow out, check whether there are aphids harming the new leaves.
Spray an 800-fold solution of carbendazim or an 800-fold solution of chlorothalonil once every half month to prevent the occurrence of leaf spot. The plant should not be grown in an overly dark environment.
Leaf spot symptoms: leaf drop
Causes of leaf drop: The causes of leaf drop in the radermachera should be analyzed specifically. First, if in winter the leaves turn yellow from bottom to top and then fall, this is caused by low temperature; second, if in the vigorous growth season the leaves turn yellow from bottom to top and then fall, this is a nitrogen deficiency phenomenon caused by insufficient nitrogen absorption by the plant; third, keeping the plant in a dark place for a long time can also cause the middle and lower leaves to fall.
Solutions: For leaf drop caused by low temperature, the grower needs to raise the temperature around the plant; for yellowing and leaf drop caused by nitrogen deficiency, the grower needs to increase the plant's nitrogen nutrition; if leaf drop is caused by darkness, place the plant in an environment with suitable light for cultivation.
4. Precautions:
The radermachera has a beautiful plant shape, and generally does not need heavy pruning. Dead branches and diseased or weak branches can be cut off at any time. In winter, the room temperature should be kept not lower than 8°C, otherwise cold damage is likely to occur, and even the whole plant may die.
The radermachera is a light-loving plant and can also tolerate slight shade. Full sun and semi-shade environments are both acceptable, but strong summer light should be avoided. When placed indoors, it is best to place it in front of a window or on a balcony with sufficient light. If it is placed in a dimly lit room for a long time, it is easy to cause leaf drop. When growing it as a potted plant at home, during the overwintering period it can be placed in a higher position in front of a window or balcony so that it receives more light.
When potting the radermachera, choose a loose, breathable substrate with good drainage, with a substrate pH of 5.5-6.0. The fertilizer required for potted radermachera is nitrogen:phosphorus:potassium:calcium:magnesium = 100:9:87:53:12.
Pruning methods for the radermachera
(1) Pinching: also called removing the tip or pinching off the top. It is pinching off or cutting off the top shoot of the main stem or side branch of the flowering plant by hand, breaking the plant's apical dominance, promoting the sprouting of the lower axillary buds, inhibiting the excessive growth of branches, prompting the plant to branch more, and forming multiple flower heads and a beautiful plant shape.
(2) Cutting back the top: For large flowering plants such as the rubber tree, dragon tree, Schefflera and Dieffenbachia, the plant is too tall and difficult to cultivate indoors, so pruning or cutting back the top is needed. Usually before new branches sprout in spring, all the upper part of the plant is cut off, which is cutting back the top. When cutting back the top, how much of the main trunk to keep depends on the flower species.
(3) Thinning: includes thinning branches, leaves, buds, flowers and adventitious buds, etc. When the flowering plant grows too vigorously, causing the branches and leaves to be too dense, some of its branches should be thinned in a timely manner, or overly dense leaves should be removed, so as to improve ventilation and light transmission conditions, making the flowering plant grow more robust and the colors of flowers and fruits more brilliant.
(4) The flowers of the radermachera are upright inflorescences, terminal, night-blooming, with ovate-lanceolate calyx teeth and linear-lanceolate bracts. When pruning the radermachera, we should prune toward the effect we want the radermachera to grow into.
Precautions for growing the radermachera
(1) Temperature precautions: Control the daytime temperature at around 20°C, and the nighttime temperature at around 28°C. Whether too high or too low, it will affect development. Generally in winter the temperature should be controlled at a certain level, generally around 10°C.
(2) Humidity precautions: A moist environment is what the radermachera likes. The way to control humidity is to spray water on the leaves to ensure humidity. In summer, at least 2 sprays a day should be ensured. Do not spray water at noon in summer, otherwise it will cause harm to the plant itself. However, note that it should not be too wet, because otherwise too wet or too dry will both lead to the plant's death or yellowing.
(3) Light precautions: The radermachera relatively likes sunlight. If it is not exposed to the sun for a long time, no problems will appear, but if you want it to grow large and healthy, then it needs to be given light frequently; daily scattered light is enough. In winter, a certain level should be maintained, and it is best to place it on a balcony to receive sunlight.
(4) Watering precautions: Generally, for watering, regarding the water in the soil, the standard is not to water if it is not dry.
(5) Pruning precautions: The radermachera is placed at home mainly for ornamental purposes, so during the growth process it needs pruning. The main purpose of pruning, besides managing its appearance, is also to cut off its dead leaves and diseased leaves.
Efficacy and effects of the radermachera
(1) The radermachera can beautify the environment
Beautifying the environment is one of the important effects of the radermachera. After being made into a potted plant, it is suitable for placement on a balcony or in an entrance hall. It can add some green to the indoor environment and give the home a vibrant feeling. In addition, it can purify the air, remove harmful substances from the air, and provide humans with a good living environment.
(2) The radermachera can treat bruises and injuries
Besides being for human appreciation, the seeds, leaves and roots of the radermachera can also be used as medicine. It has various effects such as clearing heat and cooling blood, and reducing swelling. Usually the radermachera can be used to treat human bruises and injuries. During treatment, its roots can be sliced, added with clear water and decocted, then taken internally directly, which can play an important role in promoting blood circulation and removing blood stasis, and reducing swelling and relieving pain.
(3) The radermachera can treat venomous snake bites
The radermachera can clear heat and detoxify, and can treat venomous snake bites. Usually, after people are accidentally injured, there is no need to panic. You can take the leaves of the radermachera, mash them into a paste with a tool, and then apply them directly externally to the injured area, changing the medicine once a day. After two or three days, the poisoning symptoms caused by the venomous snake bite can completely disappear.
Cultivation methods and precautions for the jade plant (9 articles in total)
Cultivation methods and precautions for the jade plant, Part 1
"Cultivation Methods and Precautions for the Jade Plant"
Crassulaceae, Crassula.
[Morphology] Evergreen succulent plant, plant height 45-75 cm, stems semi-lignified. Single leaves opposite, leaves thick and fleshy, broadly elliptical, entire, 3-5 cm long, 1-3 cm wide, leaf color deep green, glossy; after exposure to light, the leaf margins turn red. Horticultural varieties include variegated-leaf and colorful-leaf types.
[Habits] Native to South Africa. Likes warmth, tolerates drought, likes light, and also tolerates semi-shade. It grows best under bright scattered light. It likes fertile, loose, well-drained and breathable sandy loam.
[Propagation] Cuttage propagation. Both branch cuttings and leaf cuttings root easily, and water cuttings can also survive. The cutting time is from May to September. Take a 5-10 cm branch or 1 leaf, insert it into plain sandy soil, pay attention to moisture retention, and it can take root after one week.
[Cultivation] Use 2 parts garden soil and 1 part leaf mold, plus an appropriate amount of river sand to make the potting soil. After potting, water the small seedlings thoroughly and place them in a shaded place. After they survive, place them in a bright place and do not let direct sunlight hit them. In summer, attention should be paid to coolness and ventilation. In order to make the plant shape full and compact, fertilizer and water should not be too much at ordinary times, and the potting soil should be alternately dry and wet. At the end of autumn, bring it indoors for warmth, and the room temperature should be above 7°C. In winter, watering should not be too much. Repot and change the soil once every spring.
Although the jade plant is easy to propagate, easy to plant and easy to manage, it is still common to see jade plants on some residents' balconies looking elegant in spring, summer and autumn, but once winter passes they become wilted and lusterless, and even become "bare chickens." This is mainly because growers only see the easy-to-cultivate side of the jade plant and ignore its fragile side. After entering severe cold, they still place it on an open balcony and let it suffer from cold wind and freezing, causing the jade plant to suffer cold damage. After cold damage, the fleshy leaves and tender stems of the jade plant begin to show wounds as if scalded by boiling water, then gradually become soft and shriveled, and finally fall off. In severe cases, only the bare main stem remains.
Therefore, doing a good job of overwintering potted jade plants on balconies is very important. The following aspects should mainly be handled well:
1. Move the pot indoors in time. After entering winter, move the jade plant indoors for warmth where 7°C to 10°C can be maintained. On warmer days, at noon you can move the jade plant to the balcony to bathe in sunlight, and still move it indoors at night.
2. Control the dryness and humidity of the potting soil. In winter, the potting soil should be mainly slightly dry, and water should be supplemented by spraying fine mist on the leaves at appropriate times. Under normal circumstances, there is no need to water the potting soil directly.
3. Move it into a warm shed for warmth. If conditions permit, the pot can be moved into a warm shed. If conditions do not permit, a plastic film cover can also be used, but attention should be paid to the humidity inside the cover. If excessive moisture is found, uncover the cover in time for ventilation to prevent leaf rot.
4. If the jade plant has already suffered cold damage due to mistakes in earlier cold protection measures, do not easily discard the plant. As long as the frozen leaves and tender branches are removed and the plump main stem is preserved, and fertilizer is appropriately applied in the coming spring, the main stem can still sprout new branches and new leaves. Generally after 1 to 2 years of cultivation, it can develop into a perfect jade plant again.
First, when growing this jade plant, water as little as possible in summer. Its roots are fleshy and the leaves evaporate slowly. In summer, generally just water thoroughly when the soil is dry. Do not let water accumulate. Summer
Cultivation methods and precautions for the jade plant, Part 2
"Introduction to the Cultivation Methods of the Jade Plant"
A warm, dry and sunny environment. Not cold-tolerant, afraid of strong light, slightly shade-tolerant. Fertile, well-drained sandy loam is best. In winter the temperature should not be lower than 7°C.
1. Potting soil requirements: The most suitable time for changing potting soil and planting is early spring. The potting soil should be loose, fertile and well-drained. You can choose 2 parts leaf mold or peat soil, 2 parts garden soil, 3 parts coarse sand, 1 part limestone gravel, or 3 parts each of leaf mold, garden soil and coarse sand, plus 1 part each of bone meal and plant ash, fully mixed as the potting soil.
2. Temperature requirements: A temperature between 20-30 degrees is most favorable for the growth of the jade plant. Spring and autumn are the most suitable growing seasons for the jade plant. The jade plant is afraid of strong light. When the temperature is high in summer, attention should be paid to placing the plant in a cool place to avoid direct sunlight. When the growing environment temperature of the jade plant is higher than 38 degrees, the growth rate will begin to slow down or even enter a brief dormancy. In winter, pay attention to controlling the temperature well, place the plant in a greenhouse, preferably in a place with light. The room temperature cannot be lower than 7 degrees. Below 0 degrees, the plant will freeze to death. For the jade plant in the growing period, except for shading needed during the high heat of summer, it should be placed in a place with sufficient sunlight at all other times.
3. Watering requirements: When the jade plant is in the growing period, the watering frequency needs to be controlled to watering once every two to three days. There should be no water accumulation, and the potting soil should also be avoided from becoming too wet. When growing the jade plant in summer, control the number of waterings well and strengthen ventilation to avoid leaf drop in the jade plant. When growing the jade plant in winter, reduce watering. The specific principle depends on whether the potting soil is dry or wet. The potting soil should preferably be slightly dry.
Cultivation methods and precautions for the jade plant, Part 3
"Jade Plant Cultivation Methods"
Strong light, slightly shade-tolerant. Fertile, well-drained sandy loam is best for the soil. In winter the temperature should not be lower than 7°C.
Plant or repot and change soil before the jade plant begins to grow in early spring. The potting soil should be loose, fertile and well-drained. Generally choose 2 parts leaf mold or peat soil, 2 parts garden soil, 3 parts coarse sand, 1 part limestone gravel, or 3 parts each of leaf mold, garden soil and coarse sand, plus 1 part each of bone meal and plant ash, fully mixed as the potting soil.
The suitable growth temperature for the jade plant is 20-30°C. Spring and autumn are suitable growing periods. During high temperatures in summer, shade it or place it under tree shade to avoid direct strong sunlight. When the temperature exceeds 38°C, growth slows or it enters brief dormancy. In winter, it should be moved into a greenhouse or placed in a sunny place indoors, with the room temperature kept at 7-10°C, and the lowest must not be lower than 5°C. If it drops below 0°C, it will freeze and die. During the growing period, except for shading needed during the hot summer, it should be placed in a place with sufficient sunlight at all other times.
During the growing period, water the jade plant once every 2-3 days, but the potting soil should not be too wet, and especially not waterlogged. During the hot summer, watering should be strictly controlled and ventilation strengthened, otherwise leaf drop is likely to occur. In winter, reduce watering, and the potting soil should preferably be slightly dry. During the growing period, apply topdressing, generally 2-3 times a month with fully decomposed dilute cake liquid fertilizer. Before changing soil or planting, sufficient base fertilizer should be applied. Fully decomposed organic fertilizer, such as chicken manure, pigeon manure, bone meal, human manure and urine, and various cake fertilizers, can all be added into the potting soil as base fertilizer. To maintain a full plant shape, fertilizer and water should not be too much, so as to avoid excessive growth.
Cultivation methods and precautions for the jade plant, Part 4
"Plant Cultivation Methods (Simplified)"
Cut the trunk at a place leaving 20-50 cm (the height depends on your appreciation). The shortened branches can be inserted into river sand and placed in a cool place, ensuring sufficient air humidity. After about 2 months, they can become a new black prince.
When potting the black prince, it is advisable to use 1 part leaf mold, 1 part garden soil and 1 part river sand, plus a small amount of base fertilizer, to make the potting soil. It grows very fast in a high-temperature and humid environment, and can produce one leaf every 5-10 days. During this period, sufficient fertilizer and water must be ensured. Generally apply liquid fertilizer or compound fertilizer 1-2 times a month, while maintaining relatively high soil moisture. After the beginning of autumn, gradually reduce the frequency of fertilizing and watering to promote solid plant growth and facilitate overwintering.
Cultivation methods for the black prince
① Light: Except for shading when the summer sun is particularly strong, give sufficient light at other times, otherwise the leaf color will be poor.
② Temperature: Likes high temperatures, with a suitable temperature between 20-32°C. For overwintering, it needs to be kept above 10°C.
③ Humidity: Does not like an overly dry environment. Maintaining moisture is very important, as it is related to whether the leaf color is glossy or not.
④ Watering: If grown indoors, dry and wet alternation must be maintained. Water thoroughly when dry!
⑤ Fertilizing: Apply less but frequently, and never apply concentrated fertilizer or raw fertilizer.
⑥ Pruning: Tolerates pruning. When branches are too long or the plant shape is poor, you can safely prune and shorten them.
⑦ Propagation: Combined with pruning, semi-lignified branches can be cut for propagation, with a very high survival rate.
⑧ Pest and disease control: The common problem is red spider mite damage on the leaves. You can spray specific miticides such as dicofol, hexythiazox and pyridaben for control. Precautions for growing the black prince
1. Temperature too low: The suitable temperature for the growth of the black prince is between 20-30°C, and it grows most luxuriantly at 25-30°C. Below 10°C it grows poorly, and below 0°C it is prone to cold damage. If it is exposed to cold wind indoors, yellow leaves and leaf drop will occur.
2. Light too dim: The light required for the growing environment of the black prince is about 10000-20000 lux. When the light is too low and accompanied by poor ventilation, yellow leaves and leaf drop will occur.
3. Improper watering: The black prince likes water but is not tolerant of waterlogging. When waterlogging occurs, the roots cannot get oxygen, and yellow leaves and leaf drop will occur. Watering should follow the principle of "water when dry, stop when wet," and do not water too frequently. 2. Malabar chestnut
1. Temperature: The Malabar chestnut likes a high-temperature and humid environment, and the optimal temperature is 22°C to 30°C. When the temperature exceeds 32°C, build a shade for the Malabar chestnut and spray water on the leaves to increase humidity and lower temperature, so that it can maintain vigorous growth momentum. In winter, the lowest temperature cannot be lower than 5°C.
2. Watering: The Malabar chestnut likes moist soil. Water an appropriate amount every early morning and evening. In winter, spray more water and water less. There must be no water accumulation in the pot.
3. Light: The Malabar chestnut needs relatively good light, but is also relatively shade-tolerant. It is suitable for care in a semi-shade environment. Its light requirement changes somewhat with age. If the light is too strong, it is easy to cause the leaves to turn yellow and lose their spirit, reducing its due ornamental value.
4. Fertilizing: Fertilize the Malabar chestnut once a month. After the beginning of autumn, apply phosphorus and potassium fertilizer 2 times in succession. In winter, all forms of topdressing should be stopped.
5. Soil: Small plants should be repotted once a year, and large plants should have their soil changed once every 2 years. During the growing season, loosen the soil once a month. The time for repotting and changing soil is best in spring.
6. Pests and diseases: The tender leaves and new buds of the Malabar chestnut are prone to aphids. After spreading plant ash on the plant, rinse it clean with clear water; spraying chinaberry leaf juice can effectively kill insects; spray with a 2000-fold solution of 10% imidacloprid wettable powder to kill them.
Precautions
1. If a small number of diseased leaves appear, remove and burn them in time; avoid the whole leaf turning yellow and wilting, causing the plant to drop a large number of leaves.
2. If there is water accumulation in the potting soil, it is easy to cause the plant to turn yellow. The lower leaves will turn yellow and then fall off. In severe cases, it will cause the plant's roots to rot and die.
Cultivation methods and precautions for the jade plant, Part 5
"Cultivation Methods for the Jade Plant: How to Grow the Jade Plant"
The idiom Feng... Yushu City, Sichuan Province... Actually, the jade plant is just a kind of tree. The jade plant is also known as the finger jade, and is suitable for potting. It can be placed on a balcony or used as an ornament on an indoor small table, appearing very elegant and refined. Below, Huamu China Network introduces to you the cultivation methods for the jade plant:
Cultivation methods for the jade plant: how to grow the jade plant
1. Propagation methods for the jade plant
The commonly used propagation method for the jade plant is cuttage propagation. Generally, select side branches with leaves from a plant with good growth vigor and many side branches. The cuttings should be 8-12 cm long, placed in a cool and ventilated place to dry for 1-2 days so that the cut is slightly dry, and then inserted into a propagation sand bed; you can also pick the leaves of the main stem, let the cut dry slightly, and insert them into the sand bed, maintaining 20-25°C and suitable humidity. They can take root in about half a month.
2. Substrate required for the growth of the jade plant
Plant or repot and change soil before the jade plant begins to grow in early spring. The potting soil should be loose, fertile and well-drained. Generally choose 2 parts leaf mold or peat soil, 2 parts garden soil, 3 parts coarse sand,
Cultivation methods and precautions for the jade plant, Part 6
"Cultivation Methods for the Jade Plant"
Living
rooms and office lobbies all look especially noble and grand, with beautiful scenery. The jade plant not only releases oxygen during the day, but also absorbs indoor carbon dioxide at night, which most indoor flowers cannot compare with. Therefore, small potted jade plants are very suitable for placing in the bedroom for care. Seeing is believing, so first enjoy the jade plant pictures.
Many friends do not know how to grow the jade plant and are unclear about the cultivation methods for the jade plant. Below, the editor will give everyone a brief introduction.
Jade Plant Growing Methods and Precautions, Part 7
"Jade Plant Growing Methods"
A succulent subshrub, it prefers a warm, dry environment with plenty of sunlight. It is not cold-tolerant, fears strong light, and tolerates slight shade. A fertile, well-drained sandy loam soil is best. In winter, the temperature should not fall below 7°C.
Plant jade plants or repot and change the soil in early spring before growth begins. The potting soil should be loose, fertile, and well-drained. Generally, use a mix of 2 parts leaf mold or peat soil, 2 parts garden soil, 3 parts coarse sand, and 1 part limestone gravel, or 3 parts each of leaf mold, garden soil, and coarse sand, plus 1 part each of bone meal and plant ash, thoroughly mixed as the potting soil.
The suitable growing temperature for jade plants is 20-30°C. Spring and autumn are the suitable growing seasons. During high summer temperatures, shade them or place them under tree shade to avoid direct strong sunlight. When the temperature exceeds 38°C, growth slows or the plant enters a brief dormancy. In winter, move them into a greenhouse or place them in a sunny spot indoors, keeping the room temperature at 7-10°C, and never below 5°C. If it drops below 0°C, the plant will freeze and die. During the growing season, except for shading needed during the hot summer, they should be placed in a spot with ample sunlight.
During the growing season, water jade plants once every 2-3 days, but do not let the potting soil become too wet, and never let water accumulate. During the hot summer, strictly control watering and increase ventilation, otherwise leaf drop is likely. In winter, reduce watering, and keep the potting soil slightly dry. Apply top dressing during the growing season, generally 2-3 times a month with diluted decomposed cake fertilizer liquid. Before changing soil or planting, apply enough base fertilizer. Decomposed organic fertilizers such as chicken manure, pigeon manure, bone meal, human waste, and various cake fertilizers can all be mixed into the potting soil as base fertilizer. To maintain a full plant shape, do not apply too much fertilizer or water, to avoid leggy growth.
Jade plants not only release oxygen during the day but also absorb indoor carbon dioxide at night, which most indoor flowering plants cannot match. Therefore, small potted jade plants are very suitable for keeping in the bedroom.
Cuttings are taken in spring and autumn, rooting quickly with a high survival rate. The suitable temperature for cuttings is 16-21°C. Using soft cuttings, roots form in 3 weeks after insertion. When the roots are 2-3 cm long, pot them up.
Jade Plant Growing Methods and Precautions, Part 8
"Growing Jade Plants"
Redness, swelling, and pain, and if splashed into the eyes it can even cause blindness. Although the jade plant is not showy, because this succulent plant is robust, drought-tolerant, easy to cultivate, and full of branches and leaves, with leaves that stay emerald green all year round, and because the swollen stem nodes on its stem give it the posture of an ancient tree stump, potted jade plants are now relatively common on the balconies of urban and rural residences in the Jiangnan region.
The jade plant is also known as Yanzi Zhang, Sedum tree, and so on, and is a plant of the Crassulaceae family and the genus Crassula. It is native to South Africa and is now cultivated in various places. It is an evergreen small shrub. The stem is cylindrical, grayish-green, and jointed. The leaves are opposite, flat, succulent, elliptical, with entire margins, slightly pointed at the tip, and clasping the stem with a rounded base. The flowers are red. It prefers warmth and dryness, and likes ample sunlight and ventilation. It likes loose sandy potting soil. Avoid overly wet soil. Propagation is mainly by cuttings. Soft branches or leaves can be used for cuttings. Before inserting, the cuttings need to be dried in the shade. They can be inserted in spring or autumn in moist yellow sand or perlite.
Yanzi Zhang has few pests and diseases, though it sometimes suffers from anthracnose and leaf spot, which can be controlled by spraying with a 1000-fold dilution of 70% thiophanate-methyl wettable powder. If indoor ventilation is poor, the stems and leaves are prone to scale insect damage. Once pests are found, immediately scrub them off by hand. If the damage is severe, spray with a 1000-fold dilution of 40% omethoate emulsifiable concentrate for control.
Yanzi Zhang cultivation and management is simple and extensive, but to achieve a full and robust plant shape and have it covered in flowers as expected, there is indeed some work to do. First, Yanzi Zhang grows relatively fast, so repot every spring, add fertile soil, and place it in a sunny spot for care. Apply a diluted fertilizer solution once every 10 days to half a month, and water once every 2 to 3 days, following the principle of watering when dry and withholding when wet. During the high heat of midsummer, Yanzi Zhang enters a semi-dormant state and fears strong light that can scorch the leaves, so shade care should be done at this time. Stop fertilizing in summer, pay attention to ventilation, and prevent the leaves from turning yellow and dropping. If it rains heavily for days, avoid being pounded by rainstorms, so that water does not accumulate at the roots and cause root rot and death. From August to October, as autumn arrives and it turns cooler, Yanzi Zhang begins to resume growth, so strengthen the light again and remove the shading equipment. At this time, fertilizing and watering are in principle the same as in spring. Before Frost's Descent, move it into a greenhouse, place it in a sunny spot indoors, stop fertilizing, and restrict watering, basically watering once every half a month with half the amount used in summer. Yanzi Zhang is not cold-tolerant in winter, and the temperature should be kept above 7°C. Shape and prune once a year, carried out when repotting in spring or when moving into the greenhouse in late autumn, so that the plant shape remains simple and elegant all year round.
How can a jade plant be made to bloom?
Yanzi Zhang, also known as jade plant, Sedum tree, and so on, is a plant of the Crassulaceae family and the genus Crassula. It is commonly propagated by cuttings, which can be done during the growing period, and roots form about 3 weeks after insertion, making it very easy to grow. As far as the author knows, Yanzi Zhang is fairly commonly cultivated in the Huang-Huai region, but few bloom. From more than ten years of experience growing Yanzi Zhang, to make it bloom, it must have a certain age and be provided with certain growing conditions. The author's experience with Yanzi Zhang blooming is described below.
In the past two years, three pots of Yanzi Zhang have bloomed in succession, two of which were 5 years old and one 6 years old. All produced clusters of flower buds in early November, and some buds opened in early December. The flowers have five petals, are white, and are elegantly distinctive. They continued to open until the flowers faded in early to mid-March of the following spring, with a flowering period of about a hundred days and a rich fragrance.
Although the jade plant is easy to propagate, easy to grow, and easy to manage, it is still common to see jade plants on some residents' balconies looking elegant through spring, summer, and autumn, only to become wilted and colorless once winter passes, or even reduced to a "bare chicken." This is mainly because growers only see the easy-to-cultivate side of the jade plant and ignore its fragile side. After severe cold arrives, they still leave it on an open balcony, letting it suffer the invasion of cold wind and freezing, causing the jade plant to suffer freeze damage. After freeze damage, the succulent leaves and tender stems of the jade plant begin to show wounds as if scalded by boiling water, then gradually soften, shrivel, and finally drop off. In severe cases, only the bare main stem remains.
Yanzi Zhang cultivation and management is simple and extensive, but to achieve a full and robust plant shape and have it covered in flowers as expected, there is indeed some work to do. First, Yanzi Zhang grows relatively fast, so repot every spring, add fertile soil, and place it in a sunny spot for care. Apply a diluted fertilizer solution once every 10 days to half a month, and water once every 2 to 3 days, following the principle of watering when dry and withholding when wet. During the high heat of midsummer, Yanzi Zhang enters a semi-dormant state and fears strong light that can scorch the leaves, so shade care should be done at this time. Stop fertilizing in summer, pay attention to ventilation, and prevent the leaves from turning yellow and dropping. If it rains heavily for days, avoid being pounded by rainstorms, so that water does not accumulate at the roots and cause root rot and death. From August to October, as autumn arrives and it turns cooler, Yanzi Zhang again
Jade Plant Growing Methods and Precautions, Part 9
"Cymbidium sinense Growing Methods and Precautions"
Nanhuamu website editor Lili explains how to grow Cymbidium sinense. To master the daily care techniques for Cymbidium sinense, you must first understand its growth stages. Over the course of a year, the growth and development of Cymbidium sinense roughly goes through the following stages:
February to March (Gregorian calendar, same below): new buds sprout;
April to May: new buds emerge from the soil;
June to July: new leaves elongate; August to September: new leaves continue to elongate, forming new orchid plants; new roots sprout and grow, forming an independent root system; October to November: new orchid plants gradually mature, the pseudobulbs enlarge, and flower buds differentiate;
December to January of the following year: flower spikes elongate;
February: flowering period.
Propagation methods of Cymbidium sinense
(1) Division propagation. This method is simple and reliable to perform, blooms quickly after division, and can preserve the original characteristics of the variety. It is a propagation method in which the clustered pseudobulbs of Cymbidium sinense are divided into single ones or groups of 2-3 and planted independently to achieve multiplication. Division propagation of Cymbidium sinense is best carried out during the dormant period, that is, before new buds emerge from the soil and before new roots grow, or during the dormant period after flowering. The separated orchid plants should be inspected, and rotten roots and withered leaves cut off. For the disinfection method,
a 800-1000-fold solution of 70% thiophanate-methyl can be used to soak the orchid roots for 10-15 min. After soaking, let them dry slightly, and they can be replanted. Although division propagation is simple and easy to carry out, and can preserve the inherent characteristics of the variety so that many precious varieties can be preserved, division has a rather small propagation coefficient after all, making it hard to meet the needs of large-scale production and the market. Therefore, we must explore more scientific and advanced propagation methods. Tissue culture propagation of Cymbidium sinense is a more advanced propagation method that can meet production and market needs.
(2) Tissue culture. Tissue culture is an advanced science and technology developed on the basis of cell theory and the theory of plant cell totipotency. It is currently being continuously promoted in forest tree propagation. According to relevant statistical analysis, herbaceous plants are easier to propagate by tissue culture than woody plants, and the success rate is also greater. Tissue culture propagation of Cymbidium sinense is an advanced method of propagating Cymbidium sinense using advanced equipment and modern science and technology. Tissue-cultured Cymbidium sinense has strong resistance, few pests and diseases, and a high survival rate, and can be produced in batches.
Growing methods and precautions for Cymbidium sinense
1. Cultivation substrate
Traditional Chinese pot cultivation of Cymbidium sinense mostly uses the humus soil from under the forests of its place of origin, which locals call "orchid mud." This soil is rich in humus, loose and non-sticky, and often slightly acidic, making it an excellent potting soil for cultivating Cymbidium sinense. When cultivating Cymbidium sinense in the north, generally 5 parts leaf mold and 1 part sandy soil are mixed. Some also use a mix of 4 parts humus soil, 2 parts peat soil, 2 parts furnace slag, and 2 parts river sand.
2. Dividing seedlings and disinfection.
When dividing the pots, first grasp the base of the orchid seedlings with the five fingers of the left hand, turn the pot upside down, and gently tap around the pot to separate the pot from the potting soil, then carefully pat the soil ball gently to shake off the soil. Carefully clean the orchid roots, cut off rotten roots, broken roots, withered leaves, and dried pseudobulbs, then rinse clean with water, and place the orchid roots into a 1000-fold thiophanate solution or an 800-fold potassium permanganate solution for disinfection. Kill the pathogens near the wounds.
3. Potting.
After the pot is selected, before planting, first cover the drainage hole at the bottom of the pot with a large piece of broken tile, and lay down window screen, then spread coarse mountain soil particles,