Camellias fail to bloom mostly because the temperature is too low, the air is too dry, the soil is too alkaline, or fertilizer is applied too frequently
As one of China's top ten famous flowers, the camellia has a long blooming period, gorgeous flowers and a captivating fragrance, and is welcomed and loved by people. However, if you do not follow the proper camellia growing methods, the camellia will also fail to bloom, and then you will be in trouble! So why do camellias fail to bloom? The following are two situations in which camellias fail to bloom, along with the reasons, so come and take a look with the editor.
1. Why camellias fail to bloom: buds that do not open / no buds at all
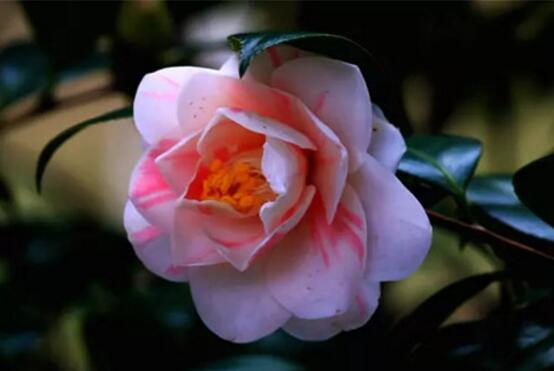
After a camellia blooms, the scene is as beautiful as a painting, which is why it is loved by flower enthusiasts. However, once the temperature is too low, watering is improper, light is insufficient, fertilizer is applied too frequently, or the plant is attacked by pests and diseases, the camellia will fail to bloom. There are two situations in which a camellia fails to bloom: one is having flower buds that simply will not open for a long time; the other is having no buds at all, with no sign of blooming after being grown for a long time. Let us continue to look at the specific situations and causes.
(1) Buds that do not open
The first situation of a camellia failing to bloom is seeing buds, but they simply will not open. There are two reasons for this: 1) it takes a very long time for a camellia to go from having buds to blooming, so this is normal; 2) improper care, for the following reasons:
1. Temperature too low
Camellias like a warm environment, and during the bud stage their most suitable temperature is 10-15°C. If the temperature suddenly drops below 5°C, this will cause the camellia buds to suffer frost damage and fail to bloom.
Remedy: When winter temperatures are low, during the day place the flower in a warm, windless, sunny spot; at night move it indoors. If the indoor temperature is below 5°C, you should cover the pot with a plastic film bag to raise the temperature.
2. Air too dry
Camellias like a humid environment. In winter the air is relatively dry, and if you only water without sprinkling water around the plant, once the air becomes too dry, the camellia will have buds but still fail to bloom for a long time.
Remedy: In late winter and early spring, after 10 a.m. on sunny days, you need to spray or mist the camellia to maintain air humidity. As for watering, generally water once every 3-5 days on sunny days, just keeping the soil surface moist; it must not be too dry or too wet.
(2) No buds at all
The second situation of a camellia failing to bloom is that no buds can be seen at all, and after growing it for a long time there is simply no sign of blooming. The editor has summarized the following 5 causes of this phenomenon:
1. Temperature too low
In winter, when the temperature suddenly drops below 0°C, it easily causes frost damage to the tender branches, and the buds fall off after being frozen. Without buds, the camellia naturally will not bloom.
2. Soil problems
According to the camellia's growth habits, it likes loose, fertile, well-drained, slightly acidic soil. Once the soil is too acidic or too alkaline, it will also cause the camellia to fail to bloom.
3. Insufficient water
Camellias like a humid environment, and throughout their entire growth and development they need a fair amount of water. If we cannot give them sufficient water, it often causes flowers and buds to drop, causing the whole plant to wilt severely. In this regard, you had best master the camellia watering method.
4. Fertilizing too frequently
Camellias like fertilizer, but some flower enthusiasts apply fertilizer frequently in order to make the camellia bloom as soon as possible, and as a result the camellia grows explosively three times in a single year! This deprives the camellia of the chance to set buds and bloom, so that you only see leaves growing and no flowers. In this regard, you had best master the camellia fertilizing method.
5. Pests and diseases
In addition to the above points, attack by pests and diseases can also cause camellias to fail to bloom. The main insect pests of camellias are stem borers and scale insects; the main diseases are anthracnose, sooty mold and so on. As for exactly what pesticide to spray, this is described in detail in camellia pest and disease control, so I will not say more here.
The beauty of the camellia is self-evident, but to see the camellia's beautiful flowers requires careful care on our part. Once a camellia fails to bloom, there is no need to panic; just do as described above: first find out why the camellia is not blooming, then solve it accordingly. Finally, may everyone's camellias all bloom with beautiful flowers.
How to grow potted camellias? Camellia growing methods and points to note
The camellia, also known as shancha, shancha hua and so on, is a shrub or small tree of the genus Camellia in the family Theaceae. Its blooming period is relatively long, with flowers opening from October to May of the following year, and the peak blooming period is usually from January to March. Because of its graceful plant form, dark green and glossy leaves, and gorgeous, colorful flowers, it is treasured by the world horticultural community. Let us take a look below at the camellia growing methods and points to note!
The origin and distribution of camellias
There are about 2,000 camellia varieties, which can be divided into 3 major groups and 12 flower forms. By 2013 China already had more than 306 camellia varieties. It is native to southwestern China, and is mainly distributed in China's Yangtze River and Pearl River basins, Yunnan, and in Korea, Japan, India and other places. It is widely cultivated in the open ground in the central and southern provinces of China, with a cultivation history of 1,400 years, while in the north it is grown as potted plants in greenhouses. Wild species occur in Sichuan, Taiwan, China, Shandong, Jiangxi and other places.
The growth habits of camellias
Camellias fear wind and like sun, high, cool terrain, air circulation, warmth and humidity, good drainage, and loose, fertile sandy loam, loess or humus soil, with a pH of 5.5-6.5 being best. The suitable temperature is between 20-32°C; growth stops above 29°C, and at 35°C the leaves will show scorching. A certain temperature difference is required. The environmental humidity should be above 70%, and most varieties can tolerate a low temperature of -8°C. South of the Huai River they can generally overwinter naturally. They like acidic soil and require good air permeability. To favor the development of root hairs, a mixture of peat, rotted sawdust, red soil, humus soil or a mix of the above can usually be used as the growing medium. Camellias can go without shading in spring, autumn and winter, and in summer 50% shading can be used.
Camellia propagation methods
1. Cutting propagation: Camellia cutting propagation is the simplest. The most suitable time for cuttings is September, and spring also works. Choose well-grown, semi-lignified branches, remove the leaves at the base, keep the upper 3 leaves, cut a slanted opening with a sharp knife, immediately dip the cut end in 200-500 ppm indolebutyric acid for 5-15 minutes, dry it in the sun, then insert it into a sand pot or vermiculite pot. After insertion, water it; the wound heals in about 40 days and roots form in about 60 days. Cuttings treated with hormones root 2-3 months earlier than those not treated. Using vermiculite as the cutting bed also roots much faster than a sand bed.
2. Approach grafting propagation: Choose a suitable variety such as chazhong tea or oil tea as the rootstock, and approach-graft a precious camellia onto it. The time for approach grafting is generally between Qingming Festival and Mid-Autumn Festival. First plant the rootstock in a flower pot, use a knife to cut away about half at the parts to be joined, with smooth cuts, then press the cut surfaces of both closely together, bind them with plastic film, and water the rootstock twice a day; they will heal after 60 days. At that point you can cut it off and plant it, placing it in the shade of a tree to avoid direct sunlight. In February of the following year, cut off the tail of the rootstock with a knife, then plant it out.
3. Leaf cutting propagation: For camellia propagation, stem cuttings are generally used, but some precious varieties, due to limits on the source of branches, or because taking material would affect their tree shape, also use the leaf cutting method. Use mountain soil as the cutting medium, and you can mix in 1/3 river sand to favor aeration and drainage. Put the medium in a clay pot, then do the pot cutting. Leaf cuttings are best done in the rainy season. Take one-year-old leaves as the leaf cutting material; ones that are too old root with difficulty, and ones that are too tender rot easily. Insert them about 2 cm into the soil, press the soil firmly after insertion, water thoroughly, then place in a cool, ventilated spot. Roots generally form in 3 months, and in the spring of the second year they can sprout and grow shoots.
4. High-branch layering propagation: The greatest feature of the high-branch layering method is that it can give new life to all the weak, small branches on a camellia that would otherwise be pruned off. This method also has a high survival rate, quick rejuvenation and early blooming. The method is: take the thin, weak branches that need to be pruned off, and do a ring cut at a suitable position (generally the upper part can be left as a 15-25 cm branch); the ring cut length can be between 5-8 mm. Tie on a suitably sized plastic film, add sterilized and disinfected peat soil or leaf mold inside the film, and after 7-10 days do another ring cut of 5-8 mm below the plastic film. This is called the double ring-cut high layering method.
5. Tree grafting propagation: Grafting camellias has many advantages: it can maintain the excellent traits of the variety, can speed up plant growth so it takes shape quickly and can be produced on a large scale, and saves scion wood, which is especially important for rare varieties with few sources of scion wood. The best grafting time is between June and July, when the leaves of the new shoots of the camellia scions have already unfolded and the temperature is relatively high, so the graft wound heals quickly and the survival rate is high. The grafting method uses the cut grafting method among the branch grafting methods. Because the grafting position is relatively high, it is often called “high grafting to change the head”.
Camellia growing methods
1. Soil requirements: Soil is the fundamental condition for camellia growth, so the choice of soil is also very important. Generally when choosing soil, you should choose soil with a relatively high humus content, slightly acidic soil, and generally a soil pH between 5-6.5 is best.
2. Suitable temperature: Generally the suitable growing temperature for camellias is 18-25 degrees. If the environmental temperature is too high or too low, it is not good for camellia growth. Pay special attention to moving the plant indoors to grow in winter. Generally at noon move the plant to the balcony, and in summer also pay attention to sun protection to prevent the temperature from being too high.
3. Moderate watering: Camellias generally like to grow in a humid environment, so you should mainly water the camellia, but note that it is best to keep the soil from being too dry or too wet. Generally water more in spring and summer, which also favors camellia growth. In winter, note to water less, and watering once every two to three days is best.
4. Moderate fertilizing: Camellias are fertilizer-loving plants, so during the growing process remember to fertilize. Generally during the growing period, add phosphorus and potassium fertilizer, which also favors camellia growth and makes the flowers bloom more abundantly. At the same time, also note not to apply too much fertilizer.
5. Regular pruning: Pruning work is also very important. Generally when the camellia buds become dense, it is recommended to do regular pruning work, cutting off weak branches and tidying the buds, which can also promote the camellia's absorption of nutrients.
6. Pest and disease prevention: Camellias are also very prone to pests and diseases. Generally there are two kinds, sooty mold and anthracnose. Note during the period of pests and diseases to spray the camellia with some medication against pests and diseases, which can play a very good role in promoting growth.
Potted camellia growing methods
1. Pot and soil selection: According to the growth characteristics of the camellia, it is advisable to choose a slightly acidic, loose, fertile, well-drained mixed soil as the potting soil. Pay special attention to good drainage, and by all means do not use calcareous soil. The ratio of the mixed soil is 6 parts red soil, 3 parts orchid mud (leaf mold), 1-2 parts fine sandy soil. The pot size should be moderate, not too large or too small. Generally the ratio of pot to seedling is that a camellia 40-50 cm tall with a crown width of 20-25 cm is best planted in a purple clay pot or clay pot with a diameter of about 20 cm, and other sizes follow the same pattern.
2. Potting time: The potting time for camellias is November in winter and February-March in early spring. At this time the buds are plump and the flowers are in full bloom, the most suitable time for potting. When the flowers are fading and new roots are still sprouting, if you want to pot them, you must be especially careful not to damage the root system. Generally stop potting around the budding period, because at this time the new shoots are about to emerge and the leaves are unfolding, requiring a large amount of water; if you pot them, the new roots will be injured and it will easily affect the growth and development of that year. Potting is also taboo in hot and severe winter seasons, to avoid causing the plant to wither and die.
3. Potting method: First place 3-4 pieces of broken tiles over the drainage hole at the bottom of the chosen flower pot, then fill in some coarse soil, plant the seedling in the pot, fill fine soil around the roots, then slowly fill the larger grains of potting soil around the sides of the pot, gently shake the pot, and press with your hand so that the potting soil fits tightly against the roots. For a large pot, you can use a bamboo stick to gently press the potting soil down, taking care not to damage the roots. The potting soil should account for 4/5 of the pot height, to allow for watering.
4. Watering method: Keep newly potted seedlings moist. After 2 months they can be watered like other potted seedlings. The number of waterings depends on the climate, with the principle of keeping the soil moist. Generally water more in spring to meet the needs of sprouting and growing shoots. In summer watering should be done in the morning and evening. During the plum rain period, guard against waterlogging. In autumn drought, water promptly. In winter, watering should be done at noon to prevent the potting soil from freezing, as dry soil freezes even more severely.
5. Fertilizing method: Camellias are not very fond of fertilizer, so there is no need to apply too much. Generally apply fertilizer 2-4 times before flowering in October-November and after flowering around April-May. Generally use a mixed fertilizer (human waste, cake fertilizer, barnyard manure, phosphate fertilizer), best with phosphate fertilizer as the main component and nitrogen fertilizer as secondary, to prevent the branches from growing excessively and the flowers from decreasing. All fertilizers must be fully decomposed before use, but rapeseed cake and fish meal can be scattered directly on the soil surface without decomposing, then covered with a thin layer of soil, letting them slowly rot and seep into the soil for the roots to absorb. The amount of fertilizer applied should follow the principle of more for strong seedlings and less or none for weak seedlings. For seedlings that are growing too weakly, replacing the potting soil instead of fertilizing also works very well.
6. Shading and cold protection: Camellias like a warm, humid climate, and both too cold and too hot are bad for growth and development. In spring and the plum rain period, give potted camellias plenty of sunlight, otherwise the branches will develop thin and weak, easily inviting sooty mold and scale insect damage, or moss growing on the trunks, leading to dead branches, aging or death. In the high-temperature seasons of summer and autumn, shade and cool them promptly. When the winter temperature drops below zero, it will cause buds to fall or the flower centers to freeze, affecting the quality of blooming. Therefore, the indoor overwintering temperature for potted seedlings is best kept at around 3-4°C. If the temperature exceeds 16°C, it will promote early sprouting and in serious cases cause leaf and bud drop.
7. Disease and pest control: The main insect pests of camellias are stem borers and scale insects. The main diseases are anthracnose and sooty mold on the leaf surface and moss parasitizing the branches and trunk. Promptly prune off the affected branches and spray pesticide for control.
Points to note in camellia growing
1. Camellias should not be heavily pruned. Their flowers, leaves and buds develop over a relatively long time, and the crown forms relatively evenly. Basically no special pruning is needed; just cut off diseased and pest-infested branches, overly dense branches and weak branches, and shorten leggy branches.
2. Camellias are a many-flowered tree species, especially on weak-growing plants; if the buds are dense, they will consume too many nutrients, which is bad for plant growth. So bud thinning is an important part of cultivation management. It is best to leave 1-2 buds per branch, at most only 3, and keep a certain distance between them. The buds that are thinned off can be used medicinally.
3. Camellias have a relatively long blooming period, with the whole blooming period lasting as long as half a year. So promptly picking off flowers that are nearing withering is very beneficial for reducing nutrient consumption and strengthening the tree.
Five points to note in fertilizing camellias
There are several sayings about fertilizing camellias: 1. Do not fertilize when new branches are sprouting, on the grounds that it may burn the roots and affect the sprouting of new branches; 2. Do not fertilize in high-temperature seasons, on the grounds that it easily burns the seedlings in high-temperature seasons; 3. Do not fertilize after the buds show color, on the grounds that it may cause the buds to burst or drop; 4. Do not fertilize during the blooming period, on the grounds that it will shorten the blooming period and cause flowers to drop; 5. Do not fertilize in winter, on the grounds that the plant does not absorb fertilizer applied in winter, so it is a waste. Below I will talk about my views on the above sayings:
1. Do not fertilize when new branches are sprouting, for fear of burning the roots and affecting the sprouting of new branches. May I ask: when new branches are sprouting, must the concentration of this fertilizer really be used to the point of burning the roots? Can it not be a bit lower in concentration and a bit smaller in amount? Or is it that you yourself are afraid you cannot control this concentration well and so do not dare to use it? If it is the latter, is it not absurd to conflate "not daring to use" with "not suitable to use" or "cannot use"? If this plant was originally short of fertilizer, should you also not use it when new branches are sprouting?
2. Do not fertilize in high-temperature seasons; it easily burns the seedlings in high-temperature seasons. That high temperatures make fertilizer easily burn seedlings is a huge misunderstanding. Under high-temperature conditions fertilizer transforms a bit faster and volatilizes easily, but it will not burn seedlings because of this. Whatever concentration you usually use, using the same concentration in a high-temperature season will likewise not burn seedlings. What is worth noting is that in high-temperature seasons the soil moisture of the pot must be well managed; do not let it become too dry. If you are afraid of burning the seedlings, the concentration can be lowered a bit.
3. Do not fertilize after the buds show color, on the grounds of fear of the buds bursting or dropping. Although the time I have spent with camellias is not very long, it is also not very short; not long and not short, exactly 20 years. I have seen quite a few of the various ailments and problems of camellias, and have even encountered things I could never have imagined even in dreams. Yet this "bud bursting" I have really never encountered. As for its cause, I do not dare to make a rash judgment; that it is related to fertilizing I for one do not dare to agree with. Because of this matter I once did destructive experiments for two consecutive years (the first year using chemical fertilizer, the second year using decomposed chicken manure) (using 2-3 times the usual amount right when flowering began), and as a result I did not find a single bud burst, and the flowers were both large and gorgeous. So I personally believe "bud bursting" should have another cause. If bud drop in camellias is caused by fertilizing, then it is definitely caused by fertilizer damage; after fertilizing, provided there is no fertilizer damage, the buds absolutely will not drop. If buds do drop, there is definitely another cause unrelated to fertilizing (there are many causes of bud drop: plants that are too weak, too many buds retained, long periods of rain and lack of light, frost damage, pest and disease damage, and so on can all cause bud drop.).
4. Do not fertilize during the blooming period, on the grounds that the blooming period will be shortened and flowers will drop. Will fertilizing during the blooming period cause flowers to drop? The reasoning is the same as point three; as long as no fertilizer damage is caused, the flowers absolutely will not drop. Here let me talk about "the blooming period will be shortened". Anyone with a bit of common knowledge should be clear that the length of the camellia blooming period should first of all be related to the characteristics of the variety; secondly, it is directly related to the good or bad weather and the high or low temperature at the time of blooming; the strength or weakness of the plant is also related; pests and diseases are also related to some degree. In any case, apart from the factor of fertilizer damage, based on my shallow understanding of camellias and fertilizers, at least for now I cannot find any basis in theory for the idea that fertilizing during the camellia blooming period shortens the blooming period.
5. Do not fertilize in winter; the plant does not absorb fertilizer applied in winter, so it is a waste. If you do not have a bit of professional knowledge, this question is really easy to be fooled by. If you know what kind of process fertilizer goes through from being applied to the soil to being absorbed by the plant, it is very clear. After fertilizer is applied to the soil, the vast majority is adsorbed and fixed by the soil and becomes poorly soluble fertilizer; only a very small part is absorbed by the plant. Some fertilizers cannot be absorbed directly by plants and need to be transformed before plants can absorb them. The release of the poorly soluble fertilizer after being fixed by the soil is, under the action of physical, chemical and microbial factors, extremely slowly weathered and decomposed and transformed into water-soluble fertilizer, and only then can plants absorb it. Strictly speaking, fertilizing in winter is not to directly let the plant "eat", but to prepare for the coming spring, temporarily storing it in the "warehouse" (the soil), so that when the temperature rises again next year the plant can "eat" the fertilizer at any time. As for saying fertilizing in winter is a waste, I really do not know what to say, so I can only say: friend, it is better to learn a bit of knowledge after all.
In short, there is no rigid rule for fertilizing camellias. You need to look at the plant's specific growth condition to decide what fertilizer to use, how much to use, and by what method to apply it.
At the request of flower enthusiasts, here I introduce a foolproof fertilizing method (suitable for beginners). Taking "potassium sulfate" type compound fertilizer as an example (not containing "biuret"), with a total nitrogen, phosphorus and potassium content within 45%, the fertilizing method is: apply as a solution. For toothpick-sized seedlings and 1-2 year seedlings, 0.2%; for medium seedlings and 3-4 year seedlings, 0.4%-0.5%; for large seedlings over 5 years, 0.7%-0.8%. How long the interval between waterings should be is hard to say here; it depends on the specific condition of the seedling and the potential fertility of the potting soil.
For the nitrogen, phosphorus and potassium formula, take nitrogen as the base of 1. During the vegetative growth period, 1-0.5-0.8; during the reproductive growth period, 0.8-0.6-1.2. If you have special requirements, you can adjust it yourself as you like.