What to Do When Iris Leaves Turn Yellow? Keep the Environment Ventilated and Control Watering
Iris is a highly ornamental plant, with flowers generally in blue tones, giving a fresh and elegant feeling, which is why it is loved by many people. However, no matter how high a plant's ornamental value is, yellowing will affect its overall beauty. As for what to do when iris leaves turn yellow? Let's take a look below.
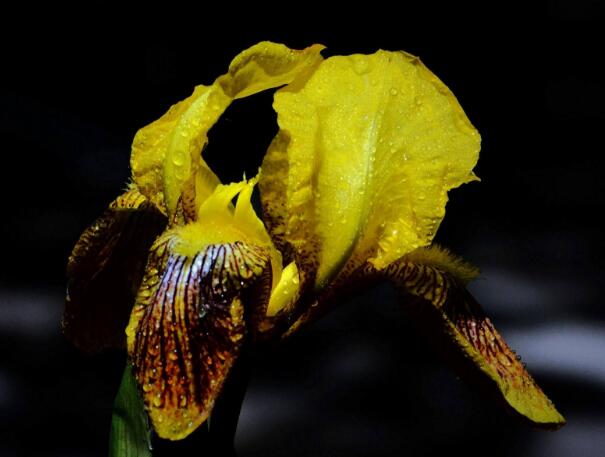
What to Do When Iris Leaves Turn Yellow / Keep the Environment Ventilated
If you want to know what to do when iris leaves turn yellow, you first need to understand what caused the situation. Only by finding the cause can you deal with it accordingly. Below are detailed explanations of the various causes of this problem and the solutions. Those interested can take a look.
1. Too Much Fertilizer
Although fertilizer is an important nutrient during the growth of iris, it should not be applied too frequently, otherwise it can easily cause soil compaction and lead to yellowing leaves. For the specific frequency of fertilization, you can refer to the article on iris cultivation methods. I won't go into too much detail here.
2. Improper Watering
In the process of growing plants, watering is an essential step, and iris is no exception. However, the amount of water still needs to be controlled. If you water too much or too little, it may cause the leaves to turn yellow. Generally, in spring and autumn when the temperature is suitable, we can choose to water once a week. In summer, when water evaporates faster, we can increase it to once every 3-4 days.
3. Long-Term Exposure to Strong Sunlight
Although iris is a plant that relatively likes light, it should not be exposed to strong sunlight for long periods. Especially in summer when the sunlight is too intense, long-term direct sunlight will cause iris leaves to turn yellow and dry up. At this time, we had best move it indoors to a semi-shaded spot for cultivation, so that it will not be exposed to strong sunlight and will not lack sunlight either.
4. Non-Ventilated Environment
When growing iris, it must not be placed in a dark and damp environment, as this can easily cause the leaves to turn yellow. It is best to grow it in a relatively ventilated environment, which is more conducive to its growth.
5. Pests and Diseases
During the cultivation of iris, if pests and diseases occur, they can also cause the leaves to turn yellow, so daily care must be careful. Of course, if pests and diseases have already appeared, we need to carry out prevention and control. For detailed methods, you can refer to the article on iris pest and disease control.
Iris Cultivation Methods: What Should You Do When Iris Leaves Turn Yellow?
Iris generally refers to plants of the Iris genus, a collective term for a group of herbaceous flowering plants. This flower consists of a sheath formed by 6 petal-like leaves, 3 or 6 stamens, and an ovary enclosed by the flower base. Other names: purple butterfly, blue butterfly, black iris, flat bamboo flower; distributed in Japan, central China, Siberia, France and almost the entire temperate world. It is the national flower of France. The name "iris" comes from Greek, meaning rainbow. It indicates that all the colors of the rainbow in the sky can be seen in the flower colors of this genus. Iris flowers have a delicate fragrance and can be used to make perfume. In our country, it is commonly used to symbolize love and friendship, a bright future, boundless prospects, and keen observation.
Iris Cultivation Methods
1. Soil Requirements
Iris grows poorly in acidic soil, so when cultivating iris, you should choose humus-rich clay loam, or alkaline soil mixed with lime. Before planting, the soil should be thoroughly plowed, and decomposed compost and a small amount of bone meal, plant ash, etc. should be applied as base fertilizer. In addition, iris should not be planted too deep, and the rhizome should be pressed firmly.
2. Light and Temperature
The optimal growth temperature for iris is 15-17°C, and it prefers a sunny and moist environment. However, if the light is too strong, appropriate shading should be provided. If the humidity is too high, the humidity can be reduced through heating and ventilation.
3. Watering
After planting iris, water it thoroughly once. After that, water according to the dry and wet condition of the soil. Generally, it is better for the soil to be slightly dry. Do not let the soil become waterlogged or stay too wet for a long time, so as to avoid root rot or disease. To keep the plant looking attractive, the leaves can be washed.
4. Fertilization
From spring sprouting and growth to before flowering, iris should be given 1-2 applications of decomposed dilute cake fertilizer water or compound flower fertilizer. After the flowers fade, it is best to apply liquid fertilizer once more.
5. Pest and Disease Control
The main disease that iris is prone to during cultivation is soft rot. If the plant is found to have soft rot, it should be dug up promptly, the rotten parts removed, and the planting location changed or the pot replaced for transplanting. The main pest of iris is the bean beetle. Control mainly involves manual capture of adults and poisoning of larvae.
Iris Propagation Methods
Planting Method
Before planting, the soil needs to be loosened and made slightly moist. Then, use your thumb to gently press each bulb until most of the bulb is submerged in the soil. This method is called the "finger-pressing method." The above series of operations is all to protect the bulb's root crown and germinating roots from damage. In greenhouses and open fields, if frost is expected before plant growth, it is best to plant the bulbs in a seedbed. After planting, cover the seedbed with soil until the bulb tips are just covered. This treatment is also suitable for warm climate conditions, to prevent the soil temperature at the bulb roots from exceeding 20°C.
Division Method
Division is carried out in early spring or late autumn. For open-field cultivation, first prepare the planting bed, and apply soybean cake fertilizer or barnyard manure as base fertilizer; first cut off dead branches and old roots, then divide the root base, keeping 2-3 buds per rhizome as one cluster, with 2-3 clusters as one plant, planting 9-15 plants per sq m, with the planting depth such that the bud-bearing rhizome base is not exposed. After planting, water thoroughly once, then frequently loosen the soil and weed. If growth is poor, apply top dressing 2-3 times. After flowering, cut off the flower stems to save nutrients; after winter begins, the dead leaves must be cut off. The potted method is the same, but in winter it should be moved for overwintering, with no special heating required.
The Effects and Functions of Iris
1. German Iris Can Be Used for Ornamental Viewing
The flowering period of German iris is from May to June each year. The flowers are large and come in many colors, with the most common being purple, light purple and bright purple, among others, and they also have an attractive fragrance. German iris has high ornamental value. It can not only be planted in gardens and scenic areas for people to enjoy, but can also be made into potted plants for display at home.
2. German Iris Can Be Made into Cut Flowers
The flower stems of German iris are very long, mostly between 60 and 90 cm. When its flowers are open, they can be cut to make cut flowers. Whether given to friends or placed in a vase, it is a good choice. It can regulate people's emotions and reduce the occurrence of depression.
3. The Medicinal Effects of German Iris
The rhizome of German iris can be used as medicine. It can be harvested throughout the year. After removing the fibrous roots, it is sliced and dried for later use. Anti-inflammatory action is the main effect of German iris after being used as medicine, because the root of German iris contains a large amount of flavonoid glycosides, which are natural anti-inflammatory substances. After entering the human body, they eliminate various bacteria and can be used to treat sore throat, rheumatic pain and malaria, among other diseases.
What Causes Iris Leaves to Turn Yellow? How Should It Be Solved?
1. Excessive Light
Iris prefers a semi-shaded growing environment, so it is often cultivated in greenhouses. If cultivated outdoors, attention should also be paid to the light issue for iris. If the sunlight is too strong, the leaves of iris will turn yellow. Solution: When cultivating iris outdoors, the main issue to address is shading. When the sunlight is too strong, it is best to move it to a place that can provide sufficient sunlight but is not too intense.
2. Overwatering
Iris is not tolerant of waterlogging, so do not water too frequently or too much. Soil waterlogging or long-term excessive moisture can cause iris leaves to turn yellow or lead to disease. Solution: During the growing season, water iris once a week. As the temperature drops, gradually reduce the amount of watering. Generally, it is better for the soil to be slightly on the dry side.
3. Too Little Watering
Overwatering iris can cause root rot and make the leaves turn yellow, but the growth of iris still requires sufficient water. If watering is insufficient, the iris soil will become too dry, which is unfavorable for the growth of iris and causes the leaves to turn yellow and dry up. Solution: During the growth period of iris, attention should be paid to watering and keeping the potting soil moist.
4. Too Much Fertilizer
When iris is over-fertilized, fertilizer damage can occur, damaging the root system and causing the leaves to turn yellow. Solution: Before planting iris, base fertilizer can be applied. Fertilize once every autumn. During the growing period, chemical fertilizer can be applied as top dressing, but not excessively.
Yellowing iris leaves are mainly caused by the three major issues of light, watering and fertilization. Pay attention to care in normal times, so that in the flowering season we can see blue-purple butterflies dancing among the green foliage, rather than blue-purple butterflies darting around in a pile of yellowing leaves.
Gardenia Cultivation Methods: Revealing Why Gardenia Leaves Turn Yellow and Why It Does Not Bloom
Among flowers, gardenia is undoubtedly one of the more familiar ones. People very much like to grow it at home, but many people areGardenia Cultivation Methodsnot very familiar with it, resulting in many problems during cultivation, such as yellowing leaves and failure to bloom. Today, I will introduce to everyoneGardenia Cultivation MethodsandWhy Gardenia Leaves Turn Yellow and It Does Not Bloomthe reasons.
(Gardeniaplanted in the courtyard, with a strong ornamental effect)
Gardenia grows the same all year round, with evergreen leaves. When it blooms, it is fragrant and elegant, and the white flowers appear white, looking especially fresh and beautiful, very lovable. It is often used by people for potted cultivation in courtyards, balconies and other places. It has strong environmental adaptability and can grow well in these places. It has strong decorative and ornamental effects. Below, I will discuss the various characteristics of gardenia in relation togardenia cultivation methodsand explain them.
First, Acidic Soil CultivationGardenia needs scattered light, so it likes acidic soil. If the soil is alkaline, gardenia will not be able to absorb iron well, which will greatly affect the formation of chlorophyll and further cause the flower branches to wither or even die; therefore, its soil must be loose, fertile acidic soil, and some substances with this effect can also be added to it.
(Gardeniahas a very good decorative effect)
Second, Place in a Shaded AreaGardenia must never be placed under scorching sun to bake, otherwise the leaves will turn yellow and withered. However, this does not mean placing it in full shade, because it still has a certain demand for light. It is best to place it where 60% light is maintained daily. In addition, after entering April, fertilize twice a month.
Third, Air HumidityGardenia likes moisture, so the air must not be too dry. According to expert statistics, if the air humidity is lower than 70%, it will affect the normal opening of the flowers. But if it is too wet, it will cause root and stem rot and yellowing leaves. So in addition to normal watering, clean water should also be sprayed nearby frequently. Another issue to pay great attention to is that water should not be poured too much, otherwise it will also affect growth. So how should gardenia be watered?
a. When you see the soil is dry, tap the flowerpot with your hand. If there is a hollow sound, it needs watering. Stop when water begins to leak from the bottom of the pot. It is best if some egg or soybean milk can be added to the water, as this is more conducive to growth.
(Bloominggardenia, a different kind of beauty)
Fourth, Key Points for FertilizationGardenia likes fertilizer, but too much fertilizer must not be added at one time. Be sure to apply thin fertilizer frequently. Never cut corners for convenience, otherwise the branches will become thick, the leaves large and dark green, and it will lose its own ornamental effect.
Fifth, Temperature RequirementsThe growth temperature of gardenia must not be too low, because it likes warmth. Generally speaking, the temperature during the growing season is best at 18 to 22°C, and 5 to 10°C in winter. If it is below minus 10°C, it will suffer frost damage. The north should pay special attention to this.
Sixth, Proper PruningGardenia very easily grows luxuriant branches and leaves, creating a feeling of being impenetrably dense and chaotic. This causes nutrients to be dispersed and worsens its ornamental quality, so it needs to be pruned. When pruning, it is best to retain 3 main branches, and at any time cut off new shoots sprouting from root suckers. After the flowers fade, the branches should be cut short in time, so that new branches will sprout below the cut. When the new branches grow three nodes, pinch off the tips to prevent blind growth.
(Placegardeniain a sunny spot)
Seventh, Disease PreventionGenerally, there are four diseases of gardenia that we see:
a. Iron deficiency, which is the most common one. Iron deficiency affects the formation of chlorophyll and then causes the leaves to lose their green color. At this time, ferrous sulfate water and low-concentration black alum water can be used, three times a month.
b. Magnesium deficiency, which causes the veins of the lower old leaves of gardenia to turn yellow. At this time, a low-concentration magnesium sulfate solution needs to be sprayed.
c. Soil too wet or too dry, which can be referred to in point three.
d. Scorching sun exposure, which can be referred to in point two.
Eighth, Propagation MethodsGardenia generally has two propagation methods: cuttings and layering.
a. Cuttings: In the plum rain season, use 15 cm long tender branches and insert them into a seedbed. They root in 10-12 days.
b. In April, select two-year-old branches, 20-25 cm long, press and bury them in soil, keep moist, and they root in about 30 days. Separate them from the mother plant in summer, and divide and plant them the following spring.
Causes of Gardenia Leaves Turning Yellow
First, Improper Watering
a. Overwatering: In this case, the young leaves of gardenia are dull yellow and lack luster, but the old leaves show no obvious change. At this time, just take the flower out of the pot and place it in a ventilated and cool place, and put it back after the soil dries.
b. Lack of water: The leaf tips or edges become withered and dry, and the old leaves turn yellow, dry and fall off from bottom to top, but in this case the new leaves grow relatively normally. At this time, water thoroughly and sufficiently.
(Gardenialeaves turning yellow, there are many reasons)
Second, Improper Light
a. Excessive light: Yellow spots appear on the sun-facing part of the leaves. At this time, it only needs to be moved to a shaded place for care and it will recover, and the newly grown leaves will no longer have yellow spots.
B. Insufficient sunlight: At this time, the leaves will turn yellow or even fall off. Just place it under the sun to supplement sunlight.
Third, Improper Fertilization
a. Over-fertilization: This mainly shows as brown tips on the new leaves, thick and lusterless leaf surfaces, and the old leaves becoming scorched yellow and falling off. At this time, fertilization must be stopped immediately, and in severe cases the soil should also be flushed to reduce the concentration. b. Insufficient fertilizer: Insufficient fertilizer can also cause the plant to turn yellow. For example, with iron deficiency, the leaves are pale yellow or white while the veins remain green. At this time, spray 0.2%-0.5% ferrous sulfate water for prevention and control; with magnesium deficiency, the old leaves turn yellow first, then the new leaves turn yellow, while the veins remain green. At this time, spray 0.7%-0.8% boron-magnesium fertilizer for prevention and control.
Fourth, Temperature Too LowToo low a temperature can also cause leaf yellowing. Just move it to a warmer place.
Reasons Why Gardenia Does Not Bloom
First, Improper Water and FertilizerOnce water and fertilizer are excessive, it will cause the plant to grow excessively. Without enough nutrients for reproductive growth, flower bud formation will be affected, leading to no flowering or very little flowering. Some may bloom but then immediately fall off. During the flower bud differentiation stage, special attention should be paid to the combination of phosphorus and potassium fertilizers, such as 0.2% potassium dihydrogen phosphate solution, which is beneficial to flower bud formation and bud development; if fertilization is too concentrated during the bud stage and watering is suddenly more or suddenly less, it will also cause flowers and buds to drop.
(Gardenianever blooming, pay attention)
Second, Unsuitable LightGardenia likes shade. Special attention should be paid to excessively strong light in summer and excessively weak light in winter. Too strong or too weak light will affect gardenia blooming.
Third, Soil with High AlkalinityGardenia likes acidic soil. If the soil used for cultivating gardenia has high salt and alkali content, it will cause the plant to become chlorotic and ultimately affect flowering.
Fourth, Failure to Prune and ShapeGardenia branches are messy. A large number of miscellaneous branches consume a large amount of nutrients, and branches that are too dense affect photosynthesis. Both are important reasons for failure to bloom.
Fifth, Severe Pests and DiseasesI believe everyone can understand this. Severe pests and diseases will inevitably cause flowers and buds to drop.
MethodHow to grow narcissus Recommended cultivation methods for narcissus
More plants:
[Peace Lily] [Dieffenbachia] [Lucky Bamboo] [Japanese Aralia] [Nandina] [Ivy] [Epiphyllum]
[Spider Plant] [Winter Jasmine] [Cymbidium Orchid] [Aglaia] [Crinum Lily] [Magnolia] [Peace Lily] [Anthurium]
[Bird of Paradise] [Hydrangea] [Dahlia] [Cineraria] [Clematis] [Lantana] [Pansy] [Daphne]
[Tulip] [Night-blooming Jasmine] [Tuberose] [Hibiscus] [Kalanchoe] [Gerbera] [Mimosa] [Campanula]
[Water Lily] [Oriental Lily] [Hydrangea] [Red Maple] [Japanese Maple] [Salvia] [Iris]