What to Do When a Clivia's Flower Stalk Gets Stuck? Causes and Solutions
"Stuck arrow" in clivia (Clivia miniata) means the flower scape is trapped in the gap between the leaves and cannot emerge. The main causes of a stuck arrow are as follows:
Unsuitable temperature The optimum growing temperature for clivia is 15 to 25°C; below 15°C, growth becomes poor. Especially before the scape emerges, if the temperature does not reach above 15°C, the flower scape will find it hard to push out. Before a clivia blooms, you should regularly check whether the bulb of the potted plant shows a bulge. Once you spot one, it means the arrow may be about to shoot, and you should adjust the temperature promptly to help the flower scape emerge.
Insufficient day-night temperature difference By nature, clivia likes a large difference between day and night temperatures. If the difference is small, the scape has difficulty emerging. After flower bud differentiation and before the arrow shoots, the temperature should be kept at around 10°C; then the arrow emerges more easily, otherwise a stuck arrow occurs.
How to Grow Clivia:http://hua.fengqiaoju.com/huahui-jiaoliu/junzilanyangzhi/
Kingdom: Plantae
Division: Magnoliophyta
Class: Liliopsida
Order: Liliales
Family: Amaryllidaceae
Genus: Clivia
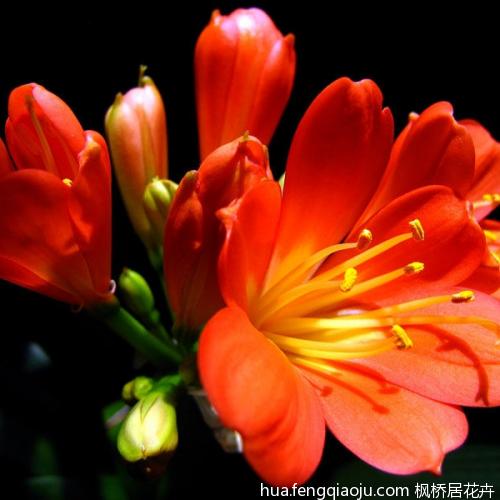
Clivia is a perennial herbaceous plant of the genus Clivia in the Amaryllidaceae family. Its elegant and handsome form has the grace of a gentleman, and its flowers resemble orchids, which is how it got its name. The roots are fleshy and fibrous; the leaf bases form a false bulb; the leaves are sword-shaped, up to 45 cm long, arranged alternately, with entire margins. The umbel inflorescence is terminal, with 7 to 30 florets per inflorescence, and sometimes more than 40. The florets are stalked, arranged in an umbel at the top of the flower, funnel-shaped, upright, yellow or orange-yellow. It can bloom year-round, mainly in spring and summer. The fruit ripens around October. Both flowers and leaves are beautiful. Attractive and dignified, and tolerant of shade, it is suitable as a potted plant for indoor display, for foliage and flowers, and is also an ideal potted flower for decorating venues and hotel interiors. It also has air-purifying effects and medicinal value.
Many friends enjoy growing clivia, but know relatively little about where it comes from. Now, let us introduce the origins of clivia. The following article is translated from the South African Clivia Society.
In September 1815, the intrepid natural scientist William Burchell scientifically collected clivia for the first time at the source of the Great Fish River in the Eastern Cape Province of South Africa. Then, around 1820, James Bowie collected some clivia at the same location and shipped them to England. In 1828, John Lindley named it CLIVIA in honor of Charlotte Florentine Clive, Duchess of Northumberland, England.
Clivia belongs to the Amaryllidaceae; Haemantheae.
At present, there are altogether five types of clivia, namely: the nodding clivia, the large-flowered clivia, the narrow-leaved clivia, the stemmed clivia, and the miraculous clivia. In addition, there is another unique clivia, the swamp clivia, which was recently discovered in KwaZulu-Natal. The leaves of the large-flowered clivia are generally no more than 50 mm wide, and rarely reach 90 mm.
At present, five species of clivia have been discovered, respectively called the nodding clivia (Nobilis), the large-flowered clivia (miniata), the narrow-leaved clivia, also translated as the garden clivia (gardenii), the stemmed clivia (caulescens), and the miraculous clivia (mirabibis). In addition, a species called the swamp clivia (Robust or swamp) was recently discovered in southern Natal. In other words, only the above six kinds of clivia are currently recognized by the South African Clivia Society.
Among them, all Chinese clivia belong to the large-flowered clivia of the genus Clivia, and their flower colors are mainly red and orange. In contrast to the floral art of other countries, Chinese clivia is mainly valued for its foliage. Classified by flower line and strain, Chinese clivia belongs to the red and orange flower lines of the large-flowered clivia category in the genus Clivia.
The first type: C. Nobilis, the nodding clivia
The leaves of the nodding clivia are very hard and rough, ribbon-like, about 300-800 mm long and 25-50 mm wide. The leaf tips are very blunt. Its inflorescence generally has 20-60 florets, nodding in form. The flowers are mostly dark orange, with green petal tips. But there are also flowers in colors between pinkish-yellow and dark red. Its fruit generally contains 1-2 seeds, and the fruit skin is red; the red fruit takes 9 months to ripen. Seedlings grown from seed have very slender leaves, about 1.5 mm thick.
The nodding clivia has a very long growth period. From a single seed to flowering takes 8 to 10 years, or even longer. Given the characteristics of its flowers, it is very easily confused with the garden clivia. Precisely because its growth cycle is so long, one may boldly surmise that the "nodding clivia" once popular in China may actually have been the garden clivia.
The second type: C. miniata, the large-flowered clivia
In its native range, the leaves of the large-flowered clivia are generally no more than 50 mm wide, and rarely reach 90 mm. Flower shapes include narrow-petaled and wide-petaled forms, like a trumpet. The inner petals are generally wider than the outer petals. The flower color is generally orange, with a yellow-white inner core. Of course, there are also flowers in colors between the yellow-white line and the dark red line. Flowers of very pale and very deep colors are relatively rare. At blooming, a single bud generally holds around 20 flowers, and sometimes as many as 40. The berry contains 1-20 seeds, generally fewer than 10.
The third type: gardenii, the garden clivia (also called the narrow-leaved clivia)
The garden clivia plant generally reaches 80-130 mm in height. Its leaves are bright green, 350-900 mm long and 25-60 mm wide, very narrow and long, with pointed tips. The flowering period is long, from late autumn to winter. The flower color is generally orange-red, with very obvious green at the petal tips. There are also other colors between yellow and red. The flowers hang in an arc, not drooping as heavily as those of the stemmed clivia and the nodding clivia. Each berry contains 1-2 seeds. The fruit takes 12-15 months to ripen!
The fourth type: caulescens, the stemmed clivia
The stemmed clivia ranges in height from 500 to 1500 mm. Mature plants have an above-ground stem reaching 1 m in length, and in special cases as long as 3 m. The soft, flat, pointed leaves are arching, about 35-70 mm wide and 30-60 cm long. It generally blooms in spring and summer. The flowers droop like those of the nodding clivia, and the flower color is orange-red with green petal tips. The round red berries contain 1-4 seeds, and the berries are 9-13 mm in diameter. The seeds generally mature in winter, with a ripening period of 6 months after pollination.
The fifth type: MIRABILIS, the miraculous clivia
Recently, a new clivia species was discovered in the Northern Cape Province of South Africa. Its name is the miraculous clivia.
The miraculous clivia grows in humus in crevices on rocky mountain slopes. They either grow alone or in groups, and these places are often covered by sparse evergreen forest of African coralwood. Some miraculous clivias also grow in the sun, but these plants often have leaf tips scorched by sunlight and appear short of water. In the morning, the vast majority of miraculous clivias are on the shady side of the cliff, and after that, until sunset, they can get sunlight. The areas where the miraculous clivia grows generally have a semi-arid Mediterranean-type climate, and often experience a rainy period in winter.
The leaves of the miraculous clivia all have a white stripe in the center, which distinguishes it from other clivia varieties. Moreover, its seeds need only 5 months to mature, unlike other clivia varieties. For example, the seeds of the large-flowered clivia need a 12-month ripening period, the seeds of the narrow-leaved clivia need 15 months, and the stemmed clivia and nodding clivia need about 9 months.
The miraculous clivia is a newly discovered species, and its identity was only formally confirmed in February 2001. This clivia is still in a specially protected natural area, and apart from the Oorlogskloof Nature Reserve, no other place has been found to have communities of the miraculous clivia. Therefore, the number of cultivated miraculous clivias remains very small. When growing the miraculous clivia, note that it likes humus-rich soil and a semi-shaded environment. Given its preference for semi-arid conditions, it should be given a fairly dry environment in summer.
The sixth type: Clivia Robust (swamp), the swamp clivia
The swamp clivia was only formally confirmed as a species in 2004. Like other clivias, this clivia is a native plant of South Africa. It tends to grow in sandy, acidic soil. According to the relevant introductory articles, this clivia is "commonly found in forested coverage areas, which are often located in or near swamp areas. Some communities also grow on riverbanks or beneath cliffs, places that are often rich in humus soil. In swamp areas, the swamp clivia appears in large communities, and some plants, supported by their root systems, can reach 1.8 m tall, while in relatively dry areas the plants are noticeably shorter and stouter."
The swamp clivia is the largest kind of clivia, able to grow to 1.8 m tall, and in swamp areas, a very few root systems can reach as long as 4.5 m! The leaves of the swamp clivia are flexible and have smooth edges. Their leaf tips are rounded, and there is a pale white stripe in the center of the leaf. The leaves are generally 30-120 cm long and 3-9 cm wide, and the leaf bases are generally unpigmented.
The swamp clivia generally blooms from March to August (the autumn and winter seasons in South Africa). The inflorescence generally has 15-40 small orange-red, drooping, tube-shaped florets with green petal tips. The pedicels range from red to green. Its fruit is spherical and red, generally containing no more than 4 seeds, and the fruit takes 12 months to ripen.
It belongs to the genus Clivia in the Amaryllidaceae family. It is a perennial herbaceous flower with thick, fleshy roots, and the stem is divided into a rhizome and a false bulb. The leaves are sword-shaped, alternate, and neatly arranged, 30-50 cm long. The cyme can bear 10-60 small flowers. It blooms in winter and spring, especially in winter. Individual small flowers can stay open for 15-20 days, opening in successive waves, and can last 2-3 months. Each fruit contains from one to many seeds.
Clivia is native to southern Africa and grows beneath large trees, so it fears heat and cannot tolerate cold. It likes a semi-shaded and humid environment and fears strong direct sunlight. The best temperature for growth is between 18 and 22; below 5°C or above 30°C, growth is inhibited. Clivia likes a ventilated environment and prefers deep, fertile, loose soil, and is suitable for indoor cultivation.
Clivia is a famous greenhouse flower. In China there are two species introduced from Europe and Japan. The former has small, drooping flowers and is called the nodding clivia; the latter has large, upward-facing flowers and is called the large-flowered clivia, which is currently the most commonly cultivated species.
The flowers of clivia are not as magnificent as peonies, nor as richly fragrant as jasmine, and certainly not as gorgeously varied as Chinese roses. But its leaves are verdant and glossy, and its upward-facing flowers resemble torches, with orange-red petals, dignified and elegant. It is an ideal potted flower for beautifying the environment. The nodding clivia has drooping flowers, restrained and profound, elegant and solemn, with a charm all its own.
The leaves of clivia are broad and strap-shaped, hard and thick in texture, with a gloss and veining. The leaves emerge in two ranks overlapping from the shortened stem at the base. With proper management, the leaves are neatly arranged and even more beautiful. The flower scape emerges from the leaf axils, and it generally blooms only when it has 20-25 leaves. The full blooming period runs from New Year's Day to the Spring Festival, and some also bloom in summer, between June and July. After flowering it can set a small number of seeds, requiring artificial pollination, and the seeds take 240-270 days to mature.
The roots of clivia are milky white, very thick and strong, and quite fleshy. The roots and leaves have a certain correlation: when new roots and leaves grow, new leaves emerge along with them; if the roots are injured or die, the corresponding leaves will also wither; if the leaves are damaged, the roots will likewise be affected.
Clivia is native to the tropics. It likes semi-shade, with 10 to 25 degrees being the most suitable temperature, and it is suited to growing in loose, fertile, slightly acidic organic soil.
In China, clivia is currently mainly propagated by sowing, which has given rise to a wide variety of cultivars. Clivia is relatively easy to cultivate. First, choose a good potting soil, and it can be placed indoors near a window, with watering and fertilizing adjusted according to the temperature characteristics of each region. During the growing season, the potting soil must be kept moist; during the high-temperature semi-dormant period, the potting soil should be on the dry side, and the leaves should be sprayed with water frequently to lower the temperature. Clivia likes fertilizer; repot once every 2 to 3 years in spring or autumn, adding decomposed cake fertilizer to the potting soil. Each year before the growing season, apply 5 to 40 grams of decomposed cake fertilizer beneath the surface of the potting soil, and during the growing season apply liquid fertilizer once every 10 to 15 days. During care, turn the pot frequently to prevent the leaves from leaning to one side; if they do lean, straighten them promptly. When the temperature is 25 to 30 degrees, the leaves tend to grow leggy, becoming narrow and long and spoiling the ornamental effect, so when growing clivia you must be sure to regulate the room temperature.
Clivia Cultivation Techniques
(1) Propagation:
Mainly by division and by sowing.
How is clivia propagated sexually?
Clivia generally uses only two propagation methods: one is sexual propagation, that is, propagation by sowing; the other is division propagation, which is a form of asexual propagation. The large-flowered clivia is relatively commonly propagated by sowing. The advantage of this propagation method is that it allows mass propagation to meet the needs of many flower growers. But to propagate by sowing, you must first carry out artificial pollination, and it is best to pollinate between different plants, because cross-pollination between different plants gives a high seed-setting rate; a robust plant can generally set ten seeds after cross-propagation between different plants, while self-pollination on the same plant can set only a few seeds.
The pollination method is: when the perianth has split open for 2-3 days, the bud is mature, and the stigma secretes a sticky fluid, that is the time to pollinate. When pollinating, use a new writing brush to dip up the pollen from the stamens and gently shake it onto the stigma of the pistil. To increase the seed-setting rate, you can pollinate once each between 9-10 a.m. and 2-3 p.m. The seeds only mature after about 8-9 months. When the fruit skin gradually turns from green to black-purple, you can cut off the fruit cluster, and after 10-20 days extract the seeds. Before sowing, soak the seeds in warm water at 30-35°C for 20-30 minutes, then take them out and air-dry them for 1-2 hours (at this point, it is even better if you can soak them in a 10% sodium phosphate solution for 20-30 minutes, take them out, wash them, and then soak them in clean water for 10-15 hours), and then sow them into the growing medium. Place the sowing pot in an environment at room temperature of 20-25°C, keep the humidity at around 90%, and in about 1-2 weeks the radicle will sprout.
To carry out propagation by sowing, another task you must do well is to prepare the growing medium in advance. Many materials can be used to make the growing medium, but one that is relatively easy to obtain is loose soil taken from the surface layer of woodland with ample humus, mixed with 1/3 clean fine sandy soil.
Clivia likes slightly acidic soil, with a pH of 6-6.5 being suitable. The timing for propagating clivia by sowing is not strict; it can be sown in spring, autumn, and winter. But temperature is an important condition; it is best to sow under temperature conditions of 20-25°C, which meets the temperature requirements for sprouting the embryo.
How is clivia propagated asexually?
Asexual propagation of flowers includes cuttings, division, layering, grafting, and other methods, but clivia's asexual propagation generally uses only the division method, and the nodding clivia uses this method even more commonly.
To propagate by division, you first need to do a few preparatory tasks: (1) For home pot growing, prepare a flower pot. It is best to use a clay pot; do not buy porcelain or ceramic ones just for the sake of a pretty surface, because they have poor breathability and are not conducive to the plant's development and growth. (2) Prepare the medium soil, and it is best to disinfect it. If using humus soil mixed with fine sand, the humus soil should be sprayed and disinfected with a 1000-2000 times aqueous solution of potassium permanganate; the fine river sand should also be scalded and disinfected with boiling water to prevent the seedlings from being infected by pathogens and rotting. (3) Prepare a little charcoal powder to smear on the wounds to absorb moisture and prevent rot. (4) Sharpen the cutting knife, and finally give it several dozen quick dry strokes (without water) on the whetstone to make the blade very hot, so as to kill pathogens.
When dividing, first take the mother clivia plant out of the pot, remove the old soil, and find the axillary buds that can be divided. If the offset grows on the outer edge of the mother plant and is relatively small, you can hold the bulb with one hand and pinch the base of the offset with the other, give it a twist and tear, and the offset can be torn away from the mother plant; if the offset is thick and strong and not easy to tear off, you should cut it off with the prepared sharp knife. Never force it off, lest you damage the young plant. After the offset is cut off, immediately smear the wound with dry charcoal powder to absorb the flowing sap and prevent rot. Next, plant the offset in a pot. When planting, the planting depth should be just enough to bury the false bulb at the base of the offset; the part near the seedling should be made slightly higher, and cover with disinfected sandy soil. After planting, immediately water thoroughly once, and when the wound has healed after 2 weeks, add another layer of growing medium. Generally it takes 1-2 months to produce new roots and 1-2 years to bloom. Clivia propagated by division has relatively stable heredity and can maintain the various characteristics of the original species.
(2) Cultivation
(1) Soil:
Clivia is suited to soil rich in humus. This kind of soil has good breathability, good water permeability, and is fertile and slightly acidic (pH 6.5). Mixing about 20% sand grains into the humus soil is beneficial for root growth. When cultivating, use pots that gradually increase in size as the plant grows. For one-year-old seedlings, a 3-inch pot is suitable. In the second year, switch to a 5-inch pot, and thereafter repot into a pot one size larger every 1-2 years; repotting can be done in spring and autumn.
(2) Watering:
Clivia has relatively well-developed fleshy roots, and the roots store a certain amount of water, so this flower is relatively drought-tolerant. However, even drought-tolerant flowers must not be seriously short of water, especially in summer when high temperatures combine with dry air; do not forget to water in time, otherwise the roots and leaves of the flower will be damaged, causing new leaves to fail to sprout and the original leaves to scorch, which not only affects flowering but may even cause the plant to die. But watering too much will cause root rot. So you must master it well, always pay attention to the wetness or dryness of the potting soil, and water once as soon as it becomes half dry, but the amount should not be too much; keeping the potting soil moist but not soggy is just right.
So, exactly how often is it best to water? Under general conditions, water once a day in spring; in summer, use a fine watering can to water the leaf surfaces and the surrounding ground together, and on sunny days water twice a day; in autumn, water once every other day; in winter, water once every other day; in winter, water once a week or less. But you must note that this refers to "general conditions." You must be flexible according to various specific situations. For example, water more on sunny days; water less on cloudy days, and during consecutive cloudy days water once every few days; do not water on rainy days. When the temperature is high and the air is dry, water several times a day; for a large flower pot, because the soil holds a lot of water and does not dry out easily, you can water less; for a small flower pot, water evaporates easily, so you should water more as appropriate. If the flower pot is placed in a well-ventilated place where evaporation is easy, it is appropriate to water more; in a place with poor ventilation, slow evaporation, and high air humidity, you should water less. During the seedling stage you can water less; during the flowering stage you need to water more. In short, it depends on the specific situation, with the principle of keeping the potting soil soft and moist, neither too dry nor too damp.
If conditions permit, magnetized water is of course best; next is rainwater, snow water, or running water from rivers; next is pond water; the worst is tap water. Flower growers living in large cities have only tap water available, so you can use a small water vat or basin or bucket, put the tap water in it, and water after 2-3 days. This allows some harmful impurities in the water to settle. In addition, it allows the substances contained in the water to be oxidized and purified, and can bring the water temperature close to the moisture of the potting soil, so it will not be too cold or too hot and harm the plant.
(3) Fertilizing:
Many flowers like fertilizer, but even for fertilizer-loving flowers, fertilizing must have a limit. Too much fertilizer is not good for growth and may even cause the plant's roots to rot or scorch. Clivia also belongs to this category of plants, and fertilizer must be applied in the right amount.
Flowers have different nutrient requirements at different stages of growth and development. Therefore, different fertilizing methods suited to the plant's needs should be adopted at each period. Such as applying base fertilizer, top dressing, and foliar feeding.
(1) Applying base fertilizer (also called basal fertilizer). The purpose is to create conditions for the plant's growth and development and to meet its nutrient needs. Base fertilizer for clivia should be applied when repotting, which is done once every 2 years. Apply into the soil the commonly used barnyard manure (that is, poultry and livestock manure), compost, green manure, soybean cake fertilizer, and so on.
(2) Top dressing. This mainly promotes the plant's growth. Clivia can be given fertilizers such as cake fertilizer, fish meal, and bone meal. Apply less to newly planted plants, and later, as the plant grows larger and the leaves increase, gradually increase the amount of fertilizer. When fertilizing, scrape open the potting soil and apply it into the soil at a depth of 2-3 cm, but note that the fertilizer applied should not be too close to the root system, lest it burn the roots. Applying this kind of solid fertilizer once a month is generally enough; it should not be more frequent.
(3) Applying liquid top dressing. Liquid top dressing is made by mixing the soaked and composted decomposed supernatant liquid of animals and plants with 30-40 parts clean water and pouring it onto the potting soil. For small seedlings, it is suitable to mix with 40 times water; for medium seedlings, 30 times water; for large seedlings, only 20 times water. After applying the fertilizer liquid, 1-2 days later you should follow with a watering of clean water (the amount should not be large), so that the fertilizer seeps into the root system in the potting soil and gives full play to its effect. Do not water 1-2 days before applying the liquid fertilizer; let the potting soil become relatively dry before fertilizing with the liquid, which is more effective. The best time to fertilize is early morning; when pouring, let the fertilizer liquid flow in along the edge of the pot, and be careful to avoid applying it on the plant and leaves.
In addition, the type of fertilizer should also vary with the season. For example, in spring and winter it is suitable to apply some phosphorus and potassium fertilizers, such as fish meal, bone meal, and hemp cake, which help leaf vein formation and improve the glossiness of the leaves; while in autumn it is suitable to apply the leachate of decomposed animal hair, horns, hooves, or soybean cake, diluted with 30-40 times clean water before pouring, to promote leaf growth.
(4) Foliar feeding. Fertilizing by this method is mainly to make up for the deficiency of nutrients in the soil, to solve the problem of nutrient deficiency within the plant, so that seedlings grow fast and flowers and fruits grow plump. Foliar feeding is spraying the diluted fertilizer solution directly onto the plant's leaf surfaces with a mist sprayer, so that nutrient elements seep through the leaf epidermal cells and stomata into the leaf tissues and are then transported throughout the plant. Commonly used fertilizer types include urea, monopotassium phosphate, and superphosphate. When spraying, spray evenly on both the front and back of the leaves. During the growing season, spray once every 4-6 days; during semi-dormancy, once every 2 weeks. Generally spray after sunrise, and stop spraying once the plant blooms. You must note that this method can only be used when the plant is found to be short of fertilizer. If the plant has sufficient nutrients and is growing vigorously, it should not be used.
Winter Management Techniques for Clivia
Keeping warm: The suitable temperature for clivia in winter is 15°C-20°C, and it is best not to let it fall below 10°C. Spray with "Hushu Jiangjun" to keep warm and prevent freezing.
Regulating light: Although clivia likes a semi-shaded environment, in winter the longer the sunlight the better. When blooming, strong light will shorten the flowering period, while weak light can prolong it; spraying "Huaduo Zhuangdiling" can also prolong the flowering period.
It can regulate the amount of water absorbed.
Watch for pests: The common pest of clivia is the scale insect. When an infestation occurs, scale insects often gather on the tender tips of the leaves, sucking the leaf sap and secreting large amounts of pathogens, turning the stems and leaves moldy black, causing sooty mold, and making the leaves wither. This insect has strong reproductive capacity and can produce multiple generations a year; a single female adult can often produce hundreds of offspring. If control measures are not taken in time, it can cause death.
Control method: Prevention should be the main approach. Ordinarily, always check the plant body frequently, and when pests are found, remove and treat them early to prevent spread. To control scale insects, manual and chemical methods can be used together. If pests are found on only 1 or 2 leaf tips, you can scrape them off manually, using a sharpened thin wooden stick or a bamboo pick to remove the insects. If large numbers of nymphs appear, you can spray and kill them with a 1000 times solution of 25% phosmet emulsion, or spray with a solution made from 40% omethoate emulsifiable concentrate plus 1000-1500 times water. Generally 1-2 sprays can kill them.
In addition, note also that: earthworms can also become a pest of clivia. When the clivia plant is young, its fleshy roots are very tender and weak. If there are earthworms in the potting soil, they often burrow around everywhere, injuring the tender roots, destroying the clivia's function of absorbing nutrients, and causing the plant to stop growing and developing or causing root rot. The control method is: always check whether there are round soil pellets (that is, earthworm excrement) on the surface of the potting soil. If found, you can immediately use a solution made from 50% dichlorvos emulsifiable concentrate plus 1500-2000 times water to drench. If earthworms are seen burrowing after the drench, remove them at once; after a week, do the same again, and the earthworms can be completely eliminated. Seasonal management key points: Clivia is native to South Africa and is a perennial evergreen herbaceous flower. It likes a warm, cool climate and fears high heat and severe cold. It goes dormant in summer and grows in autumn and winter. Therefore, strengthening winter management is the key to cultivation. Its key points are as follows:
1. Fertilizing: In winter, clivia has the fastest vegetative growth rate and needs the most nutrients, so applying good winter fertilizer is very important. Before bringing the flower pot indoors, use bone meal, fried sesame, cooked soybeans, etc., or a compound fertilizer, and apply once every 15 to 20 days mixed with water; you can also drench the roots with the soaking liquid of animal and plant residues. Make sure the fertilizer is decomposed and applied diluted, to prevent concentrated fertilizer from causing harm.
2. Watering: Clivia has fleshy roots and likes air but fears waterlogging. In addition, clivia leaves have a waxy layer, and in winter the temperature is low, so transpiration and evaporation of water are low. Therefore, do not water too much; just water in conjunction with fertilizing and keep the potting soil moist. Never flood-irrigate, which causes root rot and dead seedlings.
3. Keeping warm: The most suitable growing temperature for clivia is 15°C to 25°C; at 10°C growth stops, and at 0°C it suffers freeze damage. Therefore, in winter you must keep it warm and prevent freezing. After the flower stalk has emerged, maintaining around 18°C is suitable. If the temperature is too high, the leaves and flower scape grow leggy, thin, and spindly, the flowers are small and poor in quality, and the flowering period is short; if the temperature is too low, the flower stalk is short and prone to a stuck arrow and premature flowering (blooming), affecting quality and reducing ornamental value.
4. Adjusting light: Clivia likes scattered light and avoids direct strong light. When caring for it indoors in winter, the flower pot should be placed in a place with ample light. Especially before flowering, there should be good light, which helps the flower buds develop plump and strong. After flowering, appropriately lower the temperature and avoid strong light, and keep good ventilation, which helps prolong the flowering period.
5. Protecting leaves: With fat leaves the flowers are strong, and with green leaves the flowers are vivid. Short, broad, thick, green, glossy, and upright leaves are the characteristics of a healthy clivia, and are the basis for promoting flowering and raising ornamental value. To maintain robust leaf quality, in addition to providing reasonable fertilizer and water, you must keep the leaf surfaces clean to improve photosynthetic efficiency. Methods of protecting leaves: first, wash the leaves regularly, spraying and rinsing with the same clean water or wiping away dust on the polluted leaves to keep the leaf surfaces clean; second, spray fungicide in time to prevent leaf spot, leaf blight, and stem rot, ensuring the leaves stay green and the flowers vivid. (Source: China Flower News, 2002-11-28) The leaves of the large-flowered clivia are generally no more than 50 mm wide, and rarely reach 90 mm.
Clivia must be grown in special clivia soil!
Clivia Flowers
One,How to Care for Clivia
1 Soil: The original habitat of clivia is beneath large trees in the high-altitude forests of southern Africa, where the root system is anchored in leaf litter layers accumulated over many years. For caring for clivia, use loose, fertile neutral or weakly acidic humus soil. The cultivation soil can be made by mixing 65% humus soil, 20% clean sand, and 15% fine furnace ash. The relative humidity of the soil should be around 40%. If the soil is compacted and drainage is poor, it will cause root rot. When changing the soil in spring, it is best to buy special clivia soil for planting. Special clivia soil is leaf mold soil, which is extremely suitable for clivia's growth.
2 Fertilizing: For clivia, apply a solid fertilizer once in winter, apply less nitrogen fertilizer and more phosphorus and potassium fertilizers. Eggshell powder and decomposed fishy water are very good phosphorus fertilizers, and bran ash and tobacco ash are readily available potassium fertilizers. You can also apply a nitrogen, phosphorus, and potassium compound fertilizer to promote the sprouting of more new shoots and leaves. Fertilizing must be in the right amount, and you must never apply concentrated fertilizer or raw fertilizer that has not been fermented and decomposed, otherwise it easily causes scorched leaf tips or rot. In winter, if new leaves show spots and the root system turns yellow, it means too much fertilizer has been applied, while new leaves that are narrow, thin, and especially pale in color are a sign of fertilizer deficiency.
3 Watering: The soil should not be too dry or too wet. Each watering must be thorough, and after buds appear, water a bit more. About every 20 days, in conjunction with watering, apply once fermented soybean cake water, diluted fishy water, or horse-hoof water, combining watering and fertilizing. When the room temperature is low, control watering to prevent the potting soil from being too wet; too-wet potting soil will cause the plant to rot at the roots and die, but the potting soil should also not be too dry.
4 Keeping warm: The suitable growing temperature for clivia in winter is 15-20°C, and it is best not to let it fall below 10°C. After the arrow shoots, the temperature should be kept at around 18°C, and the day-night temperature difference is best around 10°C, otherwise the flower arrow will bloom before growing to the proper height, easily forming a "stuck arrow." When the outdoor temperature at night is below 10°C, move the clivia indoors. When the indoor temperature is below 10°C, besides covering the surface of the potting soil with a 1 cm thick layer of charcoal powder to keep warm, also place the flower pot in a sunny, warm spot indoors. When the indoor temperature is especially low, you can cover the flower pot with plastic film to raise the temperature, but the temperature inside the cover must not exceed 25°C; if it does, ventilate promptly to cool it down.
5 Light: Clivia easily blooms under short-day conditions. Scorching sun exposure, with direct sunlight in summer, will cause sunscald and inhibit growth. From May to September each year, it should be grown under a shade shed or in a semi-shaded environment without direct sunlight. But in winter, the longer the sunlight the better. When blooming, weak light can prolong the flowering period. It likes warm and cool conditions and avoids severe cold and intense heat. It generally grows well at 18-20°C, and stops growing below 5°C. After clivia is brought indoors, light is restricted, and the flower pot must be moved manually to adjust it. Under normal circumstances, during the day the flower pot should be placed in a sunny spot indoors so that sunlight can reach the plant. Before flowering, at night the flower pot should also be placed under a fluorescent lamp to supplement light. Because clivia's two rows of leaves are opposite each other, if the light stays in one position for a long time, the leaves will grow unevenly and spoil the ornamental effect. Therefore, when adjusting light, pay attention to the direction of the leaves, and change the sunny side about every 10 days. There are two ways to place the flower pot indoors: one is to set the leaves parallel to the sunny window, and the other is to set the leaves perpendicular to the sunny window; the latter works better than the former.
6 Prolonging the flowering period: The flowering period of clivia is mostly from December to March of the following year. The way to prolong the flowering period is to place it in a dark place when the flowers are about to open, appropriately control watering, and keep the temperature at 8-12°C. In this way, the flowering period can be extended by 10-20 days.
Two,Causes of and Solutions for a Stuck Arrow in Clivia
If you care for it correctly according to the above methods, a stuck arrow generally will not occur. Once a stuck arrow does occur, only treating the cause can achieve results. The specific countermeasures are:
1 Adjusting fertilizer: When autumn comes, clivia enters the reproductive growth stage, and its fertilizer requirement increases. If fertilizing is improper, it is not conducive to the scape emerging. Therefore, pay attention to adjusting fertilizer. Generally, after clivia has been grown for a full 3 years, the number of fertilizations must be increased in autumn. It is best to use a liquid fertilizer with relatively high phosphorus content. If necessary, also apply an additional 20% monopotassium phosphate to promote flower bud differentiation and formation, rapid "arrow shooting," and earlier flowering.
2 Adjusting water: Water can keep the clivia plant in its normal posture. Only when the cells and tissues in the body contain sufficient water can normal physiological activities proceed. If clivia lacks water, it cannot shoot the arrow and bloom, and the leaves will become shriveled, withered, drooping, and curled. Therefore, when the arrow is shooting, you should break the conventional "water when wet, dry when dry" watering method and appropriately increase the amount of water. Never let the potting soil dry out completely, otherwise it will cause a stuck arrow and affect flowering.
3 Adjusting temperature: The most suitable growing temperature for clivia is 15°C-25°C; below 15°C, it is very difficult for the scape to emerge and bloom. If you find that the clivia's false bulb is bulging and the newly grown leaves show an "arrow path" (referring to the mark left on the newly grown leaves by the flower scape squeezing them after the clivia's flower bud has differentiated and the flower scape has begun to emerge), then this is a sign of "arrow shooting." At this time you should pay attention to adjusting the temperature, bringing it to 25°C during the day and controlling it at 15°C at night, thus maintaining a 10°C temperature difference, and the arrow shoots more easily.
4 Reducing pressure: Because the pressure of the leaf sheath and false bulb is too great, the arrow scape is pinched inside and cannot shoot out. This is another cause of a stuck arrow. If this situation occurs, you can use a disinfected razor blade to cut open the leaf sheath pinching the arrow scape by 1.5 cm, to relieve the pressure of the leaf sheath base on the arrow scape and promote the arrow scape to shoot out.
Three,Methods for Correcting Crooked Clivia Leaves:
1 Use a small clip of appropriate strength (such as a small bamboo clip for drying clothes), pad it with soft paper, and directly clip the crooked leaf together with a properly shaped leaf; after some time the crooked leaf can be corrected.
2 Use opaque tin foil paper, or thin cardboard, folded according to the leaf length into 1/2 the leaf width, and fix it on the leaf with a hairpin or paper clip. Whichever side the leaf leans toward, fix it on that side. After a few days the leaf can return to normal. During this process, be careful to observe at all times to prevent over-correction.
3 When, viewed from the front of the clivia, some pairs of leaves are far apart and some are close together, you can use thick cardboard to make a sleeve board, cutting some slots with appropriate spacing according to the number of leaves, and carefully slot the leaves into it. After handling and shaping by the above various methods, the clivia can achieve the ideal form of looking like a single line from the side and like an open fan from the front.
Ordinarily, pay attention to the direction in which the clivia is placed. The leaf tips should point toward the north and south respectively, and regularly rotate the flower pot 180 degrees, alternating the north-south orientation of the two groups of leaves.
It is best to change the soil for clivia in spring and autumn, because the temperature is suitable at these times and clivia grows vigorously, so growth will not be affected by the soil change. In the south, clivia's vigorous growth periods are, first, March to June, when the temperatures in various places in the south are generally 10°C-15°C at the lowest and 20°C-28°C at the highest, and in some areas may exceed 30°C; this is a relatively suitable growing temperature for clivia. Growers can, according to the actual situation in their region, repot and change the soil in March to April; the second is August to September, when the weather is warm and cool with moderate temperatures, which is clivia's second vigorous growth period. According to the plant's growth condition, growers can carry out autumn repotting in mid-August. Note that after clivia has shot its arrow, or while it is budding and flowering, it is best not to change the soil, because at this stage the plant needs relatively more nutrients, and carrying out the soil-changing operation will affect the continuous supply of nutrients. But if root rot or yellow leaves occur due to poor soil quality and the soil must be changed, you should also be careful not to break up the root ball, and minimize the loss to the root system caused by the soil change.
Clivia Repotting Operation
For flower pots that need a soil change, the day before the soil change you must water thoroughly once. When repotting, place the potted flower slanting on the ground, hold the plant's false bulb with one hand, support the flower pot with the other, slowly turn it upside down, and tap the pot edge lightly on a wooden stool, and the plant will come out. If repotting a mature clivia 4 years or older, two people should work together: one person holds the plant's false bulb with both hands, the other hugs the flower pot with both hands, and taps the pot edge lightly on a wooden stool, and the plant can be taken out. When taking out the clivia with its soil ball, be careful not to let the soil ball break apart, so as to avoid damaging the root system.
After the plant is tipped out of the pot, gently remove the soil, and at the same time remove the aged and rotted fleshy roots (but do not cut off fleshy roots that are not rotten no matter how long they grow, because these fleshy roots and their tips have many root hairs, and these root hairs can not only absorb water and nutrients but also secrete various acids that dissolve hard-to-dissolve nutrients in the soil and expand absorption. If you cut them off, although the plant will not die, it will certainly affect growth). Then wash the roots with clean water (do not wash one- or two-year-old seedlings), and after air-drying for two or three hours, they can be potted.
When changing to a new pot, first use a piece of broken pot to cover half of the drainage hole at the bottom of the flower pot, then use another piece of broken pot slanting over the other half of the drainage hole, which is good for breathability and drainage. At the same time, first put a layer of broken fine pot pieces or furnace slag particles at the bottom of the flower pot to increase drainage and breathability, then fill a layer of loose coarse-grained soil or large pieces of leaf mold soil. In this way the clivia roots extend easily, and breathability and drainage are better, avoiding fine soil blocking the bottom hole of the pot and causing excessive water accumulation and root rot. When filling the soil, you can water in two stages. When the growing medium has been filled to more than half the pot, hold the clivia's false bulb with your right hand and gently lift it upward a little, letting the root system straighten, then carry out the first watering. In this way the nutrient soil can smoothly enter between the various roots, avoiding a lack of soil between some roots. When the nutrient soil is filled to 2 cm from the pot rim, water once more, to settle the nutrient soil. Both waterings should be thorough.
A newly potted clivia should be placed in a shaded place for about 10 days, to slow water evaporation and let it gradually recover its strength. This is called "adjusting to the pot." After 10 days, the light can be gradually increased.