What to Do When Saxifraga stolonifera Leaves Turn Yellow? Water More, Fertilize More, Provide Shade, Prevent Disease, Control Temperature
During the growing season, the underside of Saxifraga stolonifera leaves should be green. However, sometimes the leaves turn yellow because the methods and precautions for growing potted Saxifraga stolonifera are neglected. So what should you do when Saxifraga stolonifera leaves turn yellow? The answer is to find the cause and treat it accordingly.
What to Do When Saxifraga stolonifera Leaves Turn Yellow
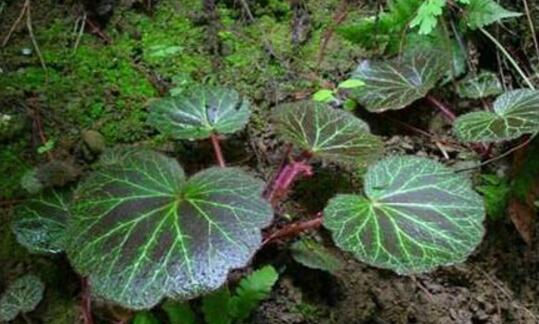
Although Saxifraga stolonifera is highly adaptable, leaves can still turn yellow if care is neglected. According to statistics, the main causes of yellowing leaves in Saxifraga stolonifera are as follows: insufficient watering, too much light, too little fertilizer, too low temperature, pests and diseases, and so on.
1. Insufficient Watering
The growing environment Saxifraga stolonifera likes best is moist soil, and to ensure this you must water frequently. If the potting soil becomes dry, yellowing is very likely to occur, and the cause is insufficient watering.
Solution: Water once a day during the growing season, and once in the morning and once in the evening during summer. Do not water too much; aim for moist soil with no standing water. You can also spray water on the leaves regularly.
2. Too Much Light
When Saxifraga stolonifera is exposed to strong light for a long time, its leaves will turn yellow, such as when placed in direct sunlight. The reason is that Saxifraga stolonifera prefers cool, shady places.
Solution: Move Saxifraga stolonifera to a cool, well-ventilated place, and never let it be exposed to blazing sunlight. Provide shade in summer.
3. Too Little Fertilizer
Although Saxifraga stolonifera does not need much fertilizer, that does not mean it needs none. If it is never fertilized, yellowing leaves are entirely possible.
Solution: What should you do when Saxifraga stolonifera leaves turn yellow due to too little fertilizer? The answer is to apply additional fertilizer. Water with a dilute cake fertilizer solution once every half month, and the yellowing will gradually improve.
4. Temperature Too Low
Most Saxifraga stolonifera varieties are fairly cold-hardy and can survive at 5 degrees, but if the temperature stays low for a long time, Saxifraga stolonifera will struggle. For example, staying below 0 degrees for a long period will turn the leaves yellow.
Solution: When winter temperatures are low, move Saxifraga stolonifera indoors and keep the ambient temperature no lower than 5 degrees; otherwise frost damage may occur.
5. Pests and Diseases
Many people think that growing Saxifraga stolonifera requires no attention to pests and diseases, but in fact pests and diseases pose a very great threat to Saxifraga stolonifera. In mild cases they cause yellowing leaves, and in severe cases they cause the plant to die, so prevention and control are essential.
Solution: Treat pests and diseases promptly when they appear. Pay attention to proper care in normal times and keep the growing environment well ventilated, which can effectively prevent pests and diseases.
Summary: Yellowing leaves in Saxifraga stolonifera are directly related to the environment and care methods. Many people do not take this phenomenon seriously, which often leads to more serious consequences. Therefore, when yellowing leaves are discovered, you should identify the cause as early as possible and solve it promptly; otherwise all your previous efforts will be wasted.
How to Grow Saxifraga stolonifera: Growing Methods and Precautions
Saxifraga stolonifera is relatively easy to grow and highly adaptable, surviving easily both outdoors and indoors. Moreover, the whole plant is covered in fine hairs, making it very cute. Friends who like it can grow a pot on a balcony or similar spot.
How to Grow Saxifraga stolonifera
For potted Sansevieria trifasciata, use a mix of equal parts leaf mold and garden soil with a small amount of decomposed base fertilizer as the growing medium. It grows well in bright light. Apart from avoiding direct blazing sun in midsummer, it should receive plenty of sunlight in other seasons; if it is placed in a too-dark indoor spot for too long, the leaves will darken and lose vitality. In addition, if it has been kept indoors for a long time, do not suddenly move it into direct sunlight; first move it to a brighter spot and let it adapt before exposing it to sunlight, to avoid scorching the leaves. Water appropriately, following the principle of preferring dry over wet. Regularly wipe dust off the leaves with clean water to keep them clean and glossy. When new plants sprout at the root crown in spring, water a little more to keep the potting soil moist; in the high-temperature summer season, also keep the potting soil moist regularly; after late autumn, control the amount of watering and keep the potting soil relatively dry to enhance cold resistance. It has low fertilizer requirements; during the growing season, apply a dilute liquid fertilizer 1-2 times a month to keep the leaves verdant and thick.
Growing Methods and Precautions for Saxifraga stolonifera
Growing Methods for Saxifraga stolonifera
1. Soil Selection for Potted Saxifraga stolonifera
The best soil for potted Saxifraga stolonifera is sandy soil rich in organic matter, and it must also have good drainage. You can make your own by mixing prepared potting soil with river sand.
2. Temperature and Light
Temperature: Saxifraga stolonifera likes a warm environment, with the most suitable growing temperature between 15°C and 25°C. It is also fairly cold-hardy and can overwinter at a low temperature of 5°C.
However, the variegated variety Tricolor Saxifraga is not cold-hardy, with an overwintering temperature of 15°C; if it drops below this temperature, it will die. Therefore, keeping it warm in winter is also essential.
Light: If light is insufficient, the leaf color will become dull. Indoors in summer, shade is also needed to avoid direct strong light. In winter, keep the room temperature above 5°C. Place it indoors near a south-facing window in a spot with ample sunlight.
3. Water and Fertilizer Management
Watering: During the growing period, Saxifraga stolonifera needs plenty of water to keep the potting soil fully moist, but the pot must not sit in water. In the two weeks after the plant blooms, gradually reduce watering. When the plant enters dormancy, simply keep the potting soil from drying out completely.
When watering during the growing period, keep the potting soil moist. Slight drought can easily cause leaves to drop, and at the same time prevent water from accumulating in the pot, otherwise root rot easily occurs.
Fertilizing: Fertilizer should be applied beneath the leaves of Saxifraga stolonifera to avoid soiling the leaf surface and affecting plant growth. In the vigorous spring growing period, apply a nitrogen fertilizer once every 20 days; do not fertilize during high summer temperatures or low winter temperatures.
4. Propagation Methods
Saxifraga stolonifera can be propagated by sowing and division. Sowing is done in March-April, and division can be done in all four seasons, but spring and autumn are best.
Precautions for Growing Saxifraga stolonifera at Home
1. Repotting: Saxifraga stolonifera likes loose, breathable soil; compacted soil easily makes the leaves dull in color. Therefore, Saxifraga stolonifera should be repotted once every other year, in early spring.
2. Pests and Diseases: The main diseases of Saxifraga stolonifera are gray mold and powdery mildew. Possible pests of Saxifraga stolonifera include mealybugs and whiteflies.
What to Do When Saxifraga stolonifera Leaves Turn Yellow
1. Watering: Keep the potting soil regularly moist and prevent it from drying out.
2. In summer, frequently spray water on the leaves and the surrounding ground to increase air humidity.
3. Avoid direct strong light; in summer, keep it under a shade frame.
4. During the peak growing season, water with a dilute cake fertilizer solution once every half month.
5. In winter, keep the room temperature at around 12°C to prevent freezing.
Hydroponic Care Tips for Saxifraga stolonifera
1. Add water promptly when the water level is low, and change the water promptly when it becomes cloudy. Generally change it about once every 10 days. In hot weather, the roots rot easily, so change the water more frequently.
2. Pay attention to cleaning the container and keeping it clean. When the air is dry, spray around the plant to increase humidity and benefit its growth.
3. Remove wilted leaves promptly when found. Light: Saxifraga stolonifera must be grown in a semi-shaded environment to show off the beauty of its leaves.
4. Saxifraga stolonifera will struggle to survive in a spot with all-day direct sunlight. Too much light will scorch the leaves, while too little light will make the leaf color very dull and not fresh enough. In spring, summer, and autumn, provide appropriate shading and grow it under relatively bright indirect light.
Saxifraga stolonifera can be grown not only in soil but also hydroponically. Hydroponic care is slightly more difficult than soil culture, so it requires more careful attention. However, whether hydroponic or soil-grown, the final result is the same: both can display Saxifraga stolonifera at its most beautiful.
How to Grow Potted Hydrangea: Hydrangea Propagation Methods
Hydrangea is a common potted ornamental flowering shrub, also known as eight immortal flower, pink ball flower, grass hydrangea, and so on. It is a shrub plant in the genus Hydrangea of the family Saxifragaceae, with very high ornamental value. Its flower heads are full, large, and beautiful, and the flower color can be red or blue, delighting the eye and soothing the mind. Modern parks and scenic areas plant it in masses to create landscapes. Now let us take a look at how to grow potted hydrangea!
Growth Habits of Hydrangea
Hydrangea likes a warm, humid, and semi-shaded environment, with an optimum growing temperature of 18-28°C, and winter temperatures no lower than 5°C. Flower bud differentiation requires 6-8 weeks at 5-7°C; a temperature of 20°C can promote flowering, and maintaining 16°C after flowering can extend the viewing period. However, high temperatures make the flowers fade quickly. Keep the potting soil moist, but do not overwater; especially in the rainy season, pay attention to drainage to prevent waterlogging and root rot. In winter, potted hydrangeas indoors are best kept slightly dry; if too humid, the leaves rot easily. It is a short-day plant; treating it with more than 10 hours of darkness per day for about 45-50 days forms flower buds. In normal cultivation, avoid blazing sunlight, and 60-70% shading is ideal. The soil is best as loose, fertile, well-drained sandy loam, but changes in soil pH greatly change the flower color of hydrangea.
Propagation Methods for Hydrangea
1. Division: Division is best done in early spring before budding. Separate rooted branches from the mother plant and pot them directly. Do not water too much, and keep them in semi-shade. After new buds sprout, return to normal care.
2. Layering: Layering is done when the buds begin to swell. Growth occurs after 30 days. Cut it from the mother plant the following spring, transplant it with soil, and it can bloom that year.
3. Cuttage: Cuttage is done during the plum rain season. Cut tender tip shoots about 20 cm long, remove the lower leaves, and use a suitable temperature of 13-18°C. Roots form 15 days after cutting.
How to Grow Potted Hydrangea?
1. Soil: The best soil for planting hydrangea is loose, fertile, well-drained sandy loam. For potting, use a mix of 4 parts leaf mold, 3 parts garden soil, 2 parts river sand, and 1 part cake fertilizer, or mix 4 parts compost soil, 5 parts sandy soil, and 1 part cake fertilizer, or use a mix of 6 parts leaf mold, 3 parts sandy soil (or furnace ash residue), and 1 part cake fertilizer. After potting, water thoroughly and keep indoors for care; move outdoors in early May.
2. Watering: Hydrangea leaves are relatively large and need a lot of water. Water frequently in spring and summer to keep the potting soil moist. In the heat of midsummer, water once in the morning and once in the evening, and pay attention to providing appropriate shade. Water less in winter, only keeping the potting soil humid. During the growing period, water thoroughly enough to keep the potting soil regularly moist; especially in summer, provide ample water.
3. Light: Hydrangea is a short-day plant. After moving outdoors in spring, it should first be placed in a semi-shaded environment for care. In midsummer, move it to a cool, well-ventilated place to prevent sunscald on the leaves. After September, as light intensity gradually weakens, move the pot to a brighter spot to promote flower bud differentiation.
4. Temperature: Hydrangea likes a warm environment, with an optimum growing temperature of 18-28°C, and winter temperatures no lower than 5°C. Flower bud differentiation requires 6-8 weeks at 5-7°C; a temperature of 20°C can promote flowering, and maintaining 16°C after flowering can extend the viewing period. Note that high temperatures make the flowers fade quickly.
5. Fertilizing: Hydrangea likes fertilizer. During the growing period, generally apply a dilute cake fertilizer solution once every 15 days or so. To keep the potting soil regularly acidic, add 0.2% ferrous sulfate when applying liquid fertilizer to make it into alum fertilizer water for irrigation. During the bud stage, apply 1-2 additional doses of 0.5% superphosphate soaking solution to promote larger flowers and more vivid color.
6. Pruning: Every year in early spring, in March, cut off diseased, dead, and weak branches from the base of the hydrangea, keep 3-5 healthy main branches and shorten them, leaving 2-3 buds per branch to encourage new shoots and abundant flowering. Through pruning and shaping, the plant can become compact, full, and well balanced, with many flowers, large blooms, and vivid color. If not pruned, the base of old branches over 3 years old has already become woody and does not easily sprout new shoots, which can easily leave the lower part of the plant empty and reduce its ornamental value.
7. Pests and Diseases: The main diseases of hydrangea are wilt, powdery mildew, and leaf spot, which can be controlled by spraying 600 times diluted 65% zineb wettable powder. The main pests of hydrangea are aphids and mirids, which can be killed by spraying 1500 times diluted 40% omethoate emulsifiable concentrate.
Precautions for Hydrangea
1. Hydrangea likes acidic soil and cannot tolerate poor or saline-alkaline soil. It grows poorly in alkaline soil, with yellowing branches and leaves. It is suitable for loose, fertile, humus-rich acidic soil. Its flower color can change due to pH, from white to red, and from red to blue.
2. Move hydrangea indoors in early to mid-October, control watering, and keep the room temperature at around 5°C to promote dormancy. Before bringing it indoors, remove the leaves to prevent rot. Starting in mid-December, move it to a sunny spot and keep the temperature at 15-20°C to encourage branch and leaf growth, then move it outdoors in late April the following year.
3. For hydrangea seedlings cut in March, after rooting they can be moved into 10 cm pots, and in mid-June planted into 16 cm pots. Perform the first pinching in June. If pinched in early June, flower buds can form in mid-August. Seedlings cut in May-June can be planted into 16 cm pots in July-August. To encourage flower bud formation that year, the last pinching must be done before September; otherwise flower buds cannot form that year.
4. Hydrangea likes fertilizer. During the growing period, generally apply a decomposed dilute cake fertilizer solution once every 15 days. To maintain soil acidity, add 1-3% ferrous sulfate to the fertilizer solution. Regularly watering with alum fertilizer water can make the plant branch abundantly and leaves green. Applying 1-2 additional doses of monopotassium phosphate during the bud stage can make the flowers large and vivid in color. Applying cake fertilizer should avoid the dog days to prevent pests and diseases and damage to the root system.
5. Hydrangea leaves are large and the branches and leaves are lush, so it needs a lot of water. In the spring, summer, and autumn of the growing season, water thoroughly enough to keep the potting soil regularly moist. In hot summer weather with high evaporation, besides watering thoroughly, also spray water on the leaves every day. The roots of hydrangea are fleshy, so watering must not be excessive. Do not let water accumulate in the pot, otherwise root rot will occur.
6. After September, as the weather gradually turns cooler, gradually reduce watering. Move it indoors before Frost's Descent, and keep the room temperature at around 4 degrees. Before bringing it indoors, remove the leaves to prevent rot. In winter, place the plant in a sunny indoor spot, and it is best to move it outdoors after Grain Rain the following year. Hydrangea management is relatively extensive, with few pests and diseases, making it a relatively easy-to-manage and cultivate ideal potted flower.