How to pot and repot camellias? Pot in November, repot after 2 years
As one of China's top ten famous flowers, camellias have been cultivated for many years and have gradually entered ordinary households, becoming an excellent choice for indoor cultivation. For beginners, buying a pot of camellias from a flower shop is enough to start growing them, but for experienced growers, everything from the soil to the flower pot to potting and repotting needs to be done by themselves. So how to pot and repot camellias is something many flower enthusiasts want to know. Below, the editor will answer your questions.
I. How to pot and repot camellias
(1) Pot soil selection
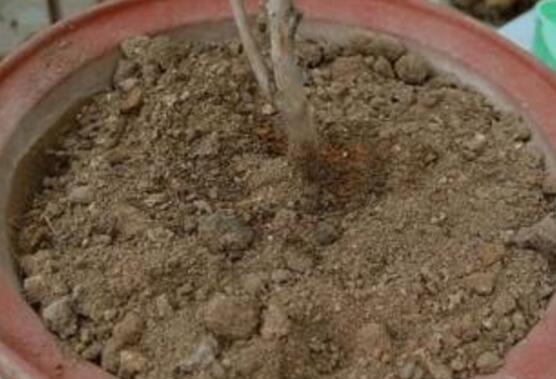
Before answering how to pot and repot camellias, we first need to know what soil camellias use and what kind of flower pot they need. For this, based on the growth habits of camellias, the editor provides the following reference:
1. Soil: According to the growth habits of camellias, you should choose loose, fertile, well-drained, slightly acidic soil. The editor recommends: black soil, red soil, pine needle soil, and sandy soil, mixed and stirred into nutrient soil. Note: Never use calcareous soil.
2. Flower pot: According to the editor's research, the most suitable pot for potted camellias is an earthenware clay pot, because its drainage and breathability are both good. As for the size of the clay pot: for two-to-three-year-old small seedlings, the pot diameter should be about 13-17 cm; for four-to-five-year-old plants about 60 cm tall, a pot with a diameter of 20-24 cm is suitable; for seven-to-eight-year-old plants about 80 cm tall, a pot with a diameter of about 33 cm is needed.
(2) Potting camellias
For how to pot and repot camellias, the most critical part is potting. The editor will provide a detailed introduction from the aspects of timing and method, as follows:
1. Potting time
The best time to pot camellias is in winter in November, or in spring from February to March, because at this time the camellia flower buds are at their plumpest and the flowers are in full bloom, making it very suitable for potting.
Note: High temperatures and harsh winter seasons easily cause plant death, so avoid potting during these times. In addition, potting should be stopped before and after the bud-break period, because this is when new shoots are about to emerge and leaves are unfurling, which requires a large amount of water. If potted at this time, new roots are easily damaged, which will affect growth and development.
2. Potting method
When potting camellias, as shown in the picture, place 3-4 pieces of broken tiles over the drainage hole at the bottom of the clay pot, then add a layer of coarse-grained potting mix or some dried chicken or duck manure as base fertilizer. After doing this, plant the camellia in, then add the prepared soil, filling to about 80% full.
Wait until the pot soil is roughly level with the camellia's root collar, then firm the soil with your fingers, and water thoroughly until water runs out from the bottom of the pot. Finally, place the plant in a shaded spot, and after about 10 days it can be exposed to sunlight. For how to pot and repot camellias, potting has been covered here; let's now look at repotting.
(3) Repotting camellias
In how to pot and repot camellias, repotting is relatively simple, since camellias only need repotting after a long time: smaller ones every two years, larger ones every 3-5 years.
Repotting method: When repotting camellias, you can use a bamboo stick to loosen the soil around the inner walls of the pot, then pull out the plant with the entire root ball intact, and prune away unhealthy blackened roots. Finally, plant the camellia into the pot, add mountain soil, and the subsequent steps are basically the same as potting, so we won't elaborate here.
II. Camellia care secrets revealed
After just buying camellias, flower enthusiasts must treasure them immensely, worrying endlessly about where to place them, how to water them, and whether to fertilize. However, many flower enthusiasts' camellias still end up growing poorly, or even dying! Actually, camellias are very easy to keep alive. After bringing them home, placement, watering, and fertilizing are not difficult. Below is the big reveal on camellia care; let's continue reading.
1. Placement
According to the growth habits of camellias, after bringing them home, you just need to place them in an environment with good ventilation, sufficient light or indirect light, and a certain level of air humidity, such as a balcony, living room, or by a window.
2. Watering requirements
Camellias prefer a moist environment, so you should water frequently, but not too much. In spring and summer, we should water camellias more, 1-2 times a day, split between morning and evening; in winter, reduce watering to once every two to three days. As for how to water, there is a detailed introduction in the camellia watering methods, so we won't elaborate here.
3. Fertilizing key points
Camellias like fertilizer, but dislike heavy or excessive fertilizing, so you must apply thin fertilizer frequently. As for how to fertilize, it's quite complicated to explain, because fertilizer types and methods differ at different stages. For this, there is a detailed introduction in the camellia fertilizing methods, and you'd best go and read about it.
As a beginner, after bringing camellias home, just follow the above points. More will need to be learned and experienced gradually. Try to master camellia cultivation methods as soon as possible, so you can grow beautiful camellias. Regarding how to pot and repot camellias and their care, the editor has covered it here, hoping it can be of help to everyone.
Camellia repotting methods
The camellia repotting method is actually not difficult; the difficulty lies in grasping the timing, such as when to repot and how often camellias need repotting. The following article will address these questions.1. Which camellias need repotting
Generally, cutting-propagated camellias need repotting every 3 to 4 years, grafted camellias every 2 years in the early stage and every 3 to 4 years in the later stage. Camellia roots are relatively fine and weak, so a pot that is too large or too small is not advisable. Generally, when the leaf spread extends more than 7.8 cm beyond the pot rim, repotting is needed.
2. Repotting time and temperature
The temperature is best between 10°C and 20°C. In southern regions, it's best from mid-October to mid-December. Repotting during this period will still grow a batch of new roots without affecting the camellia's growth the following year.
3. Repotting steps:
When the camellia's original pot soil is slightly dry, tap the flower pot at an angle against a hard surface in each direction. While tapping, pull the camellia tree with your hand to remove the entire camellia, remove the old soil. If the roots are normal, generally remove 1/3; if the roots are abnormal, remove all soil without roots.
Method for removing old soil: use a 6 mm steel bar bent into a hook to hook out soil and tidy the roots. Using the hook to remove soil can remove all soil without roots without damaging normal roots. Even if the root system is very developed, you must hook apart the original soil ball, remove some fine roots and keep slightly thicker roots. After tidying the roots and planting, the roots can immediately absorb water in the new soil, which helps with recovery.
Make the hole at the bottom of the pot as large as possible. If it's too small, chisel it larger. The hole should be at least 2 cm or more. Cover with a tile, add 2-4 cm of coarse ceramsite, place the camellia in and hold it upright, then add new soil. When almost full, gently lift the camellia and gently shake the pot so that soil and roots come into close contact. The soil must not be higher than the original root collar. Do not add new soil on top of the drainage layer, as this helps with aeration. If you add new soil on top of the drainage layer before placing the camellia, it's not easy for roots to grow. Add soil to 3-5 cm from the pot rim (depending on pot size), and do not overfill.
Then water thoroughly. If it's strongly adhesive red soil, generally watering twice consecutively after planting will allow the roots and new soil to fully contact. If it's loose humus soil, water several more times. Whether the roots and new soil have fully contacted can be judged from the water flow rate; generally, it's fine if the water runs out within about 10 to 30 seconds. If it flows out very quickly, you must water several more times. Place in a cool, shaded area for about 15 days, then normal care can begin. After one month, if the buds are doing well, you can apply a small amount of dilute liquid fertilizer. After the 2nd year, resume normal care.
If repotting due to stunted growth, the new pot should be slightly smaller. This way the pot soil dries more easily, making it easier to grow new roots and take on a new appearance.
For newly purchased camellias, if the new soil is inconsistent with the soil the plant came with, try to remove as much of the original soil as possible. You can also soak in water to remove it all (if the camellia is large, keep some original soil), because if the two soils are different, they won't blend and will affect water and nutrient absorption, and roots won't grow or won't grow well. Flower enthusiasts should pay attention to this issue.
A few care tips for potted camellias
I. Seedling selection. There are too many camellia varieties, making one dazzled. Different varieties have greatly different climate adaptability and growth rates. Relatively speaking, Camellia reticulata (Yunnan camellia) has poorer low-temperature tolerance; variegated-leaf varieties have higher light requirements; varieties with slow growth and sparse branches and leaves also have slower root growth. Beginners should start with old varieties that have good climate adaptability, strong tree vigor, and are easy to manage, gradually gaining care experience, then slowly purchase some favored varieties, which helps avoid detours. When purchasing camellia seedlings, the root system is crucial. It's best not to buy bare-root seedlings; they should come with some original soil. Some beginners, afraid of failure, like to buy relatively cheap cutting seedlings. Actually, cutting seedlings over 3 years old are much easier to grow, and grafted seedlings should also be grafted for over 3 years, otherwise they easily form dead branches or even die. The best season to purchase camellia seedlings is September-November when temperatures are stable at 15-25°C, though it varies slightly by region; spring is second best. II. Potting. 1. Preparation of cultivation soil. A key basic skill in potted camellia growing is preparing reasonable cultivation soil. Production areas customarily use loess, yellow sandy soil, or loess mixed with an appropriate amount of river sand and organic fertilizer, composted and then used for potting, and camellias grow well. However, using such cultivation soil for home potting may not be suitable. The main reason is that this soil has high water-holding capacity and long water retention time. Home potted plants are mostly placed indoors or on balconies, where air circulation and light conditions are inferior to outdoors, easily causing long-term waterlogging of roots and poor respiration. Frequent watering also easily causes soil compaction. I often use two formulas of cultivation soil, with ideal cultivation results. (1) First mix 40% sawdust, 30% pig manure, and 30% plant ash, water thoroughly, and compost in bags or in the open for 6-8 months. During fermentation, turn once a month. If the mixture is found to be relatively dry when turning, sprinkle water appropriately. The fermented mixture is black and has a faint sour smell without stench. Then mix 30% of the mixture with 70% semi-dry loam or loess/yellow sandy soil to form cultivation soil, and continue composting for 6 months. During composting of the cultivation soil, turn once a month. If dry, first sprinkle water until the moisture content reaches 60-70% before turning. Some may ask, isn't plant ash alkaline? Camellias like acidic soil! Why turn so much? Actually, during the fermentation of sawdust and pig manure, large amounts of hydrogen sulfide, ammonia, and other odor factors are produced. The potassium oxide in plant ash becomes potassium hydroxide when exposed to water, which reacts chemically with hydrogen sulfide and has a good deodorizing effect. The large amount of acidic substances produced by fermentation can completely neutralize the alkalinity of plant ash, keeping the mixture from being too acidic, and also increasing the potassium content of the mixture. Sawdust has high cellulose content and a high carbon-nitrogen ratio; fermenting and composting it alone takes a very long time. Mixing it with pig manure increases nitrogen content, which benefits the growth and reproduction of fermentation microorganisms and greatly shortens the composting time of sawdust. Among manures, pig and cow manure are richest in Streptococcus faecalis, which has an extremely strong ability to decompose organic matter. Adding pig manure helps the mixture fully compost. During the process of mixing the mixture with soil and composting into cultivation soil, maintaining a certain moisture content not only benefits fermentation but also allows the soil and mixture to form mixed granules when turned. Especially loess and yellow sandy soil, which are relatively sticky, form even better granules. After the cultivation soil is composted, it should be sun-dried and stored. (2) Mix 50% loess or yellow sandy soil or loam, 40% dead leaves (preferably broadleaf), and 10% coal cinder or coarse sand, pile in the open or compost in bags. During composting, fully turn once a month. If the pile is found to be dry when turning, water first. Fully ferment for 10-12 months, sieve on a sunny day, sun-dry and store. Such cultivation soil is fully composted, with moderate pH, no odor, and comprehensive nutrition. Fertilizer is effectively wrapped and slowly released by the soil, promoting steady plant growth. It also has high porosity and excellent drainage and water retention. Even after 2-3 years, the pot soil remains very loose, camellia roots are very healthy, and the fibrous roots are particularly thick and developed. 2. Potting. For potted camellias, it's best to use clay tile pots; for indoor or balcony potting, you can use attractive ceramic pots with good breathability. The pot diameter should be 40-50% of the canopy spread; it doesn't need to be too deep. If too large or too deep with too much cultivation soil, the soil is hard to dry after watering, easily causing waterlogging, and it's also troublesome to move normally. If using an old pot, it's best to first soak and disinfect it in 0.1% potassium permanganate solution for 10 minutes. Place a suitably sized tile over the bottom hole (both for drainage and to facilitate future removal of the camellia from the pot. When removing, lay the camellia down and push directly against the tile). Add a 5 cm layer of coarse coal cinder (diameter 1-1.5 cm or more) on top, then add a 1 cm layer of fine coal cinder (mung bean to soybean sized particles) as a drainage layer. The drainage layer in the center of the pot should be slightly raised. Using coal cinder as a drainage layer has the characteristics of being lightweight and porous, with drainage, water retention, and fertilizer retention performance significantly superior to gravel. Many beginner flower enthusiasts underestimate the importance of the drainage layer. Many flower enthusiasts' potted camellias have relatively thin drainage layers, with the central part even thinner. During rainy seasons or when overwatered, waterlogging is particularly likely to form, easily causing root rot, disease, and even death. On top of the drainage layer, add 10-15 cm of cultivation soil, place the camellia seedling in, hold it upright, add soil to 3-4 cm from the pot rim, and gently pat the pot to promote close contact between the cultivation soil and roots. Camellias should not be planted too deep; it should be similar to the original growing depth, so the specific thickness of cultivation soil on top of the drainage layer should be determined according to actual conditions. If using mixed composted cultivation soil, the soil has high organic matter content and easily breeds insects, earthworms, and even camellia pests. When potting, appropriate long-acting soil insecticides should be added. For courtyard potting, carbofuran can be used; for indoor or balcony potting, use chlorpyrifos, or you can choose other insecticides. Newly purchased camellia seedlings are generally wrapped in mud. When potting, first soak for a few minutes to soften the soil ball and allow the roots to spread, but do not soak excessively. It's best to keep some original soil when potting. If the original soil has already crumbled and become bare-root, you can take the crumbled original soil to protect the roots, preventing the roots from directly contacting the new cultivation soil. This helps the camellia seedling grow new roots and also helps the root system gradually adapt to the new cultivation soil, promoting early establishment and resumption of growth, which is very beneficial for camellia survival. If you purchased a potted camellia, you can remove it from the pot and directly repot it, or you can remove some original soil and old roots before potting. After potting, it's best to use a watering can to water thoroughly once. For those potted with dry cultivation soil, water twice. The first watering should be until water leaks from the bottom hole, then wait 60 minutes and repeat to ensure thorough watering. Then move the camellia to a semi-shaded, semi-sunny location for about 30 days of care before entering normal management.III. Daily management. 1. Placement and movement of potted camellias. Beginners who have just bought their favored camellia seedlings often treasure them like a daughter-in-law in confinement, moving them wherever the environment feels best, afraid of not serving them well enough, yet often things turn out contrary to wishes, either growing poorly or dying. Actually, camellias are fairly tough. As long as there is good ventilation, moderate air humidity, and sufficient indirect light or a semi-shaded, semi-sunny environment, they're fine. But camellias have a strong sense of direction, especially some precious varieties, which many beginners easily overlook. Indoor or balcony potted camellias sometimes need to be moved for cleaning and other reasons. If moving changes the light-receiving side of the camellia leaves, it's equivalent to rotating the pot when caring for other flowers. For other flowers, this helps form a beautiful plant shape, but camellias cannot adapt well to this. Frequent moving and changing direction, in mild cases, causes poor growth and easy leaf drop; in severe cases, it can even cause death, especially in high-temperature seasons. This is also the main reason enthusiasts often say camellias should not be moved frequently, otherwise they won't grow well. Therefore, after potting, use a marker pen to mark a certain direction on the pot rim. No matter how you move it afterward, always keep a fixed orientation. If you really need to change the light-receiving side or orientation of the camellia, it's best to do so after October when temperatures are below 20°C or in spring. In my practice, changing 10-15° per week during high-temperature seasons was found to be tolerable for camellias, with little impact on growth. 2. Watering and fertilizing. (1) Watering. Camellia watering requires "dry-wet cycle" - water when dry, stop when wet. So-called dry should be dry but not parched; the purpose is to increase soil aeration, promote downward root growth, promote plant sturdiness, and enhance stress resistance. But excessive dryness will cause root damage or death. Wet should be moist but not soggy; soggy easily causes waterlogging and root rot, triggering camellia disease and even death. Dry and wet are relative. Overall, camellias like moist soil. Compared to other flowers, camellia roots grow more slowly. In the first year after potting, watering management should be especially careful. Newly potted camellia roots generally have some damage, with poor absorption function. At this time, insufficient water supply, in mild cases, causes leaf drop; in severe cases, death. When the surface soil slightly whitens, water a small amount to keep the soil moist but not too wet, which helps with recovery. After careful care for 2-3 months at 10°C-25°C, some new roots will grow, and then normal watering can begin. From seasonal management, spring is the main season for camellia new shoot growth; keep soil moist to facilitate new shoot emergence and leaf expansion. From new leaf expansion to late August, keep the soil slightly dry frequently, which helps promote new branch sturdiness and lignification, and also has a good bud-forcing effect. In summer, the focus is preventing water shortage, so water thoroughly each time. It's best to shape the pot surface soil into a slope with the rim higher and the base of the flower stem slightly concave, which can effectively prevent dry soil balls from forming at the roots. But do not overwater, especially in muggy weather, otherwise root rot is very likely. Water only when the pot surface soil is clearly dry. Watering is best done at 5-6 AM and 19-20 PM, which helps soil absorb water and makes thorough watering easier. Watering during the day, water evaporates before seeping into the bottom of the pot, and the temperature difference between soil and water is too great at this time, also easily causing fibrous root damage or death. For potted camellias in the Jianghuai region, during the plum rain season, there is a lot of rain and high air humidity, making root waterlogging and oxygen deficiency particularly likely. For camellias kept outdoors, during this stage, the pot soil should be shaped into a mound to facilitate drainage and root health, and appropriate rain-shelter measures can also be taken. In autumn, the air is dry and the temperature difference between day and night is large. This is the camellia flower bud swelling period and also the autumn shoot emergence period for vigorously growing varieties. Water frequently to keep the soil moist. Watering is best at 6-7 AM, which can maintain higher soil temperature, benefiting camellia root growth and nutrient accumulation. Watering in the afternoon or evening lowers pot soil temperature, which is not good for root growth. During overwintering, indoor overwintering camellias can keep the soil slightly dry; outdoor overwintering should keep the soil moist but not wet. Winter watering is best at 9-10 AM on clear days with higher temperatures. For camellia water, clean natural rainwater is best. If using tap water, it should be left standing for more than 7 days. When watering, the water temperature should match the soil temperature, especially in midsummer and harsh winter. If the leaves are clean, generally no leaf spraying is needed, to avoid forming spots on the leaf surface that affect leaf health and photosynthesis. Generally, watering on rainy days is not advocated, but in my experience, if the soil is dry, you should still water appropriately. (2) Fertilizing. Camellia fertilizing should be thin and frequent. Newly potted camellias should not be fertilized within 2 months, which helps new root germination. Afterward, gradually apply some dilute liquid fertilizer, preferably chemical fertilizer such as 0.1-0.2‰ potassium dihydrogen phosphate. For beginners, organic fertilizer is not advocated, as poor concentration control can be detrimental to new root growth. After 3 months, gradually add some organic fertilizer to promote root development. For camellias potted in autumn of the first year, after a winter of recovery, some new roots will grow. About 30 days before spring new shoots emerge, sprinkle a small amount of fresh cake fertilizer on the pot surface and let it ferment naturally. When watering, the decomposed nutrients enter the soil with the water. The fertilizer is mild and lasting, easily absorbed by camellias, won't cause fertilizer burn or concentrated fertilizer root damage, and has no odor. If no cake fertilizer is available, you can sprinkle a small amount of compound fertilizer on the pot surface. For a 30 cm diameter pot, use 30 g of fresh cake fertilizer or about 10 g of compound fertilizer at a time. For normally cared-for camellias with pot diameters of 25-30 cm, apply 80-100 g of fresh cake fertilizer or 20-25 g of compound fertilizer on the pot surface at a time. When new shoots have fully emerged and leaves have expanded, apply a shoot-strengthening and bud-forcing fertilizer, preferably a mix of compound fertilizer and organic fertilizer, or a compound fertilizer mainly based on phosphorus and potassium. For plants or varieties with excessive vigor and few flower buds, also combine with foliar spraying of 0.2-0.3‰ potassium dihydrogen phosphate, once a week for 2-3 consecutive times, which has a good bud-promoting effect. If mainly using liquid fertilizer, during the normal growing season, top-dress about once every 15 days, preferably combined with watering. In the dog days of southern China, fertilization can be skipped. To prepare liquid fertilizer, the fermentation period should reach more than 6 months. During fermentation, the material-to-water ratio is 1:10, and add ferrous sulfate at 1.5% of the total material and water mass, which can effectively prevent iron-deficiency chlorosis in camellias. When watering, add 5% of the fermented stock solution to the water; do not make it too concentrated. For indoor or balcony potting, applying fermented liquid fertilizer has an unpleasant odor. It's better to directly apply fresh cake fertilizer or compound fertilizer on the pot surface, which has no odor, doesn't need frequent application, and is simple, convenient, safe, and effective. To prevent insects from breeding when cake fertilizer ferments on the pot surface, appropriately mix in insecticides or tea saponin, matrine, etc. For large-flowered and giant-flowered varieties and plants with many flowers and buds, nutrient consumption during the flowering period is enormous. At this time, appropriate top-dressing with quick-acting inorganic fertilizer mainly based on phosphorus and potassium is still needed. Otherwise, flowers may not fully open, flower quality may be poor, flowers and buds may drop, and even plant death may occur due to nutrient depletion. 3. Shaping, bud thinning, and flower protection
(1) Shaping. Use a combination of bud removal and pruning for shaping, which helps camellias quickly form an ideal tree shape and reduces ineffective growth. Before new shoots emerge, bud removal should focus on removing buds on the lower part near the pot surface, buds growing downward, and weak buds. At the same time, prune weak branches, inner canopy branches, and branches near the pot surface. Appropriately prune leggy branches by cutting about 3 cm from the branch stem. Apply plant ash or carbendazim to the cut. If a thick branch is cut, wrap the cut with plastic film to prevent excessive water loss or rain from affecting branch health. Pruning and bud removal should be done on sunny days with moderate temperatures. For bud removal during the growing season, for vigorous side branches that open up the tree shape, remove the terminal bud when new shoots are near lignification. Wait for their lateral buds to sprout and grow to a pen-tip shape, then remove weak buds and overly dense buds. Appropriately keep inner-side buds at suitable nodes to prevent hollowing. For controlling the height of leggy new branches, combine with cuttings and cut when semi-lignified. For upright and compact tree shapes, appropriately keep more outer lateral buds and fewer inner buds to prevent the inner canopy from becoming too closed. For varieties with softer branches, promote balanced growth of terminal and lateral buds and keep buds appropriately to prevent excessive branches and insufficient nutrition making stems even weaker. Inner canopy buds are generally not kept. For camellia seedlings, when the main branch new shoots reach about 20 cm, remove the terminal bud; when lateral branch new shoots reach 20 cm, remove the terminal bud again, promoting early formation of the canopy and tree shape. (2) Bud thinning. Generally, only 4-year-old cutting camellias can keep buds, but for vigorously growing medium, small, and miniature flower varieties or plants, 3-year-old seedlings can keep 1-2 flower buds without affecting growth. Newly potted camellia seedlings should preferably not keep buds; if they are large seedlings or grafted seedlings, 1-2 buds can be kept. Many references say one bud can be kept per branch, but this statement is at least incomplete. Potted camellias have limited nutrient accumulation, so fewer flower buds should be kept appropriately to ensure large, brightly colored flowers and robust growth the following year. The specific number of buds to keep can be determined by leaf count. Giant-flowered varieties need at least 30-40 leaves to keep one flower bud; large-flowered varieties 20-25 leaves, medium-flowered varieties 15 leaves, small-flowered varieties 10 leaves, and miniature-flowered varieties 6-7 leaves to keep one bud. If you want to extend the flowering period, keep a portion each of large, medium, and small buds. For a beautiful tree shape during flowering, keep a portion of buds in each direction and of each type, maintaining a well-distributed arrangement. Some people like all flowers on a single pot to open at once, in which case buds of relatively uniform size should be kept. Generally, inner canopy buds, buds shaded by branches and leaves, and axillary buds should all be removed. Buds kept should preferably be at the top of strong branches, where flowers open fully and are easy to appreciate. But for medium-small and miniature flower prolific varieties, a certain number of axillary buds and twin buds can be kept, preferably keeping flower buds on all branches. Bud thinning is generally done in mid-to-late September, not too early. Varieties with strong sprouting ability or prolific flowering can be delayed to early October (early-flowering varieties should complete bud thinning by early September). Bud thinning should be done on sunny days. When thinning, cut off 4/5 of the bud with scissors; the remaining bud will wither and fall off on its own. Do not pull hard, to avoid damaging leaf buds. (3) Flower protection. During the camellia flowering period, the temperature should preferably be kept at 10-15°C; flowers open fully, large and brightly colored. If the soil lacks water during flowering, it easily causes flower and bud drop or incomplete opening. If light is too strong and temperature exceeds 15°C, it easily causes early flower wilting or petal scorching. If temperature is below 5°C, some varieties' flowers may not fully open or not open at all, and if too low, may even freeze-damage buds. For large-flowered, giant-flowered, or many-flowered plants, during the flowering period, on clear days with temperatures of 7-15°C between 10 AM and 12 PM, appropriately spray 0.1‰ potassium dihydrogen phosphate on the leaves. This promotes complete flower opening and enlarges petals. Before spraying, cover the flowers with soft paper, etc., so fertilizer solution doesn't splash onto the petals. IV. Disease control. Common camellia diseases include flower rot, anthracnose, root rot, dieback, scab, gray leaf spot, soft rot, sooty mold, viral chlorosis, etc., as well as pest damage from scale insects, aphids, stem borers, whiteflies, red spider mites, and freezing injury, heat injury, etc. Main preventive measures for potted camellia diseases: (1) Choose healthy seedlings. After purchasing seedlings, check carefully. If disease is found, isolate immediately. Discard those with infectious diseases or pot them bare-root. Bare-root potted plants should be isolated for more than one year until completely cured. (2) Soil. Resolutely do not use soil that has already been used to grow camellias or plants of the same family for potting or repotting. It's best to use new soil to prevent soil-borne disease. (3) Good water and fertilizer management. Poor water and fertilizer management is one of the main triggers of root rot, dieback, soft rot, and flower rot. (4) Maintain appropriate light. When temperatures are below 25°C, maintain full sunlight; above 25°C, sufficient indirect light is enough. (5) Air humidity. The suitable humidity for camellia care is 40-60%. (6) Strengthen low-temperature management. Generally, camellia varieties can tolerate short periods of -8°C low temperature. Under normal circumstances, when outdoor temperatures drop below -2°C, they should be moved indoors. It's worth noting that potted camellias are relatively delicate. Even relatively cold-tolerant varieties, when encountering a cold wave with temperatures suddenly dropping from around 10°C to around -2°C, are easily severely freeze-damaged. Camellias should be moved indoors in advance. Camellia reticulata or varieties with C. reticulata bloodline have poor low-temperature tolerance and weaker resistance to sudden temperature drops, and should be treated even more carefully. (7) Strengthen flowering period management. Mainly avoid rain, prevent water from entering the flower center when watering, and pay attention to cold protection. Treatment: (1) Fungal diseases. Mainly use carbendazim 500x solution, thiophanate-methyl 500x solution, chlorothalonil 500x solution, etc. for whole-plant and leaf front and back spraying. Use 2-3 consecutive times depending on the condition. For root rot, use carbendazim 300x solution for root drenching, then keep the soil slightly dry to dry. Do not fertilize that year, keep the surrounding environment clean and the air dry. After recovery, thoroughly wash the roots and repot in October. If, as some references say, you directly wash the roots and repot the diseased plant, most will die. For viral chlorosis, alternating use of various antibacterial drugs has some effect. For anthracnose, Bordeaux mixture is best for control. For scale insects and stem borers, pyrethroid or systemic insecticides can effectively kill them. For aphids and whiteflies, imidacloprid can be used. For red spider mites, dicofol can be used. Appendix: Bordeaux mixture preparation. Dissolve copper sulfate in 90 kg of water to make copper sulfate solution. Dissolve quicklime in 10 kg of water, filter out residue, to make quicklime solution. Slowly pour the copper sulfate solution into the freshly prepared quicklime solution while stirring until the solution becomes a sky-blue suspension. Made with 1 kg copper sulfate and 1 kg quicklime is called 1% equal Bordeaux mixture; made with 0.5 kg copper sulfate and 1 kg quicklime is called 0.5% double Bordeaux mixture; made with 0.5 kg copper sulfate and 0.5 kg quicklime is called 0.5% equal Bordeaux mixture; Bordeaux mixture made with 1 kg copper sulfate and 0.3-0.4 kg quicklime has the strongest adhesion. When using, spray directly; best to prepare and use immediately. (Before use, a test should be done first, as different camellia varieties have different sensitivity to Bordeaux mixture, to prevent accidents.)