What to Do When Camellia sasanqua Loses All Its Leaves? Frequent Watering, Frost Protection, and Pest and Disease Control Are Key
Camellia sasanqua, which many people should recognize, combines the merits of camellia and beauty, making it a very beautiful flower. However, because many people do not follow the proper cultivation methods for Camellia sasanqua, various problems arise, such as yellowing leaves and leaf drop. So what should you do when Camellia sasanqua loses all its leaves? Here are several causes of leaf drop in Camellia sasanqua and their solutions. Come take a look!
I. What to Do When Camellia sasanqua Loses All Its Leaves: Find the Cause
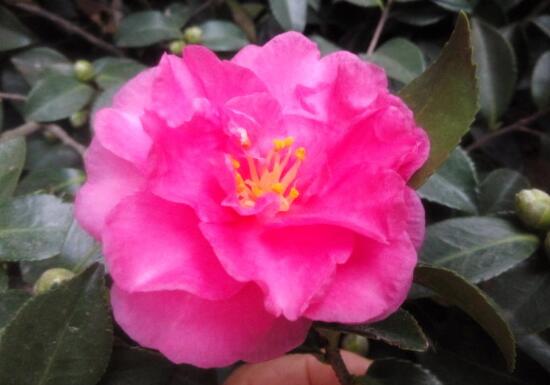
Camellia sasanqua is very beautiful, but once its leaves are all gone, its ornamental value is lost. So what should you do when Camellia sasanqua loses all its leaves? At this point, you must stay calm, carefully think about which aspect you failed to get right based on the growth habits of Camellia sasanqua, and then address it accordingly. For this, the editor will analyze it one by one from several aspects including watering, temperature, pests and diseases, and more. It is very detailed, so let's continue reading.
II. Causes of Leaf Drop in Camellia sasanqua and Solutions
1. Improper Watering
During cultivation, because Camellia sasanqua prefers a humid environment, watering is essential. But this is troublesome for many beginners, who often fail to control the degree of watering, causing leaf drop in Camellia sasanqua. Improper watering falls into two situations: one is too little watering, and the other is too great a difference between dry and wet.
Too little watering: The roots of Camellia sasanqua cannot absorb enough, which easily causes the leaves to become dull and lusterless, dropping at the slightest touch. The symptoms are: the lower old leaves age, and gradually turn yellow and drop from bottom to top. Over time, the leaves are all gone. Solution: Water in small amounts to let it gradually recover, then return to normal watering.
Too great a difference between dry and wet: After the plant goes without watering for a long time, suddenly giving it a large amount of water means Camellia sasanqua cannot adapt at all, which easily causes leaf drop. If you continue to ignore it, it may even lose all its leaves. Solution: After a long period without watering, water it slowly until it adapts, then return to normal watering.
2. Frost Damage
Camellia sasanqua is cold-tolerant, but in winter, once the temperature drops below minus 2°C, the leaves will turn the color of soy sauce, then gradually drop until they are all gone, seriously affecting its ornamental value.
Solution: In winter, place Camellia sasanqua indoors for care and maintain a room temperature of 3-6°C. After caring for it this way for a period of time, Camellia sasanqua will slowly recover.
3. Sudden Environmental Changes
Storms gather without warning. During the cultivation of Camellia sasanqua, once the environment changes greatly, such as temperature alternating between cold and hot, or light alternating between strong and weak, some old leaves of the plant will drop.
Solution: What to do when Camellia sasanqua loses all its leaves? First, do not move Camellia sasanqua around frequently. Second, keep the environment unchanged. Then, make artificial adjustments according to environmental changes: supplement light when there is insufficient light, artificially raise the temperature when it drops. In short, supplement whatever is lacking, so that the growing environment of Camellia sasanqua does not change too drastically at once.
4. Poor Ventilation
During the cultivation of Camellia sasanqua, we need to give it a ventilated environment, because once ventilation is poor, it may also cause leaf drop in Camellia sasanqua. Especially in winter, because Camellia sasanqua is placed indoors for a long time, poor ventilation or poor air quality will cause leaf drop.
Solution: Very simple. Place Camellia sasanqua in a ventilated environment for care, and it will recover after a period of time.
5. Pests and Diseases
Besides the above points, pests and diseases are also something we need to consider when it comes to leaf drop in Camellia sasanqua. During the cultivation of Camellia sasanqua, it is inevitable that it will be attacked by pests and diseases, especially red spider mites, which will cause leaf drop in Camellia sasanqua, and in severe cases may even cause all leaves to drop.
Solution: What to do when Camellia sasanqua loses all its leaves? At this point, of course you need to spray pesticide. As for what pesticide to use, it is described in detail in the pest and disease control section for Camellia sasanqua, so I won't say more here.
What to do when Camellia sasanqua loses all its leaves? After reading the above content, everyone should know what to do! Actually, leaf drop is caused by one reason, but it is often the result of multiple factors, so when you encounter this situation, you must make a correct diagnosis so that you can prescribe the right remedy.
What to Do When Nepenthes Gets Bugs: Pest and Disease Control for Nepenthes / 1 Pest and 2 Diseases, Spray Pesticide
When it comes to Nepenthes, everyone thinks of its function of catching mosquitoes and flies. But did you know that even such a mosquito-repelling plant can get bugs! Because Nepenthes is a tropical plant, growing it in our country will be affected, and if you are not careful, it will be attacked by pests and diseases. So what should you do when Nepenthes gets bugs? The following is the pest and disease control for Nepenthes. Let's take a look together.
I. What to Do When Nepenthes Gets Bugs: Spray Pesticide
It is understood that Nepenthes is a tropical plant, and cultivating it in most regions of our country will have a certain impact on its growth. If you are not careful, Nepenthes will be attacked by pests and diseases. So what should you do when Nepenthes gets bugs? Actually it is very simple, just spray pesticide.
As for what pesticide to spray, it is described in detail in the pest and disease control section for Nepenthes. Let's continue reading.
II. Pest and Disease Control for Nepenthes
According to the editor's research, if you do not strictly follow the cultivation methods for Nepenthes, it is prone to leaf spot disease, root rot, sunscald, and more. Among these, leaf spot disease and root rot are the more serious, and in addition it can also be attacked by scale insects. The specific symptoms and control methods are as follows:
1. Root Mealybug
A type of scale insect that mainly sucks the fresh sap of Nepenthes. Symptoms of infestation: Nepenthes leaves turn yellow, wither, and even drop, seriously affecting the ornamental effect of Nepenthes.
Control method: If a small number of root mealybugs are found, they can be removed with a brush or coarse burlap, then the diseased leaves should be cut off and burned in a concentrated manner to reduce the source of infection. Finally, spray 40% Supracide emulsifiable concentrate at 1000-1500 times dilution or 25% Ekatin emulsifiable concentrate at 700-800 times dilution for spraying to kill them. Note that both the front and back sides of the branches should be covered to improve the insect-killing rate.
2. Leaf Spot Disease
One of the pests and diseases of Nepenthes, it mainly infects its leaves. Symptoms: water-soaked spots and small dots appear on the leaves, gradually expanding to form oval spots that are brown. The diseased areas produce a black mold layer and later rupture. It seriously affects plant growth and ornamental effect.
Control method: Promptly remove diseased leaves and destroy them in a concentrated manner to reduce the source of infection. When the disease occurs, spray fungicide or a 1000-times antibacterial solution. When spraying, it should be uniform and cover the whole plant, including the back of the leaves.
3. Root Rot
In a high-temperature summer environment, if there is no ventilation and the water used for watering contains lime, then Nepenthes will suffer from root rot. Symptoms: the above-ground leaves turn yellow and gradually wilt. The underground roots turn brown and rot, and no new roots grow for a long time.
Control method: In the early stage of the disease, promptly spray chemicals such as Likuijing or Genfuling, diluted with clean water into a solution and sprayed. To avoid root rot, you can use a mixture of peat soil, dried cow dung, leaf mold, and sandy soil, hang it in a greenhouse, and provide appropriate shading.
4. Frost Protection and Pest Prevention
Nepenthes is a tropical plant, and when the temperature is low it is prone to frost damage, with many small spots appearing on the leaves. If it lives in a humid and dark environment for a long time, it is also prone to sooty mold. In summer it can also be attacked by pests such as thrips and scale insects.
Control method: When the temperature drops, keep it warm in time, preferably placing it in an air-conditioned room. To avoid pest damage, promptly spray specialized insecticides. Provide timely ventilation and sunlight, and remove bugs promptly when found.
That is all the editor has to introduce about pest and disease control for Nepenthes. I believe everyone now knows what to do when Nepenthes gets bugs or gets sick! Overall, although Nepenthes can repel insects, it can also get bugs, so to avoid unnecessary trouble, everyone should care for it attentively.
Potted Clivia Propagation and Pest and Disease Control Cultivation Techniques
The flower language of Clivia is "gentle and courteous," and it also carries meanings such as firmness and unyieldingness. Many people cultivate Clivia, and the most common method of growing Clivia at home is in pots. So what should be noted during the process of growing potted Clivia? The following detailed introduction to Clivia will take you to a deep understanding of Clivia.
1. Biological Characteristics
Clivia is a perennial herbaceous flower. It is not cold-tolerant and also avoids high temperature and severe heat. It prefers a semi-shaded and humid environment, fearing both cold and heat. The suitable growth temperature is 15-25°C, and the flowering period should be controlled at 15-20°C. When the temperature drops below 10°C, the plant grows and develops slowly. The winter temperature must not be lower than 5°C. When it drops below 5°C, growth and development are inhibited. When it drops below 0°C, in mild cases the leaves are frostbitten, and in severe cases the whole plant dies. When the temperature exceeds 30°C, it is forced into dormancy, resulting in a short flowering period and pale flower color, so ventilation and cooling should be carried out; otherwise, the plant will grow leggy, with slender, soft, and thin leaves. Clivia requires an air humidity of 60%-80%, so that the leaves are dark in color, appear tender green, and are short, wide, and neatly arranged. When the humidity is below 60%, the tender leaves become lighter, turn yellow, and even wilt, and in severe cases the whole plant wilts and dies. When the humidity is above 90%, the stems and leaves grow leggy. When the water content is 20%-40%, excessive soil moisture easily causes root rot. The loam soil should be loose, fertile, well-drained, humus-rich, slightly acidic sandy soil, and it prefers ventilated, deep, fertile, and loose leaf mold. The roots of Clivia are thick and well-developed fleshy fibrous roots. The leaves are dark green, wide and large, leathery, and the leaf bases form a pseudobulb. The leaves are arranged in two rows, overlapping and sword-shaped, with entire margins. The flower scape is drawn out from the leaf cluster, arranged in a semicircular or flat-round umbel, with funnel-shaped flowers. The flowering period is year-round, mainly in spring and summer. The fruit is a spherical berry, and each fruit contains 1 to many seeds. The fruit ripening period is about 10 months.
2. Propagation Methods
In northern regions, Clivia propagation is mostly by division, while seed propagation is common in southern regions with a climate close to its place of origin. Take the mother plant that can be divided out of the pot, remove the old soil and dried roots, use tools or manual methods to separate the offset buds from the mother plant at the connection point, then apply some plant ash to the wound to absorb the flowing sap and prevent rot. Let it dry for a few hours, and after it is slightly dry, plant it in a pot. Division propagation is the most widely used and can be carried out in all four seasons. When the temperature can remain stable at around 20°C, it can be done. Plants propagated by division have the most stable heredity.
3. Cultivation Management
3.1 Fertilization
The fertilizers required by Clivia mainly include nitrogen fertilizer (decomposed soybean cake, peanut cake, peanuts, sesame, sesame oil residue, castor beans, etc.), phosphorus fertilizer (fermented and decomposed rice bran, bone meal, fish meal, etc.), and potassium fertilizer (charcoal, rice straw, plant ash, rice husk ash, etc.). Clivia fertilization follows the principle of "thin fertilizer applied frequently," mainly using organic fertilizer, appropriately combined with inorganic fertilizer, and fertilizer must not directly touch the roots to avoid burning them. Grasp the amount of fertilization according to growth characteristics. In spring and autumn, growth is rapid, so more fertilizer can be applied. In summer and winter, it should be applied sparingly or stopped. At the same time, observe the effect of fertilization. In winter, if spots appear on new leaves and the root system turns yellow, it indicates excessive fertilization, while new leaves that are narrow, thin, and especially pale in color are a sign of fertilizer deficiency.
3.2 Watering
Clivia prefers humidity and must not lack water throughout the plant's growth period. It has relatively well-developed fleshy roots, and the roots store a certain amount of water, so this flower also has a certain drought tolerance. The amount and frequency of watering should be controlled according to its growth cycle and different seasons. Watering should follow the principle of "water when dry, not when not dry; when dry, water thoroughly, thoroughly but without leakage." In summer, under high temperature plus dry air, it must not be seriously short of water; otherwise, it is easy to cause the potting soil to become too dry, making the leaves turn yellow and damaging the roots, so that new leaves cannot emerge, which not only affects flowering but may even cause the plant to die. In summer, it is advisable to spray the leaf surface and surrounding soil with clean water every morning or evening to maintain a cool environment. Excessive watering will cause root rot and lead to the occurrence of pests and diseases, so in spring and autumn keep the potting soil moist, and in winter slightly dry. During the scape-pulling period, water must not be applied to the leaves, to avoid the occurrence of scape rot. After flowering, appropriately reduce the amount of watering, and be careful not to splash water droplets onto the flowers, to avoid petal rot and shortening the flower's lifespan.
3.3 Light
Clivia is a semi-heliophilous, shade-loving flower that prefers scattered light and does not require a long illumination time. It grows poorly under both strong light and weak light conditions. From November each year to February of the following year, no shading is needed. From March to October, choose shading according to light intensity. In summer, place it in a ventilated and shaded area for care. If exposed to scorching sun, it will suffer sunscald and growth will be inhibited. In spring and autumn, the strong midday light should be shaded. In winter, place it indoors in a sunny spot with full light exposure; the longer the sunlight exposure, the better. Weak light and scattered light during the Spring Festival flowering period can extend the flowering period. Clivia has phototropism. To make Clivia beautiful in appearance and neat in leaf surface, with the plant type forming a line when viewed from the side and appearing like a fan when viewed from the front, the direction of the flower pot should be frequently rotated as the sun's position changes. There are two ways to place the flower pot indoors: one is to place the leaves parallel to the sunny window, and the other is to place the leaves perpendicular to the sunny window. The latter works better than the former. If the leaves are crooked and twisted, light shaping should be the main method, supplemented by artificial mechanical shaping.
3.4 Pot Selection and Repotting
During the growth of Clivia, the original pot cannot accommodate the further extension of its root system, so the pot used for cultivation should gradually increase in size as the plant grows. If the nutrients in the original soil have been completely absorbed, repotting is also needed. Clay pots have good air permeability and good cultivation results. When repotting, first, the diameter of the flower pot should be close to the spread length of the Clivia leaves. Second, the planting depth should be appropriate when planting into the pot. When repotting, remove old, residual, and dead roots, being careful to protect the root tips from being broken, and spread the root mass artificially when planting. Repotting should be carried out in spring and autumn.
3.5 Temperature Control
The suitable growth temperature for Clivia is 15-20°C. Too high or too low a temperature has a very large impact on Clivia. When the temperature is above 30°C, the leaves become thin and slender, and the leaves become lighter, turn yellow, and even wilt. The lowest critical temperature is 0°C. If the temperature is below zero, frost damage may occur, and the leaf tips and leaf margins will turn yellow. Therefore, temperature management is a very important part of Clivia management. In summer and winter, measures such as cooling, cold protection, and frost protection should be taken for Clivia. In winter, control the room temperature. Temperature can be increased through heating equipment such as radiators and fan heaters. If the temperature cannot meet the requirement, the flower pot can be placed on a radiator padded with a wooden board; otherwise, the growth and development of Clivia will be inhibited, and leaf frost damage may even occur, causing the leaves to wither and turn yellow or causing the "scape clamping" phenomenon. This not only affects the ornamental effect but is also unfavorable to the growth and development of Clivia. If the "scape clamping" phenomenon occurs, the indoor temperature needs to be increased. In summer, the greenhouse can be regulated by opening windows for ventilation and cooling, and water can also be sprayed on the ground around the potted flowers and on the leaf surface to cool and increase humidity. During the "scape drawing" stage, the temperature should be higher. A flowering temperature of around 15°C can prevent the "scape clamping" phenomenon. The day-night temperature difference is best around 8°C, which is favorable for the scape to shoot up; otherwise, the flower scape will bloom before reaching the proper height, and it is also easy to form "scape clamping."
3.6 Leaf Surface Care
Clivia is a flower whose flowers, leaves, and fruits are all ornamental. For large-flowered Clivia, there is the characteristic of "leaf viewing surpassing flower viewing." Therefore, attention should be paid to the care of the leaf surface to improve its ornamental value. Glossy leaves are one of its main indicators. How to make the leaf surface glossy is related to the following factors: (1) Ensure the root system is well developed and does not rot, apply fertilizer properly and reasonably, and scientifically carry out the ratio of phosphorus fertilizer and potassium fertilizer in the nutrient soil. (2) Maintain humidity, pay attention to the moisture level of the leaf surface, and spray water on the leaf surface every day, preferably with a mist-like water flow. In the high-humidity season of summer, spray once each in the morning and evening, with the purpose of reducing the evaporation of water inside the leaves. In high-temperature weather, in order to prevent the leaves from growing leggy and elongating, spraying water reduces the evaporation of water inside the leaves, lowers leaf temperature, and protects the leaves. (3) There must be sufficient light. In spring and autumn, it is recommended that the light duration not be less than 8 h. In summer, avoid strong light irradiation that causes damage to chlorophyll, while in winter increase light as much as possible. When receiving light, pay attention to the angle between the plant and sunlight to avoid the leaves tilting randomly. If the leaves become deformed due to factors such as light, scape shooting and flowering, or fruit setting, they need to be reshaped in time. (4) Observe the condition of the leaf surface to determine whether the plant has pests or diseases, adopt corresponding treatment measures, and carry out timely rescue. The best ornamental state for Clivia leaves is a leaf width ratio within 4, rounded and blunt leaf tips, and clearly protruding leaf veins.
4. Common Problems and Pest and Disease Control
4.1 Root Rot
Common factors causing root rot: (1) Long-term heavy watering in a high-temperature environment causes the fleshy roots of Clivia to lack oxygen and rot. (2) Excessive fertilizer use causes root burning and root rot. (3) The potting soil is not changed for a long time, the soil becomes compacted and not breathable, and root respiration is blocked, causing root rot. (4) Long-term water deficiency causes the roots to wither, and then excessive watering causes the root system to rot. (5) Undecomposed leaves and other organic fertilizers in raw soil generate heat during fermentation in the pot, burning the root system, or improper soil selection. After root rot occurs, the main symptoms of Clivia are soft and yellow leaves, with the leaves appearing water-soaked. Corresponding measures should be taken: (1) Take Clivia out of the pot and remove the rotten roots. (2) Wash the roots with potassium permanganate to disinfect and sterilize, and methods such as gentian violet, charcoal ash, and rice straw ash can also be used to apply to the wounds. (3) Replace with new soil and control the amount of watering, while adding fertilizer.
4.2 Scape Clamping
Scape clamping is manifested as the flower stem developing too short to extend beyond the leaves before opening. It is usually caused by low temperature, improper watering, or insufficient fertilization. The suitable temperature for Clivia to draw its scape is around 20°C. If the temperature during the period when the flower stem is drawn is below 15°C, the growth vigor of the flower stem is weakened. When Clivia reaches the reproductive growth stage, its fertilizer requirement increases. If fertilizer and water are improper during this period, the flower stem will grow poorly under conditions of water and fertilizer deficiency. The method to prevent scape clamping is to raise the soil temperature to around 20°C during the scape-drawing period of Clivia and to change the soil and pot in time. During the scape-drawing period, Clivia needs more water than in other periods, so watering should be more frequent, but the soil should not be overly moist; a soil water content of 30% is appropriate. When watering, do not pour water between the two rows of leaves. Entering the reproductive growth stage, increase the number of fertilizations and apply more liquid fertilizer.
4.3 Sunscald
Clivia easily grows under scattered light, and exposure to sunlight in summer will kill leaf cells and cause sunscald. Therefore, outdoors it should be placed in a shaded, humid, and ventilated area. Indoors, direct sunlight should be avoided.
4.4 Infertility
The main reason for not flowering is related to light duration. In its place of origin, Clivia receives no more than 13 h of light, while indoor-cultivated Clivia, due to factors such as normal lighting and artificial lighting, receives far more than 13 h. To prevent Clivia from not flowering, the light duration should be controlled at around 13 h. The phenomenon of flowering without fruiting is mainly due to pollination. The stigma of the pistil of Clivia is higher than the anther of the stamen. If the flowering season is indoors in winter and spring, with no insects for pollination, artificial pollination is needed to facilitate fruit setting [Jishan Huayao].
4.5 Diseases
Common diseases of Clivia are soft rot, leaf spot disease, and anthracnose. Control methods: (1) Strengthen environmental sanitation and maintenance work, change the soil in time, pay attention to soil disinfection, wash the fleshy roots with clean water when changing soil, and pot them after drying. (2) Pay attention to ventilation and light transmission, and avoid problems caused by insufficient fermentation of nutrient soil and fertilizer, unsatisfactory soil disinfection, and mechanical damage. (3) Before the disease occurs or in the early stage, the fungicides that can be selected for spraying are: 50% thiram wettable powder at 500-700 times dilution, or 75% chlorothalonil wettable powder at 600-800 times dilution. (4) Pay attention to fertilizer and water management, improve growth vigor, and enhance disease resistance.
4.6 Pests
There are not many common pest species on Clivia, mainly scale insects, snails, and earthworms. When only a small number occur, they can be gently removed with a soft brush, rag, or bamboo piece, or wiped to death with a cloth ball dipped in kerosene, then washed clean with clean water. Before germination, spray 1 time with 3-5 degree Baumé lime sulfur mixture. During the nymph stage, spray 80% dichlorvos emulsifiable concentrate at 1000 times dilution. For earthworms, drench with a diluted solution of 50% dichlorvos emulsifiable concentrate.
The above is an introduction to the propagation and pest and disease control cultivation techniques of potted Clivia. Has the above content helped you understand Clivia? Whether Clivia is grown in pots or on the ground, care for it is absolutely indispensable.