What to Do When Chrysanthemum Leaves Turn Yellow? Control Watering and Fertilizing, and Spray Pesticides to Prevent and Control Pests and Diseases
As one of China's top ten famous flowers, chrysanthemums are potted at home by many flower lovers because of their beautiful flower shapes and bright colors. However, many beginners encounter yellowing chrysanthemum leaves while growing chrysanthemums, which greatly reduces the ornamental value of chrysanthemums. So what should be done at this time? In response, the editor has summarized 6 causes of yellowing chrysanthemum leaves. Flower lovers with this problem, come and take a look!
1. What to Do When Chrysanthemum Leaves Turn Yellow: Find the Cause
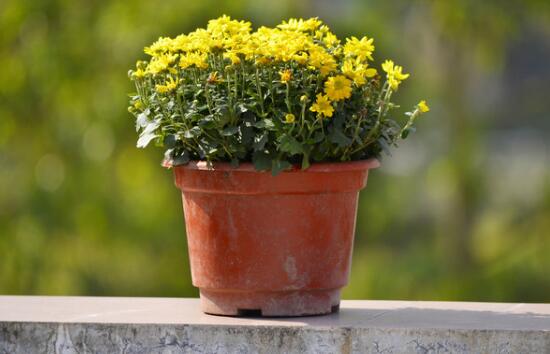
In daily life, many people grow chrysanthemums, but most of them are basically beginners, so they do not grow them according to chrysanthemum cultivation methods, resulting in phenomena such as yellow leaves. As for what to do when chrysanthemum leaves turn yellow, the editor has summarized 6 points and attached solutions. Let's continue reading.
2. Causes of Yellowing Chrysanthemum Leaves and Solutions
1. Sudden Environmental Change
As for the causes of yellowing chrysanthemum leaves, there are actually many, but the first thing everyone should consider is environmental factors. This situation occurs because many flower lovers buy their chrysanthemums online, which leads to a large regional span. After buying them back, the environment changes too much at once, and the chrysanthemum cannot adapt for a while, so symptoms of yellow leaves appear.
Solution: At this time, you can communicate with the seller to learn about the growing environment of the chrysanthemum before it was purchased. Then we can create the same environment at home, and then change it slowly until the plant fully adapts to the current environment. After a period of time, the chrysanthemum will recover its health.
2. Alkaline Soil
In chrysanthemum cultivation methods, we once said that chrysanthemums prefer loose, fertile, well-drained, slightly acidic soil. If everyone grows chrysanthemums in alkaline soil, over time the chrysanthemum leaves will turn yellow. In addition, if mineral water is used for watering for a long time, it will also cause the soil to become alkaline, resulting in yellow leaves.
Solution: If it is caused by alkaline soil, quickly change the potting soil and replace it with loose, fertile, slightly acidic soil, and after careful care for a period of time it will recover; if it is caused by watering, you can often water with fermented rice-washing water or rainwater. After a period of time, the soil will return to slightly acidic conditions, and the plant's leaves will regain their luster.
3. Overwatering (Water Yellowing)
Chrysanthemums like a moist environment, but once they are overwatered, causing water accumulation in the pot soil and poor soil aeration, some of the chrysanthemum's fibrous roots will rot. The symptoms shown are: the chrysanthemum's young leaves become dull yellow and lusterless, and the new shoots shrink.
Solution: The principle for watering chrysanthemums is to water when the potting soil is dry, do not water when it is not dry, and water thoroughly when watering. If overwatering causes chrysanthemum leaves to turn yellow, everyone should stop watering, then move the flowerpot to a ventilated sunny place so the water can evaporate quickly; or, more simply, directly change the potting soil, and after a period of time the plant will recover its health.
4. Long-Term Lack of Water (Drought Yellowing)
In addition to overwatering, long-term lack of water or too little watering can also cause chrysanthemum leaves to turn yellow. The symptoms are: although the new leaves have a normal leaf color, the lower leaves gradually dry, yellow, fall off, and age from the bottom upward.
Solution: At this time, we only need to increase the frequency of watering. But note that the amount of water each time should not be too much, so as to avoid water accumulation and harm to the chrysanthemum's roots.
5. Overfertilizing (Fertilizer Yellowing)
After talking about watering, let's talk about fertilizing. It is also one of the causes of yellowing chrysanthemum leaves. It is understood that chrysanthemums like fertilizer, and proper fertilization can make them grow better. However, once too much fertilizer is applied, it will cause root burn, which is reflected as yellowing leaves.
Solution: Stop fertilizing and water to dilute it. In severe cases, change the potting soil so the chrysanthemum becomes fresh again. Usually, when fertilizing, we should grasp the principle of applying thin fertilizer frequently, so as to avoid fertilizer yellowing.
6. Leaf Blight Disease
Indoor cultivation is not the same as outdoor cultivation. During the growth of chrysanthemums, it is inevitable that they will be invaded by pests and diseases, such as infection with leaf blight, which is also one of the causes of yellowing chrysanthemum leaves.
Solution: Spray once every 15 days with 500 times diluted wettable amobam or zineb. In addition, other pests and diseases can also harm chrysanthemum leaves. At this time, we need to determine the type of disease and then spray accordingly to solve it. As for what pesticide to spray, it is introduced in detail in the pest and disease control section for chrysanthemums, so I will not say more here.
Complete Home Flower Growing Techniques, Teaching You Step by Step "Watering, Fertilizing, Pest and Disease Control"
Complete Home Flower Growing Techniques, Teaching You Step by Step "Watering, Fertilizing, Pest and Disease Control"
Flower appreciation and flower growing have now become a fashion, and home flower growing is generally mainly potted flowers. To grow flowers well, you must master care and management knowledge, especially the three key techniques of watering, fertilizing, and pest and disease control. Dadi Ge has compiled a complete home flower growing guide for everyone today. Flower lovers, remember to save it well!!
1. Choosing Water Quality for Watering
Home flower growing mostly uses tap water for watering, but tap water contains disinfectant bleaching powder, and the chloride ions in it easily damage the tender root hairs of potted flowers. It must be stored for 1~2 days, and only after the chlorine gas has volatilized and the water temperature is close to the soil temperature can it be used to water flowers. Because the natural arrangement of water molecules in magnetized water has been disrupted by the magnetic field and is similar to the water molecules in plant cells, it is easily absorbed and used by plants, so potted flowers are best watered with magnetized water.
Watering Amount
The principle of watering is "water thoroughly when watering, and water thoroughly without letting it leak," that is, each time water until water seeps out from the saucer under the pot. In addition, it should also be determined according to the size, depth, and material of the flowerpot. Small pots are shallow, so watering should be less and more frequent; clay pots have good water permeability and the potting soil dries easily, so water frequently; stone pots and glazed pots do not easily permeate water, and long-term water accumulation will cause flowers to rot roots.
Different flowers and trees have different watering periods. The first is the prefer-moist-not-dry type, referring to flowers and trees that will be damaged and die after the potting soil completely dries out. This type of flower and tree should be watered sufficiently when the potting soil is slightly dry, such as maidenhair fern and spider brake; the second is the prefer-dry-not-moist type, referring to flowers and trees that should be watered after the potting soil has dried completely, such as cactus and aloe; the third is the alternately-dry-and-moist type, referring to flowers and trees that should be watered immediately when about 3cm of the potting soil surface is dry, such as monstera and pothos.
Watering changes with the seasons. In early spring when it turns warm again after cold, the weather changes unpredictably. At this time potted flowers begin to sprout and take root, and their water demand is large, so the potting soil should be kept moist; summer is dry and evaporation is fast, so watering should be doubled; in autumn, watering should be appropriately reduced to avoid excessive growth of flower branches and affect flowering the next year; in winter, most flowers and trees are in a dormant state, so keeping the potting soil slightly dry is enough.
Complete Home Flower Growing Techniques, Teaching You Step by Step "Watering, Fertilizing, Pest and Disease Control"
Watering Time
The daily time for watering flowers differs in spring, summer, autumn, and winter. A flower proverb says it well: "Morning water is sweet dew, noon water is arsenic, evening water is a life-saving soup." This means that in spring and autumn, around 10 a.m. and after 4 p.m. are suitable times to water flowers, while in summer do not water flowers at noon. At noon in midsummer the temperature is highest, and the difference between potting soil and water temperature is greatest. Watering at this time can easily obstruct the normal physiological activities of the root system, weaken the root system's absorption of water, produce physiological drought, and cause branches and leaves to wilt. By the same reasoning, in winter it is better to water flowers at noon. In short, "water at noon in spring, in the morning and evening in summer, every other day in autumn, and check frequently in winter."
Watering Methods
Before watering potted flowers, the compacted potting soil must be loosened so that the water applied can be absorbed in time and will not overflow from the edge of the pot. It is best to use a fine-hole watering can to water evenly and thoroughly. For small potted flowers, the pot-soaking method is best for watering, that is, place the flowerpot into a larger water basin so that water seeps into the potting soil from the drainage hole, and after the surface of the potting soil is slightly wet, take it out. This can prevent the potting soil from becoming compacted due to watering and is beneficial to the root respiration of potted flowers. Generally, shade-tolerant foliage potted flowers, under the special environment of a dry room and covered by dust, often find it difficult to show their bright true colors. In addition to regular watering, leaf-surface spraying should also be used to wash away dust and moisten leaves. This method can also lower the temperature and relieve heat for potted flowers at noon in summer during high temperatures, and help semi-dormant flowers break dormancy and continue to bloom well.
Complete Home Flower Growing Techniques, Teaching You Step by Step "Watering, Fertilizing, Pest and Disease Control"
2. Fertilizing
Types of FertilizerOrganic fertilizer. Organic fertilizer is fertilizer formed from the seeds, organs, residues, or excrement of various plants and animals after processing and decomposition, such as human feces and urine, livestock and poultry manure, cake meal, distiller's grains, weed green manure, and so on. Organic fertilizer is a slow-release fertilizer with complete nutrients and long-lasting fertilizer efficiency. Before use, it must be fermented and decomposed.
Inorganic fertilizer. Inorganic fertilizer is fertilizer made by chemical synthesis or processing of natural ores, such as urea, superphosphate, potassium dihydrogen phosphate, and so on. Inorganic fertilizer has quick fertilizer efficiency, but its nutrients are simple and its fertilizer efficiency does not last long. The nutrient content is single, and long-term use alone will make the potting soil compacted, so it is better to use it together with organic fertilizer.
Complete Home Flower Growing Techniques, Teaching You Step by Step "Watering, Fertilizing, Pest and Disease Control"
Rational Fertilization
The principle of fertilizing is timely and appropriate amount. Timely means applying it when flowers need it, such as applying fertilizer when flower leaf color becomes lighter or the plant grows thin and weak. No matter when, an appropriate amount should be used. Excessive fertilization will affect the growth and development of flowers. Too much nitrogen fertilizer makes plants prone to spindly growth, with weak stems and leaves, affecting flowering and fruiting, and making them susceptible to pests and diseases; too much phosphorus fertilizer will hinder flower growth and development and affect flowering and fruiting; too much potassium fertilizer makes plants short, with wrinkled brown leaves, and even withered.
Change fertilization according to the growth stage of the flower seedlings. In the seedling stage, growth is rapid, so more nitrogen and potassium fertilizer should be applied to make stems and branches strong and the root system well developed; before flowering and at the bud stage, apply more phosphorus fertilizer to promote large flowers, beautiful colors, and full buds; spraying potassium dihydrogen phosphate during color change and after flowers fade can prevent flower and bud drop; during the flowering period and early fruit-setting stage, fertilizer and water should be controlled, otherwise flowers and fruits are prone to drop.
Change fertilizer concentration according to seasonal changes. In winter, the temperature is low and plant growth is slow. Most flowers are in a dormant or semi-dormant state, so generally no fertilizer is applied. Spring and autumn are peak growing seasons, so more topdressing should be applied appropriately. In summer, the temperature is high, water evaporates quickly, and flowers grow vigorously, so adhere to the principle of applying thin fertilizer frequently. Organic fertilizer must be fully decomposed before application. The concentration of chemical fertilizer must not be too high, to prevent flowers from being "burned to death."
In different seasons, fertilization times differ. Generally, in summer it is better to fertilize in the evening, and in winter it is better to fertilize around noon. Generally, fertilizing can be done on sunny days when the climate is dry or before rain; do not apply after rain or during continuous cloudy and rainy days; apply more when the climate is warm and suitable for growth, and do not apply when the climate is hot or cold and plants are semi-dormant or dormant; apply when the potting soil is dry, and do not apply when it is wet; apply more to old potting soil and less to newly changed potting soil; apply less when base fertilizer is sufficient, and more when there is no base fertilizer or it is insufficient.
Fertilize according to the characteristics of the flowers. For foliage-oriented flowers such as pine, bamboo, and spider plant, nitrogen fertilizer is mainly used, which can promote the growth of branches and leaves and make the color deep green. For flowers mainly grown for flowers and fruits, more fertilizer is needed. When growing branches and leaves, apply 1~2 times of fertilizer mainly based on nitrogen fertilizer; during the growth stages of flower bud differentiation, flower bud formation, and before flowering, fertilizer mainly based on phosphorus fertilizer should be applied, which can make flowers abundant and fruits plentiful. Generally, for diseased or newly transplanted flowers, do not fertilize for the time being; for flowers in the flowering period, it is best not to fertilize, so as to avoid flower buds and flowers dropping.
Complete Home Flower Growing Techniques, Teaching You Step by Step "Watering, Fertilizing, Pest and Disease Control"
Fertilization Methods
Base fertilizer. Base fertilizer application generally adopts 2 methods: first, mix fertilizer evenly with culture soil in a certain proportion (about 1:9) and then use it to grow flowers. This can both improve the physical properties of the soil and supply the nutritional needs of flowers throughout the entire growth period. Second, put a small amount of fertilizer at the bottom of the pot when potting, repotting, or changing the soil for flowers, generally not exceeding 1/10 of the potting soil, and cover it with 1 layer of soil above before planting the flowers.
Topdressing. Topdressing generally adopts 2 methods: first, soil application, that is, applying fertilizer directly into the soil. For liquid fertilizer topdressing, first dilute it and spray it into the potting soil; for solid fertilizer topdressing, it can be evenly scattered on the surface of the potting soil and then covered with 1 layer of soil. Note that after fertilizing, water should be applied to aid absorption. Second, leaf-surface spraying, also called foliar topdressing, which has the advantages of saving fertilizer and taking effect quickly. It is usually used during the vigorous growth period of flowers or when a certain element is lacking. Generally, inorganic fertilizer is prepared into a concentration of 0.1%~0.5% and sprayed in the morning or evening when there is no wind, so that the leaf surface is moist. The most commonly used are urea, potassium dihydrogen phosphate, superphosphate, ferrous sulfate, and so on.
Complete Home Flower Growing Techniques, Teaching You Step by Step "Watering, Fertilizing, Pest and Disease Control"
3. Prevention and Control of Common Pests and Diseases
Diseases① Powdery mildew. Diagnosis of powdery mildew: yellow transparent small spots appear on the leaf surface, then gradually spread to the entire leaf, white powdery spots appear, and later the diseased spots turn gray. It mainly harms many flowers such as Chinese rose, rose, dahlia, chrysanthemum, peony, cineraria, impatiens, and banksia rose.
② Anthracnose. Diagnosis of anthracnose: yellow-brown sunken spots appear on the leaves and spread outward into dark brown round spots, or irregular patches appear on the leaves, and the leaf tips dry up and continuously spread downward. In the later stage, small black spots form on the diseased spots, often arranged in concentric rings. When the disease is severe, the leaves wither and die. It mainly harms many flowers such as orchids, rubber tree, Rosa species, Cactaceae species, peony, jasmine, dianthus, and fishtail palm.
③ Black spot. Diagnosis of black spot: nearly round or irregular black diseased spots appear on the affected leaves and gradually expand. In severe cases, the leaves turn yellow, fall off, and even cause the plant to die. It mainly harms flowers such as Chinese rose, rhododendron, camellia, cherry, and elm-leaved spirea.
Complete Home Flower Growing Techniques, Teaching You Step by Step "Watering, Fertilizing, Pest and Disease Control"
Control methods:
① Agricultural control. Strengthen cultivation management, appropriately increase the application of phosphorus and potassium fertilizers, enhance plant disease resistance, and promptly remove diseased and fallen leaves and burn them, clean the environment, and reduce transmission vectors; pay attention to ventilation and light transmission.
② Chemical control. In the early stage of disease, spray 1:1:100 Bordeaux mixture for protection to prevent the occurrence and development of the disease; in the early stage of disease, spray fungicides such as 50% carbendazim, 50% tecloftalam, 65% zineb, 75% chlorothalonil, 50% thiophanate 500 times solution, and 50% benomyl 1000 times solution.
Pests
① Aphids. Aphids, also known as greasy insects, can occur all year round and mainly harm bougainvillea, chrysanthemum, pomegranate, and so on. The affected plant's leaves curl, branches and leaves turn yellow, causing a large number of leaves and flowers to fall off, and in severe cases causing the plant to die quickly.
Control method: Use 50g of red chili pepper, add 30~50g of water and soak for 24 hours, then spray the affected plants with the filtrate. The control effect is very good. Or spray 40% dimethoate emulsifiable concentrate 2000~3000 times solution, 50% menazon emulsifiable concentrate 1000~1500 times solution, or 80% dichlorvos emulsifiable concentrate 3000 times solution.
② Red spider mites. Red spider mites are also called fire dragon bugs and occur in multiple generations a year. They mainly harm the leaves and petals of wild elm, Sageretia thea, five-needle pine, and so on. The body of the red spider mite is about the size of a needle tip, dark red or purple, and with the naked eye only a small red dot can be seen. The affected plant's leaves lose green, the leaf margins curl upward, and then scorch and fall off, causing early shrinking of flower buds, and in severe cases plant death.
Control method: Use 50g of citrus peel, add 0.5kg of water and soak for 24 hours, then filter and spray the plants, or spray dicofol 1500 times solution or 40% omethoate 2000 times solution for control. When spraying, spray both the leaf surface and the back of the leaves for a better effect.
Chrysanthemum Planting Soil, Pest and Disease Control, and Fertilization Methods
Chrysanthemums like a warm climate and a sunny environment. The suitable temperature is 20-25°C. They can tolerate cold but fear waterlogging, yet they cannot lack water during the seedling stage and flowering stage. Chrysanthemums are short-day plants and are very sensitive to day length. Only with no more than 10 hours of light per day can they form buds and bloom. Chrysanthemums are planted all over the country, and the planting methods are relatively mature. However, in existing planting methods, it is believed that chrysanthemums have no strict requirements for soil and no treatment is done to the soil. In this way, because the soil itself may carry diseases, it is easy to cause some common diseases in planted chrysanthemums, such as root rot, downy mildew, and brown spot. When pests and diseases appear, they are also treated by conventional pesticide spraying, which pollutes the environment, damages the soil structure, and does not meet food safety and hygiene standards. Today, Cherry Meimei will share with everyone some methods for chrysanthemum planting soil, pest and disease control, and fertilization, as follows:
1. Disease and pest prevention treatment of chrysanthemum planting soil:In early December each year, plow the land and open ridges, apply 150kg of lime per mu, and apply it evenly. Wait until mid-February of the following year and spray lime sulfur mixture, evenly spraying at a ratio of 0.5kg lime sulfur mixture diluted with 100kg water, to play a role in disease and pest prevention;
2. Selecting seedlings for chrysanthemum planting:After breeding, propagate by cuttings, with the time being February-March each year;
3. Land preparation and planting for chrysanthemum planting:Open ridges with a ridge height of 30 cm and a width of 50 cm. The planting density is 50×40cm. Place protein organic fertilizer and a small amount of phosphorus fertilizer at the bottom. The soil quality should be loose. The planting time is April each year;
4. Watering chrysanthemums:After planting, water with rooting water, and afterward do it as appropriate according to the situation, achieving timeliness and appropriate amount. Summer is the peak growing season for chrysanthemums, and water demand also increases accordingly. Generally, water once a day. In high-temperature and clear weather, watering once in the morning and once in the evening each day is enough; if water is lacking, the leaves will turn yellow or even fall off; if there is heavy rain or showers, promptly check whether the drainage facilities are unobstructed to prevent root rot;
5. Fertilization methods for chrysanthemums:One month after planting, when they turn green, begin fertilizing. Apply fertilizer frequently and thinly. The first time mainly use nitrogen fertilizer, the second time mainly apply cake fertilizer and human feces and urine, or apply full-effect protein fertilizer. It is best to apply full-effect protein fertilizer. Apply 5-6 times each year, and at the same time increase leaf-surface spraying. For leaf-surface spraying, use protein essence and humic acid, spraying at a ratio of 13ml protein essence, 28ml humic acid, and 22kg water; root fertilizer uses a combination of organic and inorganic fertilizers, with organic fertilizer accounting for 80-85% of the annual fertilization amount;
6. Disease and pest prevention methods for chrysanthemums: Use 13ml protease, 28ml humic acid, and add 22kg water to spray the leaf surface to increase leaf photosynthesis and prevent insects. At the same time, install yellow sticky boards to prevent insects, installing 3 yellow sticky boards per mu, each 50×80cm, and release 1-day-old chicks (that is, chicks within 2 months old) into the field to eat insects and achieve pest prevention.
7. Harvesting chrysanthemums:Generally harvested from Frost's Descent to the Beginning of Winter. The suitable harvest period is when the flower center has opened 2/3; when harvesting chrysanthemums, choose a sunny day, and after harvesting process them promptly to prevent rot and discoloration.
The above is what Cherry Meimei shared today about chrysanthemum planting soil, pest and disease control, and fertilization methods. I hope it can help friends in need. If you want to learn more planting techniques, welcome to follow Huinong Academy!