Does Zinnia need pinching? Timing and method for pinching twice
As a highly ornamental plant, zinnia not only grows fast but is also easy to keep alive, so many flower lovers grow it in pots at home. But precisely because zinnia grows fast, it needs timely pinching to avoid leggy growth. So how do you pinch zinnia? Below is the pinching method for zinnia; follow along with the editor to learn more.
I. Does zinnia need pinching? Yes, it does
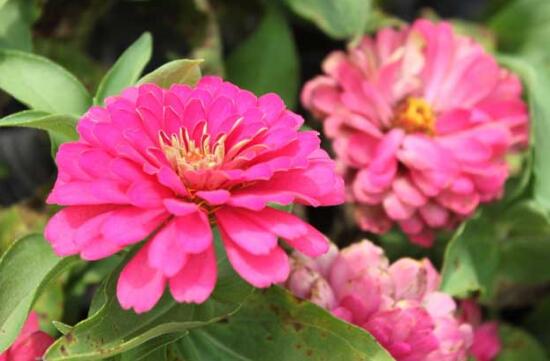
Zinnia, a plant with very strong vitality, grows extremely fast. If zinnia is allowed to grow unchecked, it will ruin the plant's overall shape, cause uneven growth, and hinder uniform blooming, thus affecting its ornamental value. So does zinnia need pinching? The answer is yes.
Why zinnia needs pinching: The main reason is to control plant height, which saves a lot of nutrients and also achieves a dwarfing effect. In addition, pinching can promote the sprouting of side branches; the more side branches sprout, the more flower buds there are, and naturally the more flowers bloom. So pinching is very necessary for growing zinnia.
II. Pinching method for zinnia
1. Pinching time
How to pinch zinnia: taking the correct method is the most crucial part, but besides that, grasping the right timing for pinching is very important, because if the timing is not grasped well, it may cause irreparable losses:
Pinching too early: Because the plant is too tender and weak, it may inhibit normal growth; if pinched at the seedling stage, it may even risk causing plant death;
Pinching too late: The plant may already have grown tall, so the dwarfing effect cannot be achieved, and side branches also sprout slowly or not at all; of course, flowers will also be reduced.
Pinching time: When the zinnia seedlings grow 4 leaves, you can transplant them, and 7 days after transplanting, pinch them. Pinching at the right time can let zinnia produce more beautiful flowers during the flowering period.
2. First pinching
When the zinnia seedlings grow to 4 leaves, transplant them and pinch them. 7 days after transplanting, you can carry out the first pinching: when the zinnia seedlings are about 10 cm tall, keep two pairs of leaves and pinch off the rest. After pinching, spray a fungicide once, then apply a light fertilizer once.
3. Second pinching
It is not that after pinching once, you never pinch again. When zinnia grows 2-3 pairs of leaves, we need to carry out a second pinching. This can not only make the plant shape “plump,” but also increase the number of flowers the plant produces.
Method: Treat with a chlormequat chloride solution. Spray the chlormequat chloride solution evenly on the upper leaves of the plant, once every one to two weeks, for a total of 2~3 treatments.
Notes: The number of pinchings cannot be done whenever you feel like it; whether to carry out the next pinching should be decided according to the plant's growth and branching.
That is all the editor has to introduce about the pinching method for potted zinnia. I hope it can help everyone. Overall, zinnia is highly ornamental after blooming. In order for the plant to produce more and more beautiful flowers, we must pinch it. Because zinnia has strong vitality, even beginners can pinch it as long as they pay a little attention~
How to prevent and control zinnia black spot disease
Zinnia generally refers to Zinnia elegans
Zinnia elegans (scientific name: Zinnia elegans Jacq.): annual herb. Stem erect, 30-100 cm tall, covered with strigose hairs or long hirsute hairs. Leaves broadly ovate or oblong-elliptic, rough on both surfaces, densely short-strigose beneath, with three basal veins. Capitulum solitary at branch tips, involucre broadly campanulate; phyllaries in multiple layers, broadly ovate or ovate-elliptic. Ray florets dark red, rose, violet, or white; ligules obovate, apex 2-3-toothed or entire, short-hairy above, long-villous beneath. Disk florets yellow or orange, apical lobes ovate-lanceolate, densely yellow-brown tomentose above. Female achenes obovate; disk-floret achenes obovate-cuneate. Flowering period June-September, fruiting period July-October.
How to prevent and control zinnia black spot disease
Black spot is a rather stubborn disease; its leaves, stems, and flowers can all be affected. In the early stage of leaf infection, small dark brown spots appear, soon expanding into irregular large spots, 0.2 cm to 1 cm in diameter, red-brown, with the center becoming gray-white and necrotic, but on the back of the leaf the center and edge of the spot are the same color. As the spots increase and enlarge, the entire leaf turns brown and dries up. On stems, the disease starts from the petiole and develops longitudinally into elongated dark brown streaks. When moist, black powdery mold appears on the diseased parts. When the stem base is affected at the seedling stage, dark brown to blackish-brown sunken ulcer spots form at the center, and in severe cases they can cut across the base, causing damping-off. Based on these characteristics, you can accurately determine whether the plant is infected with black spot. It overwinters as mycelium on the affected stems and leaves, and infected seeds are also an initial infection source; the next spring, conidia spread by wind and rain and invade through wounds or stomata. The disease is severe in high-temperature seasons, with August to September being the peak period. Plants that are too dense, poor ventilation and light transmission, and excessive nitrogen fertilizer application all easily lead to the disease.The timing and method of prevention and control are not quite suitable. To prevent the occurrence and spread of this disease, promptly remove diseased stems, leaves, and flower remnants and burn them in a centralized manner; this point cannot be ignored. Collect plump seeds from healthy, disease-free plants; this point is very important. Plants growing at the edge of a flower bed that are not infected may have grown from seeds without pathogens, or may be a relatively disease-resistant individual plant, so you might as well try keeping it for seed. Once a small number of disease spots appear on a plant, quickly cut off the diseased leaves and burn them, and promptly spray all plants with a 500-fold dilution of 50% zineb or mancozeb wettable powder, once every 10 days, continuously spraying 3 to 4 times. When spraying, pay special attention to spraying both the front and back of the leaves evenly and thoroughly.
Attention should be paid to the preparation of potting soil. The old soil from potted zinnia cannot be used again the second year. It is required to use loose, fertile, well-drained sandy loam rich in humus mixed with organic fertilizer. During cultivation, ventilation and light transmission should be strengthened, the amount of nitrogen fertilizer should be controlled, and attention should be paid to the balanced supply of the three elements nitrogen, phosphorus, and potassium.
Spring is here: what to pay attention to when growing flowers at home
The cold winter has gone, everything in spring is reviving, and it is also time to bring theseedlingskept indoors outside to see the sun. However, because it is the transition between winter and spring, the weather changes easily, so you need to pay attention to weather changes. There are also many issues to note to protect your flowers.
1. Carry out propagation.Spring is a good time for sowing, cutting, and grafting propagation. For sowing annual herbaceous flowers, such as Impatiens, cockscomb, zinnia, salvia, etc., prepare seeds, containers, soil, etc. in advance, and sow at the right time according to the temperature requirements for seed germination, without missing the opportunity. Also, according to seed size, adopt different sowing and watering methods, cover with glass or plastic film, and maintain a certain temperature and humidity to make them germinate early. Spring is also a great time for cutting propagation of many flowers. You can use branches pruned in spring, take healthy ones as cuttings, insert them at the edge of a pot, and with careful management, the survival rate is relatively high. Woody flowers are mostly propagated in spring by cut grafting and cleft grafting; prepare the rootstock in time, select good scions, and graft at the right time. Carefully and meticulously do the post-grafting management work to ensure the survival rate of the seedlings as much as possible.2. Move outdoors at the right time.Our country has a vast territory, and climatic conditions vary greatly from place to place, so the time for moving potted flowers outdoors differs. Experienced flower growers have summed up two rules from long-term practice: one is called "do not move out in spring," and the other is called "do not move in in winter." "Do not move out in spring" means that in early spring, do not rush to move flowers outdoors. Because northern spring weather is changeable and windy, with frequent cold waves, moving them out too early makes them susceptible to cold wind damage; tender buds and leaves are often scorched, or heavy leaf drop may be caused, and in severe cases the whole plant may die, so it is not suitable to move them outdoors too early. In most northern regions, the suitable time to move indoor overwintered flowers outdoors is between Qingming and Lixia. Before moving flowers outdoors, they need a period of acclimation to the environment, that is, opening windows for ventilation around noon so they gradually adapt to the outside temperature before being moved out. After being moved out, place them in a wind-sheltered, sunny spot. If windy weather or a late frost occurs, they still need to be moved back indoors promptly, and it is safer to move them out again after the weather improves.3. Change pots and soil in time.Potted flowers grow in a limited space within the pot. After one to two years of growth, development, budding, and blooming, the nutrients in the potting soil are mostly used up. Therefore, it is necessary to change pots and soil to increase soil nutrients and improve soil aeration. As for the time to change pots, perennial and woody flowers should ideally be repotted during dormancy and before new buds sprout in early spring; those that bloom in early spring should be repotted after flowering, such as potted plum blossom, peach blossom, winter jasmine, kalanchoe, clivia, Christmas cactus, etc. For repotting soil, mostly use sandy loam containing relatively rich humus, fertile, and with good drainage and air permeability. Some flowers can be divided during repotting, such as clivia, orchids, etc.4. Gradually increase fertilizer and water.Supply: Spring is the season for the growth and development of various flowers. Insufficient water and fertilizer supply often leads to wilting and even death of flowers. Attention should be paid to spraying water on the leaf surface to keep it moist; watering should be moderate, alternating wet and dry. Fertilization should be applied at the right time according to different types. For example, clivia, canna, Aglaia, jasmine, etc., should be given a liquid fertilizer topdressing every ten days.5. Prune reasonably.Spring is the best season for pruning flowers. For some woody flowers, such as crape myrtle, Chinese rose, etc., in early spring before the sap flows, prune the branches appropriately according to their respective requirements to promote new branches. Plum blossom, ornamental peach, etc. are pruned after flowering, generally keeping only two to three buds at the base and cutting off the rest. When new shoots grow to ten to fifteen cm, pinch them. Repeat this two to three times to form more flowering branches. The old stems of poinsettia should be pruned in early spring, keeping only two to three buds on the lower part of each stem and cutting off all the upper branches to promote the sprouting of new branches.The above are the precautions for spring home flower growing explained for flower lovers. I hope it can help everyone. You are also welcome to continue following Duorou Huapu, and we will continue to update knowledge about flower cultivation for everyone!