How to dwarf a potted Canna? Repotting is key in its cultivation methods
Canna is a relatively easy plant to grow, and we have also detailed the Canna cultivation methods and precautions, but if you grow it in a pot, what will be different? Today let's look at the potted Canna cultivation methods.
Potted Canna cultivation methods
1. Choose a deeper and larger pot
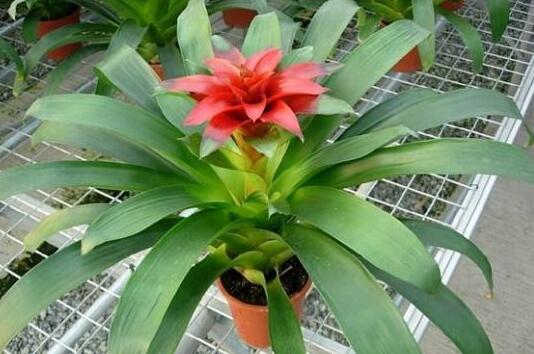
Since Canna is a tuberous-root plant, its roots will be larger than those of ordinary plants, so a larger pot should be chosen, so that during growth the size of the pot will not hinder root development.
In addition, the soil should also be looser, for example made by mixing leaf mold, garden soil and so on with sand, because loose soil will not restrict root development, and this is a very important point in potted Canna cultivation methods.
2. Control watering and fertilize more
When Canna is potted, attention should be paid to controlling watering. Unlike open-field cultivation, when watering it should be done by the principle of dry-wet alternation; during the dormant period the soil should be on the drier side, while in summer it can be on the wetter side. For details, you can refer to the detailed introduction on how to water Canna through the four seasons.
In addition, when fertilizing, attention should be paid to adding some bone meal or organic fertilizer to the potting soil, then during the growing period fertilize once every half a month to a month, with nitrogen, phosphorus and potassium as the main nutrients.
3. Repot regularly
In potted Canna cultivation methods, regular repotting is essential, generally once every 1-2 years in spring, depending on the condition of the potting soil. Its purpose is to increase the air permeability of the potting soil and ensure good soil drainage.
4. Propagate by division
If Canna is grown in a pot, the best propagation method is division, as this is the method with the highest survival rate. It can be done conveniently when repotting, which both saves maintenance time and improves the survival rate of the propagated plants.
How to dwarf a potted Canna
1. Stem-cutting method
Cut the Canna rhizome into small pieces, keeping 2-3 buds on each piece, then choose suitable potting soil and plant the cut rhizomes separately in each flower pot, generally two rhizome pieces per pot, at a depth of 8-10 cm. After planting, water thoroughly, and once the leaves grow, manage them according to the potted Canna cultivation methods.
2. Choose the right variety
Among Canna types, there is one called dwarf Canna, whose height is generally 50-70 cm, making it a very suitable type for potting, so if you want to grow it indoors, you must choose the right variety.
3. Burying paclobutrazol mud balls method
Mix 1 g of 15% paclobutrazol with 1 kg of clay evenly, add an appropriate amount of water and then make small mud balls, similar in size to a ping-pong ball, then dry them for later use. When the stems and leaves of the Canna grow to about 20 cm, bury 5 mud balls in the potting soil, after which the solution in the balls penetrates to the roots to dwarf it.
How to dwarf a potted Canna
I. Stem-cutting method
This method is to cut the Canna rhizome into small pieces, each small piece carrying two or three buds, and set them aside. Then choose a larger flower pot and plant the cut small rhizomes in it, two small pieces per flower pot being enough. The planting depth is between 8 cm and 10 cm, and base fertilizer must also be placed in the potting soil beforehand. After planting, water thoroughly, and once the leaves grow, normal water and fertilizer management can be carried out, so as to promote the growth of stems and leaves. When the stems and leaves reach 30 cm to 40 cm in height but have not yet flowered, carry out one stubble-flattening, that is, cut off all the stems and stalks without leaving a single branch or leaf; after stubble-flattening, apply dilute liquid fertilizer twice every week. After stem cutting, if nutrition is sufficient, it will quickly sprout again; at this time trim neatly and dwarf the stems and leaves again, and it will bloom in about a month. After flowering, in order to let the Canna bloom continuously many times, in June and September carry out another fine stem-cutting and stubble-flattening on it, and generally after a month it will bloom again!
II. Burying paclobutrazol mud balls method
Some varieties of Canna do grow relatively tall, which greatly affects their ornamental value. At this time, paclobutrazol treatment can be chosen to dwarf the plant. The specific method is: mix 1 g of 15% paclobutrazol with 1 kg of clay evenly, then add an appropriate amount of water, knead the clay into small mud balls one by one, the size of the balls can be similar to a ping-pong ball, about thirty are needed, then dry these mud balls in the sun for later use. When the stems and leaves of the potted Canna reach between 20 cm and 30 cm in height, some mud balls can be used in the pot, generally 5 pieces per flower pot, buried at the edge of the flower pot. After that comes watering, the purpose being to let the medicinal components in the mud balls slowly dissolve out and penetrate into the Canna's root system, prompting it to dwarf.
Have you all learned the above methods? We hope your potted Canna plants become more and more beautiful!
What are the cultivation conditions for potted Canna? What are the cultivation methods for potted Canna?
Potted Canna cultivation conditions
1. Light: full sun; during the growing period it requires sufficient light, ensuring at least 5 hours of direct sunlight every day. If the environment is too dark and light is insufficient, the flowering period will be delayed. If it is placed in a cool place when flowering, the flowering period can be extended.
2. Temperature: the suitable growth temperature is 15-30°C. When flowering, to extend the flowering period, it can be placed in a low-temperature place without sunlight, and the ambient temperature should not be lower than 10°C. When the temperature reaches above 40°C, the Canna can be moved to a ventilated and cool place. Around Frost's Descent, the potted Canna can be moved to a place at 5-10°C, and it can safely overwinter.
3. Humidity: during the growing period, spray water on the leaf surface 1-2 times a day to maintain humidity. Since Canna greatly likes fertilizer and tolerates moisture, the pot should be watered thoroughly.
4. Fertilizing: in addition to applying sufficient base fertilizer before planting, during the peak growing season topdress 3-4 times a month. If flower buds have not yet emerged 20-30 days before the scheduled flowering period, spray the leaves with 0.2% potassium dihydrogen phosphate water solution to promote flowering. Potted Canna sometimes shows symptoms of scorched and yellowing leaf edges, mainly caused by applying too much ferrous sulfate or by suffering drought and exposure to strong sunlight. In hot summer, if the water used for watering is too cold, it can also cause scorched leaf edges; if fertilizer is applied too concentratedly in the height of summer, it will even burn the rhizome and "burn it to death."
5. Soil: it is not strict about soil, growing best in loose, fertile, well-drained sandy loam, and it also adapts to fertile clayey soil. The potting soil should be mixed from leaf mold, garden soil, peat soil, mountain soil and other organic-rich soils. For potted Canna it is advisable to choose dwarf varieties, generally using leaf mold, garden soil and rice husk ash as the three raw materials in a ratio of 1:1.5:0.5, and adding a small amount of bean cake, bone meal and other fertilizers to mix well. In spring from March to April, take out the tubers, remove the rotten parts, select stem pieces with 2-3 robust buds and bury them in the potting soil, preferably with the bud tips exposed above the potting soil. Since Canna greatly likes fertilizer and tolerates moisture, the pot should be watered thoroughly; when it grows to the 5th leaf, apply a decomposed topdressing once every 7-10 days, and water after fertilizing. Generally apply 1% ferrous sulfate fertilizer water once a month, or additionally add a small amount of plant ash, to promote straight and robust stems, green and thick leaves, and bright flower colors. Stop fertilizing at the flowering stage. During the overwintering period, stop fertilizing.
6. Pruning: after the flowers at the stem tip fade, the stem branches should be cut off from the base at any time, so as to sprout new buds and grow flower branches that bloom successively.
Potted Canna cultivation methods
1. Use a deep, large pot and loose soil: Canna is a tuberous-root plant, so the pot used should be deeper and larger; a clay pot with a diameter of 30-40 cm can be used. It has strong adaptability and is not choosy about soil, growing best when planted in fertile, loose, well-drained sandy loam. Leaf mold and garden soil can be mixed in equal amounts and then mixed with a small amount of sand to make the growing medium. When planting, deep planting is advisable, covering with 6-8 cm of soil. Place a layer of broken hard plastic foam blocks at the bottom of the pot to facilitate air permeability, drainage and removal from the pot. Repot and change the soil once every spring.
2. Moderate watering and frequent fertilizing: during the growing period of Canna, the potting soil should be kept alternately dry and wet; in the rainy season, accumulated water should be drained at any time to prevent waterlogging. During the dormant period, the potting soil should be on the drier side. It likes fertilizer; in addition to adding some bone meal and nitrogen-phosphorus-potassium compound fertilizer to the growing medium when potting, during the growing period apply nitrogen-phosphorus-potassium compound fertilizer once about every half a month. Do not apply during flowering; continue applying after the flowers fade. Avoid applying nitrogen fertilizer alone, otherwise there will be many leaves and few flowers. Do not fertilize during the dormant period.
3. Likes light and warmth, fears cold: Canna is a shade-loving flower native to the tropics and should be placed in a sunny courtyard, rooftop garden or west-facing balcony with good ventilation and sufficient sunlight. In this way, not only are the tubers large and the tillers many, but the flowers are also numerous and gorgeous. If placed in a shady spot, the plant will be tall with few flowers and pale colors, or even no flowers. It fears frost, snow and freezing; after Frost's Descent, cut off all the scorched yellow leaves, invert an empty flower pot over the pot, and it can overwinter safely outdoors south of the Yangtze River; north of the Yangtze River it needs to be brought indoors to overwinter. Prune the flower stems in time. For potted Canna, after the flowers fade, promptly cut off the flower stems from the lower part of the stem level with the soil surface, and fertilize to encourage new stems to tiller from the stem base; after 1.5 to 2 months it can bloom again, so from late May to October it can bloom 3-4 times, always maintaining beautiful flowers and leaves.
4. Division propagation is easy to survive: in spring, together with repotting and changing the soil, pour out the tubers, cut them into several pieces with a sharp knife, each piece having at least 2-3 buds, smear the cuts with sulfur powder or wood charcoal, and plant them separately in pots. They can also be bred after flowering and propagated by sowing in the following spring.
Potted Canna pest and disease control
From May to August every year, pay attention to leaf-roller pests, so as not to damage the tender leaves and inflorescences. They can be controlled by spraying with 50% dichlorvos 800-fold solution or 50% fenitrothion EC 1000-fold solution. Ground-planted Canna occasionally has cutworms; they can be caught manually, or the soil at the roots can be drenched with trichlorfon 600-800-fold solution for control.
Well, that is all for the potted Canna cultivation methods. Canna not only has high ornamental value, but its roots and flowers can also be used as medicine; the tubers can treat jaundice-type acute infectious hepatitis, hypertension and metrorrhagia, etc., and the flowers can treat hemoptysis. It is a medicinal and ornamental flower worth cultivating.
Related articles