How to prune bamboo fern? A detailed guide to thinning, truncation and shaping methods
We know that among the functions and effects of bamboo fern, its main role is ornamental, and to maintain the charm of bamboo fern, its branches and stems must be well-spaced and varied in height, which requires us to pay more attention to pruning in daily care. So how do you prune bamboo fern? Let's take a look at the pruning methods for bamboo fern.
How to prune bamboo fern
1. Cut away overly dense branches and leaves
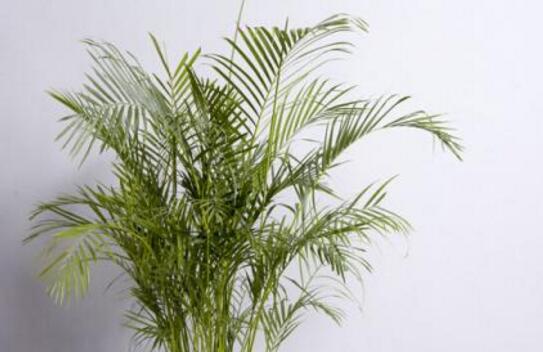
After bamboo fern grows for some time, it may become dense and congested, with branches and leaves possibly becoming too crowded. This not only affects some branches and leaves receiving normal sunlight, but also affects the overall appearance, so the overly dense branches and leaves need to be pruned, which is professionally called thinning.
When thinning, how do you prune bamboo fern? Generally, choose to cut off overly dense crossing branches, parallel branches, inward-facing branches, diseased branches and aged branches, which can encourage the plant to open up, making it more sparse and growing better.
2. Cut away overly tall branches and stems
Bamboo fern has dwarf types suitable for pot cultivation, and also types that can grow to 5 m tall. Whichever type it is, to keep it attractive and easy to manage, its height should be controlled by truncating overly tall branches and stems, making the plant denser rather than scattered.
When pruning, use relatively sharp large scissors to cut directly, rather than using smaller tools to cut, to avoid leaving too many wounds on the plant, which could allow some bacteria to infect these wounds.
3. Overall shaping
To make bamboo fern's leaf color more vivid and its appearance more beautiful, you can give it an overall shape, for example by cutting off slanting branches and leaves to create a beauty of varied heights. So when shaping, how do you prune bamboo fern? The specific approach can be based on personal preference, cutting out the shape you like.
4. Pruning when repotting
When repotting, you can also appropriately prune bamboo fern, for example by cutting off rotten or old roots from the root system, and cutting off diseased plants or withered yellow branches, which can avoid unnecessary consumption of nutrients.
The making of tree bonsai
Tree bonsai is made by selecting young trees or old tree stumps of ornamental trees, and after cultivation, artistic processing and planting arrangement in exquisite pots. Its making art most importantly requires mastering the biological characteristics of various trees and fully bringing out their natural beauty of posture, charm and color. For example, the lushness and vigor of pines and cypresses, the antique elegance and quiet fragrance of plum stumps, the plainness and antiquity of elm and maple, the unrestrained elegance of green bamboo, and the clear branches and leaves of Japanese apricot and boxwood. The cultivation, making and management of tree bonsai is a meticulous work that is both highly artistic and highly scientific. A good bonsai with a beautiful shape and enduring appeal is formed through the aesthetic conception and superb artistic techniques of skilled craftsmen, and only through careful maintenance and management can its vigorous growth and beautiful posture be ensured. The making and management techniques of tree bonsai roughly include the following aspects: tree species selection, tree embryo cultivation, processing and shaping, potting and scenery matching, and maintenance management. Maintenance management also includes: placement location, watering, fertilizing, pruning and posture training, repotting and soil changing, pest and disease control, etc.
1. Selection of tree species
There are many materials suitable for making tree bonsai. Generally, those with gnarled roots, dense branches and fine leaves, beautiful posture, and gorgeous flowers and fruits are preferred. At the same time, they are required to have biological characteristics such as strong sprouting ability, tolerance to pruning, and long lifespan.
The selection of materials for tree bonsai in our country has a long history and tradition. During the Jiaqing period of the Qing Dynasty (1796-1820), Su Ling of Wuxi wrote "Occasional Records of Bonsai", which recorded many tree bonsai and divided bonsai plants into the Four Masters, Seven Sages, Eighteen Scholars and Four Elegants of Flowers and Plants.
Four Masters: Caragana sinica, boxwood, winter jasmine, and Sabina chinensis var. sargentii.
Seven Sages: Huangshan pine, Juniperus chinensis 'Kaizuka', elm, maple, holly, ginkgo, and Japanese apricot.
Eighteen Scholars: plum, peach, Damnacanthus indicus, kumquat, goji berry, azalea, Cuibai cypress, Chinese quince, wintersweet, nandina, camellia, Buddhist pine, Malus spectabilis, bamboo fern, crape myrtle, pomegranate, Serissa japonica, and gardenia.
Four Elegants of Flowers and Plants: orchid, chrysanthemum, narcissus, and acorus.
Many of the tree species selected for ancient tree bonsai above are still commonly used materials for making bonsai today. However, with continuous introduction and discovery, there are now as many as one to two hundred materials suitable for tree bonsai, which can usually be divided into the following categories:
Pine and cypress category: Japanese white pine, Huangshan pine, black pine, Pinus thunbergii 'Nishiki', Japanese cedar, dawn redwood, Chinese swamp cypress, Chinese juniper, Sabina procumbens, Juniperus chinensis 'Aurea', Cuibai cypress, creeping juniper, Juniperus chinensis 'Parsoni', Juniperus chinensis 'Filifera', Juniperus chinensis 'Kaizuka', Chinese juniper, Buddhist pine, yew, etc.
Mixed wood category: Chinese elm, boxwood, Japanese apricot, Syzygium buxifolium, Chinese fringeflower, orange jasmine, hackberry, Fujian tea, tamarisk, small-leaf privet, etc. Leaf wood category: trident maple, red maple, ginkgo, Ilex cornuta, bamboo fern, bamboo fern, Buddha belly bamboo, palm bamboo, sago palm, etc.
Flowering wood category: camellia, sasanqua, Caragana sinica, Chaenomeles speciosa, plum, ornamental peach, crape myrtle, Malus halliana, Malus spectabilis, winter jasmine, osmanthus, azalea, Serissa japonica, Jasminum floridum, etc.
Fruiting wood category: fruiting pomegranate, firethorn, nandina, kumquat, finger citron, hawthorn, Ilex cornuta, Diospyros cathayensis, Elaeagnus pungens, Ardisia japonica, Diospyros rhombifolia, persimmon, goji berry, Jerusalem cherry, etc. Vine category: Chinese trumpet creeper, ivy, star jasmine, Euonymus fortunei, wisteria, honeysuckle, etc.
2. Collection and cultivation of tree stumps
The materials for tree bonsai mainly come from two aspects: propagation and seedling raising, and collecting tree stumps. The former uses sowing, cutting, layering, grafting, division and other propagation methods to obtain saplings, which are cultivated from a young age, with relatively free shaping and relatively even thickness of branches and stems, but it takes a long time; the latter digs up tree stumps that have grown for many years in the mountains and fields, and after handling according to the material and carrying out cultivation and processing, the time can be greatly shortened, and old stumps with natural beautiful forms and antique plainness can often be selected to make excellent bonsai. The disadvantage is that it is limited by the inherent form of the tree stump, and the thickness ratio between the trunk and side branches is not easy to make even. In addition, some precious tree species such as Japanese white pine, Sassafras tzumu, and red maple cannot be dug up in the mountains and fields, so saplings have to be obtained through artificial propagation.
Regarding propagation and seedling raising techniques, these are introduced in many horticultural books, and will not be repeated in this book. Here, the methods of digging and cultivating tree stumps are introduced.
Digging tree stumps must master certain scientific methods, otherwise it is difficult for them to survive, let alone become finished products, wasting time, manpower, and natural resources.
When selecting tree stumps to dig, one should comprehensively consider tree species, tree age, form and future prospects. Regarding tree species selection, this has been introduced earlier. As for tree age, older stumps are valued, but they must also grow vigorously. As for the form of the tree stump, do not blindly pursue the bizarre or the figurative (figurative form is not a selection standard for bonsai art), but rather prefer those with antique strangeness and vigorous twists and turns, with special attention to the form of the roots and trunk. Tree stumps generally should not be too tall or too large, so as to facilitate survival, processing, potting and display. Although some tree stumps have certain defects, from a developmental perspective, as long as they can be processed and remedied, they can still be used.
The time for digging tree stumps is generally after the trees enter dormancy, preferably in early spring when the ground has thawed and before the trees have sprouted. Digging in late autumn or early winter is also possible, but winter maintenance is more troublesome, especially in the north, where greenhouse maintenance is required. As for deep winter, because the soil layer is frozen, digging is difficult and roots are easily damaged, so it is not very suitable. The time for digging tree stumps must also be adapted to local conditions and determined according to the habits of the tree species. For tree species that are not cold-resistant, it is best to dig in March to April to avoid frost damage.
When digging, generally the main root can be cut off, but more lateral roots and fibrous roots should be retained. For pines and cypresses and some taproot tree species, it is better to retain appropriately more main roots, otherwise survival is difficult. After the tree stump is dug up, a heavy pruning can be carried out. Pruning should be based on the form of the tree stump and initially consider the future shaping. Generally, retain part of the main branches and stems and truncate them, and cut off all the rest. For evergreen tree species with weak sprouting ability, such as pines and cypresses, the branches and leaves must not be completely cut off. The dug tree stump does not need to have soil around the roots. It is best to dip it in mud, put it in a basket, and fill it with moss to protect the fibrous roots from withering due to loss of water. After bringing it back, it must be planted as soon as possible.
No matter how beautiful the natural form of a tree stump dug from the mountains and fields is, to make it into a bonsai it must still go through a certain period of cultivation, called "raising the embryo". Some bonsai enthusiasts, eager for quick success, plant newly dug tree stumps into relatively shallow glazed pots or purple clay pots, or even expose the roots and claws, trying to complete the bonsai in one go. As a result, most are difficult to keep alive, let alone shape. This is what is meant by haste makes waste.
For raising the embryo, it is best to choose a place with loose and fertile soil, good drainage and sufficient sunlight for ground planting, or use clay pots for planting, so as to facilitate shaping and processing. Planting should be appropriately deep, preferably leaving only the bud eyes above the soil. For tree stumps with relatively tall trunks, moss can be used to wrap the trunk. After planting, water thoroughly once, and cover the tree stump with a little straw to maintain humidity. In high summer temperatures, build a shade shed and spray water frequently. In winter, surround it with straw curtains to prevent freezing. Usually pay attention to replenishing water. During the vigorous growth period of the trees, water must not be lacking, but also be careful not to water too much, to prevent root rot. In dry weather, it is best to spray water on the leaf surface frequently. To make the tree embryo take shape as soon as possible, fertilizing is very important. Newly planted tree stumps have relatively tender roots, so it is advisable to apply thin fertilizer frequently. Fertilizer can be decomposed cake fertilizer or manure, diluted before use. During the embryo raising period, pruning, bud picking, and pest and disease control must also be done well.
Pruning mainly refers to cutting off branches and stems that will not be needed for future shaping, so as to avoid consuming nutrients. Dead branches, diseased branches, etc. must also be cut off, otherwise they will affect the sprouting of new buds or lead to the spread of pests and diseases.
Bud picking mainly refers to removing excess buds. Generally, retain the buds needed for future shaping (including spare buds), and remove all the rest, so as to avoid growing useless branches and stems. When the retained buds grow into branches and stems, further selection can be made, cutting off unused branches and stems and removing the terminal buds of the retained branches and stems, to promote axillary buds to sprout side branches and increase the layers and density of branches and leaves.
3. Processing and shaping of the tree embryo
Saplings cultivated from a young age generally begin processing and shaping after 3 to 5 years; tree stumps dug from the mountains and fields can mostly be processed and shaped after one year of embryo raising.
Before processing, ground-planted tree embryos can be dug up and temporarily planted in pots of basically suitable size, to facilitate operation and shaping. Large tree embryos can also be processed and shaped in place.
Processing and making must follow a series of artistic techniques of bonsai creation. First carefully observe and consider the tree embryo material, and according to the characteristics of the material decide what theme to express and how to shape, that is, "handling according to the material". Arrange the skeleton of the tree embryo's roots, trunk and branches according to the rules of bonsai art, so that it becomes a living bonsai art work with coordination and symmetry, beautiful lines, and profound artistic conception. If pine is chosen as the material, it is suitable to express the vigor and uprightness of its main root, with branches and leaves spread flat in cloud-like layers; cypress is suitable to express its antique and peculiar trunk, with branches and leaves in clusters; plum shaping is suitable for sparse branches extending sideways; winter jasmine is suitable for drooping branches and arched curves; ... this is considered from the natural characteristics of the tree species. In addition, it must also be considered from the inherent shape of the tree stump. For example, some tree stumps have straight trunks and can follow their nature to be made into the straight-trunk style; some tree stumps have naturally curved trunks and are suitable for the curved-trunk style or cliff style; some tree stumps have withered and bare trunks and are suitable for the withered-peak style ... Handling according to the material can save labor in bonsai making and also have natural wild charm. If everything is completely allowed to grow naturally, then there is no talk of bonsai art, but if the traces of artificial work are too excessive, then the natural beauty is lost. Therefore, for the shaping of tree stumps, one must not rigidly adhere to conventions and apply fixed patterns.
Shaping and processing methods also have a certain procedural order. Usually the trunk is done first and then the branches, from bottom to top, by wiring, pruning or carving, which can be determined according to the tree species and shaping needs. Different regions have different processing methods due to different customs. Generally, for pines and cypresses and tree species with weak sprouting ability, wiring is the main method. For tree species with strong sprouting ability such as Chinese elm, Japanese apricot, Fujian tea, and trident maple, pruning can be the main method. Tree stumps processed by wiring can be shaped freely, with varied twists and turns, and take shape relatively quickly; tree stumps processed by pruning are vigorous and natural, but take shape more slowly. In southern regions, the climate is warm and trees grow quickly, so it is suitable for wiring and shaping; in northern regions, the climate is cold and trees grow slowly, so it is suitable for wiring and shaping. Of course, these are only general situations. The styles and schools of bonsai in different places are different, and the shaping methods are entirely different. For example, the Lingnan school uses the pruning and shaping method of "storing branches and truncating trunks"; the Yang school uses the wiring and shaping method of "one cun with three bends"; the Su school uses the shaping method of "coarse wiring and fine pruning"; the Hui school uses the shaping method of "zigzag bending"; the Chuan school uses the "square turn" or "dropping turn" shaping method, etc. If we master the most basic methods of pruning and wiring and apply them flexibly according to specific circumstances, ideal results can often be produced.
(1) Wiring method: that is, through wiring materials such as palm fiber, hemp bark or metal wire, the tree branches and stems are bent into various shapes.
Metal wire binding method: This method is simple and easy to do, and allows free bending, but removal is somewhat troublesome. It is best to use wire that has been heated over fire, but usually the more economical galvanized iron wire is used. Select wire of appropriate thickness according to the thickness of the branch or stem being wired. Metal wire generally uses sizes 12 to 24, used according to match. Wire thickness selection table
Wire No. 12 No. 12 No. 16 No. 18 No. 20 No. 22 No. 24
Branch or stem diameter 15 mm 10 mm 6 mm 4 mm 3 mm 2 mm 1.5 mm
When wiring, first fix one end of the metal wire to the base or crossing point of the branch or stem, then slowly wrap it tightly against the bark, making the metal wire form about a 45° angle with the branch or stem. If the branch or stem is to be twisted downward to the right, the metal wire is wrapped clockwise; otherwise, wrap counterclockwise. Note that while twisting, bend at the same time, so that the metal wire stays close to the bark, and the branch or stem is also less likely to break. Do not use too much force, to prevent damaging the bark or breaking the branch or stem. For tree species with thin bark that is easily damaged, such as pomegranate and red maple, the branch or stem can first be wrapped with hemp bark, and then the metal wire can be applied. If repeated metal wire wrapping occurs on one branch, attention must be paid to the consistency of the wrapping direction, and crossing should be avoided as much as possible.
Palm fiber wiring method: This is a traditional shaping method of Chinese bonsai. Its advantages are: the palm fiber color harmonizes with the branch or stem, it can be appreciated immediately after processing, it is not easy to damage the bark, and removal is convenient, but wiring is relatively difficult. Generally, first twist palm fiber into palm ropes of different thicknesses, tie the middle section of the palm rope around the lower end of the trunk to be bent (or make a loop knot), twist the two ends against each other a few times, place them on the upper end of the branch or stem to be bent, tie a slip knot, then slowly bend the branch or stem to the required curvature, then tighten the palm rope and tie a dead knot, completing one bend. Generally, the bend should not be excessive, otherwise it is easy to lose the natural form. The key to palm fiber wiring lies in controlling the force points; according to shaping needs, choose the positions for applying the palm fiber and tying the knot.
The order of palm fiber wiring: at the beginning, first wire the trunk, then the branches and leaves; when wiring branches and leaves, first wire the top, then the lower part; when wiring each part, first wire the large branches, then the small branches; when wiring the trunk, proceed from the base to the top.
Through long practice, old bonsai craftsmen in various places have summarized many kinds of palm fiber wiring methods, called palm methods. These palm methods differ slightly by region or school, but the basic principles are the same, and the purpose is to use palm fiber to tie tree branches and stems into the required forms. The palm method is a means, not an end. After mastering the basic principles, it can be handled flexibly according to shaping needs.
For bending relatively thick branches or stems, they can first be wrapped with hemp bark, and a strip of hemp fiber can be placed on the outer side of the part to be bent to enhance the toughness of the trunk. If the branch or stem is too thick and difficult to bend, the "knife-opening method" can also be used, that is, use a sharp small knife to cut a 3 to 5 cm deep opening at the bending point of the trunk, and then wrap the cut surface with hemp bark as above. This makes bending easier and breakage less likely. To help the cut heal, it is best to make the cut surface perpendicular to the plane where the bend is located.
Whether metal wire or palm fiber wiring is used, generally it can be removed after one year to set the shape. If not removed in time, as the branch thickens, the metal wire or palm fiber will sink into the cortex, affecting tree growth and appearance. However, for slower-growing tree species and thicker branches or stems, the time can be extended by about half a year to a year.
Wiring time for various tree species: pay attention to timely wiring, then the branches are soft, bending is easy, and after wiring, development and growth are good. If wiring is not timely, the branches are easy to break, and development and growth are also affected. Tree species wired in winter and spring include: Chinese juniper, magnolia, Japanese snowball, butterfly tree, wintersweet, plum, peach, cherry, Prunus glandulosa, Prunus triloba, Malus spectabilis, Malus halliana, pomegranate, crape myrtle, Chinese elm, hackberry, Vitex negundo, etc. For the tree species from wintersweet onward, before they take shape, the newly lignified new branches should also be wired once in summer. Tree species wired in summer and autumn include: Buddhist pine, Huashan pine, Diospyros cathayensis, Elaeagnus pungens, Serissa japonica, osmanthus, etc. Tree species wired in winter and autumn include: Chaenomeles speciosa, firethorn, Japanese apricot, boxwood, etc. Some tree species such as Euonymus alatus, winter jasmine, and goji berry can be wired at any time. Flower-viewing tree species such as camellia and azalea are all suitable for wiring before flowering.
(2) Pruning method: that is, through pruning of branches and stems, removing excess parts and retaining their essence, so as to make the tree form beautiful. This is one of the main means of shaping tree bonsai. The effects of pruning include weakening, dwarfing, and changing the tree form. When pruning, adjust and cut off messy crossing branches, overlapping branches, parallel branches, opposite branches, etc. For the remaining branches, nutrients are concentrated and they grow thick and strong. When the cultivated branch grows to a suitable thickness, carry out strong pruning to shorten it and produce the second section branch; when the second section branch grows to a suitable thickness, cut it again, and do the same for the third and fourth section branches in turn. Generally, retain two small branches on each section branch, one long and one short. After many years of pruning, the branches and stems become shortened, thick and strong, vigorous and powerful, gradually forming the required tree shape.
Pruning methods: there are measures such as pinching, cutting, thinning, and wounding. Pinching refers to pinching off growing tips and leaves. Removing the tip of a new shoot during the growth period is called pinching. Pinching can promote axillary bud growth, produce more branches, inhibit height growth, and help make the bonsai shape beautiful. Leaf removal can promote the sprouting of new leaves. For example, removing old leaves from elm during the growth period will make the new leaves smaller and more delicate, which is good for viewing; removing old leaves from maple and pomegranate, the new leaves sprout red, bright and pleasing to the eye. Cutting refers to truncating current-year branches. After truncation, medium and short branches increase and the mother branch thickens. As the saying goes, when branches are sparse, cut them; when cut, branches become dense, which is beneficial to the shaping of branch pads. Retrenchment is truncating perennial branches, the main technique of the Lingnan school's "storing branches and truncating trunks", which is beneficial for renewing and rejuvenating old trees. When digging wild tree stumps, during the embryo raising process, the method of retrenchment and trunk truncation is often used. It is both a measure for dwarfing the tree stump and a means for renewing and rejuvenating old stumps. Thinning refers to thinning pruning, cutting away part of overly dense branches from the base, which helps improve ventilation and light transmission conditions and promotes vigorous growth of the remaining branches. Wounding refers to measures such as scoring, girdling, twisting branches, twisting shoots, and bending branches on tree branches and stems. Flower-viewing and fruit-viewing bonsai often adopt this method to promote flowering and fruiting.
Pruning timing should be timely and suitable for the tree species. Generally, deciduous tree species can be pruned in all four seasons, but pruning after leaf fall and before bud break is preferable. Pines and cypresses tend to bleed resin after pruning, so winter pruning is suitable; fast-growing tree species with strong sprouting ability such as tamarisk and elm can be pruned several times a year; for flower-viewing tree species, those that flower on current-year new branches, such as crabapple, apple, crape myrtle, and pomegranate, are suitable for pruning before sprouting; tree species that flower on one-year-old branches such as ornamental peach, plum, and winter jasmine are suitable for pruning after flowering.
(3) Carving method: To show the antiquity of trees, sometimes a chisel or sharp carving knife can be used according to shaping techniques to carve the trunk into natural concave and convex changes. Part of the bark can also be peeled off, and even half the trunk can be split away (such as the split-trunk style shaping of plum stumps), making the tree present a naturally withered and aged posture. However, when carving, artificial traces of knife cuts and axe cuts must not be revealed. This method is mostly used for pines and cypresses and relatively large old tree stumps.
(4) Root-raising method: Tree stump bonsai emphasizes exposed roots and claws, and gnarled roots, which is also one of the important contents of bonsai appreciation. The root-raising technique usually plants the tree first in a deep pot, and then year by year removes the soil mounded above, so that the thick roots are raised above the soil surface. At the same time, the root system can also be artistically coiled and bent, making it appear more antique, peculiar, plain and wild. However, when raising roots, it must be done in moderation, and too many roots must not be exposed all at once, so as not to affect the growth of the tree stump or even cause death. The root systems of tree species such as elm and Caragana sinica are slender and soft. When raising roots, the long roots can be coiled into an antique shape, but the coiling of the root system must be orderly and aesthetically pleasing, and must not be tangled randomly and lose naturalness, which would instead affect the effect.
The forms of trees in nature are ever-changing, and as a miniature of them, bonsai should of course also be diverse. Therefore, it is difficult to set specific standards for tree shaping. But it must conform to nature and be full of pictorial quality. Arbitrary fabrication loses the natural form of the tree. But merely conforming to nature is not enough; artistic processing must also be carried out on the basis of nature. This is the same principle as painting. To reach a certain artistic realm, one must usually observe various trees in nature more, accumulate perceptual understanding, and especially be good at mastering the typical postures of trees commonly used in bonsai, such as the natural form characteristics of pine, cypress, willow, plum and common miscellaneous trees. At the same time, observe more tree painting methods in landscape paintings and learn techniques from them. In addition, improve artistic accomplishment from aesthetics, literature and other aspects.
4. Planting of trees
Tree embryos that have been processed and shaped, if they cannot yet take shape for the time being, can continue to be cultivated in the ground; if they are close to taking shape, they can be potted and matched with scenery.
(1) Pot selection: Only when a beautifully shaped tree is matched with a pot of moderate size, appropriate depth, matching style, harmonious color and suitable texture can it become a perfect bonsai art work.
When choosing a pot, first pay attention to moderate size. If the pot used is too large, the inside of the pot appears empty, the tree appears short, and at the same time the large pot holds more soil, so it stores too much water, which in mild cases causes the tree to grow excessively and affects shaping, and in severe cases causes root rot; if the pot used is too small, the bonsai appears top-heavy and lacks stability, and it is easy to cause insufficient water and nutrients, affecting tree growth. Generally speaking, for short and sturdy trees when planted alone, the pot mouth surface must be smaller than the crown range, and the pot length must be greater than the height of the trunk; for tall and upright trees when planted alone, the pot mouth surface must be greater than the crown range, and the pot length must be less than the height of the trunk; combined planting styles should be slightly larger, to express a certain spatial environment. In addition, when using a shallow pot, the pot mouth surface should preferably be larger rather than smaller; when using a deep pot, it should preferably be smaller rather than larger.
The depth of the pot has a great influence on bonsai shaping and also a certain influence on plant growth. If the pot used is too deep, the tree in the pot appears low and short, and at the same time it is not conducive to the growth of dry-loving plants; if the pot used is too shallow, trees with thicker and taller trunks appear unstable, and it is difficult to plant them, which is not conducive to the growth of moisture-loving plants and flowering and fruiting trees. Generally speaking, combined planting styles should use the shallowest pots; straight-trunk style should use relatively shallow pots; slanting-trunk style, lying-trunk style and curved-trunk style should use pots of moderate depth; cliff style should use the deepest cylindrical pots, but large cliff style sometimes instead uses medium-deep pots, to contrast and show the length of the drooping branches. In addition, for regular-style tree bonsai, deeper pots are customarily used; while for natural-style tree bonsai, especially those with accessories placed in the pot, the pot must not be deep.
When selecting and matching pots, the style and the scenery content must be consistent in tone to be harmonious. At the same time, consideration must also be given to benefiting plant growth. If the tree's posture is vigorous and upright, then the lines of the pot should also be firm and straight, using square, rectangular and various angular pots, to focus on expressing a masculine beauty; if the tree's posture is twisted and winding, then the outline of the pot should preferably use curved lines, using round, oval and various rounded pots, to show a feminine beauty. It must be explained that this method of pot selection is not absolute. Sometimes, in order to create a contrast, the opposite approach is also taken. Trees with upright forms use short-footed pots; trees with elegant slanting forms use tall-footed pots.
Trees that grow quickly and have well-developed root systems should use pots with flared or straight openings, to facilitate repotting; trees that grow slowly and have poorly developed root systems can use pots with various opening forms.
Trees of traditional regular-style shaping should use square pots or round pots whose length, width and height dimensions differ little, and can also use pots in styles such as begonia shape, hexagonal shape, and plum blossom shape; trees with no obvious directional tendency should use relatively shallow pots such as round and square types; slanting-trunk style should use relatively shallow pots such as rectangular and oval types; multi-trunk style, forest style, connected-root style, and stone-attached style bonsai have relatively complex content and should use shallow pots with simple shapes such as rectangular and oval types.
The texture of the pot has a certain influence on both appreciation and plant cultivation. Pines and cypresses generally should use purple clay ceramic pots; mixed wood types generally use glazed ceramic pots; flower-viewing and fruit-viewing types should use tile pots for cultivation, which is good for flowering and fruiting, and when viewing, an outer porcelain pot or glazed ceramic pot can be added; miniature bonsai should use purple clay ceramic pots or glazed ceramic pots; extra-large bonsai can use carved stone pots or cement pots.
The colors of the pot and the tree scenery should both contrast and harmonize. Pines and cypresses are green in all four seasons, and when matched with dark purple clay ceramic pots such as red and purple, they appear even more antique and simple; flowering and fruiting types are rich in color and should be matched with brightly colored glazed ceramic pots, making the colors of flowers and fruits even more gorgeous. For example, red plum, Chaenomeles speciosa, wisteria and firethorn can be matched with white, light blue, light green and light yellow glazed ceramic pots; yellow-flowered azalea, white plum, Caragana sinica and winter jasmine can be matched with darker-colored glazed ceramic pots; for foliage-viewing and mixed wood types, even more attention must be paid to the color of the pot, for example red maple should be matched with a light-colored pot and ginkgo with a dark-colored pot. In addition, pot matching must also consider the color of the tree trunk.
The above introduced the main points to note in selecting and matching pots. They cannot be regarded as absolute rules and should be applied flexibly according to specific circumstances. Selecting and matching pots is an important step in bonsai art creation and has a great bearing on the success or failure of a bonsai work. Serious exploration and research are needed, and only through a great deal of practice can one become proficient.
(2) Soil: The pot soil for tree bonsai should be selected according to the biological characteristics of each tree species. Different tree species have different requirements for the physical and chemical properties of the soil. Some require acidic soil, such as azalea, camellia, Chinese fringeflower and gardenia; some require neutral soil or calcareous soil, such as Chinese elm, zelkova and hackberry; tamarisk and goji berry can tolerate alkaline soil, which shows that different bonsai trees should use different pot soils. But generally bonsai plants all need fertile, loose, sandy loam rich in humus.
There are many kinds of pot soil, such as humus soil, paddy field soil, mountain soil, leaf mold, pond mud, river sand, etc., all suitable for bonsai soil. Culture soil can also be prepared according to different situations. Ordinary culture soil is usually prepared from the following materials: 4 parts fertile field soil (garden soil), 4 parts leaf mold (soil formed by piling and decomposing large amounts of leaves and weeds), 2 parts coarse sand, then mix evenly with a small amount of rice husk ash and sieve. Fertilized culture soil is ordinary culture soil mixed with 1 to 2 parts cake fertilizer.
(3) Planting: When planting, first select the pot and soil, and use broken tiles and wire mesh (plastic mesh is better) to plug the drainage hole at the bottom of the pot. Shallow pots mostly use wire mesh, deeper pots can use broken tiles, with two pieces overlapped to fill one hole, and the deepest cylindrical pots need more tiles and sand soil placed at the bottom of the pot to facilitate drainage. The work of filling the hole is very important and bears on the survival of the bonsai plant, and must not be done carelessly. If not handled with attention and the water hole is blocked, water cannot drain out after watering, the pot soil accumulates water, and the plant will suffer root rot. When using a shallow pot to plant a relatively large tree, metal wire must be used to tie the tree roots firmly to the bottom of the pot. First place an iron rod at the bottom of the pot, pass the metal wire through the pot hole and tie it around the iron rod, so that the tree roots can be fixed when planting and will not shake because the pot soil is shallow, affecting root development and growth.
After the position of the tree is determined, put the previously sieved culture soil into the pot. If the pot soil is divided into coarse and fine, first place the coarse-grained soil at the bottom of the pot, then place the fine-grained soil to mound the roots and fill firmly. When mounding soil, while putting it in, use a bamboo stick to press the soil closely against the roots, but do not press the soil too tightly, as long as there are no large gaps, which is good for air and water permeability. When the soil is placed close to the pot mouth, leave a little watering space to facilitate watering. If it is a shallow pot, then no watering space may be left, and sometimes soil must be mounded for planting. The depth of tree planting should also be based on shaping needs, and generally the roots can be slightly exposed above the soil surface.
After the tree is planted, water it. Newly planted soil is relatively loose, so it is best to use a fine watering can to spray water. For the first watering, be sure to water thoroughly. After watering, place it in a windless, semi-shaded place, pay attention to frequent watering, and keep the pot soil moist. After about half a month, new roots will grow, and only then can normal management begin.
For the planting of stone-attached style bonsai, there are roughly two situations: one is to plant the tree in a hole in the mountain stone, which is relatively simple, but attention must be paid to using a bamboo stick to press the soil closely against the tree roots; the other is to wrap the tree's root system around the stone, which is relatively difficult. The tree roots can be carefully inserted into the cracks of the selected mountain stone, the entire outside smeared with soil, then wrapped and tied with moss, and planted together with the stone into the soil. After two or three years, when the roots have grown fully and are tightly embedded with the stone cracks, it can be taken out and planted in a shallow pot.
5. Stone matching and accessories for tree bonsai
In tree bonsai, mountain stones or accessories are often used in combination with trees. This is a unique landscaping technique of Chinese bonsai art. In a pot of pine and cypress bonsai, arranging some mountain stones will make a tree of only a foot reveal the momentum of towering into the sky. In cliff-style bonsai, placing a sharp peak stone at the base of the roots makes it seem as if the tree is growing on a cliff precipice. When tree bonsai is dotted with mountain stones, it adds poetic and pictorial charm and natural interest. Pine-stone bonsai and bamboo-stone bonsai are both techniques of foil and contrast.
Stone matching can be divided into natural style and courtyard style: natural-style stone matching imitates the natural combination of mountain and field trees with strange peaks and rocks; courtyard-style stone matching imitates the artificially arranged scenery of trees and stones in courtyards.
Accessories refer to small ceramic or stone models such as pavilions, terraces, towers, chambers, animals and figures. After adding accessories to tree bonsai, it can add a flavor of life. When using accessories, attention must be paid to conforming to the natural environment and scenic interest, and to the proportions of distance and size, as well as color harmony. Accessories are usually placed on the soil surface of the bonsai or on the matching stones. For temporary decorative treatment for display and appreciation or exhibitions, accessories are generally not placed in ordinary times, so as not to affect management work such as watering and fertilizing the trees.
Tutu shows you pictures of miniature bonsai
I wonder if everyone likes to place plants at home to decorate their home? Tutu really likes the feeling of plants placed at home, because when Tutu sees plant bonsai, she feels comfortable and peaceful. Tutu's older sister also wants to place some plant bonsai at home, but her sister's home already has a lot of decorations, and her sister's balcony also does not have enough space to place bonsai. What should be done? Today Tutu will first introduce the specific situation of miniature bonsai to everyone, and then show you a few pictures of miniature bonsai. Friends who are interested, come and take a look!
Introduction to miniature bonsai
Miniature bonsai is mainly based on flowers and grasses, decorated with small pieces such as mountain stones. It mostly uses Acorus gramineus, asparagus fern, saxifrage, spider plant, orchid, lucky bamboo, narcissus, chrysanthemum, banana, reed and other casual flowers and wild grasses. Miniature bonsai emphasizes small form and exquisite, unique shaping, and pays even more attention to the connotation of overall artistic beauty. The various ornaments of each small group of bonsai need to show different forms, and attention must be paid to the overall layout. With gathering and scattering well arranged and the theme prominent, the maker's artistic conception and aesthetic taste are finally achieved. This is where the vitality of miniature bonsai art lies.
Management of miniature bonsai
First select suitable plant materials, and match them with finely made and beautifully shaped small purple clay pots. Rectangular or oval pots carved from white marble can also be used, as well as other uniquely shaped and finely made small containers. As long as a hole is drilled in the bottom of the pot, any can be used as a pot. After selecting the plant, it can be planted into a suitable pot. Generally, in tall cylindrical pots, semi-cascade style or full cascade style is suitable; rectangular and oval pots are suitable for planting in straight-trunk or slanting-trunk style.
For general plant shaping, the most suitable time should be after the beginning of winter and before the plant sprouts the following spring. Before shaping, a shaping concept and design should be made according to the characteristics and posture of the planted tree, and the shaping method determined. The trunk is the main part of miniature bonsai shaping. If determined to be straight-trunk style, then no wiring is added, maintaining a straight and upright trunk and cultivating side branches; for slanting-trunk style, only plant the trunk at a slant, without wiring; while cliff style must use lead wire wrapped around the trunk to bend it into shape. When processing, the branches and leaves should not be too numerous. Generally retain 1 to 2 branches, focusing on simplicity and smoothness, to fully show their natural beauty. Through simple and exaggerated pruning or wiring, the shaped branches only need 1 to 2 bends. For messy branches that hinder shaping, such as crossing branches, parallel branches, opposite branches, radiating branches, and reverse branches, these should be thinned or truncated, so that the branches are orderly in density, clear in layers, and moderate in height. For varieties with relatively strong root systems such as Caragana sinica, winter jasmine and elm, when planting, the roots can also be exposed above the pot surface, to increase the aged posture of the tree.
The making of miniature bonsai mainly has four steps:
Material selection. To make miniature bonsai, generally choose materials with fine branches and small leaves, easy to survive after potting, and with peculiar roots and trunks, gorgeous flowers and fruits, and easy to shape. Commonly used ones include Japanese white pine, small-leaf Buddhist pine, real cypress, black pine, boxwood, bamboo fern, fine-leaf holly, Serissa japonica, asparagus fern, Japanese apricot, and nandina. The above tree species can be obtained by cutting, sowing and division. To take shape quickly, tree stumps such as goji berry, Caragana sinica, golden bean, wisteria, Lycopodium clavatum, and firethorn can also be dug from the mountains and fields, and after artistic shaping, planted into pots.
Shaping. "Conceive before acting," have the form of ancient trees in mind. Shaping should be highly generalized. Common methods include palm fiber tying, lead wire wrapping, branch folding, wiring, and inverted hanging, among which lead wire wrapping for shaping is relatively simple. Generally, tree shaping is best done in the morning. The specific operation should select lead wire of suitable diameter according to the thickness of the branches and stems, wrap the branches and stems, and then bend them into the required form. When wrapping with lead wire, it must be close to the bark, with moderate density, and the wrapping direction should preferably form a 45 degree angle with the diameter of the branch or stem. After 1 to 2 years, when the trunk has basically set its shape, the lead wire can be removed. For unnecessary messy branches, they should be truncated or removed.
Potting. When shaping, the tree should be moved from the clay pot into a purple clay pot or glazed pot. The shape, size and luster of the pot must match the tree body. Generally, tall cylindrical pots are suitable for cliff style; oval or shallow rectangular pots are suitable for straight-trunk or slanting-trunk style; round pots can be used for low, coiled plants; polygonal shallow pots are suitable for tall-trunk style. In addition, the pot stand should also coordinate with the shape and color of the flower pot, blending into a complete artistic structure. The ancients had a famous saying in appreciating potted plant art: "first the tree, second the pot, third the flower stand."
Maintenance. The maintenance of miniature bonsai is especially necessary to be thorough and meticulous. The pot soil should often be kept moist, alternating between dry and wet, or watered by the pot immersion method. In midsummer, place it in a shaded place, and use a fine-hole watering can to spray water on the plant, maintaining a moist environment. During the growth period, apply thin fertilizer frequently, generally once every ten days or so. Fully decomposed soybean cake water, hoof piece water, etc. can be used. A complete-element compound chemical fertilizer can also be applied, and the fertilization method is best also by the pot immersion method. Meticulous matters: the pot soil should often be kept moist, alternating between dry and wet, or watered by the pot immersion method. In midsummer, place it in a shaded place, and use a fine-hole watering can to spray water on the plant, maintaining a moist environment.
Tutu has many friends around who like plants. Many people are in a situation similar to Tutu's older sister, with not enough space at home to place slightly larger plant bonsai. At this time, Tutu will of course introduce miniature bonsai to friends. Indeed, miniature bonsai are small in size, do not take up space, and have beautiful forms, with diverse plant styles, while also decorating the whole room. Of course, they are the first choice for home decorations. For friends who like plant bonsai but have limited space at home, this is simply good news! The above is the content about miniature bonsai pictures. I hope it can be helpful to everyone!