How do you prune Photinia × fraseri? Six shapes you can cut it into
We know that in the cultivation of Photinia × fraseri, pruning is a very necessary and key step, because it keeps the plant looking good and promotes growth. So how do you prune Photinia × fraseri? What shapes can Photinia × fraseri be pruned into? Let's find out together.
How to prune Photinia × fraseri
1. When to prune Photinia × fraseri
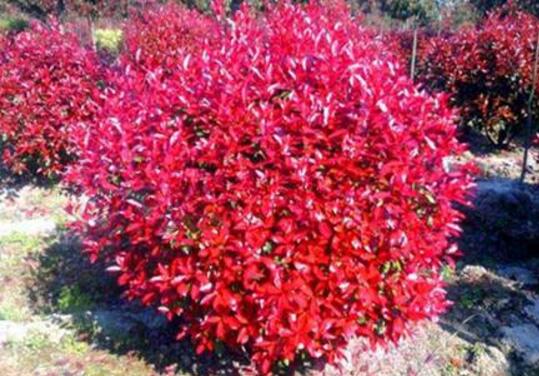
Photinia × fraseri sprouts new growth once in March, June and September, so major pruning is generally done at these three times; cutting off the excess branches helps the new sprouts grow. Apart from these periods, you can also prune if you find diseased leaves or when repotting.
2. Where to make the cut
The cut is generally made at a spot more than 10 cm from the bud, so that it is not too close and does not affect the growth of the new sprout.
Note: use a sharp tool when pruning, and the cut should be slanted appropriately. Do not prune in winter, to avoid the temperature being too low and affecting the recovery of Photinia × fraseri.
What shapes can Photinia × fraseri be pruned into
1. Cube shape
So how do you prune Photinia × fraseri at this point? Choose the size of cube you want, then cut the top and all four sides of the Photinia × fraseri into a neat square. When pruning, start with a plant that is growing vigorously with lush branches and leaves, cut the top flat, then heavily prune the side branches all around, leaving an appropriate length; once the new branches sprout they will gradually grow into the required shape.
2. Cylinder shape
Choose a vigorous plant whose height reaches the required height, pinch out the growing tips in the early stage of growth, then from top to bottom trim the branches and leaves into a cylinder; as it grows on, small branches will gradually appear, and at that point shape it again as needed.
3. Standard tree form
Photinia × fraseri is both a tree and a shrub. If you want to prune it into a standard tree form, then in the first year you need to fertilise and water sensibly to promote growth in height; in the second year cut away some of the lower side branches; when the trunk reaches 1.5 m tall, pinch out the top of the main leader, and when the main leader has grown 30-40 cm thicker, pinch out the top a second time.
4. Low globe shape
If you want a low globe shape, how do you prune Photinia × fraseri? The answer is to pinch out the growing tip at the seedling stage, and when several side branches have branched off, pinch out the tip a second time. If the branches on the crown are growing too vigorously, you need to prune again: lightly prune the side branches, then thin out the leggy shoots so that the whole crown draws in toward the middle; after a little light shaping it will form a globe.
5. Standard globe shape
Use a large Photinia × fraseri seedling as the rootstock; once the trunk height is sufficient, shape and prune the crown, then according to how the branches of the crown are distributed, graft 6 buds onto the rootstock by bud grafting; afterwards be careful to remove shoots promptly to encourage the grafted buds to sprout, then prune using the low globe method.
6. Hedge shape
First cut the top flat and level, to whatever height is required; the cross-section can be a rectangle or a trapezoid. Then cut the side branches vertically and level, to whatever thickness is required, making sure the pruned surfaces are neat and even.
How to prune Photinia × fraseri? Pruning methods for Photinia × fraseri
[Common questions]How do you prune Photinia × fraseri?
[Expert answer]Photinia × fraseri has high ornamental value and is often used as a street tree or a hedge. If you want Photinia × fraseri to be more ornamental, pruning and shaping is an important method. The pruning methods for Photinia × fraseri are described below:
Image: Photinia × fraseri
1. Specimen tree form
In the first year, during the seedling stage, increase water and fertiliser management to promote growth in height; in the second year, properly remove some of the lower side branches of the plant and continue to increase water and fertiliser management; in the third year, from the end of February to early March, as required for a trunk height of about 1.5 m, remove all the lower side branches and pinch out the top of the upper main leader to encourage side branches to form a crown. Normally 3-4 side branches are required; if after the first pinching there are still not 3-4 side branches, once the main leader has grown 30-40 cm, pinch out the top a second time so that it branches into more side branches. Through continued cultivation it can reach the standard for a specimen tree form for engineering use.
2. Low globe shape
At the seedling stage of Photinia × fraseri, when the seedling is about 40 cm tall, pinch out the growing tip to encourage several side branches (at least 3-4). If after the first pinching there are still not 3-4 side branches, pinch out the tip a second time as appropriate. Afterwards, because the upper branches of the crown grow vigorously, they should be heavily pruned, while the side branches should be lightly pruned, and leggy shoots removed promptly, so that the whole crown draws in toward the centre and gradually “huddles into a ball”; after light pruning and shaping it becomes a globe.
3. Standard globe shape
Generally, the standard globe shape of Photinia × fraseri can be achieved in two ways
1. Method one:In the first year, during the seedling stage, strengthen water and fertiliser management to promote growth in height; in the second year, properly remove some of the lower side branches of the plant and continue to increase water and fertiliser management; in the third year, from the end of February to early March, as required for a trunk height of about 1.2 m, thin out all the lower side branches, keep all branches above 1.2 m, and pinch out the top of the main leader to encourage side branches; afterwards prune using the low globe shaping method and it is done.
2. Method two:Choose a large Photinia seedling as the rootstock; while leaving sufficient trunk height, shape and prune the crown, then according to the distribution of the crown branches and the requirement for a round, neat crown, graft 5-6 buds onto the rootstock by bud grafting. After grafting, be careful to remove shoots promptly to encourage the grafted buds to sprout; afterwards prune using the low globe shaping method and you can grow a standard Photinia × fraseri globe. Because bud grafting takes very easily, growing standard globe Photinia × fraseri nursery stock by this method not only saves labour but is also easy to do, and is well worth promoting widely.
Image: Photinia × fraseri
4. Cylinder shape
Choose the plant according to the height you want to shape (that is, the required height of the cylinder). If the chosen plant reaches the required column height, pinch out the growing tip of the trunk (that is, pinch out the top), then along the intended pruning line trim the branches and leaves from the top of the plant down to the bottom into a cylinder; after small branches grow, adjust gradually to grow a cylindrical tree form directly. If the chosen plant does not reach the required column height, strengthen water and fertiliser management, keep the central upright branch of the plant and cut the surrounding branches short and round, giving the plant a “soaring” look, and cultivate it; when the plant reaches the required height, pinch out the top of the trunk and continue to cut the surrounding branches short and round; with gradual pruning and management you can grow a cylindrical tree form.
5. Hedge shape
Photinia × fraseri hedges can be divided into hedge walls and spaced hedges.
1. Hedge shape:According to the required height of the hedge, heavily cut the top of the plant flat and level; its cross-section can be a flat rectangle or a trapezoid; the side branches can be cut vertically and level according to the required thickness of the hedge wall, and the pruned surface is required to be “flat and even”; afterwards, with gradual fine pruning it will take shape.
2. Spaced hedge:The length of the hedge wall is required to vary; normally about 1-1.5 m makes one section, with a certain gap between each section; the shaping method is basically the same as for the hedge wall shape.
6. Cube shape
A cube tree form means that the top cross-section and the surrounding cross-sections of the plant are all neat squares. According to the required size of the cube, choose a vigorously growing Photinia × fraseri plant with lush branches and leaves; first heavily prune the top of the plant flat, then heavily prune the surrounding side branches leaving an appropriate length, to encourage new branches; after the new branches sprout, through cultivation, gradually prune it into “four-sided” flat surfaces.
[Editor's closing words]After pruning and shaping, Photinia × fraseri can take on a thousand different forms, with a good landscape effect and greater ornamental value. Above we have introduced the pruning methods for Photinia × fraseri, and we hope they will be of help to everyone!
Photinia × fraseri pruning methods: pruning tips for Photinia × fraseri
Photinia × fraseri is a landscaping plant; common cultivars include 'Red Robin' and 'Red Lips'. It is usually used as a street tree or a hedge and needs pruning and shaping; after pruning its shape can be a thousand different forms, with a beautiful landscape effect. There are tips to pruning Photinia × fraseri, so let's take a look at the pruning methods for Photinia × fraseri!
The growing habits of Photinia × fraseri
Photinia × fraseri likes a warm, moist, sunny environment and is very cold hardy, tolerating a minimum temperature of -18°C. It likes strong light but also has strong shade tolerance. It suits all kinds of medium-fertility soil, tolerates poor soil, has a certain tolerance of salinity and alkalinity and of drought, does not tolerate waterlogging, grows fast, sprouts readily, tolerates pruning, and is easy to transplant and to shape.
Pruning tips for Photinia × fraseri
1. Pruning time: Photinia × fraseri has three main months of new growth a year, namely March, June and September, so pruning should be done in the middle of these 3 months. Leave the places where there are gaps and cut off the excess branches, so that its crown gets rounder and finer the more you prune.
2. Pruning position: when pruning the branches of Photinia × fraseri, do not take the shears too close to the bud, so as not to affect the growth of the new bud.
3. Fine crown pruning: generally there are always a few drooping branches at the bottom of the crown, and these branches spoil the look of the crown, so as long as they do not affect the crown they should be pruned away. In this way the crown of Photinia × fraseri becomes round and tight, and a top-quality crowned Photinia × fraseri is revealed just like that!
Pruning methods for Photinia × fraseri
1. Specimen tree form: in the first year, during the seedling stage, increase water and fertiliser management to promote growth in height; in the second year, properly remove some of the lower side branches of the plant and continue to increase water and fertiliser management; in the third year, from the end of February to early March, as required for a trunk height of about 1.5 m, remove all the lower side branches and pinch out the top of the upper main leader to encourage side branches to form a crown. Normally 3-4 side branches are required; if after the first pinching there are still not 3-4 side branches, once the main leader has grown 30-40 cm, pinch out the top a second time so that it branches into more side branches. Through continued cultivation it can reach the standard for a specimen tree form for engineering use.
2. Low globe shape: at the seedling stage of Photinia × fraseri, when the seedling is about 40 cm tall, pinch out the growing tip to encourage several side branches (at least 3-4). If after the first pinching there are still not 3-4 side branches, pinch out the tip a second time as appropriate. Afterwards, because the upper branches of the crown grow vigorously, they should be heavily pruned, while the side branches should be lightly pruned, and leggy shoots removed promptly, so that the whole crown draws in toward the centre and gradually "huddles into a ball"; after light pruning and shaping it becomes a globe.
3. Standard globe shape: generally, the standard globe shape of Photinia × fraseri can be achieved in two ways
① Method one: in the first year, during the seedling stage, strengthen water and fertiliser management to promote growth in height; in the second year, properly remove some of the lower side branches of the plant and continue to increase water and fertiliser management; in the third year, from the end of February to early March, as required for a trunk height of about 1.2 m, thin out all the lower side branches, keep all branches above 1.2 m, and pinch out the top of the main leader to encourage side branches; afterwards prune using the low globe shaping method and it is done.
② Method two: choose a large Photinia seedling as the rootstock; while leaving sufficient trunk height, shape and prune the crown, then according to the distribution of the crown branches and the requirement for a round, neat crown, graft 5-6 buds onto the rootstock by bud grafting. After grafting, be careful to remove shoots promptly to encourage the grafted buds to sprout; afterwards prune using the low globe shaping method and you can grow a standard Photinia × fraseri globe. Because bud grafting takes very easily, growing standard globe Photinia × fraseri nursery stock by this method not only saves labour but is also easy to do, and is well worth promoting widely.
4. Cylinder shape: choose the plant according to the height you want to shape (that is, the required height of the cylinder). If the chosen plant reaches the required column height, pinch out the growing tip of the trunk (that is, pinch out the top), then along the intended pruning line trim the branches and leaves from the top of the plant down to the bottom into a cylinder; after small branches grow, adjust gradually to grow a cylindrical tree form directly. If the chosen plant does not reach the required column height, strengthen water and fertiliser management, keep the central upright branch of the plant and cut the surrounding branches short and round, giving the plant a "soaring" look, and cultivate it; when the plant reaches the required height, pinch out the top of the trunk and continue to cut the surrounding branches short and round; with gradual pruning and management you can grow a cylindrical tree form.
5. Hedge shape: Photinia × fraseri hedges can be divided into hedge walls and spaced hedges.
① Hedge shape: according to the required height of the hedge, heavily cut the top of the plant flat and level; its cross-section can be a flat rectangle or a trapezoid; the side branches can be cut vertically and level according to the required thickness of the hedge wall, and the pruned surface is required to be "flat and even"; afterwards, with gradual fine pruning it will take shape.
② Spaced hedge: the length of the hedge wall is required to vary; normally about 1-1.5 m makes one section, with a certain gap between each section; the shaping method is basically the same as for the hedge wall shape.
6. Cube shape: a cube tree form means that the top cross-section and the surrounding cross-sections of the plant are all neat squares. According to the required size of the cube, choose a vigorously growing Photinia × fraseri plant with lush branches and leaves; first heavily prune the top of the plant flat, then heavily prune the surrounding side branches leaving an appropriate length, to encourage new branches; after the new branches sprout, through cultivation, gradually prune it into "four-sided" flat surfaces.