How to water wintersweet (Chimonanthus praecox)? You must water thoroughly, with watering times and water amounts included
Wintersweet (Chimonanthus praecox) is a plant with strong drought tolerance, and it can survive for a long time in dry environments, but if you want it to grow normally, keeping it short of water for a long period is obviously not advisable, so how do you water wintersweet? Let's take a look at the watering methods for wintersweet.
How to water wintersweet
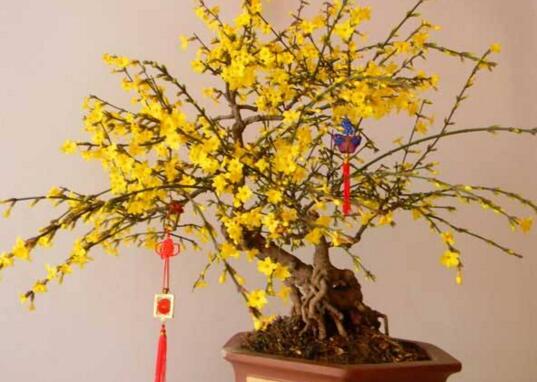
Generally speaking, watering wintersweet should follow the principle of "don't water if not dry, water thoroughly when you do": meaning do not water until the soil is completely dry, and each time you water, make sure both the upper and lower parts of the soil are moistened, while the specific timing is adjusted according to climate changes based on this principle.
1. Watering in spring
Potted: if grown in a pot, how do you water wintersweet in spring? The answer is once every 2 days; pay attention to checking whether the soil is dry or moist, and if the soil is completely dried and caked, water as early as possible.
Open-ground cultivation: if wintersweet is planted in a courtyard, then in spring watering is generally once every 3 days, but during the plum rain season watering can be stopped, because rainwater can ensure the wintersweet gets enough moisture.
2. Does wintersweet need watering every day in summer
Because summer temperatures are higher and water evaporates quickly, watering at this time is generally once a day, but it does not need to be every day; the specific frequency should depend on the moisture condition of the soil. At this time, note that you should spray water on the leaf surface to maintain air humidity.
3. Watering in autumn
In autumn the temperature gradually drops; after October, watering is generally once every 2 days to ensure the wintersweet gets an appropriate amount of water before flowering. If the soil becomes completely dry and pale, flowering will be seriously affected.
4. How to water wintersweet in winter
Although winter is the season when wintersweet blooms and it consumes some nutrients and water, at this time neither the watering frequency nor the amount needs to be too much; generally watering once every 4-5 days is enough, and the water amount should be about half of the usual. When the temperature is below minus 10 degrees, watering should be stopped.
What happens if wintersweet is overwatered
If too much water is given when watering, it will cause waterlogging, and wintersweet is very afraid of waterlogged conditions; this will cause the roots to soak in water and be unable to breathe normally, leading to root rot. The growth of wintersweet is hindered, which not only triggers disease but may also cause the plant to die.
When overwatered, the standing water should be drained as soon as possible, and you should check whether the soil drains well. If the soil is compacted and cannot drain excess water, the soil should be replaced in time to avoid water being unable to reach the lower part of the soil after watering.
Lush green rain lily, ordinary yet pure and lovely
Rain lily gets its name because its leaves look like scallions. In China, rain lily cultivation is very widespread, and more and more growers are attracted by this pure and beautiful rain lily, so how do you grow rain lily? Below, the editor will combine rain lily pictures to explain the cultivation methods of rain lily and when rain lily blooms.
Lush green rain lily, ordinary yet pure and lovely!!
——————————————————————————————————————————————
[Plant profile]
——————————————————————————————————————————————
Chinese name:Rain lily
Scientific name:Zephyranthes candida
Alternative names:Zephyranthes candida, jade curtain, white-flowered iris lily, chive lily, liver-wind grass, rain lily
Family:Amaryllidaceae
Genus:Zephyranthes
Origin and distribution:Native to Mexico and various South American countries, widely cultivated in China. The main breeding and propagation bases include: Shuyang, Jiangsu, Zhejiang, Guangdong and other places.
Growing environment:Best used as a groundcover plant in semi-shaded areas under trees, or planted beside courtyard paths.
Morphological characteristics:Perennial evergreen herbaceous plant. Tunicate bulb oval, somewhat resembling the bulb of tuberose or single-clove garlic, relatively small in diameter, with a distinct long neck. Leaves basal, fleshy linear, dark green. Plant height 30 cm to 40 cm. Flower scape relatively short, height 0.3-0.4M, hollow. Flowers solitary, tepals 6, white, red, yellow, long elliptic to lanceolate; corolla diameter 4 cm to 5 cm.
How to grow rain lily?
——————————————————————————————————————————————
◆ Growth habits: rain lily likes sufficient sunlight but can also tolerate semi-shade; it requires a warm and humid environment, and prefers sandy loam rich in humus and with good drainage
◆ Environmental requirements: choose a wind-sheltered, sunny spot with fertile, moist soil. During the growing period, keep the soil moist, and apply diluted cake fertilizer water 2-3 times each year, and it will grow well and bloom abundantly. If yellow leaves and spent flowers are found during the peak blooming period, they should be cut off and removed promptly to maintain appearance and avoid consuming more nutrients.
◆ Watering: during the growing period, rain lily needs sufficient watering, and the potting soil should be kept moist regularly, but not waterlogged. In dry weather, also spray water on the leaf surface frequently to increase air humidity, otherwise the leaf tips are prone to yellowing and drying.
◆ Potting soil: the soil used for growing rain lily is crucial. Heavy clay, powdery soil, and alkaline soil are all unsuitable for growing rain lily, because these soils are not conducive to root development, do not drain easily, and have poor aeration. Growing rain lily in such soil will produce stunted seedlings with small leaves and short roots.
◆ Fertilizing: like other herbaceous flowers, rain lily has relatively high requirements for fertilizer and water, but it is most afraid of random fertilizing, concentrated fertilizer, and one-sided application of nitrogen, phosphorus, or potassium fertilizer. It requires following the two fertilizing (and watering) principles of "apply diluted fertilizer frequently, use small amounts but more often, with complete nutrition" and "alternate dry and wet, dry means thoroughly dry, do not water if not dry, water thoroughly when you do," and after fertilizing, keep the leaves and flowers dry at night.
◆ Temperature: rain lily likes a warm climate, but the high temperature and muggy conditions of summer (above 35°C, with relative air humidity above 80%) are not conducive to its growth; it has strict temperature requirements for winter, and when the ambient temperature is below 10°C it stops growing, and it cannot overwinter safely when frost occurs.
Cultivation methods for rain lily
——————————————————————————————————————————————
The cultivation method for rain lily is very easy, usually mainly through division propagation. In spring, plant the daughter bulbs separately, generally planting 3-4 bulbs per clump. Rain lily grows vigorously and is simple and extensive to manage; after planting, it can be divided and replanted once every 3-4 years, without needing much care.
Of course, besides division propagation, there is also sowing cultivation. For the tiny seeds that are difficult to pick up with hands or other tools, you can moisten one end of a toothpick with water, stick the seeds one by one onto the surface of the substrate, cover with substrate 1 cm thick, then place the sowing pot into water, with the water depth at 1/2 to 2/3 of the pot height, allowing the water to slowly soak upward (this method is called the "pot soaking method").
When does rain lily bloom
——————————————————————————————————————————————
"Rain lily blooms in September... rain lily silently adorns the September flower season... the beauty of September rain lily...." Usually these verses can help you understand that the flowering period of rain lily should be in September. Yes, around summer (especially before and after rain), that is exactly the season when rain lily is in full bloom.
The flower language of rain lily
——————————————————————————————————————————————
The flower language and symbolic meaning of rain lily: first love, pure love.
There are only two kinds of pure love in this world: one is first love, and the other is the love spent with a partner with whom you can still share hardships, respect each other, and stay together day and night until old age. And because of its pure white color, rain lily has been given the flower language of pure love.
"Conclusion:Rain lily is mostly used as a groundcover plant, or used in flower beds, flower borders, and under trees; it is also grown in pots, and its cultivation and management are extensive. Potted plants decorating a desk are also very elegant. Of course, rain lily can also be planted in a water tank, growing bright leaves, and is a good home decoration plant.
【More plant encyclopedia】
How to grow Guzmania How to grow spider plant Plectranthus amboinicus Do cacti have leaves When does wintersweet bloom Potted plants Cactus mountain
How to grow pothos and precautions Radiation-proof plants How to grow anthurium Potted fruit trees How to grow lilies How to grow Radermachera sinica
Rose Azalea pictures Home plant feng shui Flower language of cherry blossoms Blue enchantress What plants absorb formaldehyde Flower language of poppy
Potted grape Iris pictures Gardenia leaves turning yellow Desert rose Flower language Uses of lavender Effects and uses of rosemary
Complete guide to flower and plant care techniques
To grow potted flowers well, the main thing is in care and management, which must match the growth habits of the flowers. Beginners at growing flowers either apply too much fertilizer and "burn" the seedlings to death, or water excessively and "drown" the plants. Especially with watering, they do not flexibly adjust according to specific conditions such as season, climate, pot soil dryness and wetness, and growth stage, but instead water every day and water a lot each time, so that the plants die from watering. Beginners at growing flowers should first choose moisture-loving flowers to cultivate, such as water bamboo, bamboo-section evergreen, Monstera deliciosa, and ferns; these will not be killed by watering. Next, they can plant annual herbaceous flowers, such as zinnia, impatiens, salvia, purslane, China aster, ornamental pepper, etc.; these herbaceous flowers are also not easily killed by watering. Of course, small seedlings of these kinds may also be killed by watering, but they are only small herbaceous flower seedlings, so it is not a pity if they are killed by watering, and lessons can be learned from it. For beginners at growing flowers, because they are not used to it or do not remember, sometimes in summer they also forget to water, often causing the plants' growth to be affected by drought or causing them to wither and die. For this reason, besides planting moisture-loving flowers, you can also plant some flower types that are both moisture-tolerant and drought-tolerant, such as oleander, Buddhist pine, Euonymus bungeanus, and Canna indica. After gaining a little experience, plant those flowers that are easy to grow and easy to manage, such as purple spiderwort, winter coral, night jasmine, spider plant, pomegranate, winter jasmine, geranium, and four-season begonia. Only after gaining a certain amount of experience can you cultivate advanced flowers.
13 methods to extend the life of cut flowers in a vase
1. The best time to pick flowers is in the early morning when the dew has not yet dried. After the flower stems are cut, they should be immediately immersed in warm water to stimulate the capillaries to open and absorb water fully, so as to avoid drying out.
2. Cutting flower stems should be done in water, which can prevent air from entering the water-absorbing pores of the stems and affecting water absorption.
3. When cutting flower stems, the more slanted the cut, the better. For thick woody plants such as black pine and azalea, you can also split the epidermis about 3 cm at the cut and tap it lightly with a hammer to crack it slightly, enhancing its water-absorbing function.
For flowers with strong water absorption such as chrysanthemum, Christmas flower, and orchid, the flower stems can be longer; flower stems with weak water absorption should be shorter, and the closer to the water the better.
4. Peel off about 6 mm of the epidermis at the stem end of fresh flowers placed in a vase, then apply petroleum jelly, which can extend the flowering period.
5. At the cut of woody flower stems, you can burn it with fire for several minutes, or smear some table salt on the cut, to prevent the cut from rotting too early.
6. If you soak the stem ends of flower branches in vinegar for a while before placing them in a vase, it can extend the flowering period. Adding a few drops of vinegar to the vase can make fresh flowers absorb water more easily and stay vital for a longer time; vinegar also has a sterilizing effect.
7. Put 1 aspirin tablet in the vase to extend the life of the cut flowers.
8. For fresh flowers with large blooms and thin stems, use waste short branches to tie them into bundles before placing them in the vase.
9. After fresh flowers are placed in a vase, if they are exposed to weak light for 1 hour in the morning, it helps maintain bright flower color.
⑪ Change the water frequently, preferably once a day. Water changes should preferably be done in the evening. If the vase is moved outdoors to a cool place every night to absorb dew, the next morning you can see the cut flowers regain their original bright color.
⑫ In midsummer, if you put a little ice in the vase, it can keep the leaves on the flower branches green.
⑬ When changing the water, remove the sticky matter on the cut of the flower branches.
6 methods of watering flowers and plants
When watering potted flowers, you should grasp the principle of "do not water if not dry, water as soon as it looks dry. If you do not water, then leave it; if you water, water thoroughly." The specific tips for watering are:
1. Ordinary watering method
Water directly from the top of the pot downward (to the soil). This method is simple and easy to carry out. But the disadvantage is that it easily keeps the lower layer of potting soil dry for a long time and causes soil compaction, which is unfavorable for root development, so when using this method, you must confirm that water overflows from the drainage hole at the bottom of the pot.
2. Bottom-absorption watering method
Place the flower pot in another larger container filled with clean water, so that water moistens from the bottom of the pot up to the surface. The advantage of this method is that the water-absorbing surface is large, it can prevent soil compaction, and it promotes root development, especially for deep-rooted flowers. The disadvantage is that salts in the potting soil rise with the water and accumulate on the pot surface and rim, causing unsightly salt spots. The above two basic watering methods should be used alternately to make up for each other's shortcomings, with better results.
3. Pipe drip irrigation method
Lay out plastic pipes at intervals around the potted plants that need watering, preferably close to the plant stems, then prick one or two small holes in the plastic pipe with a needle, seal both ends of the pipe, and after connecting the water source, water slowly drips out from the small holes to supply the plants with moisture.
4. Rope wick watering method
When potting or repotting, bury a fiberglass rope at the bottom of the flower pot, with one end spread flat on the bottom of the pot and the other end extending out through the drainage hole; place a water tray under the pot, with the rope end immersed in the water. When the potting soil is dry, just pour water into the tray, and the water will be automatically carried into the pot by the rope.
5. Sand column watering method
When potting or repotting, first stand several hollow tubes in the empty pot; these can be bamboo tubes, glass tubes, or metal tubes. Then fill with soil and compact it, immediately fill the tubes with coarse sand, and after finishing, pull out the hollow tubes, so that sand columns form in the potting soil. The diameter of the sand columns depends on the size of the pot. Afterward, you only need to pour water into the sand columns, so that water diffuses evenly through the sand columns into the surrounding potting soil, which can avoid soil compaction and is beneficial to plant growth.
6. Method for watering when no one is home
People who love growing flowers, because they go out to visit or handle matters and are not at home for ten days to half a month, have no one to water the flowers. At this time, you can fill a plastic bag with water, prick a hole in the bottom of the bag with a needle, and place it in the flower pot, with the small hole against the soil, and the water will slowly seep out to moisten the soil. The size of the hole needs to be controlled well, to avoid water seeping out too quickly. Or place a container full of cool water beside the flower pot, find a wide cloth strip with good water absorption, put one end into the water in the container and bury the other end in the potting soil. In this way, the soil can remain moist for at least about half a month, and the flowers will not wither and die.
5 clever uses of water for watering flowers
1. Watering flowers with leftover tea
Using leftover tea water to water flowers can both maintain soil moisture and add nutrients such as nitrogen to the plants. But you should water according to the moisture condition of the pot, regularly and in measured amounts, and not just water whenever there is leftover tea.
2. Watering flowers with spoiled milk
After milk spoils, add water and use it to water flowers; it is beneficial to the growth of flowers and trees. But there should be more water, so that it is relatively dilute, which is better. Unfermented milk is not suitable for watering flowers, because during fermentation it produces a large amount of heat, which will "burn" the roots (cause root rot).
3. Watering flowers with cool boiled water
Using cool boiled water to water flowers can make the foliage lush and the flowers bright, and can promote earlier flowering. If used to water asparagus fern, it can make its branches and leaves spread horizontally and grow short and dense.
4. Watering flowers with warm water
In winter, when the weather is cold and the water is chilly, it is advisable to use warm water for watering flowers. It is best to place the water indoors and wait until it is close to room temperature before watering. If the water temperature can reach 35 degrees Celsius before watering, then even better.
5. Watering flowers with rice washing water
Regularly using rice washing water to water flowers such as Aglaia odorata can make their branches and leaves lush and their flower colors bright.
Growing flowers with beer
1. Fresh cut flowers:When cut-flower enthusiasts arrange flowers, as long as they pour a little beer into the vase, it can make the color and fragrance of the arrangement last 15-20 days longer than usual.
2. Potted flowers:
(1) Wipe leaves with beer: for any foliage plant, you can use absorbent cotton or a clean soft cloth dipped in beer to gently wipe the leaves. It not only removes dust and sterilizes, but also has a leaf-surface fertilizing effect, making the leaves more emerald green and glossy, and the leaf texture thicker.
(2) Spray leaves with beer: after mixing water and beer at a 1:1 ratio, use a fine-nozzle spray bottle to spray the leaves of flowers with small leaves such as asparagus fern, spider plant, umbrella bamboo, begonia, and geranium, and it can also achieve the same good effect as wiping leaves with beer.
(3) Water flowers with beer: beer is an excellent aromatic fertilizer; using it to water flowers not only provides good nutrition, but the nutrients are absorbed quickly.
Using a sponge to regulate moisture for potted flowers and plants
Cut a sponge to the same size as the flower pot, and place it at the bottom of the soil when planting flowers; it is very beneficial to the flowers and plants you grow, because it will absorb excess water poured into the pot; when the soil dries out, the soil itself will absorb the water back from the sponge.
What you need to know about repotting flowers
In old flower pots, due to long-term watering and fertilizing, the tiny air pores in the pot walls become blocked, and the flowers cannot get fresh air, so they die from poor growth. Therefore, most potted flowers and trees need to be repotted once a year, while bamboo, Chinese fir, and others that need more nutrients need repotting twice a year. Generally speaking, deciduous tree species are mostly repotted in early spring; evergreen tree species, such as Serissa japonica, Damnacanthus indicus, and gardenia, are suitable for repotting in summer; Buddhist pine and cypress can be repotted in any season except severe winter. Bamboo repotted twice a year is generally repotted in May and September, while Chinese fir is suitable in March and October. When repotting, first lift the plant gently from the pot, remove half of the old soil, cut off rotten roots and overly long fibrous roots, then place the plant back into the pot, add the prepared new culture soil, and water appropriately. Note that before putting the plant into the pot, you should use a tile piece to cover the drainage hole at the bottom of the pot, and appropriately place gravel at the bottom.
2 methods for soil disinfection in spring
Many flower diseases, such as anthracnose, black spot, brown spot, gray mold, and damping-off, overwinter in the soil as mycelium or sclerotia. Methods of soil disinfection:
1. Chemical disinfection
To kill pathogens, formaldehyde, quintozene, etc. can be used. Formaldehyde, also called formalin, has strong sterilizing power. At the same time, mix each 50 grams with 2-2.5 kg of water, and it can spray 1 square meter of soil 15-20 cm thick. Spray evenly. After spraying, cover tightly with plastic sheeting and fumigate for four to five days, then remove the plastic sheeting, turn the soil to let the medicinal smell dissipate, and after 15 days you can plant flowers. To kill nematodes, use dibromochloropropane, etc. When using, apply 10 grams of 80% dibromochloropropane oil per square meter, mix with 3 kg of water, spray evenly on the soil, and immediately cover tightly with plastic sheeting; after six or seven days remove the plastic sheeting and turn the soil. After about 15 days, it can be used for planting flowers.
2. High-temperature disinfection
The simplest methods are the soil burning method and the soil frying method. The soil burning method is to spread the soil flat on the ground, about 30 cm thick, and pile firewood and grass on top to burn for more than 20 minutes. The soil frying method is to fry the soil in a broken iron wok, keeping the temperature above 90 degrees Celsius, and fry for 20-30 minutes.
Suitable flower species for different balcony orientations
South- and southwest-facing balconies have long sunlight hours and higher temperatures, suitable for placing sun-loving, heat-tolerant flowers and trees, such as jasmine, Michelia figo, pine, cypress, cactus, and other flower species; clivia, camellia, azalea, Chinese rose, orchid, etc. prefer shade or are afraid of heat, and should be moved to north- or east-facing balconies to avoid overly strong sunlight exposure.
Summer care of orchid, Hibiscus mutabilis, Chinese rose, Aglaia odorata, and cactus-type plants
1. Orchid
Summer is the peak growing season for orchids, so the water and nutrients needed for growth must be ensured.
2. Hibiscus
Anthracnose is prone to occur; besides improving ventilation and light penetration, when disease occurs, you can spray with thiophanate once every 10 days.
3. Rose
It likes fertilizer and water, so a sufficient supply of both must be ensured. Apply decomposed bean cake water or fish fertilizer water once every half month. Stop fertilizing in mid-July. Powdery mildew is prone to occur in summer; use Bordeaux mixture or carbendazim, spraying once every half month, for 2 to 3 consecutive sprays.
4. Aglaia
It likes light and heat. It grows vigorously in summer. Before and after flowering, apply a thin fertilizer solution once every 10 days. Stop fertilizing when the temperature exceeds 30°C. Ensure a supply of water and frequently spray the leaves to prevent flower and bud drop.
5. Cacti
Although they are extremely drought-tolerant, when the temperature exceeds 38°C there is still a risk of sunburn. Do not fertilize during hot weather; spray water to lower the temperature.
Key points for fertilizing potted flowers in autumn
In autumn, most potted flowers are in a vigorous period, so the nutrients needed by the potted flowers must be ensured to meet their growth needs. When topdressing, treat them differently according to their growth conditions. Usually, apply a decomposed thin liquid fertilizer once every 10 days. For potted flowers that bloom in autumn, such as osmanthus, chrysanthemum, and dahlia, apply less nitrogen fertilizer and more phosphorus and potassium fertilizer to promote abundant flowers and lush leaves.
Key points for pruning potted flowers in autumn
In autumn, potted flowers produce many young shoots, which cannot all be allowed to develop; apart from keeping some, the rest should all be removed to avoid wasting nutrients in vain. When pruning, for the branches that are kept, retain the leaves and remove the buds. For plants with strong growth, prune heavily; for weak-growing ones, prune lightly. For potted flowers that form flower buds in summer and autumn, such as plum blossom, wintersweet, and rhododendron, in order to protect the already formed flowering branches, heavy pruning is not advisable; pruning can be done by pinching.
Clever ways for foliage plants to overwinter indoors
Foliage plants mostly originate from tropical and subtropical regions, and their growing temperature must be maintained at 25-30°C. In regions with distinct four seasons, plants are often frozen to death or withered by low temperatures during cold periods. Therefore, to help foliage plants overwinter smoothly in these regions, note the following:
1. Build adaptability
If, before being brought indoors, foliage plants are first allowed to fully experience the low temperatures of early autumn outdoors to enhance their cold resistance, they can gradually adapt to a low-temperature environment. Therefore, from early autumn to late autumn, the plants should be fully exposed to gradually decreasing temperatures.
2. Amount of watering
As the temperature drops, plant growth slows down, and in severe cold periods it almost stops growing. At this time, the frequency of watering the potting soil should be reduced. The standard for winter watering is to water only after the surface of the potting soil has been dry for 2-3 days. However, in rooms with heating and where a certain temperature can be maintained, attention should still be paid to watering at any time.
3. Indoor humidity and temperature
When winter arrives, for foliage plants moved indoors, especially those moved into heated rooms, mist water should often be sprayed on the leaves to increase air humidity. The temperature difference between day and night in the room should be as small as possible; the lowest indoor temperature at dawn must not be lower than 5-8°C, and during the day it should reach 1-20°C. If the above requirements can be met, they can generally overwinter smoothly. In addition, within the same room, temperature differences will also occur between the upper and lower spaces, so plants with weak cold resistance can be placed in high places such as bookshelves. Foliage plants placed on windowsills are most vulnerable to cold winds, so it is advisable to use thick curtains.
4. Light
In winter, sunlight shines at a slant, and light intensity is half that of summer, so some sun-loving foliage plants should be placed near a south-facing window. Ornamental plants that have been placed indoors or in shaded areas for too long must never suddenly be placed under direct outdoor light, lest the leaves be scorched.